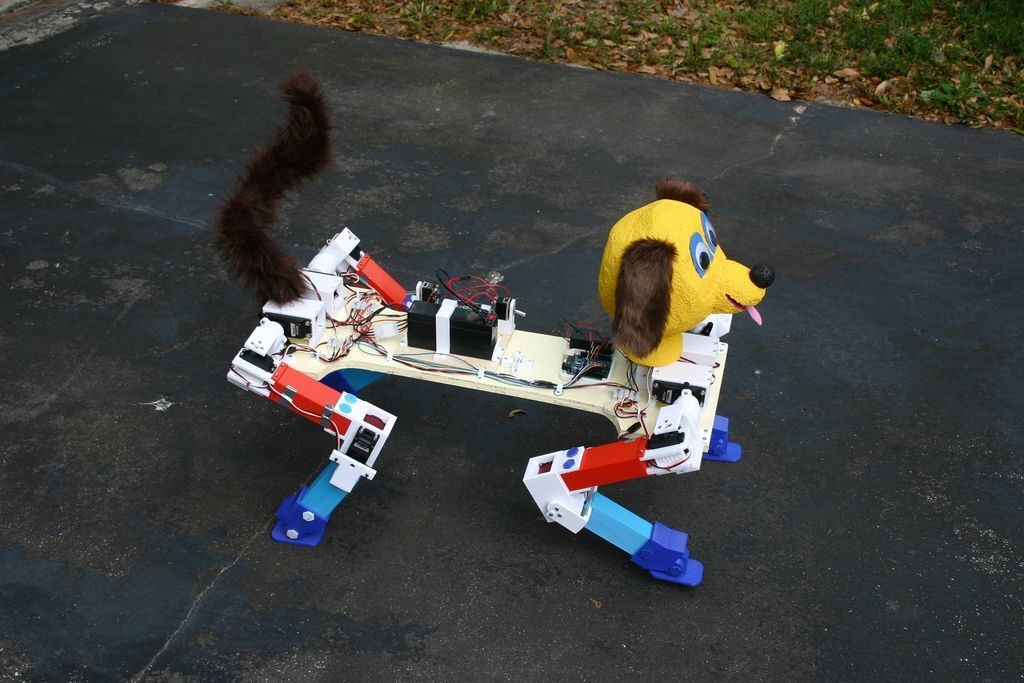
Would you like a dog? Would you like a robot dog? If so, then this build by Michael Rigsby could be a great starting point.
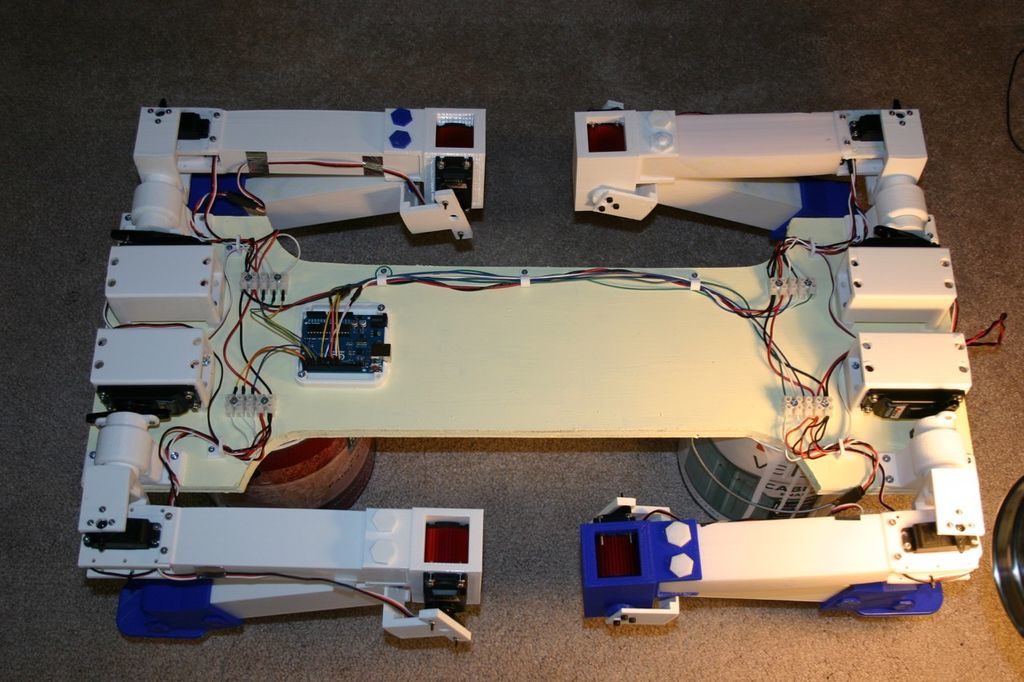
Rigbsy’s robotic pet features four servo-driven legs, with two-axis shoulder movement, as well as an articulated knee joint. As seen in the video below, it’s capable of picking itself up off the ground, and can then walk using a slow side-to-side gait.
An Arduino Uno uses the majority of its I/O pins to control the legs, and as of now, it travels forward with no directional control or sensor input.
Instructions for the project, along code and 3D print files, are available in Rigsby’s write-up.
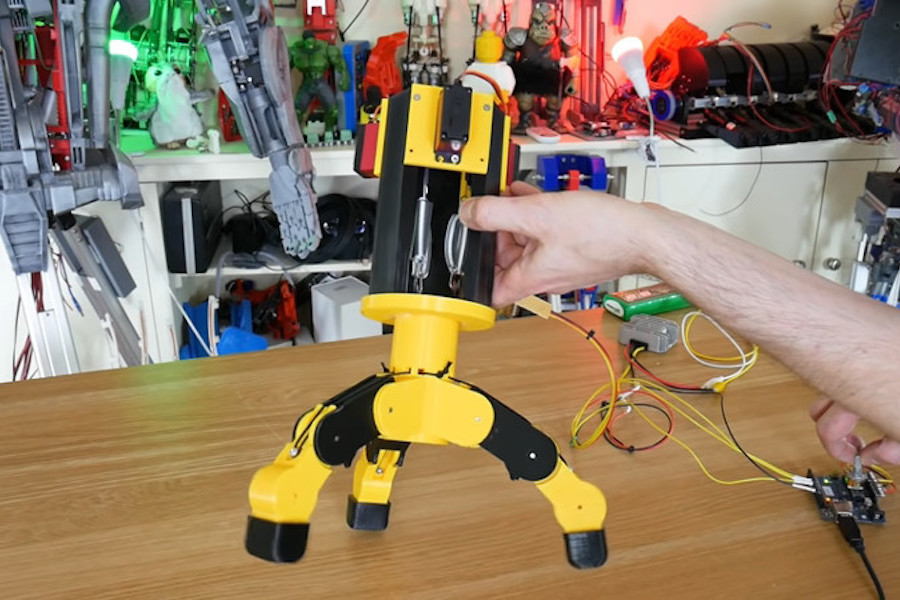
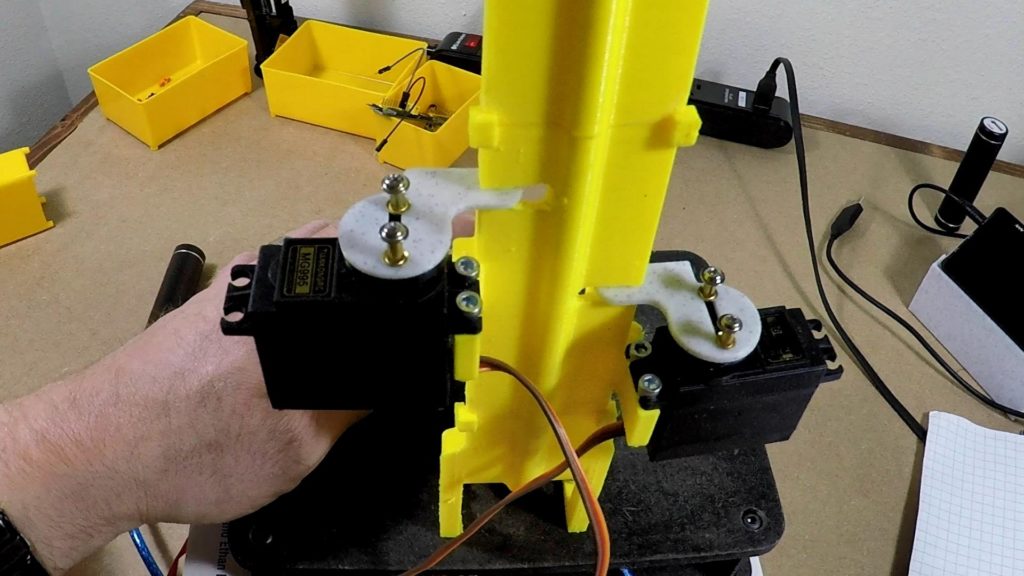
In a variety of robotic situations, you’ll need some sort of gripper. In this project, James Bruton attempts to create a force-controlled, three-fingered assembly using an Arduino Uno along with a trio of servos.
Instead of directly controlling the grip fingers, the 3D-printed device is held open with bungee cables. When it’s time to clamp everything down, the servos wind up the cables attached to the inside of the fingers, similar to how human tendons work.
To correlate servo inputs to grip force, he uses a series of springs to allow some amount of compliance, as well as flex sensors attached to the fingers themselves to measure the resulting positions. Arduino code for the build is available here.
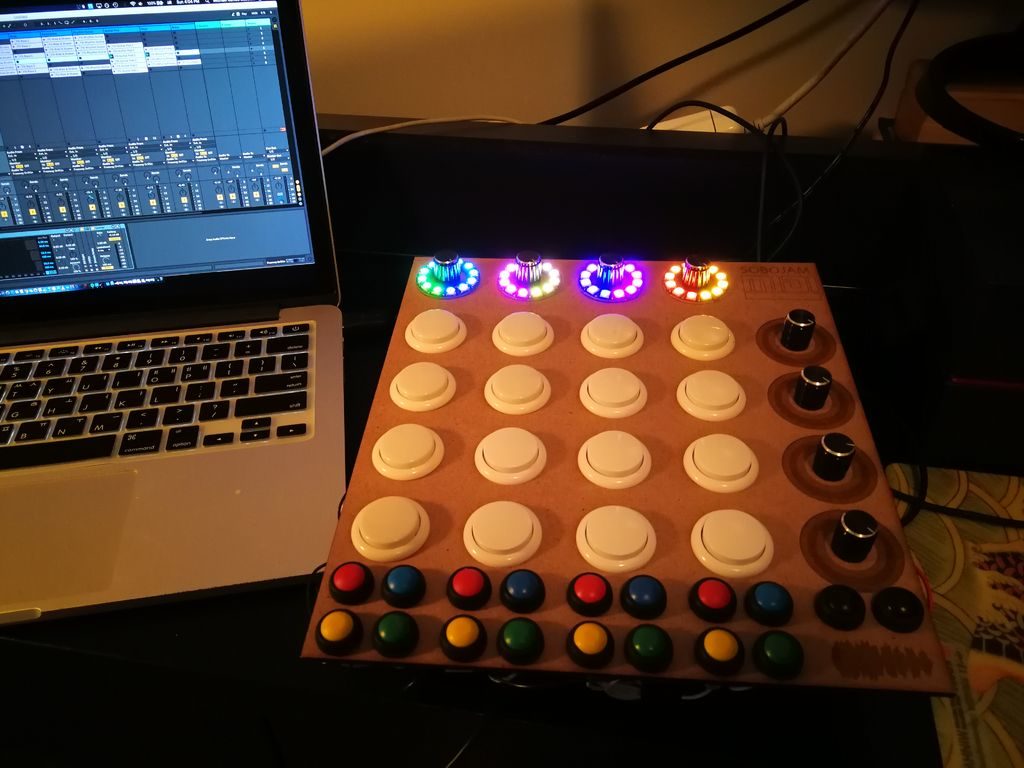
Michael Sobolak was inspired by the hardware dedicated to Ableton digital audio software, along with the DIY MIDI Fighter pads that others have constructed, to make his own light-up version.
His device is cut out of ¼-inch MDF, housing a 4×4 array of main buttons, 18 smaller buttons on the bottom and eight potentiometers, four of which are surrounded by NeoPixel rings.
To handle this massive array of inputs, he turned to the use of multiplexers, creating a spaghetti-like—though functional—wiring arrangement hidden underneath. The pad uses an Arduino Uno to control the NeoPixels, while a separate board is tasked with the MIDI interface.
You can see Sobolak’s project crank out music in the video below, with LEDs that react to potentiometer input settings.
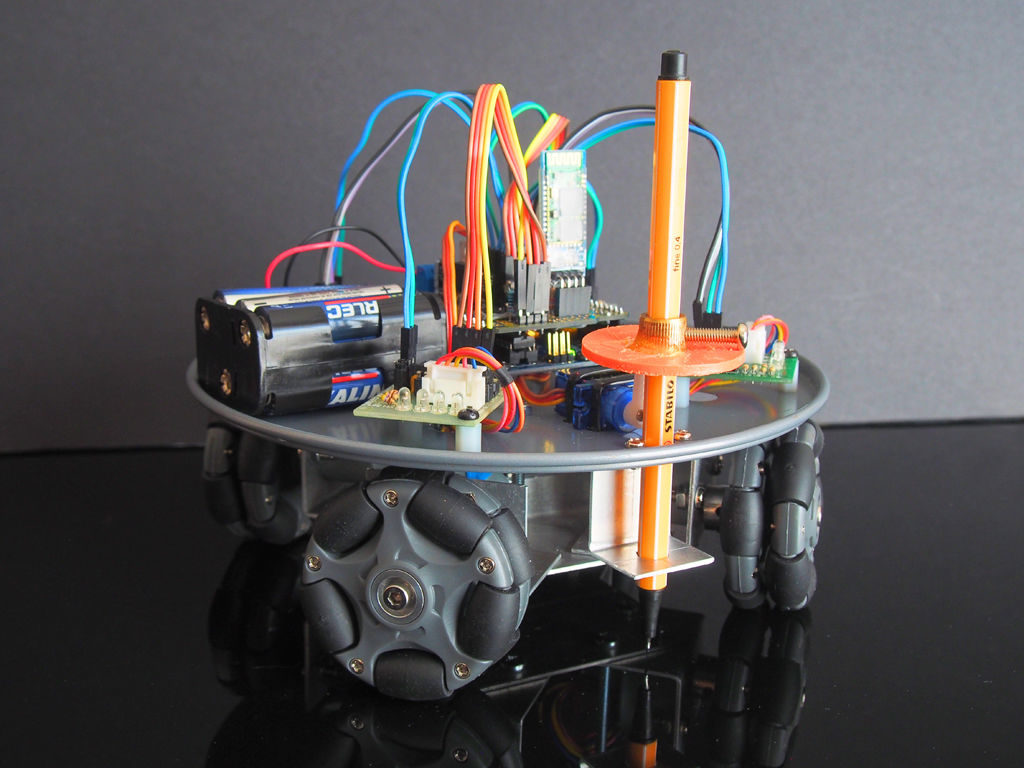
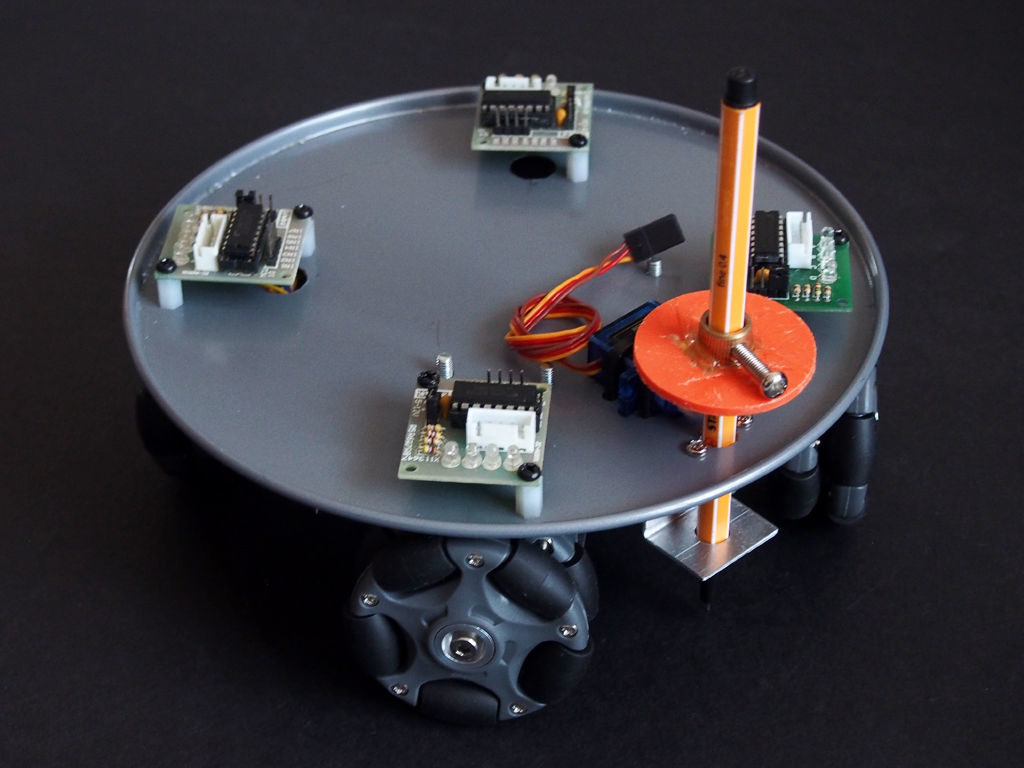
Retired maker “lingb” created an omni-bot, with four wheels that allow sliding motion in the X/Y plane courtesy of their perpendicular rollers. While that alone would have been a fun build, he also attached a pen, along with a servo-based lifting mechanism, turning this robot into a free-range plotter!
The device is controlled by an Arduino Uno and Bluetooth module, and takes movement commands via a linked smartphone or tablet. Four 28BYJ-48 stepper motors with ULN2003 drivers move each wheel, though outputs are shared between opposite motors to save on I/O.
This means that rotating the robot isn’t possible, but as shown in the video below, this isn’t needed to plot straight and curved lines with good accuracy.
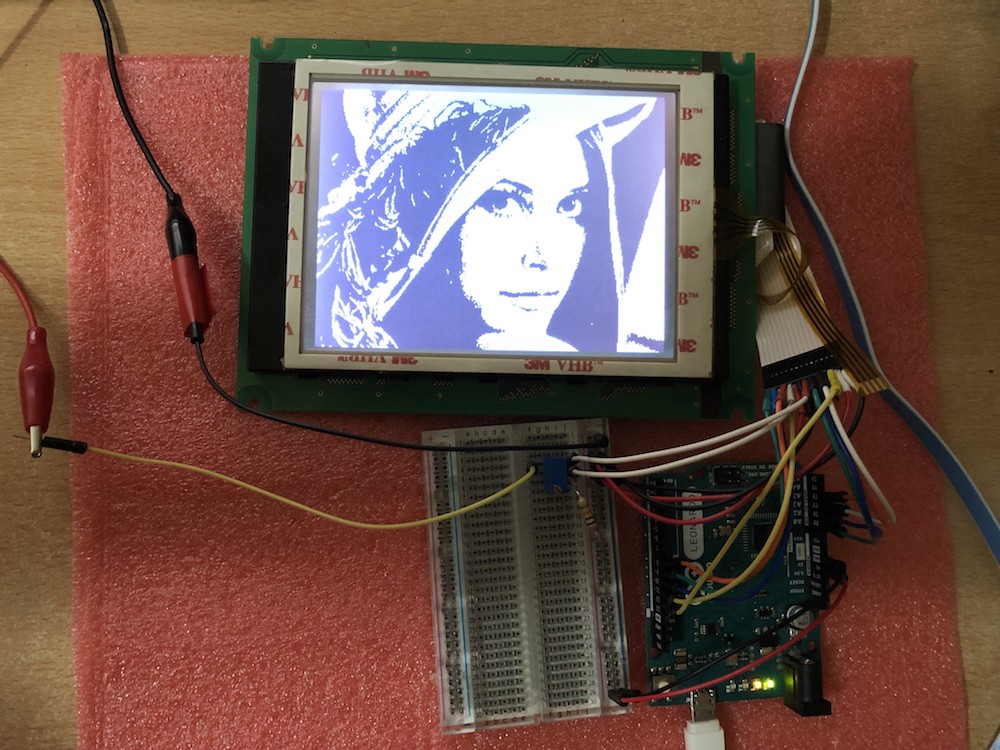
As hardware hackers, we’re always on the lookout for discarded components that can be re-purposed into something even more awesome. One such class of component that you may find is the controller-less graphics LCD modules, which can be found on old copiers, tape libraries, and the like.
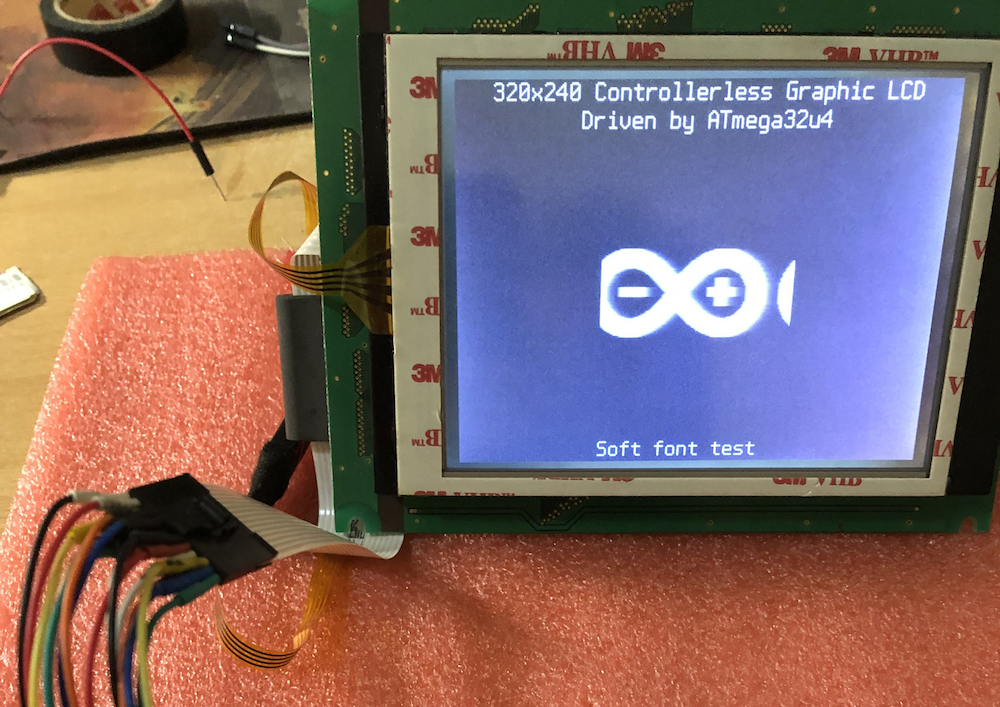
This project by Ivan Kostoski shows how to drive one of these displays with a 320×240 resolution. He’s tested his code using several types of Arduino board, such as the Uno and Leonardo, using minimal external components.
Summary Repository contains code samples for driving 4-bit parallel controllerless graphics LCD (CLGLCD) module with AVR MCU on an Arduino board, using minimal external components and staying within Arduino IDE.
4-bit Controllerless Graphics LCD modules Controllerless graphics LCD modules are antiques that can be salvaged from old copiers, tape libraries, etc… They commonly are missing, well, the controller chip, the one with the memory. Don’t go buying one of these, for Arduino usage, even if you find them on sale. They are usually industrial, have poor viewing angles, generally slow response time, and pain to work-with. There, I said my peace… But if you already have one, their size (i.e. 5.7in) or simplicity can have its uses and beauty.
I have tested this code with 320×240 STN LCD monochrome module marked as F-51543NFU-LW-ADN / PWB51543C-2-V0, salvaged some time ago from retired tape library, without the controller module (which it appears is based on FPGA and wouldn’t be of much use anyway).
The same type of interface (4-bit data) with various signal names is present on many industrial modules based on multiplexed column and common row LCD drivers, like LC79401/LC79431. Or this is what is behind the controller IC. They all have some variations like LCD drive voltage (positive or negative, depending on temperature and size of the module), backlight (LED/CCFL), some logic quirks (i.e. CL2 is ignored while CL1 is up, etc…), so maybe this code can be adapted to other controllerless modules. Module’s datasheet is necessity for the connector pinouts and timing requirements. Some modules may even generate LCD drive voltage internally, and outputting it on a pin so actual V0 driving voltage can be adjusted.
More info on the build/technique is found on GitHub, where you can also download project code and find more background on how interfacing with these devices works.
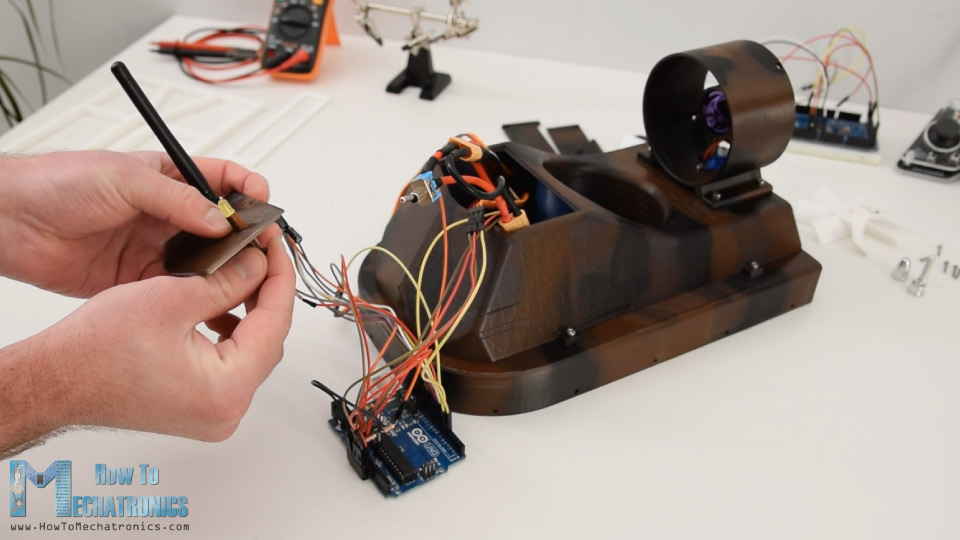
If you’ve ever considered building your own RC hovercraft, be sure to check out the latest project from “How To Mechatronics.”
The build shows how to assemble one using a variety of 3D-printed parts, a pair of brushless DC motors for hover airflow and forward motion, and a servo for steering.
An Arduino Uno along with an nRF24L01 module are employed for control, and as demonstrated in the video below, it slides across a basketball court with the greatest of ease!
More info is available on How To Mechatronics’ write-up, including CAD/3D printing files, a parts list, and Arduino code.
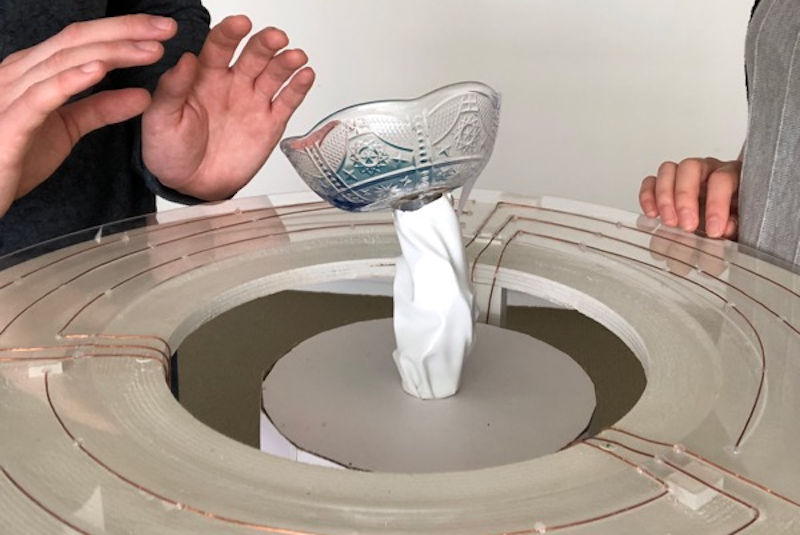
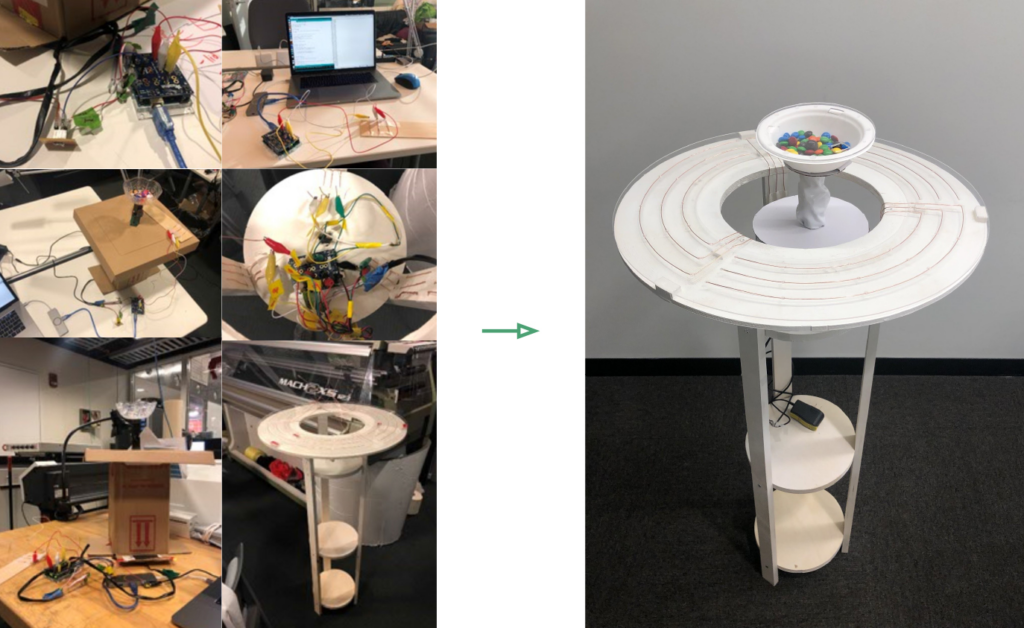
Depending on your personality, you may tend to dominate a discussion, or metaphorically slink back into the corner, waiting for a turn to speak that never comes. MIT Tangible Media Group’s SociaBowl, however, aims to change this as “a dynamic table centerpiece to mediate group conversations.”
SociaBowl takes the form of a circular standing table, with a rather curious servo-actuated bowl in the center. Copper wires embedded in the table’s acrylic surface, along with a capacitive touch shield pick up user inputs.
An Arduino Uno then translates into bowl motion, which can mean a reward for thoughtful speakers when the bowl is filled with candy, or in another implementation, the possibility of water inside spilling if one chats for too long.
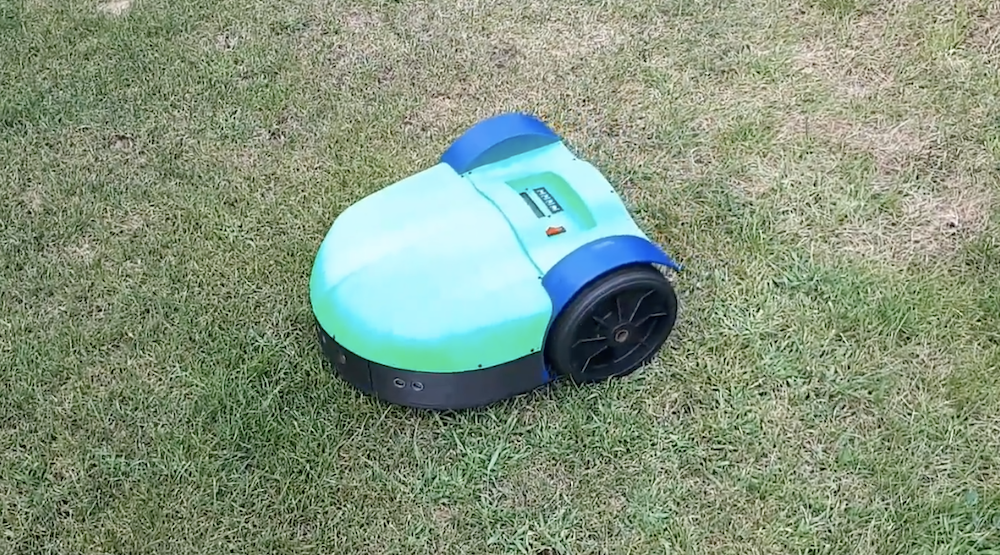
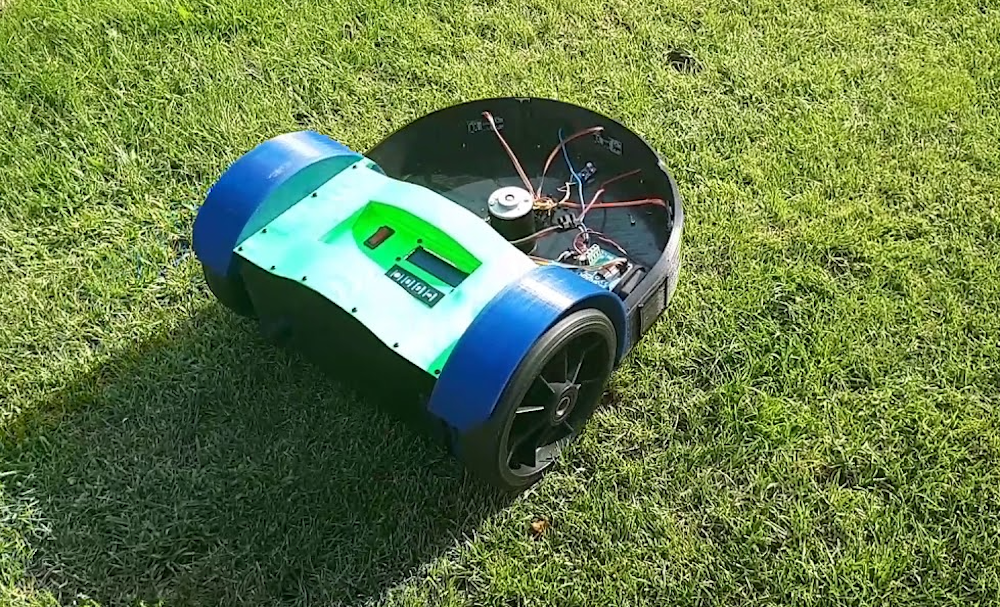
Do you enjoy mowing your lawn? No? Well now you can ‘simply’ print a robot to do it for you, based on German mechanical engineer Philip Read’s design. His Roomba-esque device uses a pair of gearmotors for movement, an array of three ultrasonic sensors for obstacle avoidance, and a perimeter wire/sensor to keep it within the designated boundary.
An Arduino Mega is employed as the main processing unit for the robotic mower, however a separate Nano onboard helps measure battery voltage as well as current when charging. Meanwhile, an Arduino Uno along with a motor driver are used to control the perimeter wire setup.
Extensive build info is available on the project’s write-up, and a short demo can be seen in the video below.
Fully autonomous robot lawn mower. The mower project includes the mower itself a boundary wire control station and an optional charging station. The mower navigates within the boundary wire which is positioned (pinned) around the perimeter of the garden. Once the mower senses the perimeter wire, it stops reverses and moves off in a new direction. The mower also has 3 sonar sensors to detect objects in the mowers path. Once the mowers battery is exhausted, the mower uses the boundary wire to navigate itself back to the charging station. All this can be customised in the Arduino software or completely re-written to your personal preferences.
Commercial mowers with this specification cost upwards of 600€ ($680).
Obviously, you’ll want to use such a device in an area devoid of kids or pets
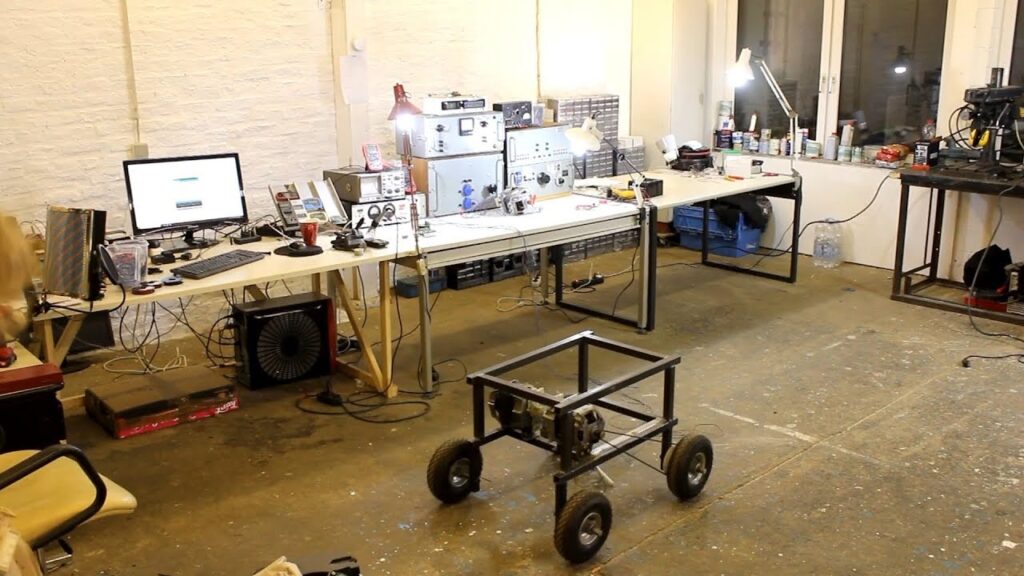
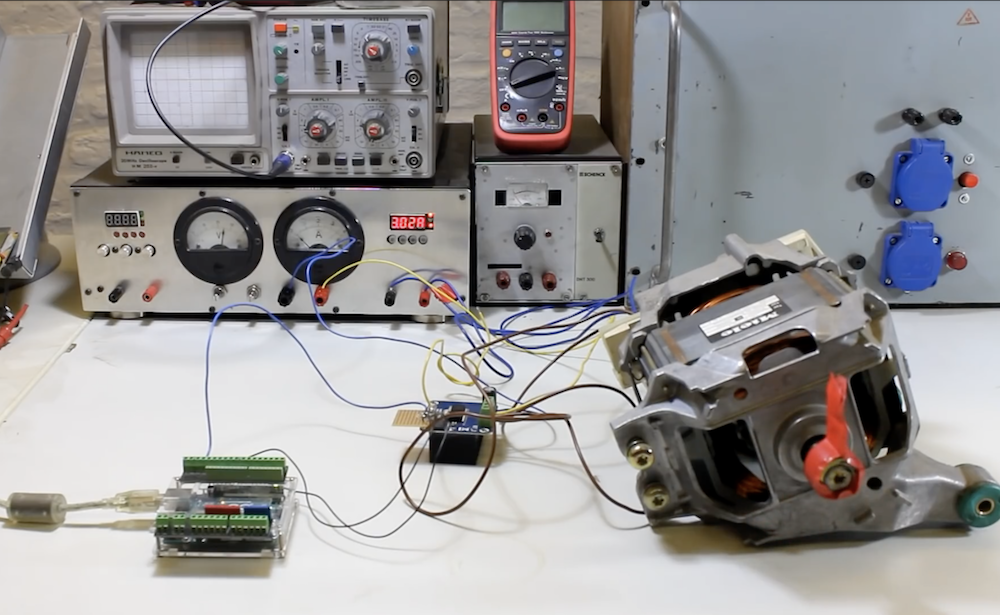
Powering small robots could be considered the specialty of Arduino boards, but what if you want to control something much bigger? There are, of course, ways to do this, but larger motors are naturally more difficult to source. This hasn’t deterred YouTuber The Post Apocalyptic Inventor, however, who has been exploring the use of European-style washing machine motors to drive a large steel tubing robot chassis.
While the project is not yet finished, he’s turned to an Arduino Uno for experimental control along with a variety of other components to provide the proper power.
Be sure to check out video below of this robot-in-progress if you’re interested in “beefing up” your next project!
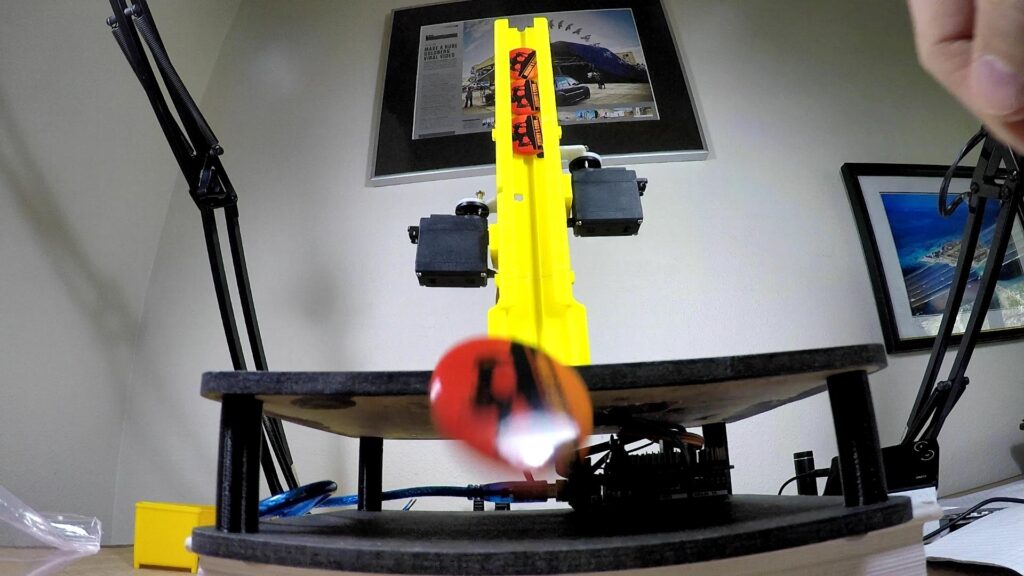
Giving away buttons at Maker Faires or trade shows is a great way to promote your brand, but what if you want to dispense these trinkets in style? That was the idea behind this automated button dispenser mechanism from Jeremy S. Cook, which drops buttons one at a time, and uses a capacitive sensor to detect when someone presses a marked “activation circle” on its base.
When triggered, the Arduino Uno commands two servo motors in sequence to release the lower button, while holding the other stacked buttons in place. The button-in-motion then proceeds down a 3D-printed slide, shooting out into the receiver’s hands—or floor depending on one’s reflexes!
Be sure to check out the build process in the video below, and you can find code/print files on GitHub if you’d like to make your own!