Posts with «uncategorized» label

Build an Arduino Mega fingerprint door lock

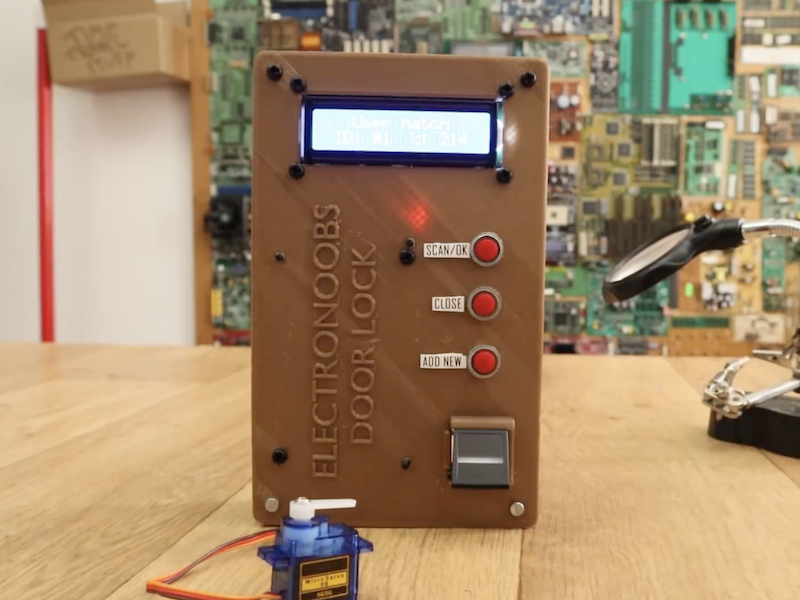
If you don’t want to carry keycard or memorize a passcode, this build from Electronoobs might be just the thing. 

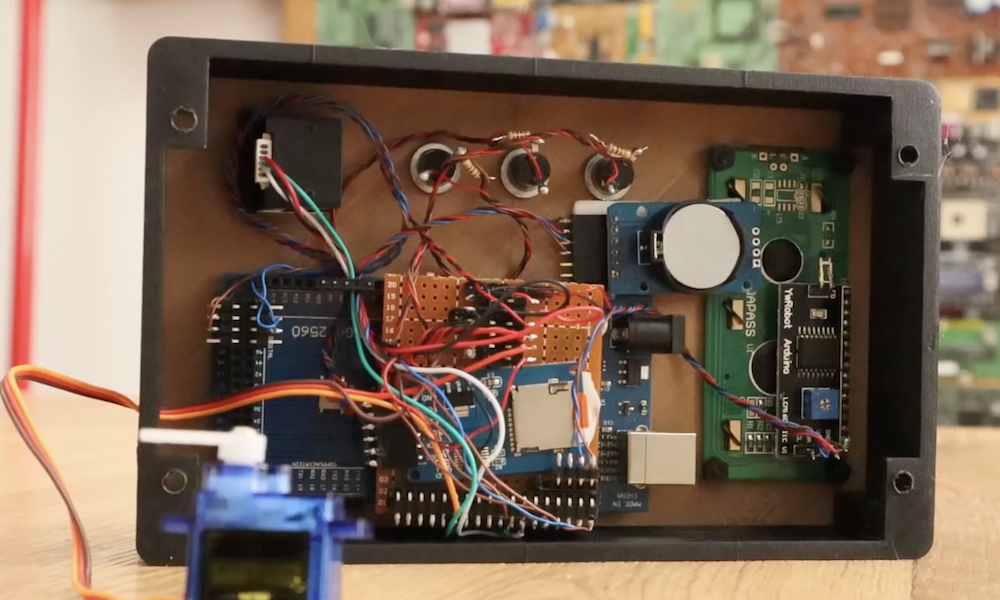
The system uses a fingerprint reader to check to see if you have access, and if approved, the device’s Arduino Mega unlocks the theoretical door using a micro servo motor. Three push buttons and a 16×2 LCD screen complete the user interface, and allow more authorized fingers to be added with the main person/finger’s permission.

While you might question the security gained by a hobby servo, the video notes that this could trigger any sort of security device, perhaps via a relay or electromagnetic coil lock. Besides security, the build gives a good introduction to Arduino fingerprint scanning, as well as the use of an SD card for data logging functions.

Arduino and Distrelec launch a new automation & robotics contest!

How can you help advance Industry 4.0 using the Arduino ecosystem? From robots and predictive maintenance to remote control and data acquisition, we’ve teamed up Distrelec to launch a new Automation & Robotics Contest challenging our community to create innovative solutions that can make the industry faster, cheaper, more flexible, and efficient.

Participants are required to tap into our extensive range of IoT boards like the MKR1000 WiFi and MKR GSM 1400, libraries, and online platform to bring their ideas to life. Industrial automation projects could target energy management, remote monitoring, machine safety, or predictive maintenance, for example, using Arduino Create to set up, control, and connect your Arduino, Intel, and Arm-based devices. Robotics projects could include designs for surveillance drones, robotic arms, rovers, or autonomous transportation, leveraging feature-rich boards like the Mega and Due to prototype advanced systems. 

How to Enter

  • Create a free account on Arduino.cc (or log in if already a member).
  • Register for the contest by clicking “Register as a participant.”
  • Send your concept to the Arduino/Distrelec: Automation & Robotics Contest by June 29, 2018. The top 150 makers will receive a coupon for Distrelec online store. Moreover, there will be a series of micro contests, with weekly prizes handed out from Distrelec.
  • Design, build, and submit your project by September 16, 2018. Winning projects will be selected based on their originality, quality, creativity, and social impact. 

Prizes

Ready to get started? You can find more information on the contest here and browse Distrelec’s entire Arduino lineup on their website. To submit your ideas, please visit the Arduino Project Hub. And remember, projects must use an Arduino board in order to be eligible to win!

SKELLY the Skeleton Robot

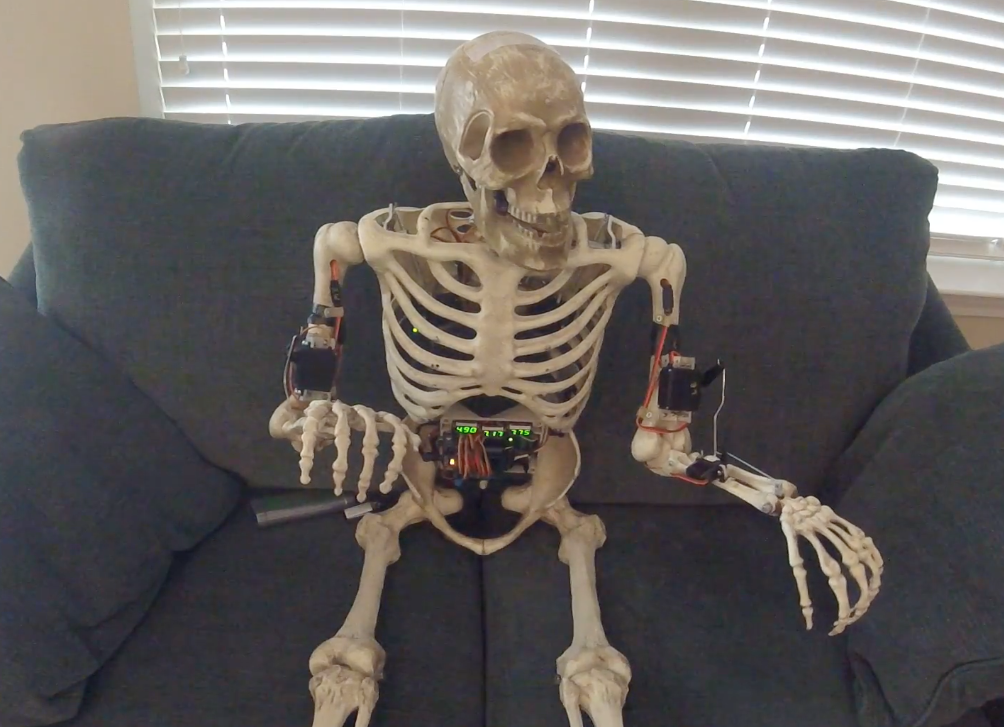
While it might seem like a long time away to most people, if you’re looking to make an amazing automated display for Halloween, it’s time to start planning! One idea would be an automated skeleton robot like SKELLY.

This particular robot was built using an Arduino Mega, a Cytron PS2 Shield, a modified sensor shield, and a wireless PS2 controller. SKELLY is equipped with a total of eight servos: six for bending his shoulders, elbows and wrists, one for running his mouth, and another for turning his head. There is also a pair of LEDs for eyes, and a small motor in his head with a counterweight that allows him to shake.

SKELLY is programmed using the Visuino visual programming environment. As seen in the videos below, the robot–which is the author’s first–is quite nimble, waving and moving along with an automatic piano!

Selectively silence a landline phone with Arduino

Silencing a smartphone at night isn’t difficult, but if you have a landline, Arduino can help!

Before computer hacking/modding became accessible, the next best thing was to creatively explore the phone system via custom electronics. Though this pursuit, known as “phone phreaking,” has largely gone away, some people still have landlines. As “MolecularD” shows in this Instructables writeup, with a few components you can creatively trick your phone into not ringing on your end, while appearing to the caller to simply ring and ring as if no one is home.

In order to make it much more useful, MolecularD hooked up an Arduino Mega with a real-time clock module to turn the device on and off depending on the time of day. Now calls from phone solicitors, or “IRS agents” at 4 in the morning can be eliminated automatically. As noted, this may or may not be legal where you live, so attempt it at your own risk!

Arduino Day: Extended deadline, new events, and more updates!

Arduino Day is now less than three weeks away, and we cannot wait to celebrate with everyone on April 1st. So far, we’ve received hundreds of submission from all across the world and are constantly updating our map with new events — which by the way, if yours has been approved, do not forget to add the agenda!

As we prepare for Arduino Day, we’ve got three more announcements to share:  

  • NEW DEADLINE: The call for submissions has been extended until March 18th! Remember, participation is open to everyone and anyone can organize event of their own Submit yours here!
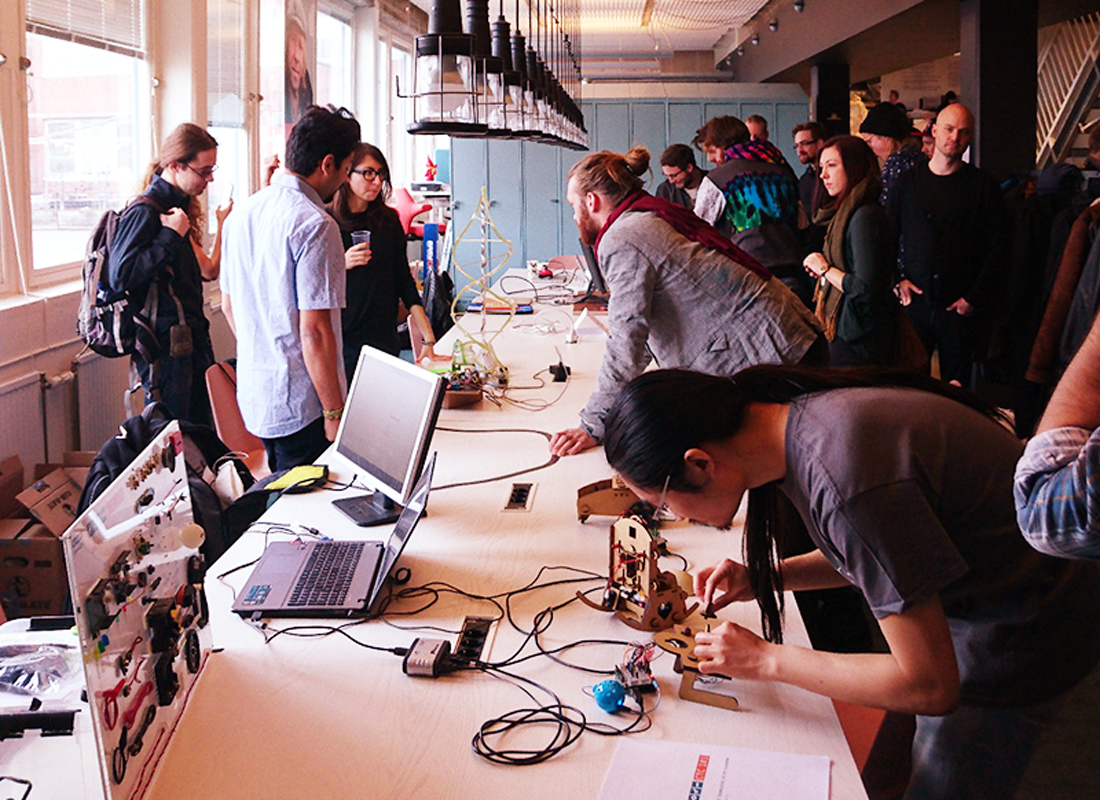
  • OFFICIAL ARDUINO DAY IN MALMÖ: Aside from our festivities in Turin, the Arduino team will host another official event in Malmö. The program will include a showcase of Maker projects, free activities for kids, and a lineup of talks. Live in Sweden or nearby? Join us!
  • ONLINE EVENTS: Not only will the Arduino community come together at various physical locations throughout the globe, but now several celebrations this year will also be taking place virtually. If you want to host an online event — such as a hangout or a live streamed workshop (we are very open!) — please contact arduinoday2017@arduino.cc with your idea, and we’ll get back to you!

Last but not least, do not forget to post and invite your friends via social media using the hashtag #ArduinoD17


Attachment is like a modern-day message in a bottle

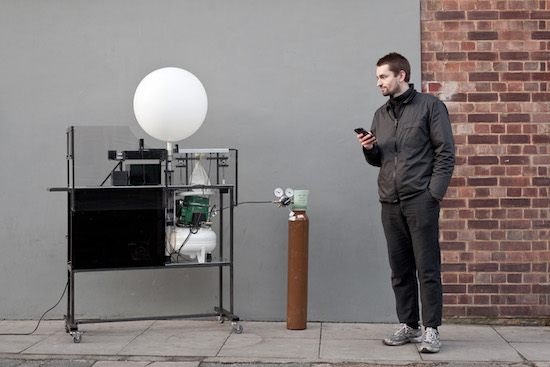
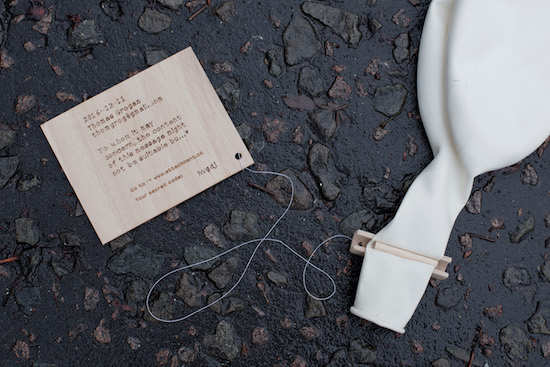
If you want to reach out to someone, you could always pick up your phone and send a text. But if you’re seeking something a bit more random and indirect, one idea would be to write and attach a message to a biodegradable balloon using Swiss designer David Colombini’s “poetic machine.”

Colombini’s Attachment project allows you to do just that, by dispatching digital notes, images or videos gleaned from the Internet into the atmosphere. Once the Arduino Mega-driven device receives this input, the message is laser-etched on a thin piece of balsa wood, then released into the air (though a human has to ‘reload’ after five launches). Word space is limited to a Twitter-esque 120 characters, but the finder of the balloon can access any additional content that you include through a code on the project’s website.

According to Creative Applications:

Software includes PHP / MySQL database, vvvv (take the message from web database, layout of the message, transform it and stream it to the engraver) and Arduino IDE (controlling all the mechanisms). Hardware includes an Arduino Mega, NEMA 23 motors + drivers, linear actuators, a Bambi air compressor, helium cylinder, Festo pneumatic components (helium + air valves, helium and air pressure sensors, pneumatic cylinders, DHEB) and MicroSlice engraver (based on Arduino Uno).

You can read more on this project as well as its previous version. Additionally, visit the Attachment.cc page to input your own message!

(Photos: David Colombini)

Teensy 3.5 & 3.6 Kickstarter

As many of the followers of my blog know, the Teensy 3.1 and Teensy LC have been my favorite microcontroller boards for the past couple of years.  The Teensy 3.1 has since been replaced by the slightly better Teensy 3.2, which has a better voltage regulator but is otherwise pretty much the same as the 3.1.  I’ve been using the Teensy LC with PteroDAQ software for my electronics course.

I’ve just noticed that PJRC has a Kickstarter campaign for a new set of boards the Teensy 3.5 and 3.6.  These will be much more powerful ARM processors (120MHz and 180MHz Cortex M4 processors with floating-point units, so at least 2.5 times faster than the Teensy 3.2, more if floating-point is used much).  The form factor is similar to before, but the boards are longer, taking up 24 rows of a breadboard, instead of just 14.  The extra board space is mainly to provide more I/O, but there is also a MicroSD card slot.

The designer is still dedicated to making the Teensy boards run in the Arduino environment, and the breadboard-friendly layout is very good for experimenting.

PJRC is positioning the new boards between the old Teensy boards and the Linux-based boards like the Raspberry Pi boards. The new Teensy boards will have a lot of raw power, but not an operating system, though I suspect that people outside PJRC will try porting one of the small real-time operating systems to the board.

The new boards are a bit pricey compared to the Teensy LC ($23–28 instead of under $12 for the Teensy LC), but still reasonable for what they provide.  PJRC also has a history of providing good software for their boards.

I probably need to get both a Teensy 3.5 and a 3.6 to port PteroDAQ to them—that looks like a $50 purchase. If the boards and the software are available in time for me do development on PteroDAQ by December, I might get it done—any later than that and I’ll have no time, as I have a very heavy teaching and service load for Winter quarter.

I suspect that the new Teensyduino software will need a newer version of the Arduino development environment, which in turn would require a newer version of the Mac operating system (my laptop is still running 10.6.8), which in turn probably means a new laptop.

I’m waiting to see if Apple releases a new, usable MacBook Pro in October, so there is a bit of built-in delay in the whole process. I’m not impressed with their recent design choices for iPhones and MacBook Air—I need connections to my laptop—so there is a strong possibility that I may be having to leave the Macintosh family of products after having been a loyal user since 1984 (that’s 32 years now).


Filed under: Uncategorized Tagged: Arduino, Kickstarter, PteroDAQ, Teensy

An Arduino VU meter for classrooms

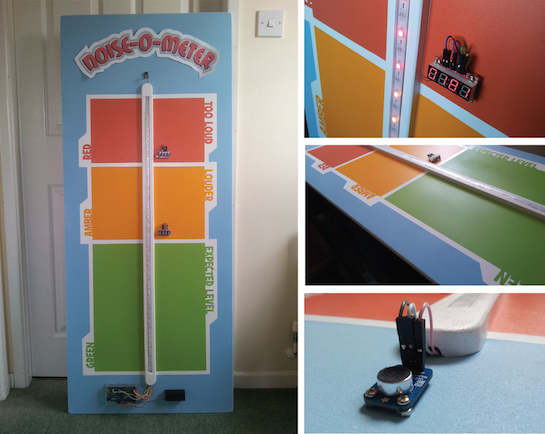
With his beautifully-colored classroom “noise-o-meter,” Mr. Jones knows when things are getting out of hand.

When you were in school (or if you are in school) the teacher likely told the class to be quiet, perhaps repeating him or herself over an over during the day. The teacher, however, likely never really defined what is good and bad. Mr. Jones has finally solved this issue by creating a classroom “noise-o-meter” using an Arduino, an electret microphone, and a programmable LED strip. In order (apparently) too keep the class in line, noise is simply marked as green for “expected,” amber for “louder,” and “red” for too loud which corresponds nicely with more “traditional” VU meters.

I built this a short while ago as an idea to use in a primary classroom setting. Poster displays are often used by primary teachers wanting to control the noise levels in their classrooms but I wanted to add technology to make it dynamic and responsive. The motivation for this came after seeing the Adafruit Digital NeoPixel LED Strip online and realizing its potential as part of a VU meter.

Are you a teacher and want to build one for yourself? You can check out Mr. Jones’ Instructables page or his own website in a different format.

Maker builds feeding machine that lets his cat ‘hunt’ for food

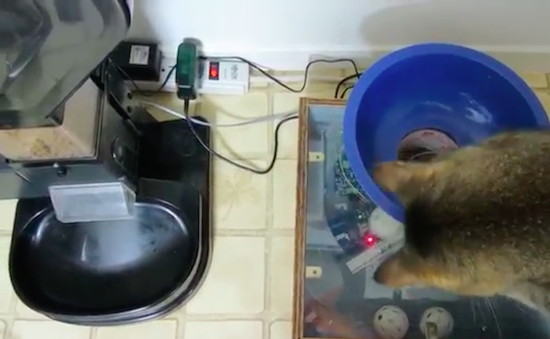
Although automated pet feeders seem to be a dime a dozen these days, Benjamin Millam’s project is on a whole ‘nother level. Last year, the Maker created a system that caters to the primal instincts of his indoor cat, Monkey, by training him to look for plastic balls hidden around the house and then drop them into the machine. Once the apparatus recognizes the RFID-tagged balls, food gets dispensed into the bowl.

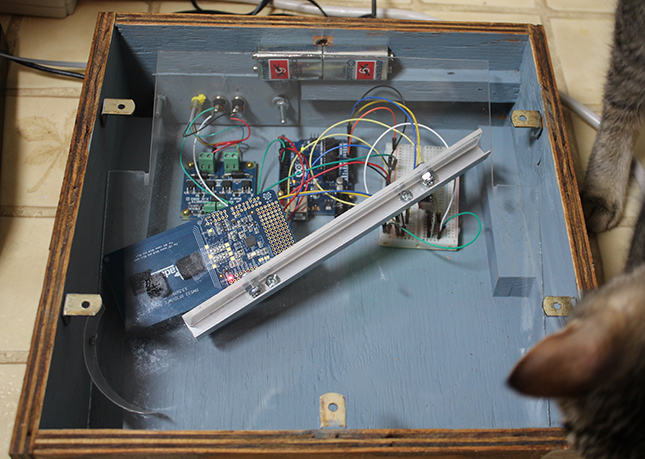
The system is comprised of a modified Super Feeder, an Adafruit RFID reader, a remote antenna, a few relays and an Arduino Uno. Millam writes that he conceived the idea after learning why cats repeatedly scour the same area.

What if my cat, while out on patrol, actually found its prey? Surely this would bring him one step closer towards a more fulfilled and self-actualized indoor kitty existence. I imagined hiding little bowls of food around the house… then I imagined me actually refilling these bowls. Then I imagined having to move them around to different hiding spots, spilling, forgetting, and every so often, perhaps only after following a trail of ants, finding one undiscovered and rancid. Hmmm, maybe there’s a way to hide something else, a way to hide something other than food, a way to make something not-food = food…

Throughout the day, the feline seeks out a series of embedded balls and plops them into a blue bowl on top of the makeshift device. From there, gravity takes over. As the ball makes its way down the shoot, the RFID tag is scanned and and the program is initiated. The Arduino switches on the relay that closes the feeder’s power circuit, and voila!

The Maker does note, however, that a little training is needed in order for this method work. While we’ll have to wait and see if this becomes an actual product, you can watch Monkey go after some Wiffle Balls right meow!

Spinphony turns cycling into music

Spinphony is a bike installation that was built in collaboration with 72andSunny‘s Google team and their Made with Code initiative, with hopes of inspiring teenage girls to take an interest in coding.

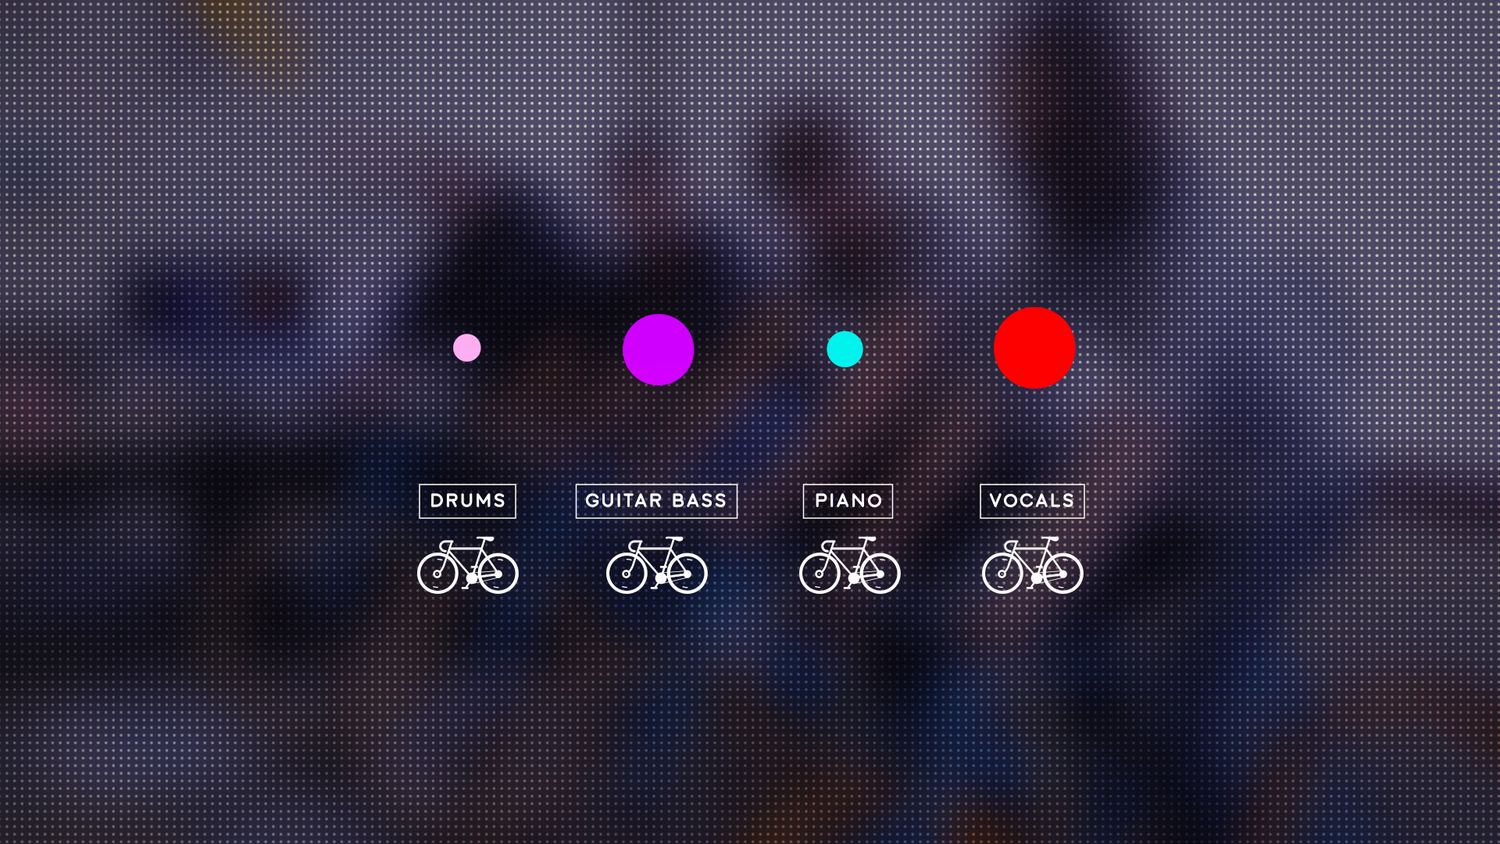
As its name would suggest, the project combines spinning (indoor cycling) and music with each bike representing a different instrument stem of a song.

For instance, bike one controls drums, bike two might control bass and so on. The way we made it all come together was to have the volume of each stem depend on the speed at which the bike was being pedaled (i.e. the slower the RPM the quieter the stem of the song and vice versa). This is where Arduino came into play.

The prototype is based on an Arduino Uno and uses two magnets, a reed switch, RPM values, and MIDI to produce some spincredible sounds. You can see it in action below!