Posts with «tutorial» label

A Custom Keyboard At Maximum Effort

No one loves hacked keyboards more than Hackaday. We spend most of our workday pressing different combinations of the same 104 buttons. Investing time in that tool is time well spent. [Max] feels the same and wants some personality in his input device.

In the first of three videos, he steps us through the design and materials, starting with a layer to hold the keys. FR4 is the layer of fiberglass substrate used for most circuit boards. Protoboards with no copper are just bare FR4 with holes. Homemade CNC machines can glide through FR4, achieving clean lines, and the material comes in different mask colors so customizing an already custom piece is simple. We see a couple of useful online tools for making a homemade keyboard throughout the videos. The first is a keypad layout tool which allows you to start with popular configurations and tweak them to suit your weirdest desires. Missing finger? Forget one key column. Extra digit? Add a new key column. Huge hands? More spaces between the keys. [Max] copied the Iris keyboard design but named his Arke, after the fraternal sister to Iris which is fitting since his wrist rests are removable.

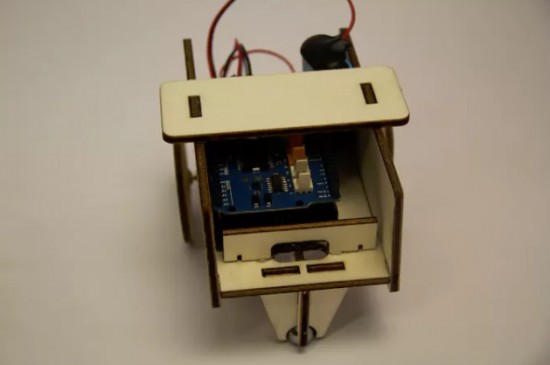
In the second video, we see how the case and a custom cable are designed. One of the most beautiful features of this build is the cable with 3D-printed boots that are sized to fit ordinary pin headers. The homemade keyboard that this article is being typed on just has a piece of yellow Cat5 between the halves. When the custom cable is assembled, we see a hack revealed by accident. Twelve wires for the cable are salvaged from some ribbon cable and by cutting the ribbon straight across, every scrap of wire is the same length. No more of those unruly wires at the end or that one short one that kinks all the others. There is also a cable boot design that didn’t make the final cut but featured some secure threaded ends that are still available for download.

Another bonus hack comes from the calipers used to break wires into subsections. Check out how to make your calipers run for years on a singe battery. Keyswitch wiring is explained in the final video, shown below, which is simple enough since it is a row-and-column arrangement. The third bonus hack is when we see that classic gray ribbon “stripped” by applying a hot iron to the tip. [Max], like others, has a video about making helping hands from coolant hoses, but here he chooses the more straightforward route of putting some gummy tack on the table and mashing the header into it. Like the shortcut with the keyboard layout design, an online tool generates the firmware.

When you are ready to make your own keyboard, you will be in good hands with time-tested methods or even 3D printing. If you like the regular design, you can also overhaul an old keyboard, or update a USB device to Bluetooth.

A list of Arduino Tutorial sites

I have just created a new page on my blog which lists a huge number of websites and YouTube channels that are dedicated to creating Arduino tutorials. If you are learning to use the Arduino, this page will definitely point you in the right direction.

Please let me know if I have missed any obvious sites.

Link :  Arduino Tutorial Site List
ScottC 17 Jul 16:51
arduino  list  site  tutorial  

A BluePill for Arduino Dependence

Arduinos are helpful but some applications require more than what Arduinos can provide. However, it’s not always easy to make the switch from a developed ecosystem into the abyss that is hardware engineering. [Vadim] noticed this, which prompted him to write a guide to shepherd people on their quest for an Arduino-free environment, one BluePill at a time.

With an extended metaphor comparing Arduino use and physical addiction, [Vadim’s] writing is a joy to read. He chose to focus on the BluePill (aka the next Arduino Killer™) which is a $1.75 ARM board with the form factor of an Arduino Nano. After describing where to get the board and it’s an accompanying programmer, [Vadim] introduces PlatformIO, an alternative to the Arduino IDE. But wait! Before the Arduino die-hards leave, take note that PlatformIO can use all of the “Arduino Language,” so your digitalWrites and analogReads are safe (for now). Like any getting started guide, [Vadim] includes the obligatory blinking an LED program. And, in the end, [Vadim] sets his readers up to be comfortable in the middle ground between Arduino Land and the Wild West.

The debate for/against Arduino has been simmering for quite some time, but most agree that Arduino is a good place to start: it’s simpler and easier than jumping head first. However, at some point, many want to remove their “crippling Arduino dependency” (in the words of [Vadim]) and move on to bigger and better things. If you’re at this point, or still cling to your Uno, swing on over and give Vadim’s post a read. If you’re already in the trenches, head on over and read our posts about the BluePill and PlatformIO which are great complements for [Vadim’s].


Filed under: hardware, news
Hack a Day 02 Sep 12:00

Step by step guide installation guide for ch340 USB-UART converter

Hello Friends,

In this tutorial, we will cover how to install ch340 driver for different versions of windows.
CH340 is USB-UART converter and is used for serial communication with PC/ laptop with external device e.g. GSM module, GPS module, arduino pro, etc.

Things required:

CH340 USB-UART

First of all, download the driver from link below:

Download

After downloading, extract the file and follow the steps as follows:

Step 1: Open Device Manager, go to other devices. Right click on the USB2.0-Serial

Device Manager


Step 2: Browse the directory, where you had extracted the downloaded file

Browse the directory

Step 3: Select the parent directory


Choosing directory

Step 4: Viola! your driver has been installed

Driver installed
Now, check with any terminal software. I am using Bray's Terminal.


FunWithElectronics 01 Aug 06:11
diy  tutorial  usb-uart  

First Look at ABC: Basic Connections

[Alberto Piganti], aka [pighixxx] has been making circuit diagram art for a few years now, and has just come out with a book that’s available on Kickstarter. He sent us a copy to review, and we spent an hour or so with a refreshing beverage and a binder full of beautiful circuit diagrams. It doesn’t get better than that!

[pighixxx] started out making very pretty and functional pinout diagrams for a number of microcontrollers, and then branched out to modules and development boards like the Arduino and ESP8266. They’re great, and we’ll admit to having a printout of his SMD ATMega328 and the ESP-12 on our wall. His graphical style has been widely copied, which truly is the sincerest form of flattery.

But after pinouts, what’s next? Fully elaborated circuit diagrams, done in the same style, of course. “ABC: Basic Connections” started out life as a compendium of frequently used sub-circuits in Arduino projects. But you can take “Arduino” with a grain of salt — these are all useful for generic microcontroller-based projects. So whether you want to drive a 12 V solenoid from a low-voltage microcontroller, drive many LEDs with shift registers, or decode a rotary encoder, there is a circuit snippet here for you.

One of the things that we like most about the graphics in “ABC” is that they’re not dumbed down — they’re fundamentally just well-done circuit diagrams, but with graphic touches and extra detail where it actually helps to clarify things. This is a middle ground between the kind of schematic you use in a PCB layout program and the kind of diagram you get from Fritzing. In the former, every part has a symbol but multifunction parts like microcontrollers are just represented as squares bristling with pin numbers. In the latter, wiring up an IC is easy because the parts and pins are represented graphically, but you quickly run out of colors for the different wires, and the “breadboard” turns into a rat’s nest with a circuit of any complexity.

“ABC” takes the middle road, using standard circuit diagram style overall, but also the nice graphic representations of the ICs and modules that [pighixxx] is good at. Is a 2N2222 pinned EBC or BCE? You don’t have to look that up, because it’s sketched out for you here. We’d guess that this attractive, but information-rich, style is a great fit for the target audience — people with some electronics experience who do not yet have their favorite transistor symbol tattooed on their forearm. [pighixxx]’s diagrams are simple, easy to understand, easy to use, and pretty to boot.

There is a planned online counterpart to the book, with further elaborations of all of the circuit setups. They’re not finished yet, but they have a lot more of the flavor of the Fritzing-style, this-wire-goes-to-that-hole diagrams. This style does work better in an online format than in a physical book, because you can build up the rat’s nest in bite-sized steps, none of which are too overwhelming. But honestly, for an advanced beginner or intermediate electronics hacker, the book can be treated as stand-alone. The web content may help the rank newbie when they get stuck.

Tee-hee.

The breadth of circuits in “ABC” is fairly wide, covering most of the microcontroller-interfacing problems that we’ve ever encountered. None of the circuits are revolutionary — they’re the tried-and-true, correct solutions to the various problems, rather than anything too hacky or clever. We weren’t surprised by any of the circuits, but we didn’t find anything that we wouldn’t use ourselves either. These are basic connections after all, and a darn solid collection of them.

To sum up, “ABC” is an attractive book in a handy binder format that would make a great collection of solutions for anyone who’s just getting started in the whole “Arduino” scene but who gets hung up on interfacing the chips with the real world. It’s a handy reference for the pinouts of a number of frequently used parts, combined with the resistors, flyback diodes, level-shifting circuits, and whatever else that you’d need to make them work. It’s what we wish our simple circuit diagrams looked like. We like it.


Filed under: Hackaday Columns, reviews

Hacking Robotic Arm using Controllino and Cayenne


Description

This tutorial will show you how to take over the controls of the OWI Robotic Arm with the help of an Arduino compatible, open-source PLC called the Controllino MAXI, together with Cayenne (my go-to iOT application for remote connection to my Arduino projects). The Controllino MAXI will provide the physical connections to the OWI robotic arm, and Cayenne will allow me to control the arm via my web browser or via the Cayenne app on my phone.


Arduino Libraries and IDE

  1. The Arduino IDE can be used to program the Controllino. You can dowload the Arduino IDE from here: https://www.arduino.cc/en/main/software.
  2. You will also need to read the Cayenne Ethernet library installation instructions in order to install the Cayenne Ethernet Library.
  3. The Controllino will connect to the internet via the Ethernet port onboard.
  4. You do not need the Controllino library for this project, however, if you have a Controllino, you might as well install the library. You can read the Controllino library installation instructions from their GitHub webpage here: https://github.com/CONTROLLINO-PLC/CONTROLLINO_Library.
  5. You will need to notify the Arduino IDE of the Controllino MAXI board by pasting the supplied URL into the "Additional Boards Manager URLs" in the Arduino IDE.
  6. This is located under: FILE - PREFERENCES - Additional Boards Manager URLs.
  7. The URL that you need to paste is in STEP 3 of the Controllino Library installation instructions on their GitHub page.
  8. The video at the top of this tutorial may help clarify the process.


ARDUINO CODE:

The code above is very simple, however you will need to create a dashboard of widgets from within your Cayenne account in order to control the OWI robotic Arm from your phone or via the Dashboard webpage.


Setting up Cayenne Dashboard

Once you have created your Cayenne account, you will be presented with a webpage to choose a board to connect to. Controllino is an Arduino compatible PLC, so make sure to follow these instructions for setting up the Controllino in your Cayenne Account.

  1. Select Arduino from the available list of boards.
  2. Make sure to install the necessary libraries if your have not done so already.
  3. Select Arduino MEGA from the avaliable list of Arduino boards
  4. Select Ethernet Shield W5100
  5. Copy and paste the Arduino code that pops up on screen into your Arduino IDE and upload to the Controllino.
  6. Alternatively, copy and paste the code from above, however you will need to insert your Authentication token to get it to work

After you upload the code to the Controllino, and providing it has an ethernet cable connected to the internet router (and has access to the internet), and is powered on, it will connect to your Cayenne Dashboard. You can now add widgets to the dashboard in real time to interact with the Controllino, and without uploading any more code to the open source PLC.


Adding Widgets

We need to add a number of widgets in order to activate the relays on the Controllino. The relavent digital pins that we will need to know about can be found on the Controllino website here: https://controllino.biz/downloads/.

Here is the direct link to the PINOUT file for the Controllino MAXI.

"Armed" with that knowledge, we can now create the widgets which are necessary to control the relays on the Controllino. From within the Cayenne dashboard, please follow these instructions to create a widget:

  1. Select - ADD NEW
  2. Select - DEVICE/WIDGET
  3. Select - ACTUATORS
  4. Then - RELAY from the dropdown box
  5. Select - RELAY SWITCH
  6. Give the widget a descriptive name to differentiate it from the other widgets and a name that is somewhat informative (eg. R0 - Pos)
  7. I gave the first widget the name "R0 - Pos", because it will connect to Relay R0, and that relay will be connected to the Positive (POS) terminal of the OWI robotic arm.
  8. Select the device you would like to connect to. Be aware that you can change the name of the device in the settings. If you followed this tutorial, it should have the name "Arduino MEGA", but I changed the name of the device to "Controllino" to be more accurate.
  9. We will be using a digital pin to control the relay, therefore select "Digital" as the Connectivity option
  10. For this specific widget, we will be controlling R0, which is activated by digital pin D22 on the Controllino. Therefore select "D22" from the "Pin" dropdown box.
  11. Choose a "Button" as the widget type
  12. Choose an icon from the dropdown box that makes sense to you
  13. Skip Step 1
  14. Select Step 2: Add actuator

You should now see your new widget on the dashboard. Select the widget to enable or activate that relay. If you do this, and if everything goes to plan, you will see the LED for R0 illuminate on the Controllino. You now have to add the rest of the widgets to the dashboard in order to control the rest of the relays on the Controllino.


Widget Dashboard

Here is a table to show you how I setup my dashboard.


Fritzing diagram


OWI Robotic Arm Pins


Normal OWI Robotic Arm Circuit

The following circuit diagram will show you how the wired control box is normally connected to the OWI Robotic arm. This is the circuit diagram of the OWI robotic arm under normal operating contidtions.


OWI Robotic Arm Circuit when connected to Controllino

The following circuit diagram will show you how the OWI Robotic Arm will be controlled by the relays of the Controllino. This is the circuit diagram of the OWI robotic arm when it is connected to the Controllino.


All connected

The OWI Robotic Arm is connected to a breadboard using the female-to-male jumper wires. Solid core wire is then fed through to the relay terminals of the Controllino. You could just wire it up so that the robotic arm is connected directly to the Controllino, however, I did not have the right connectors for this purpose.
The Controllino is also connected to my internet router via a normal RJ-45 ethernet cable, and is powered by a 12V DC power adapter.


Summary

Now that you have all the physical connections made, uploaded the code to the Controllino, and have created your dashboard in Cayenne, you should be able to control your OWI Robotic arm from anywhere in the world. As demonstrated in the video at the start of this tutorial, the robotic arm has quite a bit of give on each of the joints, which makes it difficult to achieve certain tasks that require an element of precision. There goes that idea of being able to perform surgery with this thing !!! At least you can get it to make you a cup of tea, and if you are patient enough, you might even get a grape once in a while.

Thank you to Controllino and Cayenne for making this tutorial possible. If you would like your product featured in my tutorials, please contact me on my contact page.


If you like this page, please do me a favour and show your appreciation :

 
Visit my ArduinoBasics Google + page.
Follow me on Twitter by looking for ScottC @ArduinoBasics.
I can also be found on Pinterest and Instagram.
Have a look at my videos on my YouTube channel.


Build an automatic cat treat dispenser with Hummingbird

The Hummingbird by BirdBrain Technologies is an Arduino AtHeart microcontroller designed to enable beginners to create robots from craft materials. Hummingbird kits include LEDs, motors, and sensors that connect directly to the board. This eliminates the need for soldering or breadboarding and ensures that users have the parts they need to build their first robots. All of the components are reusable, so the same kit can be used to build many different robots.

In addition, the Hummingbird supports a variety of programming options, making it appropriate for beginning programmers as well as those who are more advanced. Some programming languages, such as Scratch and Snap!, can only be used when the board is connected to the computer. We will concentrate here on programming alternatives that enable users to upload a program onto the board’s Arduino.

Classrooms all over the world have used the Hummingbird from elementary to high school for projects ranging from Shakespeare dioramas to the physics of amusement park rides. In the following project, the BirdBrain Technologies team will show how they used the Hummingbird to build an automatic cat treat dispenser and demonstrate how the Hummingbird can be utilized to construct robots from everyday materials.

Building with the Hummingbird
Beginners can easily get started building Hummingbird robots with cardboard and craft materials. Motors, sensors, and LEDs can be connected directly to the Hummingbird board, and these elements can be added to the robot with hot glue. Hot glue peels off the components so that they can later be reused.

The example project uses one servo motor, one single color LED, and a light sensor. The dispenser consists of a servo motor attached to craft sticks that block the bottom of a chute containing cat treats. The position of the servo motor can be changed in software to release treats.

To receive a treat, the cat must cover a light sensor in front of the chute. When the cat covers the sensor, the servo motor briefly moves to open the chute and dispense a treat. The LED was included to show our test cat the location of the light sensor.

Programming with the Hummingbird
One unique feature of the Hummingbird is that it supports three different programming options for producing an Arduino program. These options provide steps of increasing difficulty to support learners as they transition from programming novices to Arduino experts.

Beginners can start with the CREATE Lab Visual Programmer. This software option is based on storyboarding. Users can select the motors and LEDs that they are using on a schematic of the Hummingbird board. Then they can create expressions by using sliders to set the values of these outputs. The expression below sets a servo motor to 100°.

Expressions can be combined to create sequences. For example, the sequence below controls our automatic cat treat dispenser. This sequence is controlled by a sensor block. If the light level is low, the three expressions on the left are executed. If the light level is high, the three expressions on the right are executed. The user can then convert this sequence to an Arduino program by simply clicking the “Export Sequence” button (shown outlined in red). The Hummingbird can then be placed into Arduino mode and the program uploaded to the microcontroller.

Another option for beginners is ArduBlock, which provides a visual introduction to the Arduino language. The Hummingbird extension for ArduBlock includes a block for each Hummingbird component. A program in ArduBlock to control the treat dispenser is shown below. This program is equivalent to the CREATE Lab Visual Programmer sequence shown above.

The Arduino code generated by this ArduBlock program is shown below. Individuals moving from the CREATE Lab Visual Programmer or ArduBlock to Arduino can start by modifying the generated code. For example, in the video we modified the commands inside the else to make the LED blink to attract the cat’s attention.

Once individuals are comfortable with the Arduino programming language, they can create more complex programs in Arduino. For instance, the video shows how we modified our robot and our code to incorporate three lights and three sensors. To get a treat, the cat must cover the sensor when the corresponding light is on.

The cat treat dispenser is only one example of a Hummingbird robot using the power of the Arduino at its core. The parts can be used and reused to construct an unlimited number of robots with low-cost materials such as cardboard, pipe cleaners, recycled materials, and even paper mache!

Measuring AC power with the Industruino PROTO

Industruino PROTO–now available on our online storejoined the AtHeart Program back in 2015 with hopes of combining industrial automation components and the simplicity of Arduino.

This robust DIN-rail mountable, Leonardo-compatible controller enables you to take your existing Arduino projects and swiftly transform them into permanent installations. The prototyping area and screw connectors allow you to install your own circuitry and reliably connect to accessories.

In the video below, Industruino co-founder Loic De Buck discusses these key features and more with Davide Gomba. (You can also find an extended version here.)

The team recently created an excellent tutorial showing how you to build an Arduino-based electricity consumption monitor with the Industruino PROTO platform. You can use it to measure AC power of your appliances, including a water cooker, TV, laptop charger, or anything else plugged into a wall socket. Alternatively, you can even use it in your electricity cabinet to evaluate the power consumption throughout your entire house (at least one phase).

The challenge is to measure an AC of a relatively high voltage (220-240V) with a direct current 5V Arduino MCU.

This may seem dangerous, but we will use a non-invasive Current Transformer (CT),  so our Arduino remains galvanically isolated from the high voltage AC.

This prototype is based on the excellent open source project OpenEnergyMonitor. It uses parts of the its standard emonTx hardware and software to report the AC apparent power consumption, based on measurements of a Current Transformer as in the picture on the left. The original project also allows to measure 3 phase and/or real power, but for our prototype here we are only measuring the current of one phase, not its voltage which would require an AC/AC adaptor.

Want to make one yourself using the Industruino PROTO? You can find all the necessary documentation, including schematics and code, on the Industruino blog!


Make a WiFi-controlled mini robot using the new MKR2UNO

A few days ago, we launched the MKR2UNO Adapter, which enables you to easily turn an Arduino Uno form factor project into a MKR1000-based one. Simply mount your IoT board to the adapter, plug in any Uno shield and have a wireless device in no time.

Our newly-published tutorial provides a step-by-step overview of how to build a WiFi-controllable robot using the MKR2UNO Adapter with a MKR1000 and an Arduino Motor Shield.

This project combines the Arduino MKR1000’s web server and Arduino Motor Shield’s capabilities to drive a pair of different DC motors. A basic interface is hosted and hard-coded in the MKR1000, allowing the user to maneuver the robot up, down, left or right.

Check out all of the schematics and code here!

Arduino Blog 11 Nov 15:08