Posts with «touchscreen» label

Hackaday Prize Entry: Oscilloscope for the Masses

If you head down to your local electronics supply shop (the Internet), you can pick up a quality true-RMS multimeter for about $100 that will do almost everything you will ever need. It won’t be able to view waveforms, though; this is the realm of the oscilloscope. Unlike the multimeter’s realistic price point, however, a decent oscilloscope is easily many hundreds, and often thousands, of dollars. While this is prohibitively expensive for most, the next entry into the Hackaday Prize seeks to bring an inexpensive oscilloscope to the masses.

The multiScope is built by [Vítor] and is based on the STM32-O-Scope which is built around a STM32F103C8T6 microcontroller. This particular chip was chosen because of its high clock speed and impressive analog-to-digital resolution, which are two critical specifications for any oscilloscope. This particular scope has an inductance meter built-in as well, which is another feature which your otherwise-capable multimeter probably doesn’t have.

New features continue to get added to this scope by [Vítor]. Most recently he’s added features which support negative voltages and offsets. His particular scope is built inside of a model car, too, but we believe this to be an optional feature.


Filed under: The Hackaday Prize, tool hacks

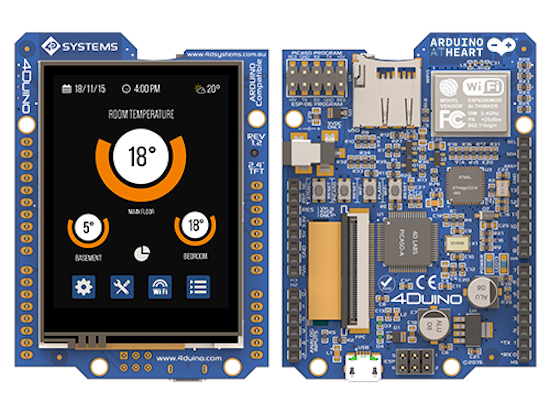
The AtHeart 4Duino combines Arduino, Wi-Fi and touchscreen

A new season, a new partner! We’ve had our sights set on 4D Systems’ touchscreen product for quite some time, and we’re excited to finally introduce that this Arduino and Genuino-compatible product is joining the AtHeart program. The 4Duino-24 is a 2.4-inch, 240×320-pixel Intelligent Display Module with Wi-Fi capabilities.

“For years Arduino/Genuino users have been taking advantage of our Intelligent Display Modules for adding graphical user interfaces with touch capability to their applications. With the 4Duino-24 we wanted to make something a bit more special and combine some of the more popular shields and the ATmega32U4 into a compact easy to use package. We are delighted to become part of the AtHeart program and very much look forward to seeing a full variety of applications running on the 4Duino-24.” – Markku Riihonen, Products and Business Development Manager, 4D Systems.

Perfect for your next creative IoT project, the 4Duino-24 runs on an ATmega32U4 MCU and is powered by the 4D Systems PICASO Graphics Processor that offers an array of display functionality and options for any designer and Maker. The 4Duino-24 also includes the popular ESP8266 module, which is pre-programmed with the AT command set firmware enabling the 4Duino to have Wi-Fi functionality right out of the box.

Beyond that, the 4Duino-24 is equipped with an onboard microSD connector and headers in the layout of an Arduino, including power pins (5V, 3.3V, GND and VIN), 20 digital I/O pins—seven of which can be used as PWM outputs, while 12 pins have analog input capabilities.

The 4Duino-24 can be programmed using the standard Arduino IDE or the 4D Workshop4 IDE and its three new 4Duino-based development environments with the added dimension of graphics. Creating Arduino GUIs doesn’t get any easier!

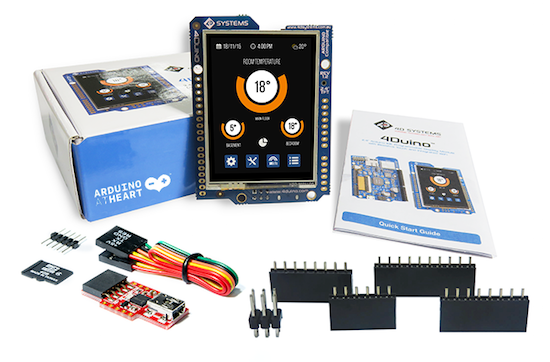
Ready to get started? You can watch 4D Systems’ 10-minute video below, as well as check out its product page here. The 4Duino-24 is available as starter kit and standalone module at the price of $79 USD/€69.90 (+tax).

Digitally Controlled Circuit Bending

Circuit bending doesn’t get a lot of respect around some parts of the Internet we frequent, but there is certainly an artistry to it. Case in point is the most incredible circuit bending we’ve ever seen. Yes, it’s soldering wires to seemingly random points on a PCB, but these bend points are digitally controlled, allowing a drum machine to transform between bent crunchiness and a classic 1980s drum machine with just a few presses of a touch screen controller.

All circuit bending must begin with an interesting piece of equipment and for this project, [Charles], the creator of this masterpiece of circuit bending, is using a Roland TR-626, a slightly more modern version of the TR-606, the percussive counterpart of the infamous TB-303. The circuit is bent in the classical fashion – tying signals on the PCB to ground, VCC, or other signals on the board. [Charles] then out does everyone else by connecting these wires to 384 analog switches controlled by an Arduino Mega. Also on the Arduino is a touch screen, and with a slick UI, this old drum machine can be bent digitally, no vast array of toggle switches required.

[Charles] has put up a few videos going over the construction, capabilities, and sound of this touch screen, circuit bent drum machine. It’s an amazing piece of work, and something that raises the bar for every circuit bending mod from this point on.

Thanks [oxygen_addiction] and [Kroaton] for sending this one in.


Filed under: misc hacks, musical hacks

Pwning Timberman with Electronically Simulated Touchscreen Presses

What do you do if you suck at a smartphone game? Buy some in-game upgrades to pretend like you’re good? Screw that! [Valentin] did what any self-respecting hacker would: developed an automated system to play for him.

Granted, when you see the demo video embedded below you’ll realize there isn’t much strategy involved in this game. But that setup to simulate the touchscreen presses is pretty neat. We’re used to seeing mechanical touchscreen hacks but this one is electronic, using a couple of pads of copper foil tape and some relays to make it happen. Here’s the one caveat: you still need to be touching something with your hand. This just uses the relays to switch the connection between the pads and your body.

We’ve looked around for this before. Does anyone have a cheap, simple, and effective hack to fully automate presses on a modern touchscreen? Can we use a potato or something? Tell us below, but send it in to the tips line too!


Filed under: Cellphone Hacks