You Need an Automated Overhead Camera Assistant

It’s 2021. Everyone and their mother is filming themselves doing stuff, and a lot of it is super cool content. But since most of us have to also work the video capture devices ourselves, it can be difficult to make compelling footage with a single, stationary overhead view, especially when there are a lot of steps involved. A slider rig is a good start, but the ability to move the camera in three dimensions programmatically is really where it’s at.
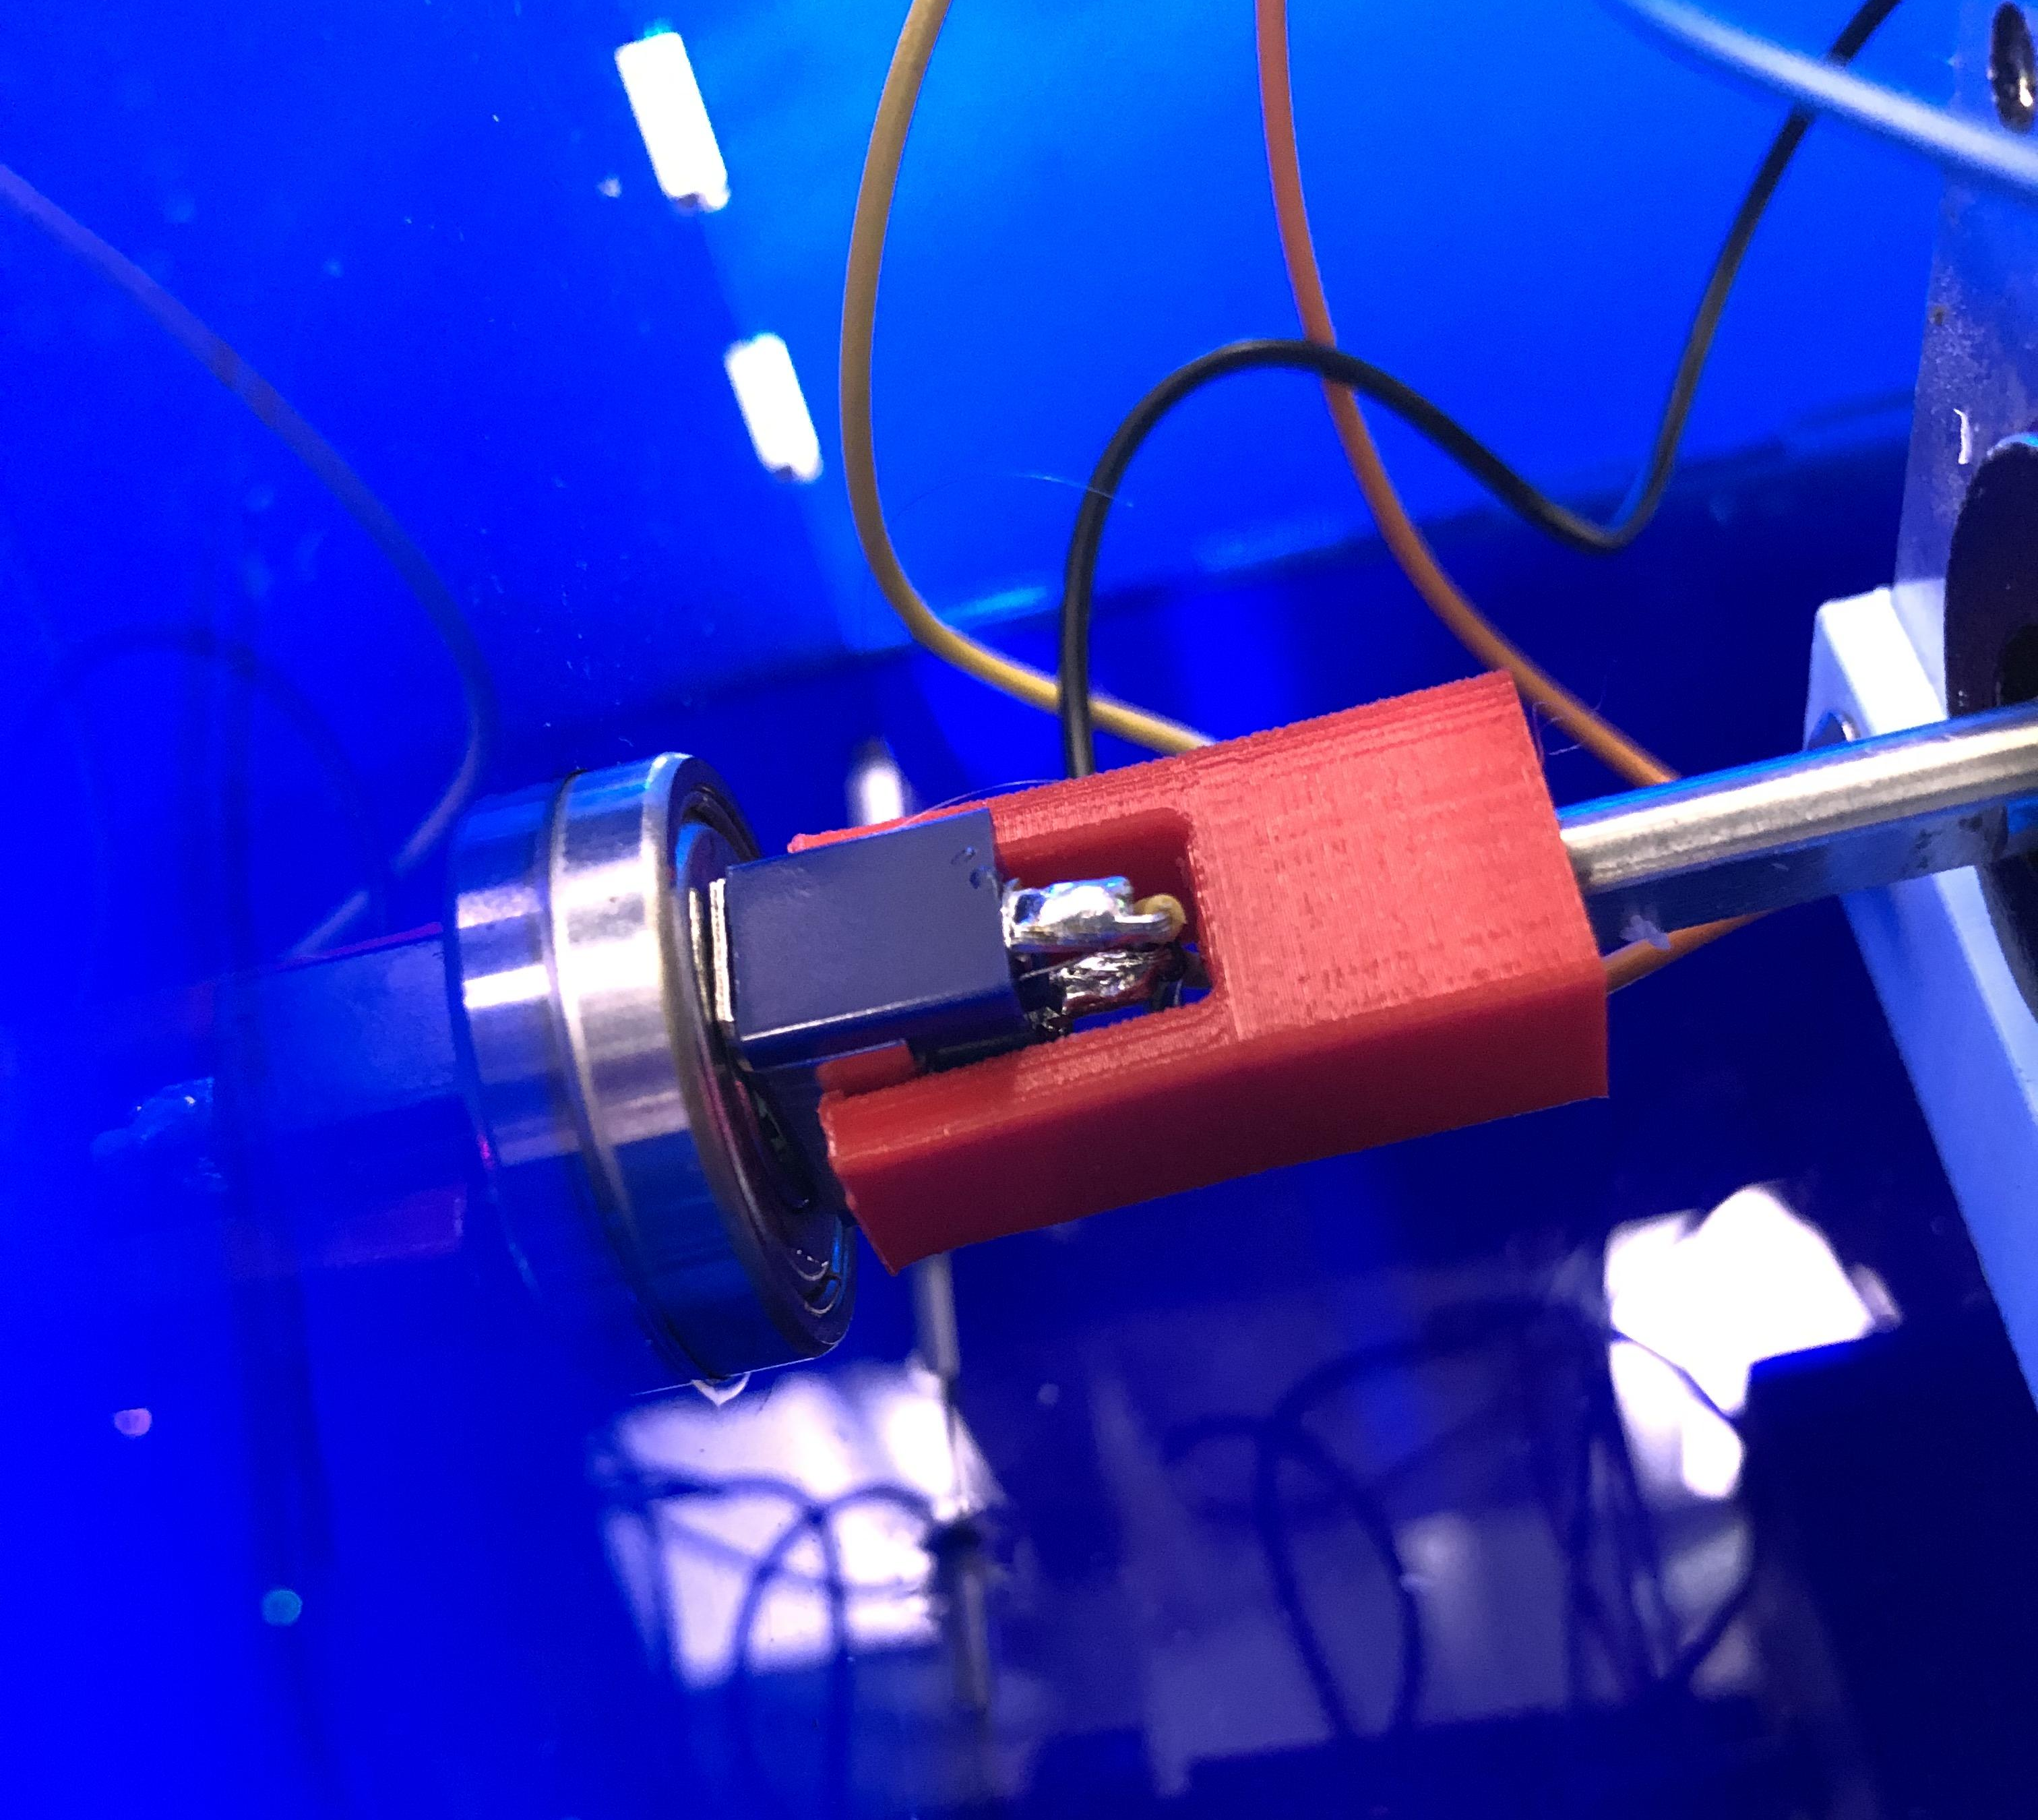
[KronBjorn]’s excellent automated overhead camera assistant runs on an Arduino Mega and is operated by typing commands in the serial monitor. It can pan ±20° from straight down and moves in three axes on NEMA-17 stepper motors. It moves really smoothly, which you can see in the videos after the break. The plastic-minimal design is interesting and reminds us a bit of an ophthalmoscope — that’s that main rig at the eye doctor. There’s only one thing that would make this better, and that’s a dedicated macro pad.
If you want to build your own, you’re in luck — there’s quite a lot of detail to this project, including a complete BOM, all the STLs, code, and even assembly videos of the 3D-printed parts and the electronics. Slide past the break to check out a couple of brief demo videos.
Not enough room for a setup like this one? Try the pantograph version.