Posts with «solenoid» label

Arduino Auto-Glockenspiel Looks Proper in Copper

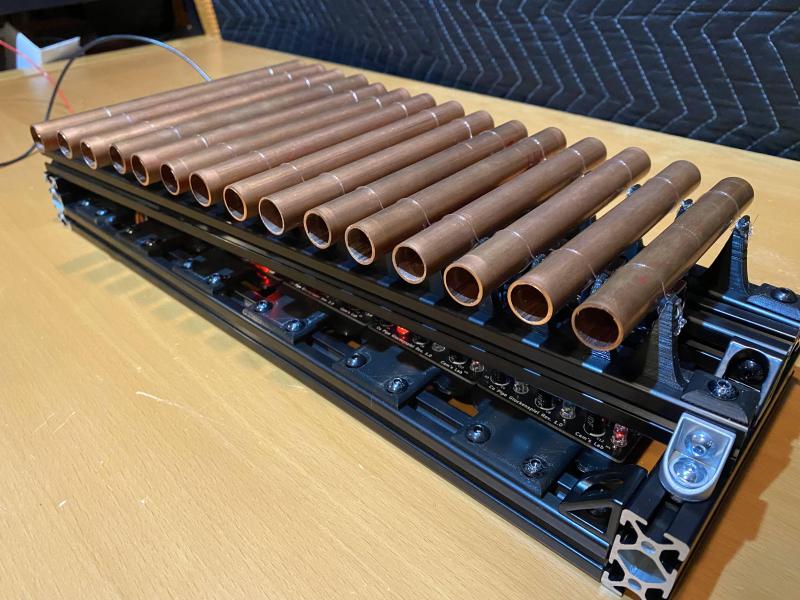
What is it about solenoids that makes people want to make music with them? Whatever it is, we hope that solenoids never stop inspiring people to make instruments like [CamsLab]’s copper pipe auto-glockenspiel.

At first, [CamsLab] thought of striking glasses of water, but didn’t like the temporary vibe of a setup like that. They also considered striking piano keys, but thought better of it when considering the extra clicking sound that the solenoids would make, plus it seemed needlessly complicated to execute. So [CamsLab] settled on copper pipes.

That in itself was a challenge as [CamsLab] had to figure out just the right lengths to cut each pipe in order to produce the desired pitch. Fortunately, they started with a modest 15-pipe glockenspiel as a proof of concept. However, the most challenging aspect of this project was figuring out how to mount the pipes so that they are close enough to the solenoids but not too close, and weren’t going to move over time. [CamsLab] settled on fishing line to suspend them with a 3D-printed frame mounted on extruded aluminium. The end result looks and sounds great, as you can hear in the video after the break.

Of course, there’s more than one way to auto-glockenspiel. You could always use servos.

Pour One Out for This Bottle-Playing Robot

If you have an iota of musicality, you’ve no doubt noticed that you can play music using glass bottles, especially if you have several of different sizes and fill them with varying levels of water. But what if you wanted to accompany yourself on the bottles? Well, then you’d need to build a bottle-playing robot.

First, [Jens Maker Adventures] wrote a song and condensed it down to eight notes. With a whole lot of tinkling with a butter knife against their collection of wine and other bottles, [Jens] was able to figure out the lowest note for a given bottle by filing it with water, and the highest note by emptying it out.

With the bottle notes selected, the original plan was to strike the bottles with sticks. As it turned out, 9g servos weren’t up to the task, so he went with solenoids instead. Using Boxes.py, he was able to parameterize a just-right bottle holder to allow for arranging the bottles in a circle and striking them from the inside, all while hiding the Arduino and the solenoid driver board. Be sure to check it out after the break.

Don’t have a bunch of bottles lying around? You can use an Arduino to play the glasses.

Robotic Xylophone Makes Music with MIDI Magic

The MIDI format has long been used to create some banging electronic music, so it’s refreshing to see how [John P. Miller] applied the standard in his decidedly analog self-playing robotic xylophone.

Framed inside a fetching Red Oak enclosure, the 25-key instrument uses individual solenoids for each key, meaning that it has no problem striking multiple bars simultaneously. This extra fidelity really helps in reproducing the familiar melodies via the MIDI format. The tracks themselves can be loaded onto the device via SD card, and selected for playback with character LCD and rotary knob.

The software transposes the full MIDI music spectrum of a particular track into a 25-note version compatible with the xylophone. Considering that a piano typically has 88 keys, some musical concessions are needed to produce a recognizable playback, but overall it’s an enjoyable musical experience.

Perhaps most remarkable about this project is the documentation. If you want to build your own, everything you need to know is available online, and the no-solder approach makes this project very accessible. Most of the write-up happened some years ago, and we’re really interested to see what improvements have been made since.

The robotic xylophone is reminiscent of these automatic tubular bells from some time ago. These musical hacks can be particularly inspiring, and we can’t wait to see more.

[Thanks Assad Ebrahim for the great tip.]

Focus Flower Motivates By Squirting Water In Your Face

When you need to get some tasks done and are short on attention, it’s hard to beat a timer. But whenever you do, it feels pretty darn good. The problem is that when you don’t finish in time, what’s the punishment? There are no consequences baked into the Pomodoro Technique other than good ol’ guilt. Wouldn’t it be better if there was a bit of negative reinforcement involved?

[Hardware Unknown]’s Focus Flower never needs watering, at least not in the normal horticultural way. You will have to fill a reservoir, because this flower provides liquid motivation. No, it’s not a spirit spritzer, though we suppose you could turn it into an avant-garde vodka fountain when the novelty of water wears off, making this Pomodoro with a twist into more of a Bloody Mary. It’s a natural next step, especially if you were already into the hot sauce idea.

Operation Focus Flower is simple: just push the easy button to start the task timer, and the Arduino Nano attached will begin a countdown. Push the button again when you’re done, but if you don’t do it before the countdown is over, the plant squirts you with a steady, skin-blasting stream of water from a solenoid-driven flosser tip. An air compressor nearby is required, which blows the minimalist vibe a bit, but you could always stow that part underneath your desk.

The Focus Flower sure looks to be effective at the whole negative reinforcement thing. And it doesn’t leave you totally clueless — there’s a ring of LEDs around the base that show how much time is left. Whenever you do successfully hit the button in time, it will say ‘that was easy’ in one of 12 languages, hence all the flags. Do not miss the totally free infomercial below.

Maybe you want a more friendly way to manage your time — we understand. Meet the Pomodachi productivity pet.

Via the Arduino Blog

Meet the Marvelous Macro Music Maker

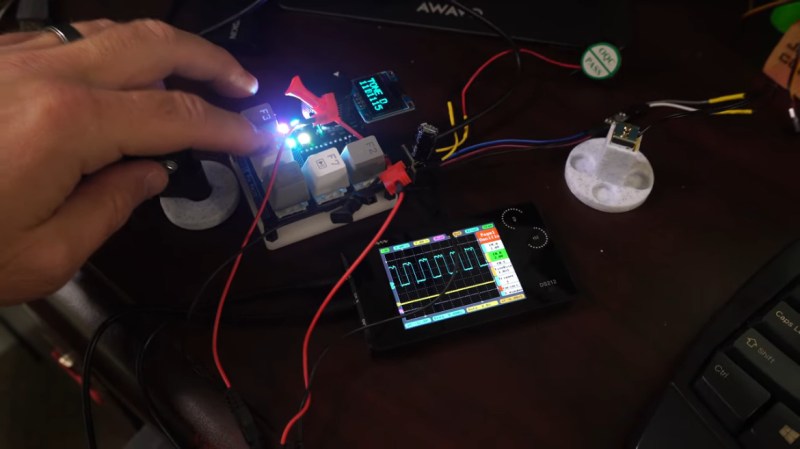
Do you kind of want a macropad, but aren’t sure that you would use it? Hackaday alum [Jeremy Cook] is now making and selling the JC Pro Macro on Tindie, which is exactly what it sounds like — a Pro Micro-based macro keypad with an OLED screen and a rotary encoder. In the video below, [Jeremy] shows how he made it into a music maker by adding a speaker and a small solenoid that does percussion, all while retaining the original macro pad functionality.

[Jeremy]’s original idea for a drum was to have a servo seesawing a chopstick back and forth on the table as one might nervously twiddle a pencil. That didn’t work out so well, so he switched to the solenoid and printed a thing to hold it upright, and we absolutely love it. The drum is controlled with the rotary encoder: push to turn the beat on or off and crank it to change the BPM.

To make it easier to connect up the solenoid and speaker, [Jeremy] had a little I²C helper board fabricated. There’s one SVG connection and another with power and ground swapped in the event it is needed. If you’re interested in the JC Pro Macro, you can pick it up in various forms over on Tindie. Of course, you might want to wait for version 2, which is coming to Kickstarter in October.

There are many ways to make a macro keyboard. Here’s one that also takes gesture input.

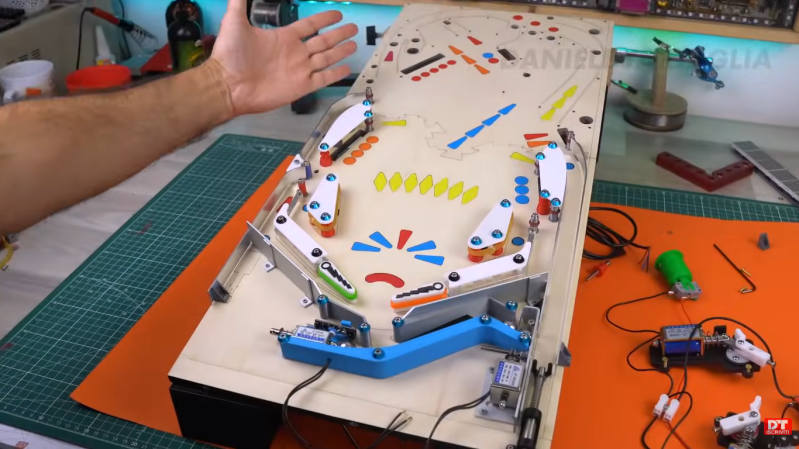
Can the Solenoid Engine Power a Car?

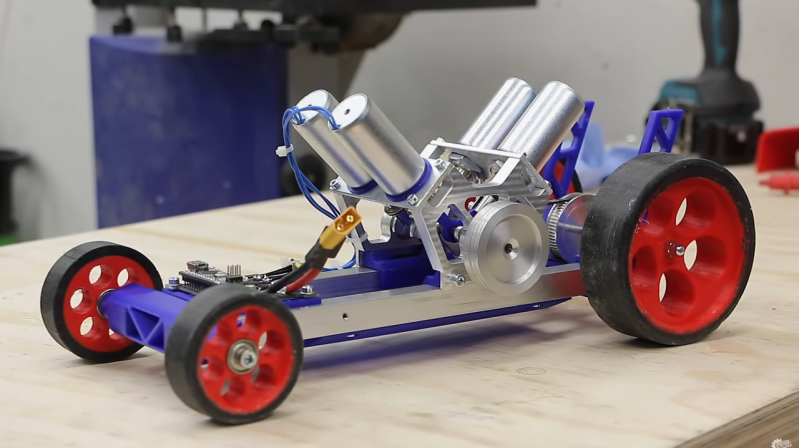
[Emiel] aka [The Practical Engineer] makes all kinds of fun projects in his fully-featured shop, and one of his tangents has been building a series of solenoid engines. These engines mimic the function of an internal combustion engine, with each solenoid acting as a piston. The only problem with [Emiel]’s concept engines, though, was that he never actually put them into a vehicle to prove their effectiveness. This build finally proves that they can work at powering a vehicle.

The project starts with a new engine. [Emiel] chose a V4 design using four solenoids and an Arduino-based controller. After some trouble getting it to operate properly, he scavenged a small circuit board he built in his V8 solenoid engine to help with timing. With that installed, the solenoids click away and spin the crankshaft at a single constant speed. The vehicle itself was mostly 3D printed, with two aluminum tubes as support structures to mount the engine. Even the wheels were 3D printed with a special rubber coating applied to them. With a small drive train assembled, it’s off to the races for this tiny prototype.

While the small car doesn’t have steering and only goes at a constant speed, the proof of concept that these tiny electric engines actually work is a welcomed addition to [Emiel]’s collection of videos on these curious engines. Of course they’re not as efficient as driving the wheels directly with an electric motor, but we all know there’s no fun in that. If you haven’t seen his most intricate build, the V8 is certainly worth checking out, and also shows off the timing circuitry he repurposed for this car.

The Clickiest Keyboard Ever

No matter how clicky your keyboard is, nothing compares to the sensory experience of using a typewriter. The sounds that a typewriter makes, from the deep clunk of hitting the spacebar to the staccato of keys striking paper to the ratchety kerchunk of returning the carriage, are a delight compared to the sterile, soulless clicks of even the noisiest computer keyboard. Oh, and the bell — who doesn’t love the bell?

Unwilling to miss out on the feel of real typing, [Jatin Patel] whipped up this solenoid-powered typewriter simulator. The first version had the core functionality, with a line of six solenoids mounted to a strip of wood. The coils are connected to an Arduino through a relay board; a Python program running on his PC reads every keypress and tells the Arduino which solenoid to fire. Each one sounds different somehow, perhaps due to its position on the board, or maybe due to differences in mounting methods. Whatever the cause, the effect is a realistic variability in the sounds, just like a real typewriter.

Version two, shown in the video below, ups the simulation with a motor that moves the solenoid rack one step with each keypress, to simulate the moving carriage of a typewriter. The last solenoid rings a bell when it’s time to return the carriage, which is done with a combination wrench as a handle. Weird hex, but OK.

Can’t get enough typewriter action? We understand; check out this typewriter-cum-USB keyboard, the tweeting typewriter, or this manual typewriter that pulls some strings.

Unique Musical Instrument Defies Description

Since the first of our ancestors discovered that banging a stick on a hollow log makes a jolly sound, we hominids have been finding new and unusual ways to make music. We haven’t come close to tapping out the potential for novel instruments, but then again it’s not every day that we come across a unique instrument and a new sound, as is the case with this string-plucking robot harp.

Named “Greg’s Harp” after builder [Frank Piesik]’s friend [Gregor], this three-stringed instrument almost defies classification. It’s sort of like a harp, but different, and sort of like an electric guitar, but not quite. Each steel string has three different ways to be played: what [Frank] calls “KickUps”, which are solenoids that strike the strings; an “eBow” coil stimulator; and a small motor with plastic plectra that pluck the strings. Each creates a unique sound at the fundamental frequency of the string, while servo-controlled hoops around each string serve as a robotic fretboard to change the notes. Sound is picked up by piezo transducers, and everything is controlled by a pair of Nanos and a Teensy, which takes care of MIDI duties.

Check out the video below and see if you find the sound both familiar and completely new. We’ve been featuring unique instruments builds forever, from not-quite-violins to self-playing kalimbas to the Theremincello, but we still find this one enchanting.

Hack a Day 11 Apr 21:00
arduino  fret  guitar  harp  midi  musical hacks  nano  plectrum  pluck  servo  solenoid  string  teensy  

Itty Bitty MIDI Piano Sings With Solenoids

Toy pianos are fun to plink around on for a minute, but their small keyboards and even smaller sound make them musically uninteresting pretty quickly. [Måns Jonasson] found a way to jazz up a two-octave toy piano almost beyond recognition. All it took was thirty solenoids, a few Arduinos, a MIDI shield, and a lot of time and patience.

This particular piano’s keys use lever action to strike thin steel tines. These tines are spaced just wide enough for tiny 5V solenoids to fit over them. Once [Måns] got a single solenoid striking away via MIDI input, he began designing 3D printed holders to affix them to the soundboard.

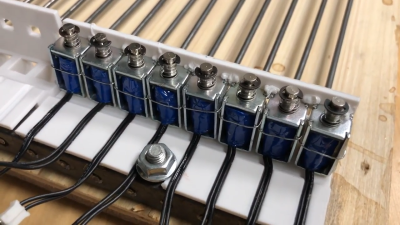
Everything worked with all thirty solenoids in place, but the wiring was a bird’s nest of spaghetti until he upgraded to motor driver shields. Then he designed a new bracket to hold eight solenoids at once, with a channel for each pair of wires. Every eight solenoids, there’s an Arduino and a motor shield.

The resulting junior player piano sounds like someone playing wind chimes like a xylophone, or a tiny Caribbean steel drum. Check out the build video after the break.

Hate the sound of toy pianos, but dig the convenient form factor? Turn one into a synth.

Hack a Day 14 Aug 00:00

Air Bubble Characters Float Along This Unique Scrolling Display

We’ve seen a lot of unique large-format scrolling message boards on these pages, but most of them use some sort of established technology – LEDs, electromechanical flip-dots, and the like – in new and unusual ways. We’re pretty sure this air-bubble dot matrix display is a first, though.

While it may not be destined for the front of a bus or a train station arrivals and departures board, [jellmeister]’s bubble display shows some pretty creative thinking. It started with a scrap of multiwall polycarbonate roofing – Corotherm is the brand name – of the type to glaze greenhouses and other structures. The parallel tubes are perfect for the display, although individual tubes could certainly be substituted. A plastic end cap was fabricated; air nozzles in each channel were plumbed to an air supply through solenoid valves. An Arduino with a couple of motor driver hats allows pulses of air into each channel to create reasonably legible characters that float up the tube. The video below shows it in use at a Maker Faire, where visitors could bubble up their own messages.

It took some tweaking to get it looking as good as it does, but there’s plenty of room for improvement. We wonder whether colored liquid might help, or perhaps adding a Neopixel or even a laser to each channel to add some contrast. Maybe something to cloud the water slightly would help; increasing the surface tension with a salt solution might make the bubbles more distinct. We doubt it’ll ever have the contrast ratio of a flip-dot display, but it certainly has a charm all its own.