Bluetooth Android Processing 1
PART ONE
Introduction
This is a four part tutorial which will take you through step-by-step on how to create Android apps on your Mobile device that will allow you to communicate with your Arduino over Bluetooth. This tutorial is based upon the Windows environment and an Android device like the Samsung Galaxy S2 Phone.
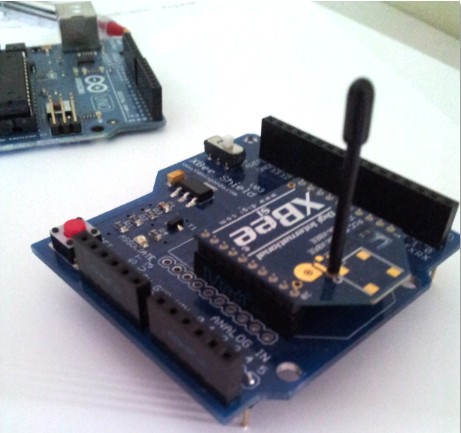
I will take you through setting up your computer and phone, and will move through in stages so that you understand what each part of the bluetooth code is actually doing. Obviously you will need to ensure that you have a Bluetooth Shield on your Arduino to be able to walk through this tutorial with me.
If you are not interested in the step-by-step instructions, you can jump straight to the end (Part 4) which will have the complete Arduino and Android/Processing code that was used in the following video:
The Goal of this project (Video)

Setting up Processing for Android applications:
For the latest and most up to date version, please follow the instructions on this website: http://wiki.processing.org/w/Android
Step One:
Download the Android SDK from this website:
http://developer.android.com/sdk/index.html

Android SDK Download:
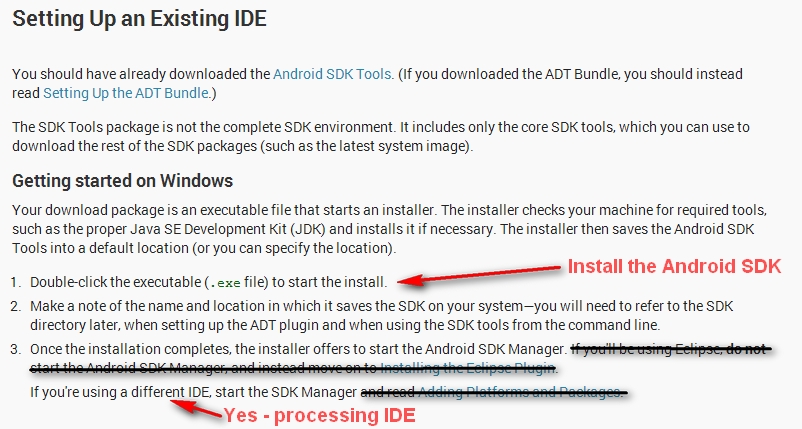
Make sure to select the "Use and Existing IDE" link, as per the picture below.

When you select the "Use an Existing IDE" link, it will then show you the appropriate download to use. This is what it should look like.
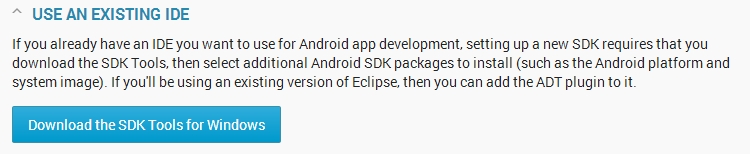
Select the "Download the SDK Tools for Windows" link.
Once you have downloaded the Android SDK, go ahead and install it as per the instructions below.
These instruction can also be found here.
Installing the necessary packages in the Android SDK Manager program
Make the following 3 selections:
- Tools: Android SDK Platform-tools
- API 10: SDK Platform
- Extras: Google USB Driver
Here is a picture of the Android SDK Manager selections:

While you may decide to download other packages,
you MUST download API 10: SDK Platform .
Do not leave this one out !!

Step Two: Processing Download
Download the latest Processing IDE(version 2.0 Beta 8) from this website:
http://processing.org/download/
I am using Windows 7, and have chosen to download the Windows 32 bit version as shown below.

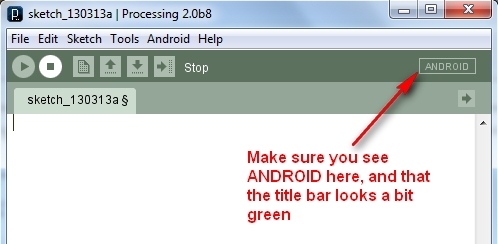
Load Processing, and switch to Android mode, as per the image below.
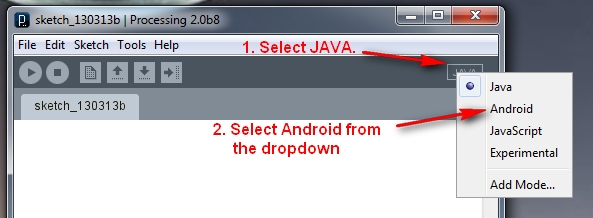
You should now have an empty sketch window which looks something like this.
Step Three: Setting up the Android Hardware device (Phone)
For the latest steps you can have a look at this site:
http://developer.android.com/tools/device.html
However, these are the ones that I carried out:
Turn on USB debugging on your Android Phone:
To find out what Android Version you are on, have a look at
Settings > About Phone : look for heading "Android Version".
- My Android version is 2.3.4 on my Samsung Galaxy S2.
Settings > Applications > Development > Select (or Enable) USB debugging
For those of you who have a different Android version, have a look below:

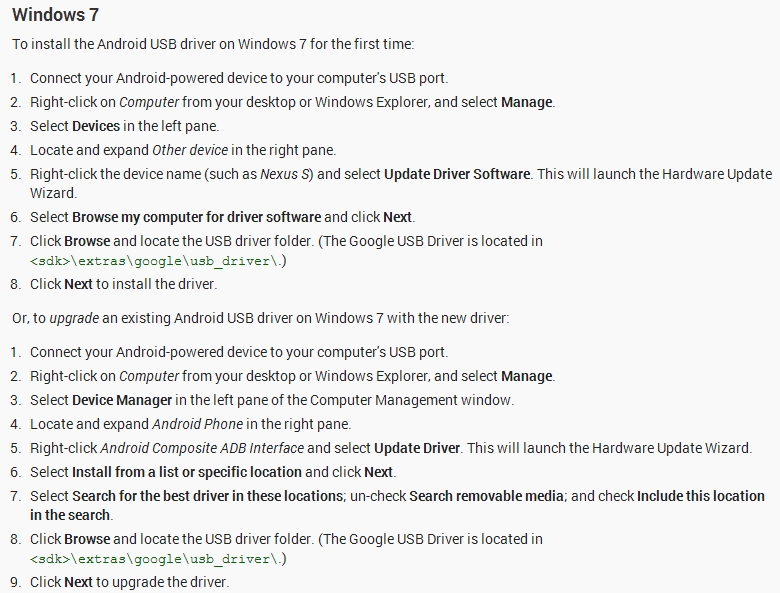
Downloading the USB driver for your Android Phone(Windows Users)
If you are developing on Windows and would like to connect an Android-powered device to test your applications, then you need to install the appropriate USB driver. Have a look at this site for more information on how to download the USB driver for your phone:
http://developer.android.com/tools/extras/oem-usb.html
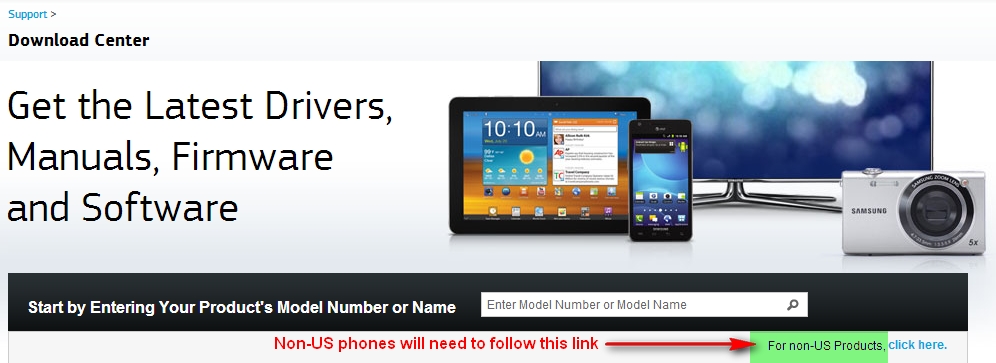
I have a Samsung Galaxy S2 phone, so I had to go to the Samsung Site here:
http://www.samsung.com/us/support/downloads
But because I am not in the USA, I had to click on the link for "non-US products":
http://www.samsung.com/us/support/downloads/global
You will need the model number of your phone:
On the Samsung Galaxy S2, you can go into
Settings > About Phone => Model number. Otherwise, it is located behind the battery.
- My Phone's Model Number is: GT-I9100
Then I continued with the install of the USB driver as per the document below:
http://developer.android.com/tools/extras/oem-usb.html
Step Four: Android-Processing Sketch
We will now test our our current setup and make sure that we can run a simple Processing Sketch on the Phone. Bluetooth functionality will be tested later on, so all we need for this step, is our computer, our Android phone, and a USB cable. While it is possible to run this sketch without an Android phone (by using the emulator), I personally do not have the patience to wait an eternity while the emulator boots up... (yes, it takes an eternity)... In this tutorial, we are going to test it on the device (phone).
This sketch has an orange background and a black circle which you can move around the screen with your finger (that's it) - I did say it was going to be a simple sketch.
This sketch has an orange background and a black circle which you can move around the screen with your finger (that's it) - I did say it was going to be a simple sketch.
Copy and paste the following Android-Processing sketch into the IDE, and then press the (Run on Device) button, which is the triangle button or press Ctrl-R.
Android/Processing Sketch 1: Circle Dragger
1 | /*Circle Dragger: Simple Android-Processing Sketch written by ScottC on 13/03/2013. |
You should see an orange screen appear on your phone. Move your finger across the screen and watch as the black circle follows your finger.
No, not rocket science, but hopefully everything worked as planned. If you want to change the colour of the background or circle, this is a good site:
http://www.colorpicker.com/
No, not rocket science, but hopefully everything worked as planned. If you want to change the colour of the background or circle, this is a good site:
http://www.colorpicker.com/
Step Five: Bluetooth testing:
We are now going to walk through Bluetooth connectivity. While we could just use a library to do all the heavy lifting for us, I decided to explore Bluetooth functionality from scratch. This will hopefully provide greater returns in the long run. Ok, lets create a new Android/Processing Sketch which changes its behaviour depending on whether Bluetooth is enabled or disabled when the sketch is run. We will display a red screen when Bluetooth is switched off, and green when Bluetooth is switched on.
To enable Bluetooth on my Samsung Galaxy SII phone:
- Settings >Wireless and Network > Bluetooth Settings > Bluetooth (Turn on Bluetooth) - check the box
To disable Bluetooth on my Samsung Galaxy SII phone:
- Settings >Wireless and Network > Bluetooth Settings > Bluetooth - Uncheck the box
In the processing/android IDE, you need to make sure that you update the AndroidManifest.xml file to grant specific permissions. You can either edit the file manually in the sketch folder, however, it is much easier and safer to do the following. In the processing/android IDE, select:
- Android > Sketch permissions (as per the picture below)
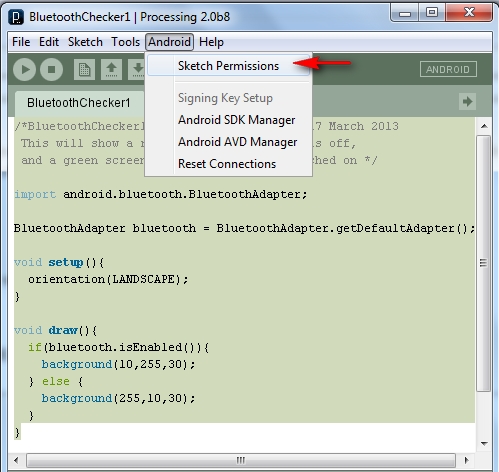
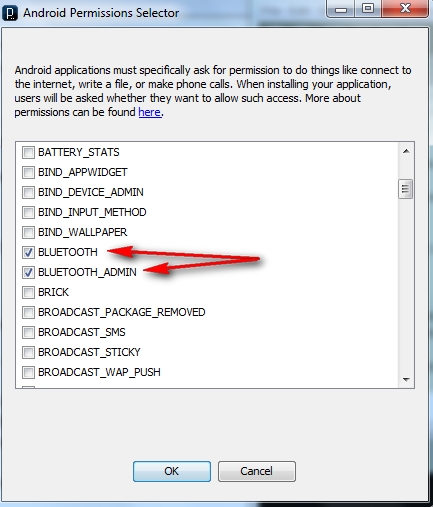
- Make sure that BLUETOOTH and BLUETOOTH_ADMIN are selected (as per the picture below). Then press the OK button.
Then copy and paste the following sketch into the processing/android IDE:
Android/Processing Sketch 2: BluetoothChecker1
1 | /*BluetoothChecker1: Written by ScottC on 17 March 2013 |
When you run the BluetoothChecker1 sketch on the device, you will either see a red screen or a green screen depending on whether you had Bluetooth enabled or disabled at the time. Ok, pretty boring, but it is a start. What if we wanted to ask the USER if they would like to enable Bluetooth at the beginning? We could then change the appearance of the screen depending on their selected answer. Before we add this functionality, I would recommend that you read about the following concepts introduced in the next sketch.
- startActivityForResult : used to create a new Activity. We create a new Activity to ask the user for permission to enable Bluetooth.
- onActivityResult: called when the Activity exits. We use this to find out whether the user granted permission to turn on Bluetooth or not.
- BluetoothAdapter.ACTION_REQUEST_ENABLE : This is action we want to take when we launch the activity.
- android.content.Intent: Mostly used when launching activities.
Android/Processing Sketch 3: BluetoothChecker2
1 | /*BluetoothChecker2: Written by ScottC on 17 March 2013 |
Useful Links:
Android Processing Wiki: http://wiki.processing.org/w/Android
Here is a good tutorial which helped me put Processing and Android together:
http://www.creativeapplications.net/android/mobile-app-development-processing-android-tutorial/
And most importantly:
The Android Developers site : Bluetooth
Click here for PART TWO
Click here for PART THREE
Click here for PART FOUR
If you like this page, please do me a favour and show your appreciation :
Visit my ArduinoBasics Google + page.
Follow me on Twitter by looking for ScottC @ArduinoBasics.
Have a look at my videos on my YouTube channel.
Visit my ArduinoBasics Google + page.
Follow me on Twitter by looking for ScottC @ArduinoBasics.
Have a look at my videos on my YouTube channel.

Feel free to share this page with your friends in any way you see fit.