Play the guitar on a guitar bag
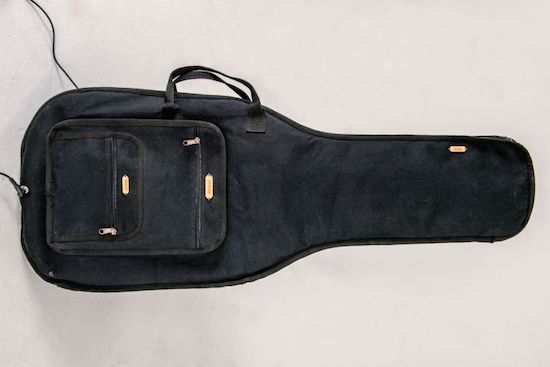
While exploring new tangible interfaces, designer Martin Hertig wanted to do something a bit different. He chose to transform the zippers on a guitar bag into a fully-functional instrument. Rather than strum the strings of the guitar, he simply pulls the bag’s zippers to jam: one zip for playing notes or chords, another for changing the bar, and a third for the vibrato.
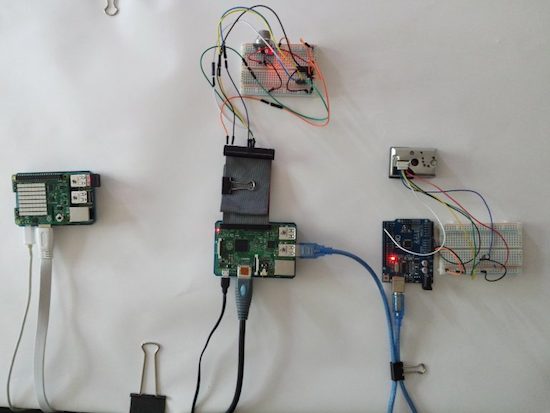
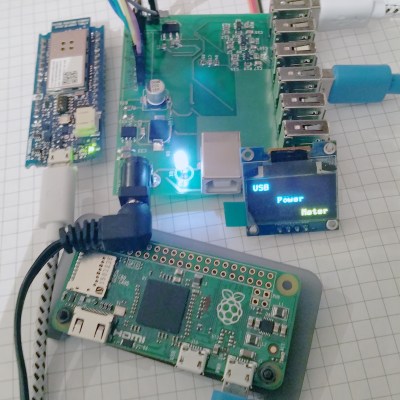
As Hertig explains, the case was converted into a MIDI controller using an Arduino and conductive thread stitched along the zipper, while a Raspberry Pi synthesizer hidden inside produces the guitar sounds.
Intrigued? Head over to Zippy’s project page, and be sure to see it in action below!