Posts with «projects» label

Hear the sound of 300 stars

Stellar is an interactive installation by sound artist Francesco Fabris, which aims to create a sonic representation of stars and constellations through a dedicated interface.

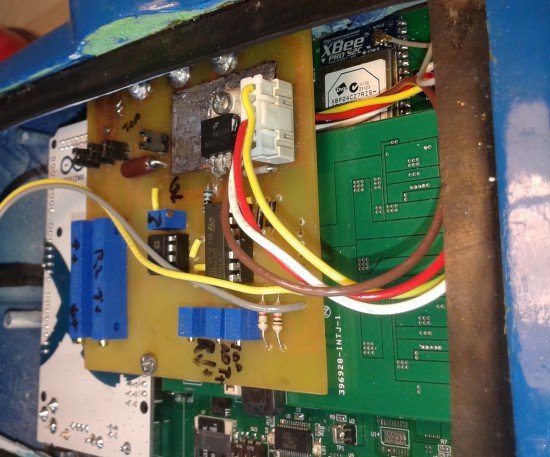
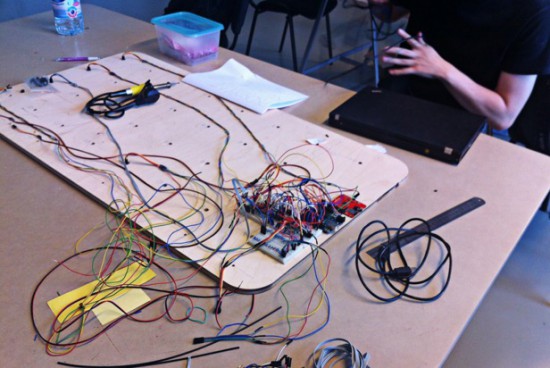
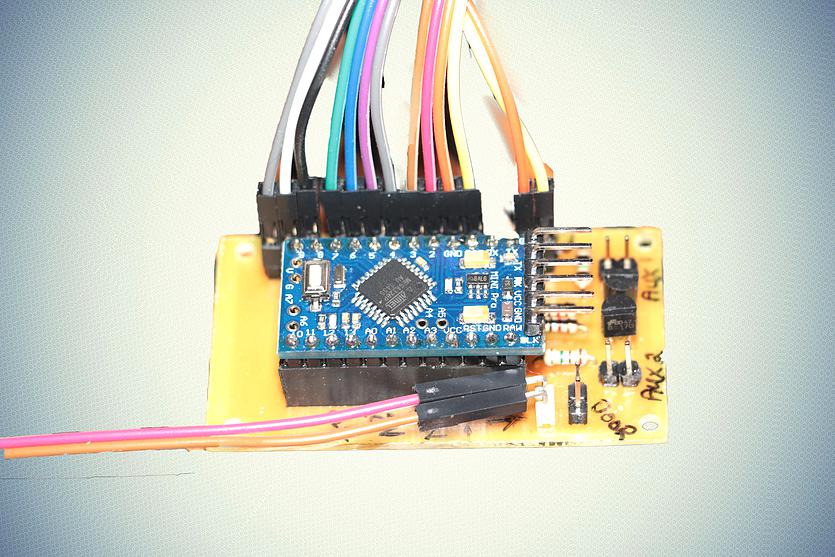
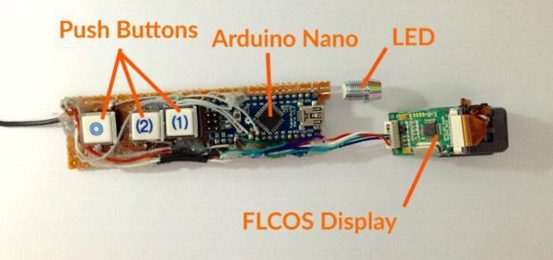
The project has been developed using two Arduino Uno, LeapMotion and Max7 software managing data of more than 300 stars and 44 constellations, stored from the open-source software Stellarium, and coded to interact with the robotic arms.

One Arduino Uno board controls four servo motors and a second one controls the led stripes. The motors are controlled with two LeapMotion but since LeapMotion doesn’t support two devices on one computer, he used two miniMac  connected through an Ethernet network.

Since there’s no sound in space, Francesco wanted  to conceptualize a link between electromagnetic and sound waves  to create a minimalistic, interactive device which would allow visitors to learn about specific stars through sound information:

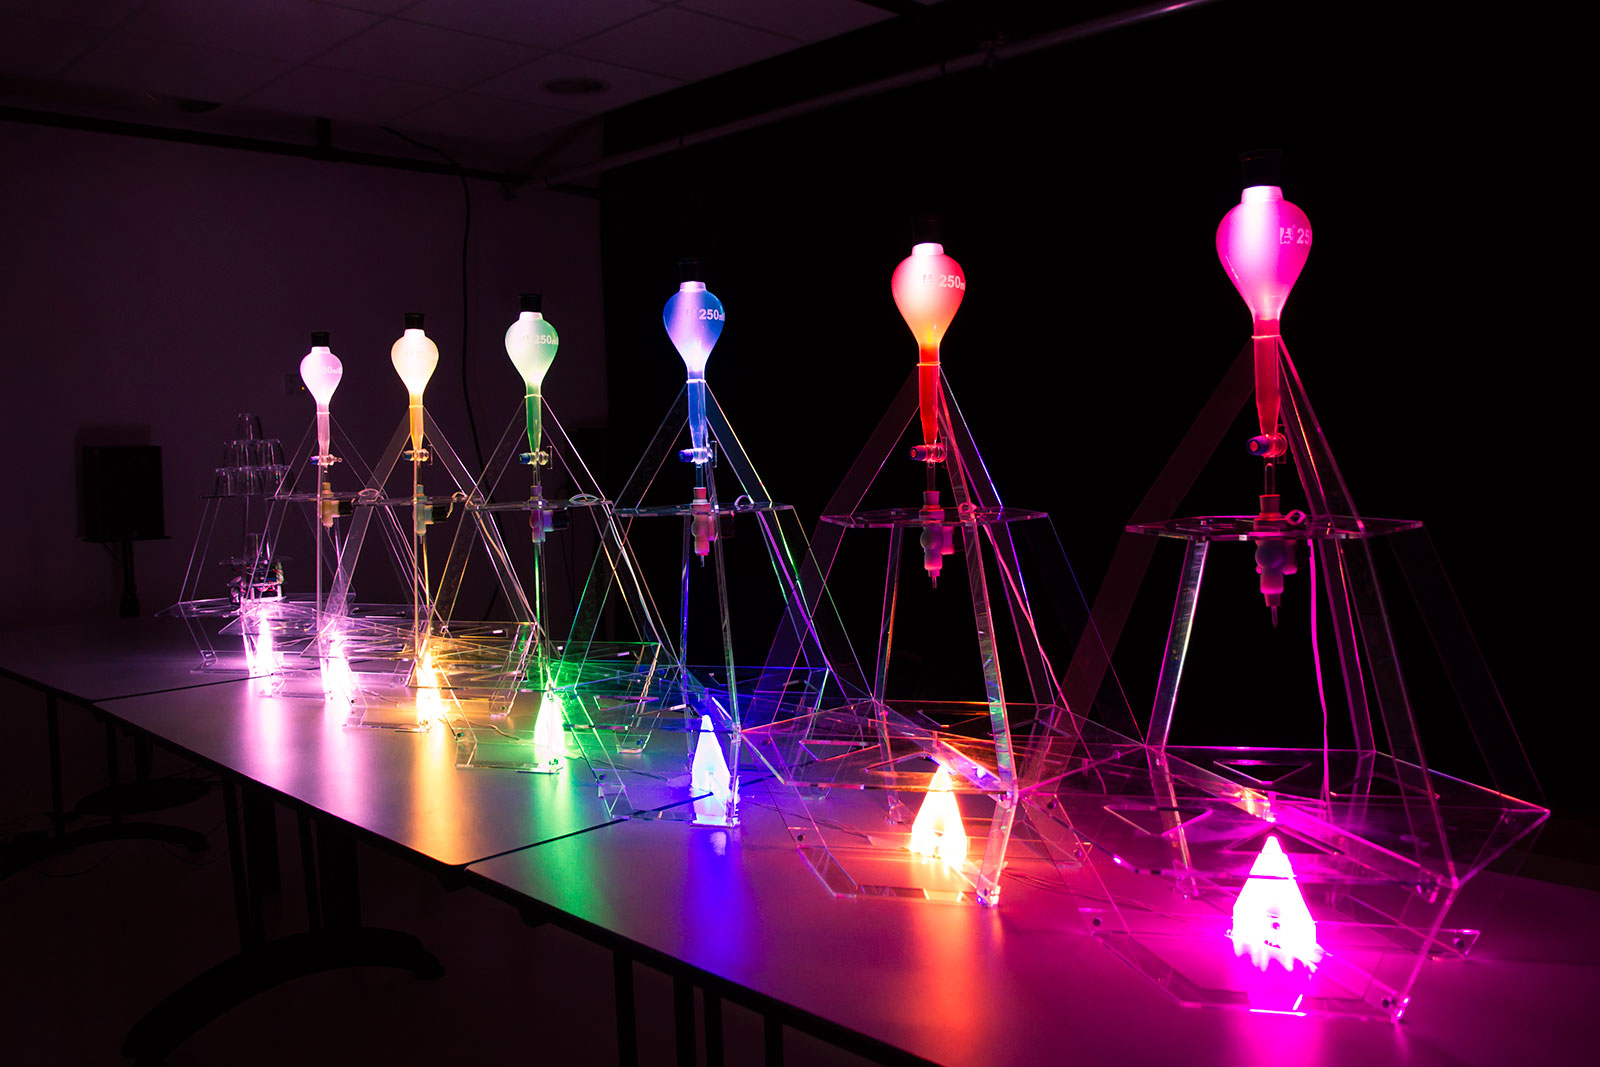
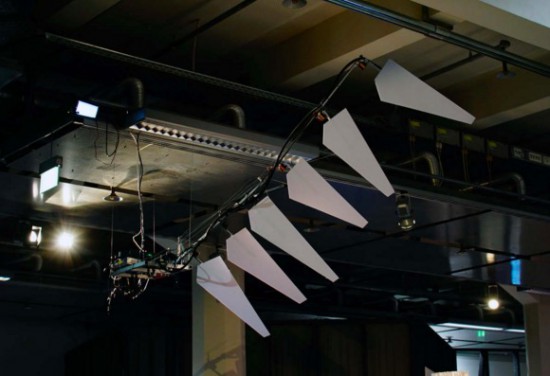
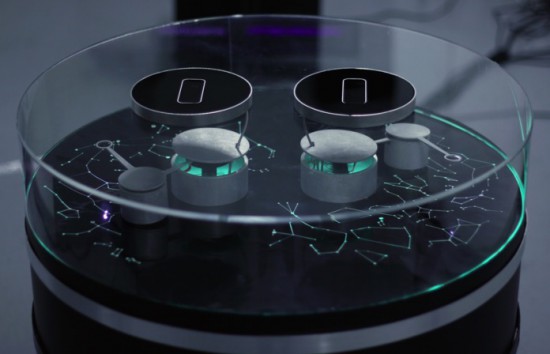
The base of the system is a cylindrical structure, on top of which are displayed the most important constellations of the northern sky. Above this representation are two robotic arms. When the tip of one of the arms aligns with a star, information on the selected star is transformed into simple sine waves, changing the colour the star emanates.

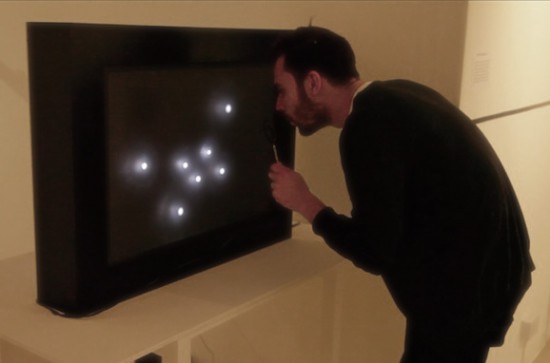
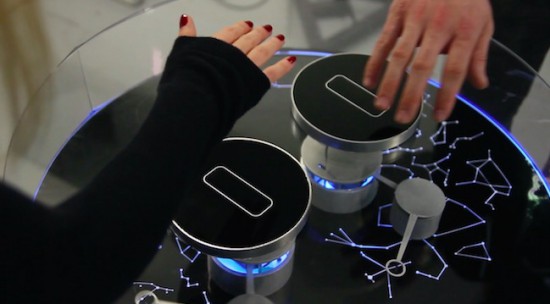
Two players can use the system at the same time, by moving their right hands over the two black, circular sensors. This allows them to move the robotic arm both horizontally and vertically.
The data analyzed for each star are: temperature (color index: red star = old and cold, blue star = hot and young), brightness (as seen from Earth), distance (from Earth) respectively transformed into: frequency (Hz), amplitude (dB), duration (ms).
The colder the star, the lower the pitch; the brighter it appears to us from Earth, the louder the sound; the further from Earth, the longer the duration.
For example, a bright, red star four thousands light years from the Earth would generate a low frequency, loud and long sound. A blue star which is closer to the Earth would generate a high frequency, weaker and shorter sound.

The background drone-sound is white noise (which is a combination of all frequencies, the opposite of space-silence). When a constellation is triggered, the number representing its area (squared degrees), becomes the cutoff frequency of a low-pass filter for the noise signal. In this way, larger constellations will gradually increase their frequency.

Don’t miss the “Making of” video:

Stellar has been produced with the support of the DE.MO./MOVIN’UP I Session 2015 project, and promoted by the Ministry of Cultural Heritage & Activities & Tourism, General Directorate for Contemporary Art, Architecture and Urban Suburbs and GAI – Association for the Circuit of the Young Italian Artists.

How to turn data into cocktails!

Data Cocktail is a device which translates in a tasty way the Twitter activity and running on Arduino Due and Arduino Pro Mini. When you want a cocktail, the machine will look for the five latest messages around the world quoting one of the available ingredients. These messages define the drink composition and Data Cocktail not only provides a unique kind of drink, but it also prints the cocktail’s recipe along with the corresponding tweets.
Once the cocktail mix is done, Data Cocktail thanks the tweeters who have helped at making the recipe, without knowing it. Check the video below to see how it works:

Data Cocktail was created in a workshop held at Stereolux in Nantes by a theme composed by Bertille Masse, Manon Le Moal-Joubel, Sébastien Maury, Clément Gault & Thibaut Métivier.

They made it using Processing and Arduino:

A first application, developed in Processing, pilots the device. The requests are performed using the Twitter4J library, then the application processes the data and controls the device, i.e. the robot, the solenoid valves and the light. The robot itself is based on a modified Zumo frame, an Arduino Pro, a Motor Shield and a Bluetooth module. The solenoid valves and the LEDs are controlled by an Arduino Due connected via USB. The impression is realized by Automator.

To prepare a cocktail, the machine can take up to a minute and may provide up to 6 different ingredients!

Visualizing “data visualization” with Leds and bubbles

“Data transparency” is a project by Jiayu Liu, a designer and media artist, interested in physical data visualisation and interactive code. The installation runs on Arduino Mega: when the microphone senses a person’s blow, it transforms it in a Led animation and then activates the bubble machine for 8 seconds. The project is not aiming to visualize any specific data but “data visualization” itself:

In my point of view, data is not dissimilar to a conclusion of our past, and we need it for our future. When we see a data from a computer, it is something that has already happened. We use intelligent methods of computing science to analyze the data so that to predict the future. We are living in a world of data, and data is like a language objectively describing our past. In this work, I take more attention on rethinking and recalibrating the role of data in our lives, and the relationship between the virtual world we build as a main method of data storing, analyzing and visualization and ourselves.

Also, I am thinking of that it is better to make sense of the role of data visualization before really visualizing it. Finally, I found a good perspective to see how data connects with our lives, which is Time.
Therefore, the project is not aiming to visualize any specific data but what I am trying to visualize is the “data visualization” itself. I would like to bring a new experience to the viewer in different space. So I want to create a interesting play space and bubble game to the viewer . Let them have a really funny and relaxing experience.

Take a look at the “making of” video below to see it in action:

Monitor your Bonsai with the help of Arduino Uno

Bonsai trees are not like other plants. There’s no single watering schedule that can be applied to a bonsai and the best way to tell if the bonsai needs water is to touch the soil. Experienced growers know when a tree needs to be watered by observing the foliage or just by the weight of the pot. If you are not used to taking care of this type of tree, Bonsai Watchdog could be the perfect project for you. It runs on Arduino and Genuino Uno and makes it really easy to monitor the moisture level in the soil.

Thomas Baum, created it and shared it some days ago on the Arduino Community on G+ :

Two pencil leads, an Arduino and a 12864 (ST7565) LCD watches out my little bonsai. The filling level shows how often the sapling need to be watered.
source and discription (in german) you can find here:
http://tiny.systems/categorie/lcdProjekt/BonsaiWatchdog.html


FogFinder turns foggy air into a reliable water source

Scientists in Chile are turning foggy air into a reliable water source for nearby residents using a new sensor connected to  Arduino Mega and XBee module. The project is called FogFinder and was developed by Richard LeBoeuf in collaboration with Juan Pablo Vargas and Jorge Gómez at the Universidad de los Andes. It’s a system to generate new renewable source of water for communities and reforestation through use of a probe and wireless communications technology to develop a liquid water flux map for fog harvesting.

Fog collectors are common in arid climates in Chile where rain runs scarce and are typically installed on hillsides and remote areas where fog is abundant. The innovative part of the project lies in determining where to install these collectors, how to orient them, and understanding how efficient they are at collecting water from the air. This can be done with a new type of sensor called the “Liquid Water Flux Probe” to measure the availability of water at current and potential fog collector sites. The sensor measures the liquid water content and speed of the fog and can be used to understand the optimal location and orientation for each of the collectors.

Matt Ahart  of Digi, the company producing Xbee modules , told us:

“The primary function of the Arduino Mega is to simplify data collection and processing. The development team also made use of software libraries that simplified the use of sensors and API mode configuration for the XBee radios.
Another important reason for using Arduino, is that the Fog Finder project was created by students with only a few months to complete the design and creation of the device. A great thing about Arduino is that the learning curve is very fast and students can quickly start making contributions instead of spending weeks or months trying to understand the software and hardware.”

The FogFinder project has received support from the Universidad de los Andes through its Fondo de Ayuda de Investigación, Andes Iron – Dominga, and the Pontificia Universidad Católica de Chile. In 2014 it was finalist in the Wireless Innovation Project sponsored by the Vodafone Americas Foundation.

Arduino Blog 21 Jan 21:06

Making a Vintage Star Wars AT-AT toy walk with an Arduino

Dave Stein is a software engineer during the day and a tinkerer on Arduino projects in his free time after work. He submitted on the blog his first Arduino project with the goal of powering his old AT-AT Walker toy (mid 1980s) with Arduino Uno and make it walk and perform some of the functions we see in the Star Wars movies.

AT-AT (All Terrain Armored Transport) are four-legged combat walkers 22.5mt (73.8ft) tall of the Galactic Empire, one of its most famous military symbols introduced  in “Star Wars V: The Empire strikes back”, and we may see them again in the next weeks on “Star Wars: The Force Awakens” the upcoming episode of the saga opening December 18th.

The AT-AT walker toy updated by Dave is controlled by a wired Xbox 360 controller that interfaces with a computer and transports a signal to the Arduino Uno for walker movement:

The left and right triggers move the walker forward and backward while the right stick moves the head horizontally. If you have ever played with this toy you may remember it was clumsy and difficult to move. In my project I wanted to learn about and conquer the difficulties of quadrupedal movement. The realization process for my project involved a massive amount of trial and error, research, and failures. I have to say that I failed many more times than I succeeded with configuring the servos with the Arduino. I went down many long roads to learn about prototyping with the breadboard, soldering, and redesigns of the final product. The most difficult part of the project aside from adjusting the gait of the walker for balance and movement was providing enough power to the servos without frying the microcontroller or any of the components. I was finally able to overcome these difficulties by implementing the Adafruit servo shield.

Check AtAt Project website for all info, parts list and upcoming tutorial!

Just imagine your ears were like wings

Wing is an interactive installation created by Dmitry Morozov  and commissioned by the Center for Art and Media (ZKM) in Karlsruhe, special for GLOBALE: Exo-Evolution exhibition, 2015. It’s a 2,5-meter wing that can be flapped by visitors thanks to compact dermal myLeaographic sensors (sensors measuring the electrical potential of muscles) installed  behind their ears and connected to an Arduino Uno:

The main idea of the project is an ironical and at the same time serious research on the topic of development of new instruments and prostheses as “extensions” of human body and accordingly its possibilities and potentials, which are being revealed by new technologies. At the same time, it’s an attempt to stimulate people to perceive and train the body in a different way, expanding the limits of self-control and self-organisation in order to adapt to the new conditions. At the same time, just like many spiritual practices aiming at the elevation of human soul through deep relaxation and control over seemingly uncontrollable muscles, this project uses the metaphor of flying as a reward for the ability to direct your mind to solving of non-standard tasks.

Explore tangible interfaces with a wooden sequencer

During the Physical Computing and Creative Coding course at School of Form a team composed by Ernest Warzocha, Jakub Wilczewski, Maciej Zelaznowski worked on a project starting from the keyword “the aesthetics of interaction”. With the help of their lecturers – Wies?aw Bartkowski and Krzysztof Golinski – they decided to rethink about typical button-like interface of audio sequencer and design a unique tangible interface for it.

The Wooden Sequencer runs on Arduino Uno and works by using familiarity of real objects and manipulating them similarly to the idea of Durell Bishop’s Marble Answering Machine:

Instead of regular buttons we created wooden discs (4×8 circles) that placed in holes generate audio sequence. Each line corresponds to different instrument and columns are responsible for time when sample is played. To know in which point at timeline our sequence plays there is hidden LED on top of each column that blink through wood and informs user which one is currently played.

To create good-looking round shapes of table we used CNC router at our university. After the milling process we connected all electronics with table and sensors for each hole. The core of our project is Arduino UNO with multiplexers and MP3 module. With rendered samples and build-in speakers our project doesn’t require computer plugged in.

Important and somehow unique in our sequencer is usage of IR reflective sensors to change played instrument sample. To decide which sample we want to play sensor recognizes different grayscale color and intensity of the reflected light at bottom of our discs – actually everything placed on table can generate sound. Creating grayscale-based controller is experimental way to interact with device. Furthermore, using grayscale palette might be great idea for MIDI instrument. For this project we used two colors to show the concept. It’s possible to add more but it’s more sensitive to non-constant background light.

Take a look at the video below and explore more pictures on Behance:

DIY Garage Door KeyPad Project

Arduino user SamJBoz needed a way to quickly gain access to his garage when he did not have the remote. He designed a simple entry system with 4 digit access codes to allow himself, family and friends to gain quick access to the garage when a remote is not at hand, running on a 5V Arduino Pro Mini. The keypad allows for up to 10 4-digit pin numbers, has a user set master pin number to create and delete user pin numbers and flashes 2 color error codes if something goes wrong.

The hardware BoM consists of a 4×4 keypad, an Arduino Pro Mini, a small custom PCB and a few external electronic parts to complete the design.

He’s been using it flawlessly for a year and you could try to build one too: all the documentation is on github comprehensive of Eagle PCB files for the main board, the Arduino code, BoM, a user manual and some useful construction tips.

Make your DIY smart glasses running on Arduino

Jordan Fung is a 13-year-old maker and programmer based in Hong Kong. He recently developed Arduino-based smart glasses called Pedosa Glass, which are able to activate, in this first release, a flashlight and a timer:

The Pedosa Glass is powered by a single Arduino Nano running an “operating system” developed by me.
There is a tiny FLCOS display in the front. The AV signal from the Arduino will be displayed on it. It is equipped with 3 push buttons, in which 2 of them are control buttons and one of them be the home button, also equipped with a super-bright white LED for use as a flashlight.

In the picture below you can explore the electronic scheme:


Jordan is working hard to add new applications and features to the project but in the meanwhile he shared his work on a great tutorial on Instructables.