Posts with «openscad» label

Add Intuitiveness to OpenSCAD With Encoders

The first time I saw 3D modeling and 3D printing used practically was at a hack day event. We printed simple plastic struts to hold a couple of spring-loaded wires apart. Nothing revolutionary as far as parts go but it was the moment I realized the value of a printer.

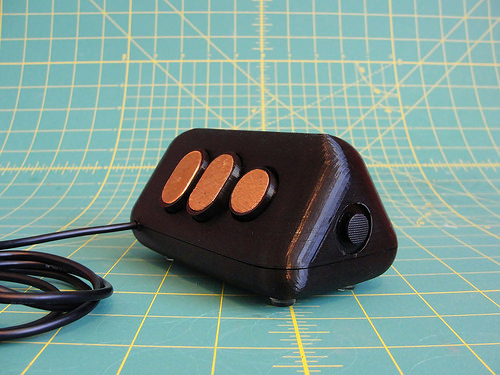
Since then, I have used OpenSCAD because that is what I saw the first time but the intuitiveness of other programs led me to develop the OpenVectorKB which allowed the ubiquitous vectors in OpenSCAD to be changed at will while keeping the parametric qualities of the program, and even leveraging them.

All three values in a vector, X, Y, and Z, are modified by twisting encoder knobs. The device acts as a keyboard to

  1. select the relevant value
  2. replace it with an updated value
  3. refresh the display
  4. move the cursor back to the starting point

There is no software to install and it runs off a Teensy-LC so reprogramming it for other programs is possible in any program where rotary encoders may be useful. Additional modes include a mouse, arrow keys, Audacity editing controls, and VLC time searching.

Here’s an article in favor of OpenSCAD and here’s one against it. This article does a good job of explaining OpenSCAD.

[Editor’s note: This is a Hackaday writer’s hack, hence the “I” in place of the usual “we”. We all love custom peripherals though, and a good number of us love OpenSCAD, so you could probably read it either way, but we don’t want to take credit for [Brian]’s work.]


Filed under: 3d Printer hacks, Arduino Hacks

Open-Source Water Quality Tester

Contaminated water is a huge problem in many third-world countries. Impure water leads to many serious health problems, especially in children. Installing a water purification system seems like a simple solution to this problem, but choosing the right purification system depends on the level of contaminants in the water.

Water turbidity testers are often used to measure the severity of water contamination. Unfortunately most commercial water turbidity testers are very expensive, so [Wijnen, Anzalone, and Pearce] set out to develop a much more affordable open-source tester. Their tester performs just as well as commercial units, but costs 7-15 times less.

The open-source water tester was designed in OpenSCAD and 3d printed. It houses an Arduino with a custom shield that measures the frequency from several TSL235R light-to-frequency converters. An LED illuminates the water and the sensors measure how much light is diffused and reflected off of particles in the water. Another sensor measures the brightness of the LED as a baseline reference. The turbidity of the water is calculated from the brightness values, and is displayed on a character LCD. More details about the tester are included in a fairly extensive paper.

[Thanks Andrew]


Filed under: misc hacks

The Rabbit H1 is a Stationary Mouse Replacement

[Dave] has some big plans to build himself a 1980′s style computer. Most of the time, large-scale projects can be made easier by breaking them down into their smaller components. [Dave] decided to start his project by designing and constructing a custom controller for his future computer. He calls it the Rabbit H1.

[Dave] was inspired by the HOTAS throttle control system, which is commonly used in aviation. The basic idea behind HOTAS is that the pilot has a bunch of controls built right into the throttle stick. This way, the pilot doesn’t ever have to remove his hand from the throttle. [Dave] took this basic concept and ran with it.

He first designed a simple controller shape in OpenSCAD and printed it out on his 3D printer. He tested it out in his hand and realized that it didn’t feel quite right. The second try was more narrow at the top, resulting in a triangular shape. [Dave] then found the most comfortable position for his fingers and marked the piece with a marker. Finally, he measured out all of the markings and transferred them into OpenSCAD to perfect his design.

[Dave] had some fun with OpenSCAD, designing various hinges and plywood inlays for all of the buttons. Lucky for [Dave], both the 3D printer software as well as the CNC router software accept STL files. This meant that he was able to design both parts together in one program and use the output for both machines.

With the physical controller out of the way, it was time to work on the electronics. [Dave] bought a couple of joysticks from Adafruit, as well as a couple of push buttons. One of the joysticks controls the mouse cursor. The other joystick controls scrolling vertically and horizontally, and includes a push button for left-click. The two buttons are used for middle and right-click. All of these inputs are read by a Teensy Arduino. The Teensy is compact and easily capable of emulating a USB mouse, which makes it perfect for this job.

[Dave] has published his designs on Thingiverse if you would like to try to build one of these yourself.


Filed under: Arduino Hacks