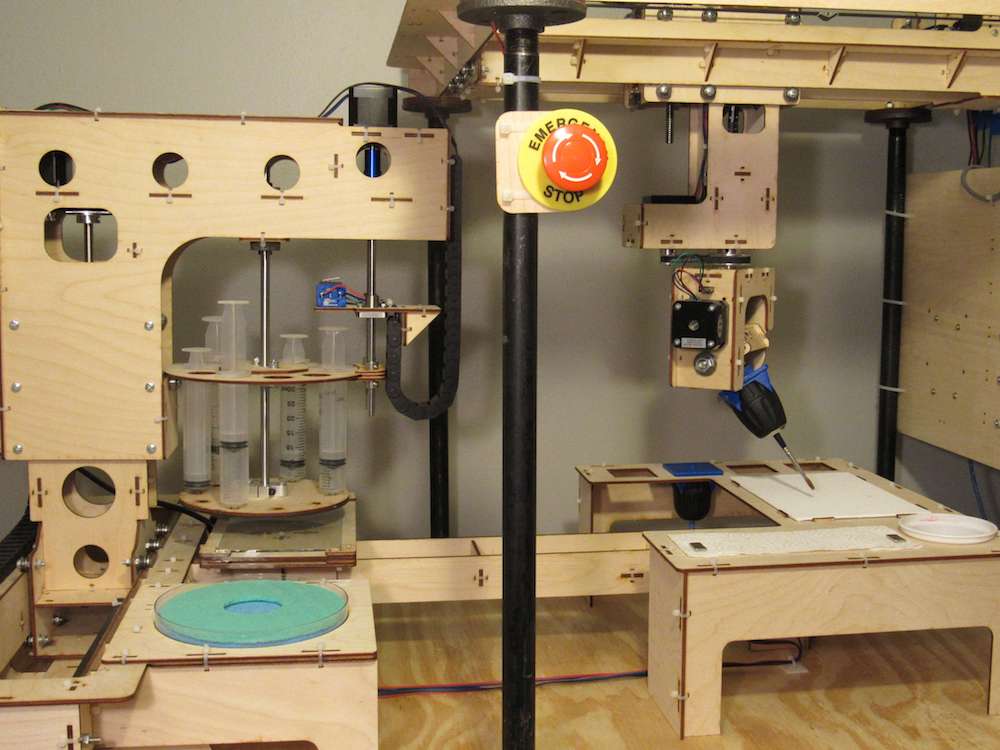
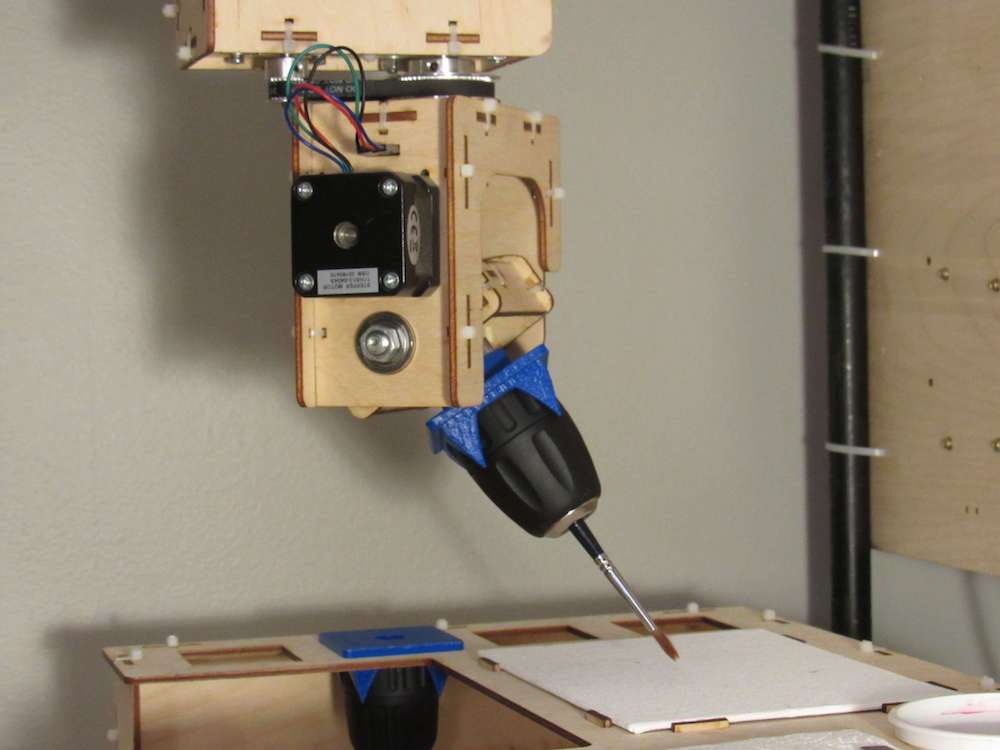
In order to produce the proper paint strokes, his device implements full six-axis brush control, moving not only in the X/Y/Z coordinate system, but rotating on three axes. Movement is handled by a modified version of Grbl running on an Arduino Mega.
If Then Paint also features the ability to change painting/art tools automatically, as well as a clever paint management system that turns a carousel of paint syringes.
More info on the build can be found here, and check out a few examples of how it works in the videos below.
As seen in the videos below, Zeus is a metallic humanoid robot capable of moving its head and arms around, featuring a pair of hand grippers that should be quite useful when the time comes. For now, creator Luis appears to be focusing on its vocal skills, with plans to eventually teach it how to walk.
The robot can engage in conversation with its companion, whether it’s answering questions like “What’s your name?” with“My name is Zeus,” or “What’s your favorite movie?” with “I wasn’t that impressed with the special effects, also the plot was not deep.” Zeus even lets Luis know when he “has no idea what to say.”
Zeus’ communication and movement are accomplished through a variety of hardware, including an Arduino Mega and an AAEON UP board, as well as an Intel RealSense Camera SR300 for vision. Luis is also using CMUSphinx for voice recognition, eSpeak for text-to-speech and AIML chatbot for interactive responses.
Perhaps we’ll see this ~1/2-sized humanoid traipsing around on its own in the future, though hopefully its comment about “taking over the world” was just a joke!
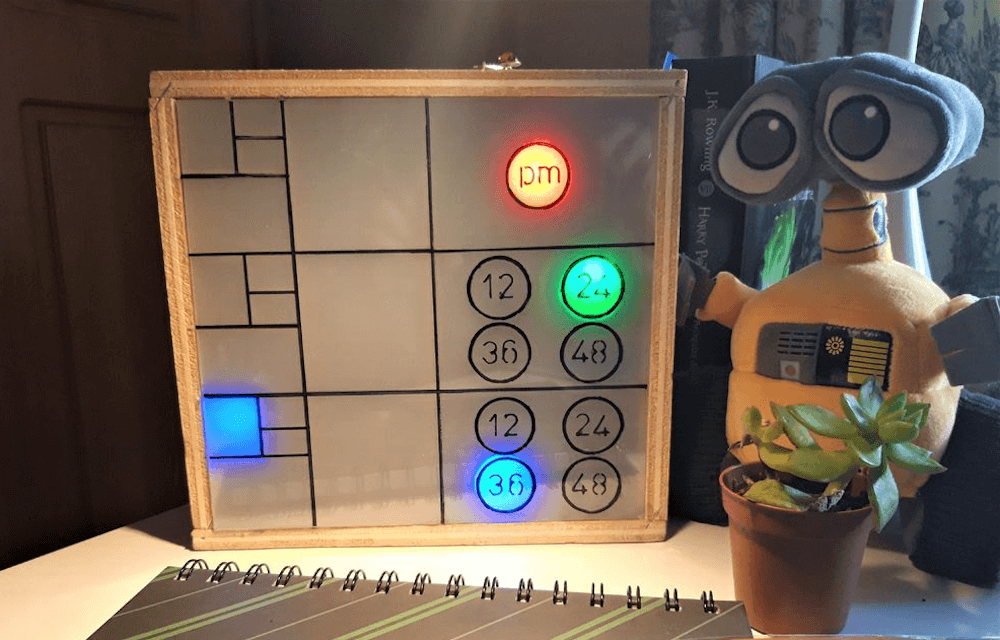
In the early 1200s, Fibonacci introduced a series of numbers that now bear his name, starting with 0, then 1, and continuing on as the sum of the two preceding numbers. This gives values of 0, 1, 1, 2, 3, 5, 8, and so on, and after being prompted by a friend, “TecnoProfesor” decided to turn this numerical pattern into a clock.
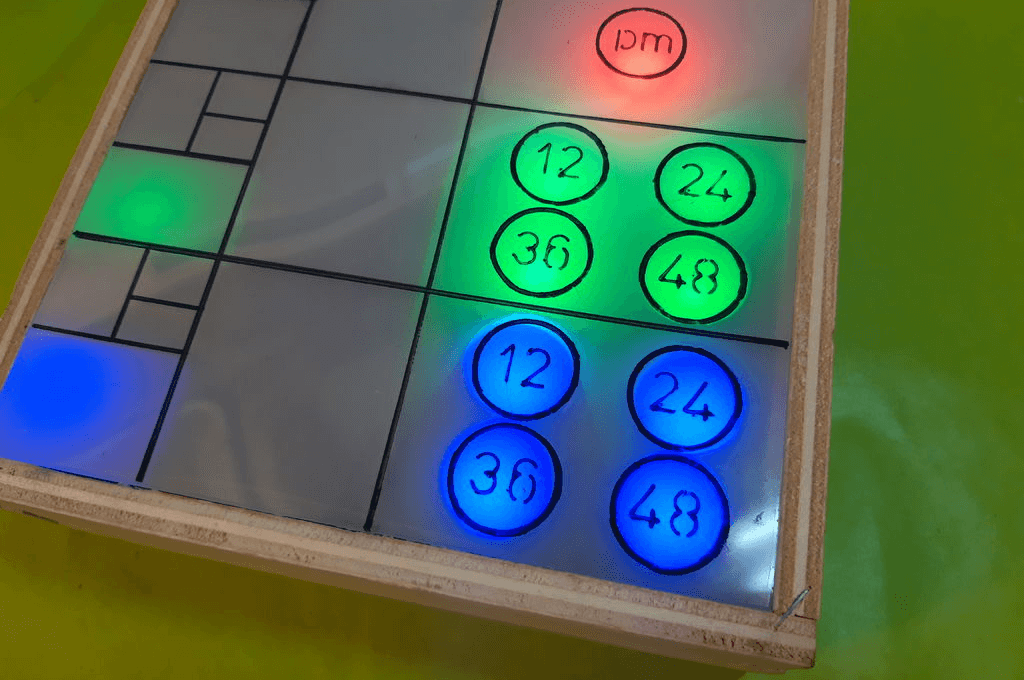
The concept here is that instead of using the conventional 1-12 to display the time, this device uses blocks corresponding to Fibonacci numbers 1-5, with circular icons adding increments of 12 for minute and second values.
It’s an interesting concept, somewhat akin to the world of binary or even word clocks. The build consists of an Arduino Mega and a DS3231 RTC module for control, a wood and methacrylate housing, and a number of programmable RGB LEDs to indicate numbers.
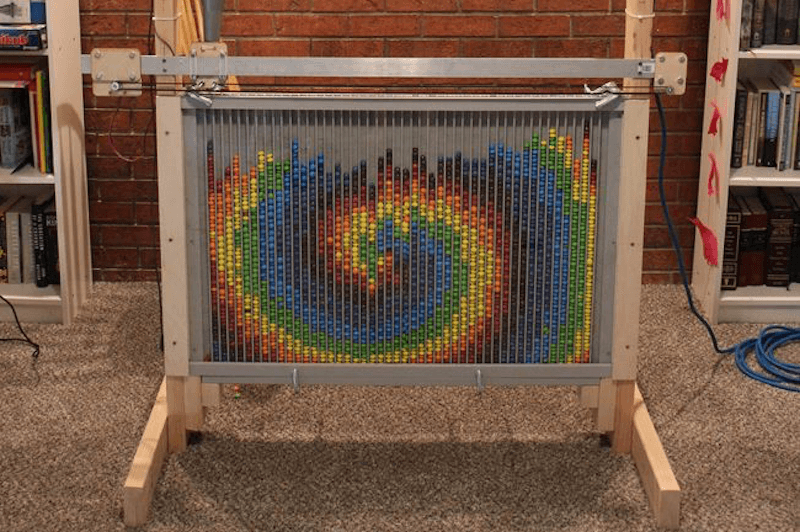
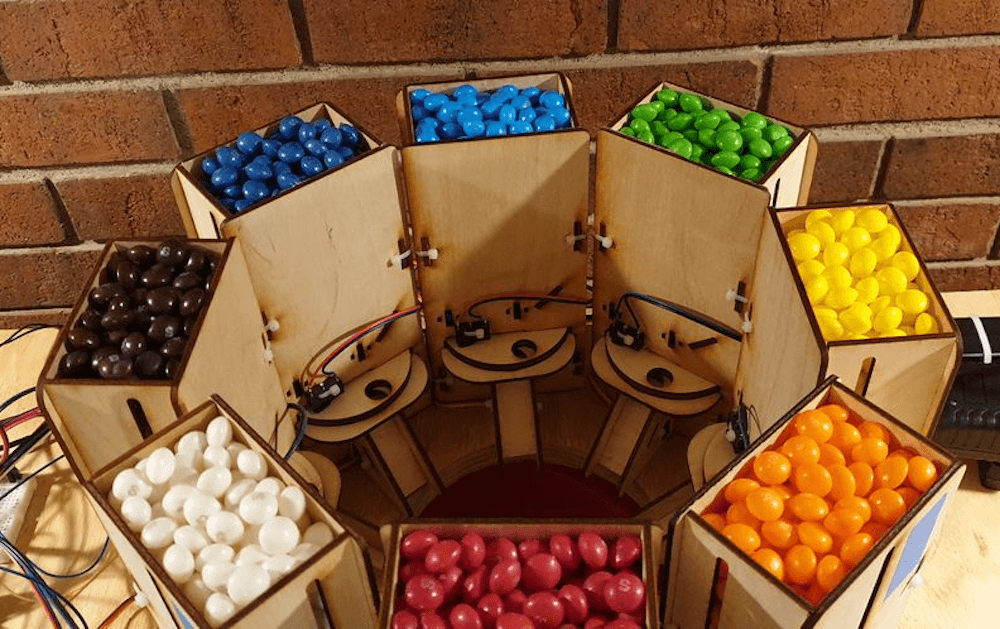
Skittles candies come in various vibrant colors. While they may be a tasty treat, JohnO3 had another idea: to create an amazing automated display for the little circles.
His device, dubbed the “Skittle Pixel8r,” uses an Arduino Mega to pull a dispensing funnel between one of 46 channels, covered on one side with a piece of glass.
On top of the shuttle mechanism, eight boxes release the correct flavor/color into an intermediate tube via individual metal gear servos. The Arduino then commands the linear axis to move the funnel to the appropriate bin. This process is repeated 2,760 times until an image, measuring up to 785 x 610mm (31 x 24 inches), is completed.
The Skittle Pixel8r an incredible build, and perhaps we could see it expanded even further to not just dispense, but also sort Skittles as an all-in-one auto art installation! Code and files for the project can be found here.
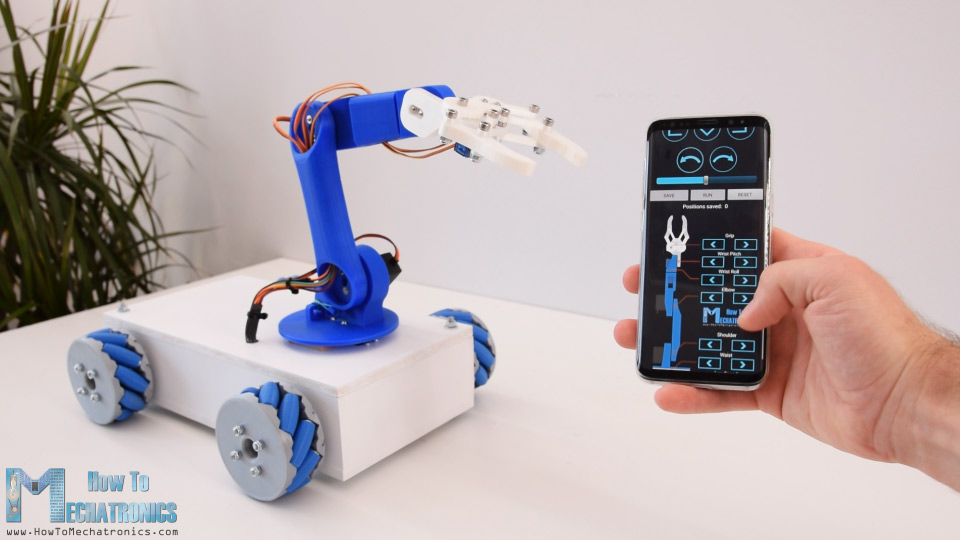
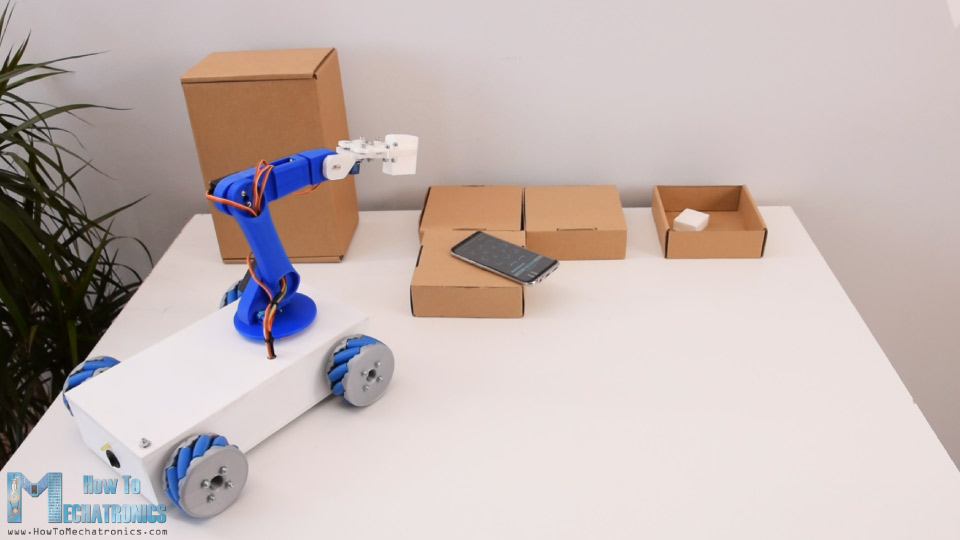
Robotic arms can be interesting, as are robots that roll around—especially on a semi-exotic Mecanum wheel setup. Dejan Nedelkovski’s latest How To Mechatronics build, however, combines both into one package.
This project actually starts out in a previous post, where he constructs the moving base with Mecanum wheels, enabling it to slide and rotate in any direction.
In this final(?) stage, he adds a five-axis robot arm mounted on top of its boxy frame, or six-axis if you count the gripper. Either way, the arm uses a total of six servos for actuation, and the base of the bot travels around under the power of four stepper motors. Each motor is controlled by an Arduino Mega, using a custom shield, allowing repeatable movements in any direction. These can be stored and replayed via the robot’s custom Android app as desired.
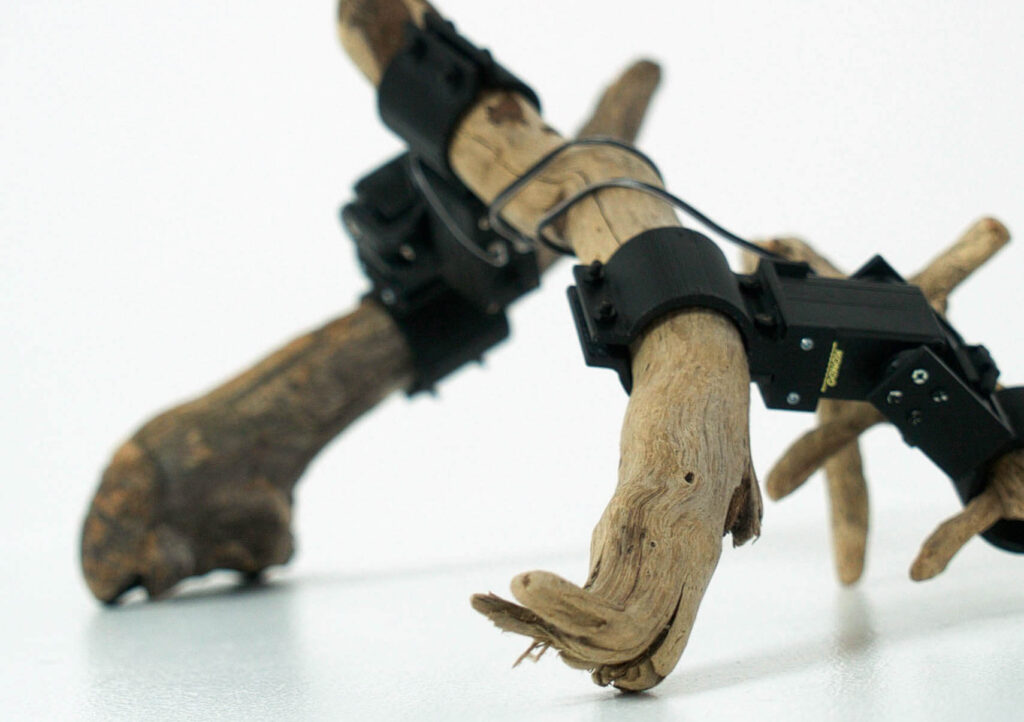
What if you were to neglect a robot’s mechanical design entirely and instead construct it out of unusual materials like random sticks? Researchers from the University of Tokyo and Preferred Networks have done just that. To accomplish this feat, the engineers first scanned and weighed the branches, then used deep reinforcement learning to teach the new contraption to walk.
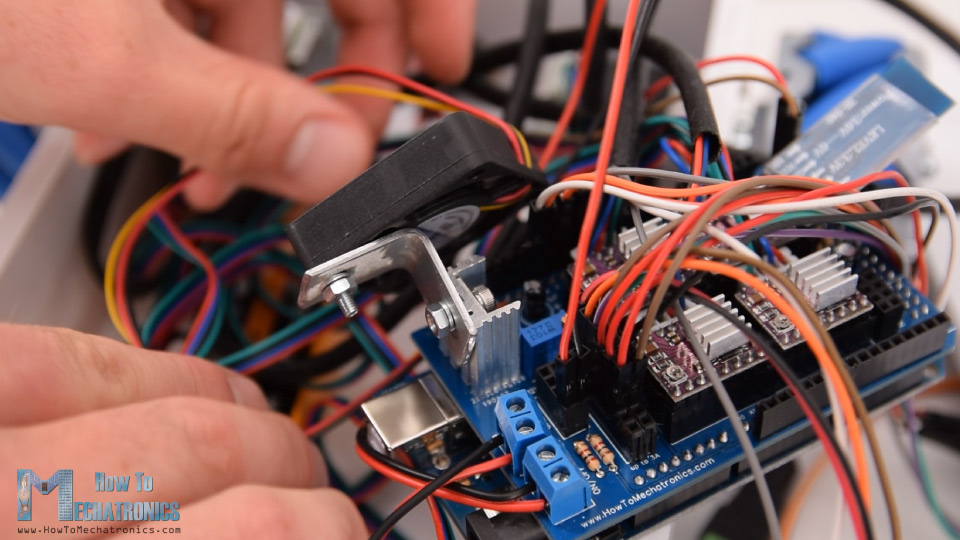
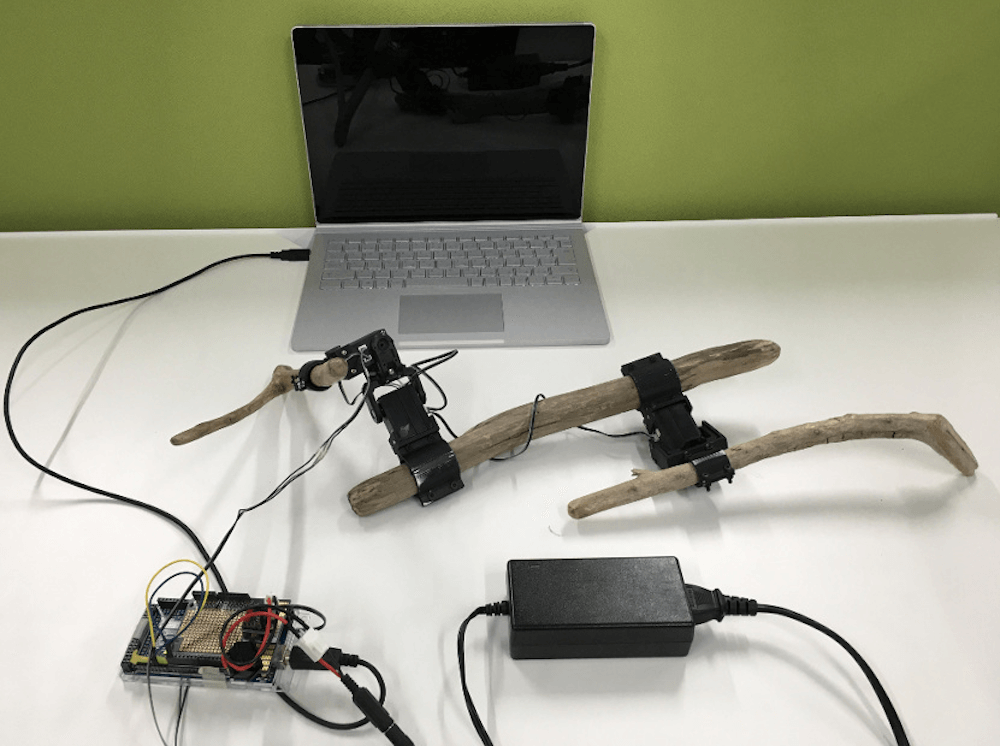
The branch-bots were then constructed in the real world using generic servos, and controlled via an Arduino Mega tether setup with a motor driver and a separate power supply.
You can see one of these bots moving around in the video below, though this configuration ironically seems to have more trouble when dropped off at its native forest habitat. Be sure to read more about this research in IEEE Spectrum‘s article here.
This project aims at creating bricolages of robots out of tree branches found at hand. Through the process in which natural objects learn how to walk by themselves, the artwork portrays the perspectives of objects. Unlike the top-down process where functions of mechanical systems are explicitly defined by designers, this project puts an emphasis on the emergence of functions, which is a bottom-up process where found objects seek for the function as a whole.
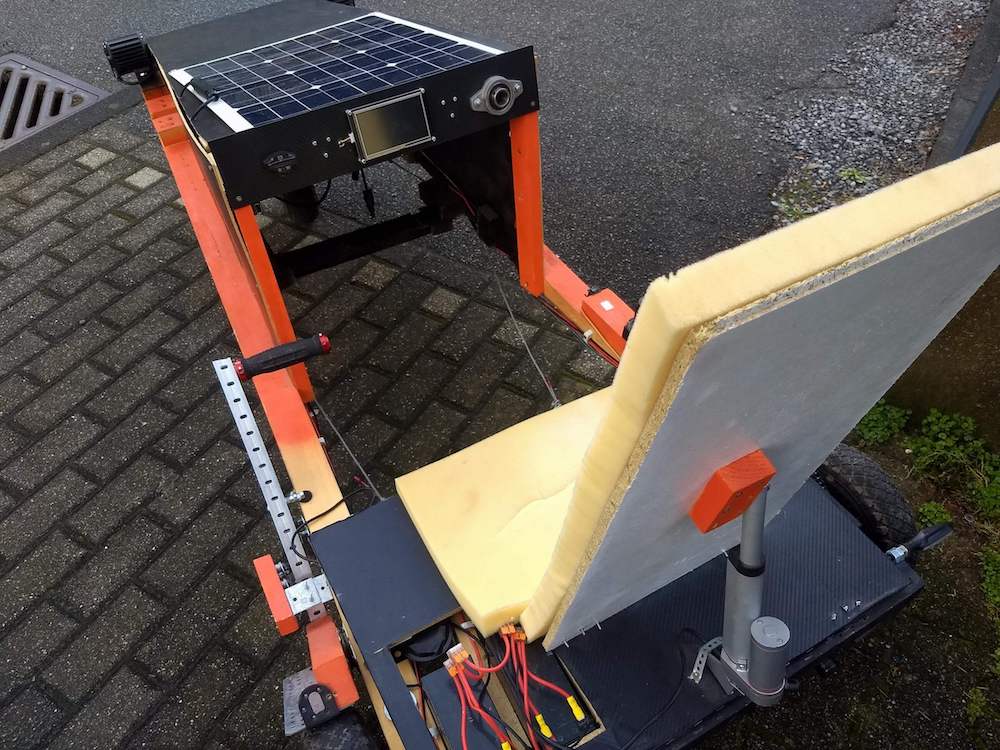
If Elon Musk was to design a soapbox car, the prototype might look something like this by David Traum.
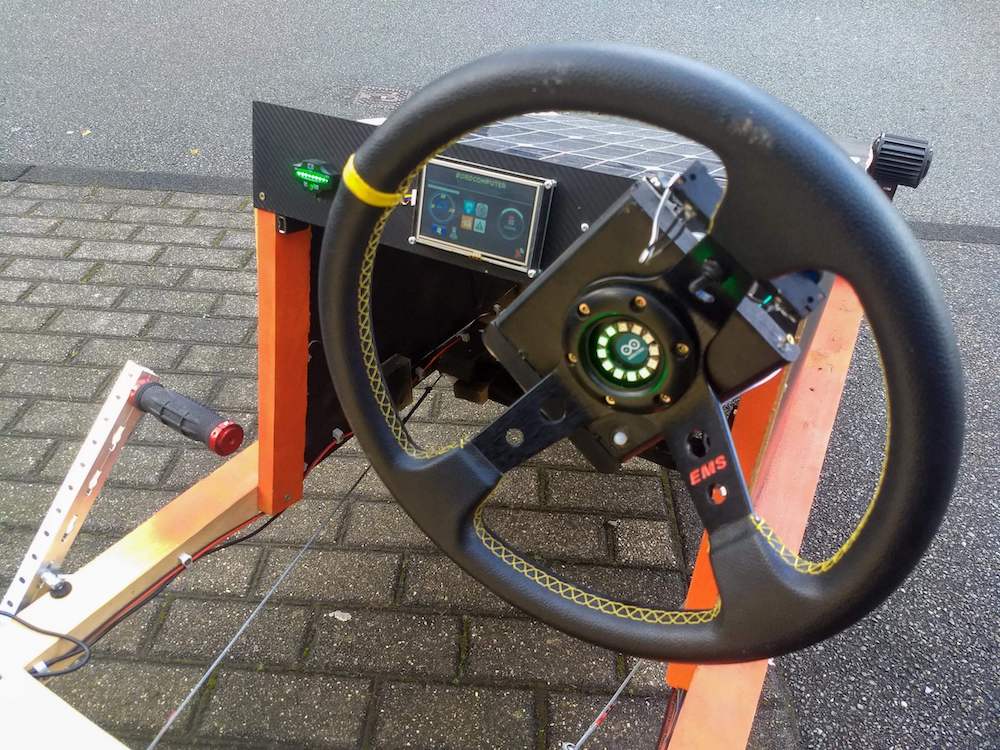
Traum’s project is powered by a 500W motor which is fed by a pair of 12V batteries and a 40 W solar cell, allowing it to attain a top speed of 35 km/h and a range of 10 to 15km. Although that might not sound like a huge number, it looks pretty fast at the end of the video below!
But that’s not all. The vehicle features a rather unique control system, with front wheel steering actuated by a stepper and cable assembly. An Arduino Mega is the brains of the operation, while user input is via a small touchscreen, a joystick, and even a steering wheel (equipped with an Uno, a 9V battery, radio module, and gyro sensor) that can work wirelessly as needed—perhaps to park remotely, or simply as a gigantic RC car
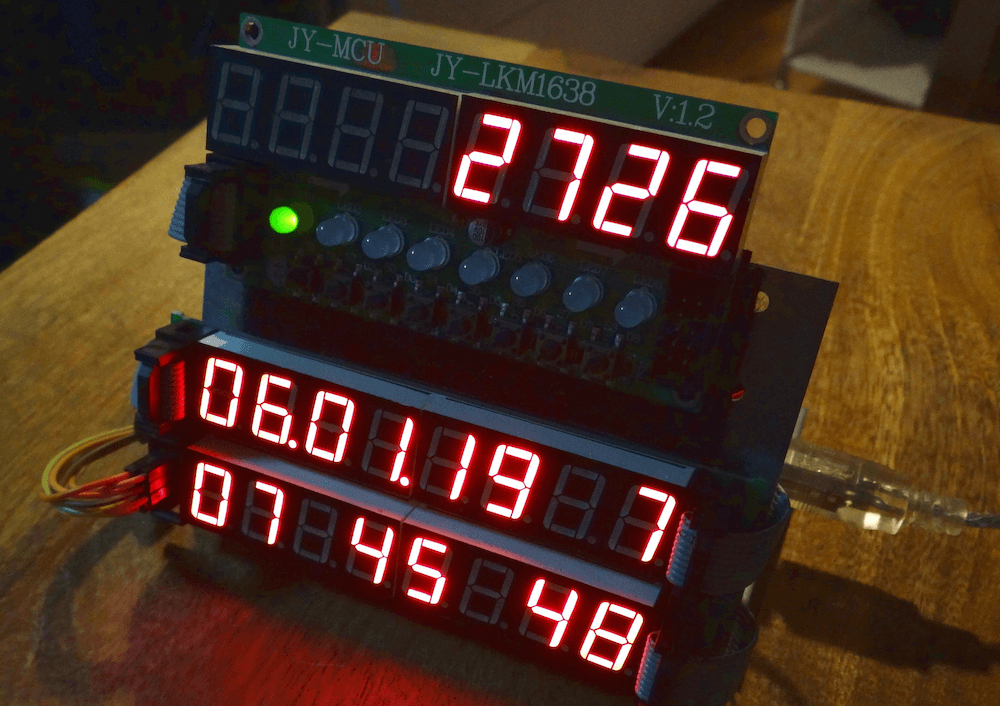
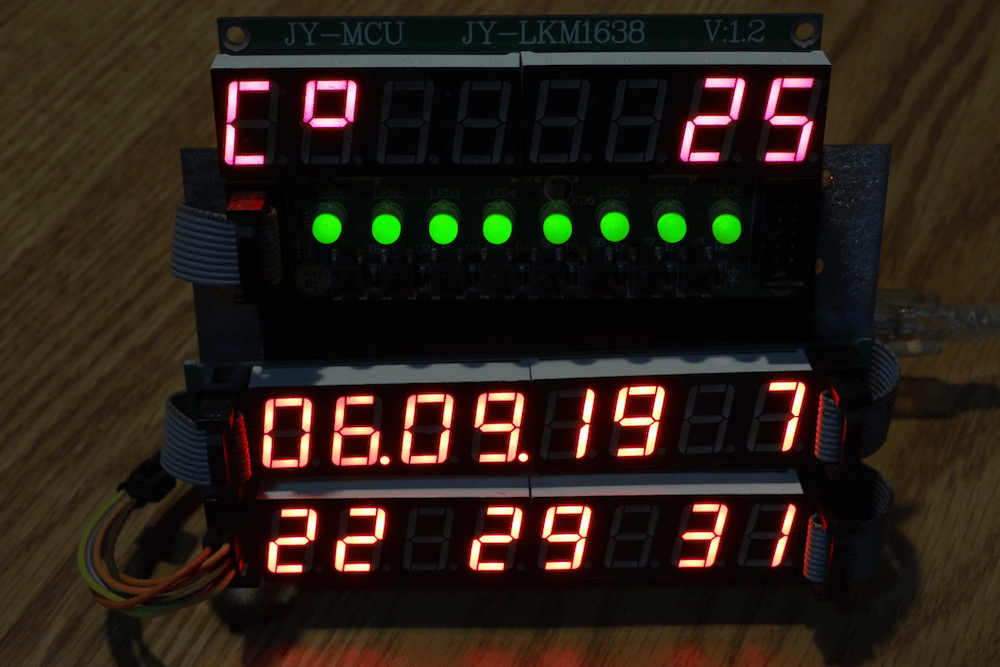
Alarm clocks of old—and certainly many of those today—require several button pushes to set things up properly. Maker Michael Wessel, however, decided to implement his own take on a more intuitive clock, creating a device that features three separate eight-digit seven-segment LED panels. Eight buttons allow for direct manipulation of each of the digits, with their own dedicated LEDs.
The info on display includes time and date, as well as temperature, and it can even show how many days, hours, or minutes have passed since a special pre-programmed day. Up to seven audible alarms are available, which can be silenced by a loud noise (e.g. clapping your hands) via a sound sensor.
The clock is controlled via an Arduino Mega, along with an RTC module to keep things accurate.
I remember I always had to set all digital clocks for my grandparents in the ’80s — these clocks and watches always required some complicated button juggling! So, here it is: a DIY LED alarm clock that my grandparents would have been able to set and use without my help!
An Arduino-based LED clock with 7 individual alarms, highly intuitive user interface, temperature display, and display of days / hours / minutes passed since a special date, e.g., your birthday. An active / ringing alarm can be disabled by making a loud noise, e.g., by clapping your hands. Timer-based PWM sound output for alarm melodies.
The Arduino’s EEPROM is being used to store the alarms of course, and the DS3231 RTC is battery backed up, so it survives a temporary power outage and you won’t be late for work the next morning.
This was put together rather quickly, thanks to off the shelf components, Velcro and existing Arduino libraries for them! The clock can be built for about $30 – 40.
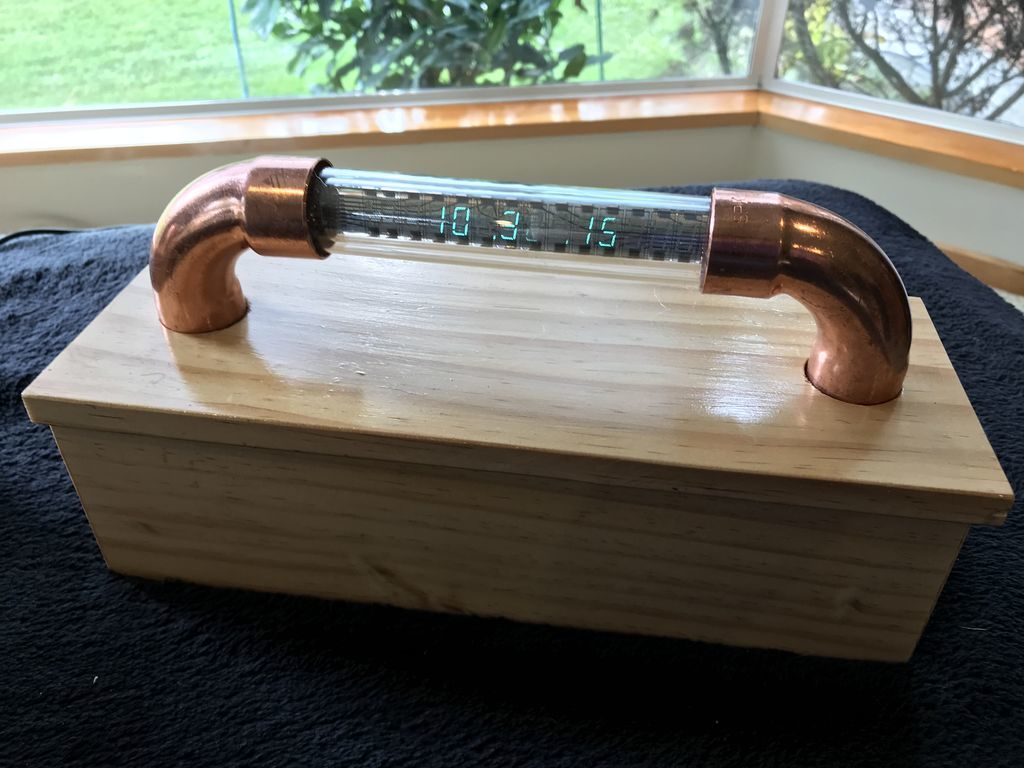
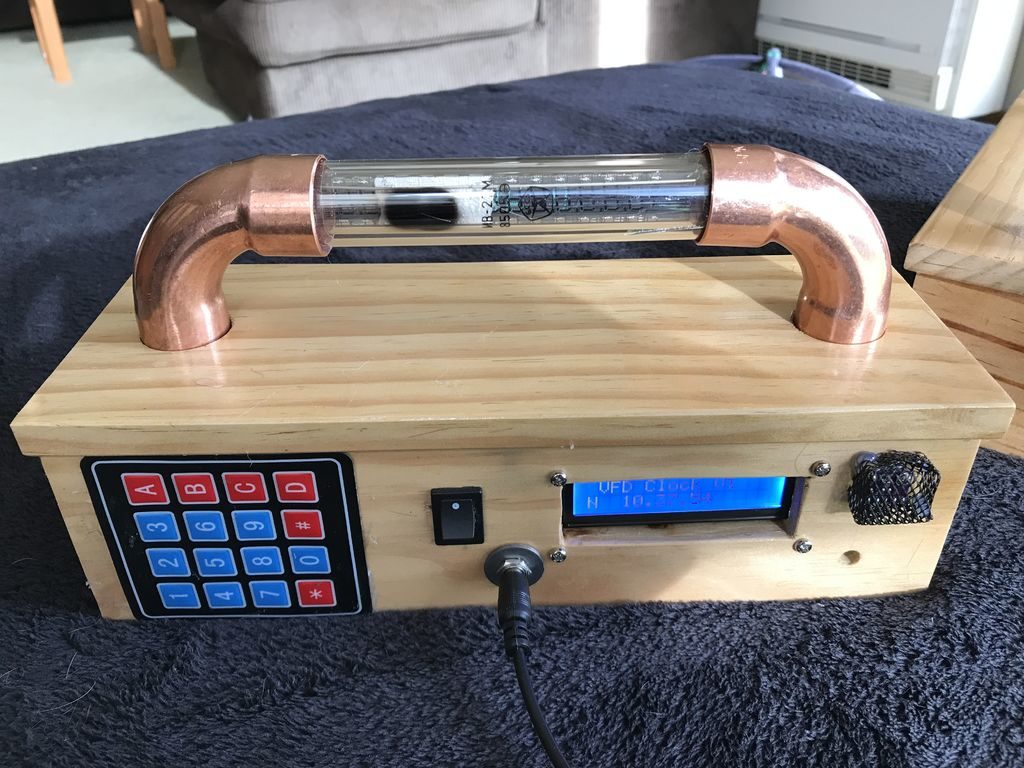
If you’re a fan of novel timepieces, then you’ll want to check out Christine Thompson’s VFD Alarm Clock.
The device features a USSR-manufactured IV-27V 7-segment tube, capable of displaying 13 numbers or letters via a 24V supply, though the MAX6921 chip used here means that only 10 grids are used.
10 characters, however, are plenty to show time, date, humidity, temperature, and pressure, plus the text “WAKE UP!” when an audible alarm sounds.
The clock runs on an Arduino Mega, along with an RTC module, a keypad, and secondary LCD screen on the back to assist with setting it up.
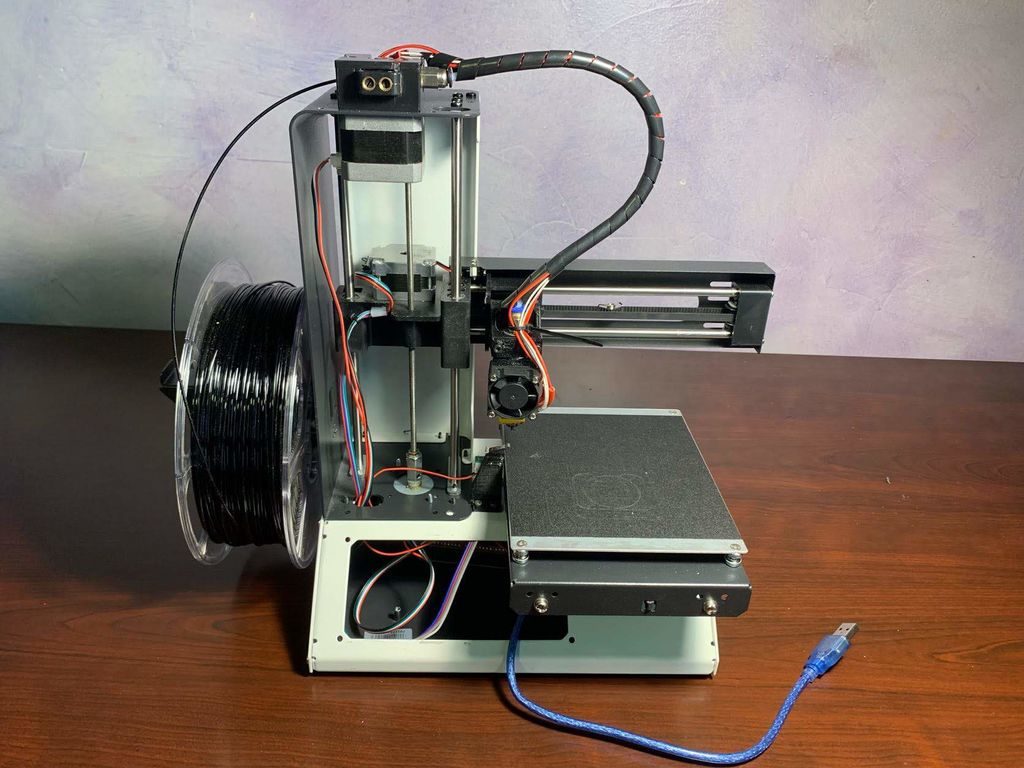
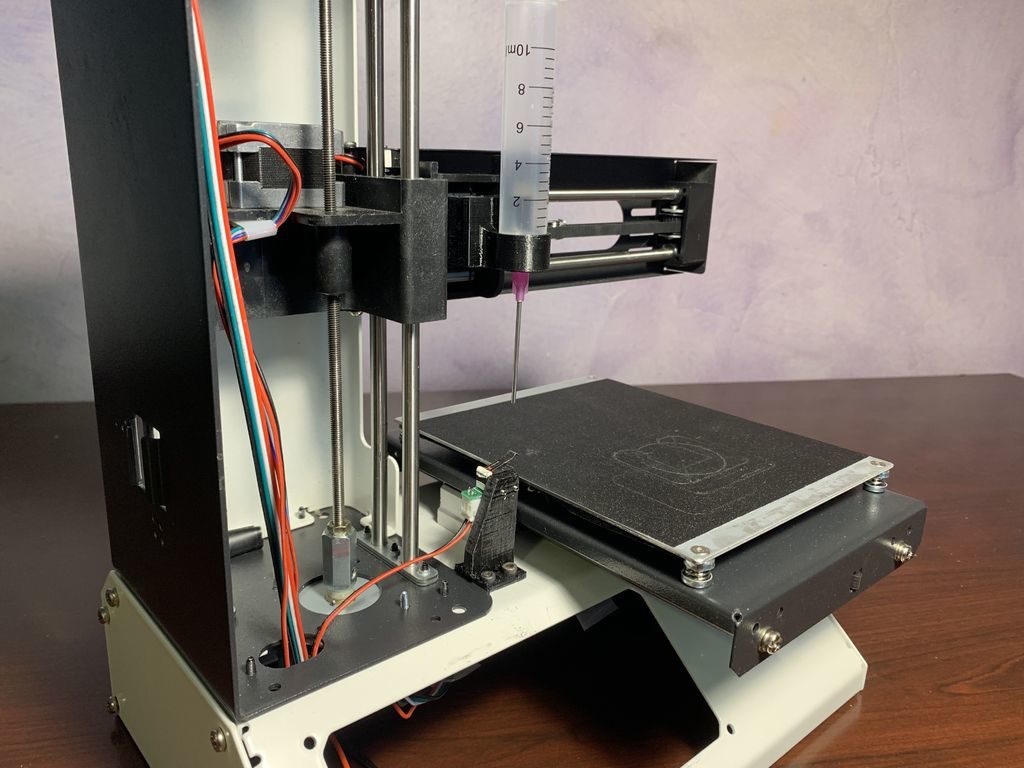
While most 3D printers deposit melted plastic in carefully controlled positions to build up a physical model, a similar process called “bioprinting” can be accomplished with biological materials. Commercial bioprinters can cost tens of thousands of dollars or more, but as shown here you can make your own using the shell an inexpensive desktop machine.
In this example, a Monoprice MP Select Mini V2 is stripped down to its bones and motors, subbing in an Arduino Mega and RAMPS 1.4 stepper driver board.
A syringe-like extruder is added to push out custom bioink, and the Z-axis switch mounting and Marlin firmware is modified to accommodate the new device. The homing sequence is modeled in the video below, giving a short snippet of how it works.