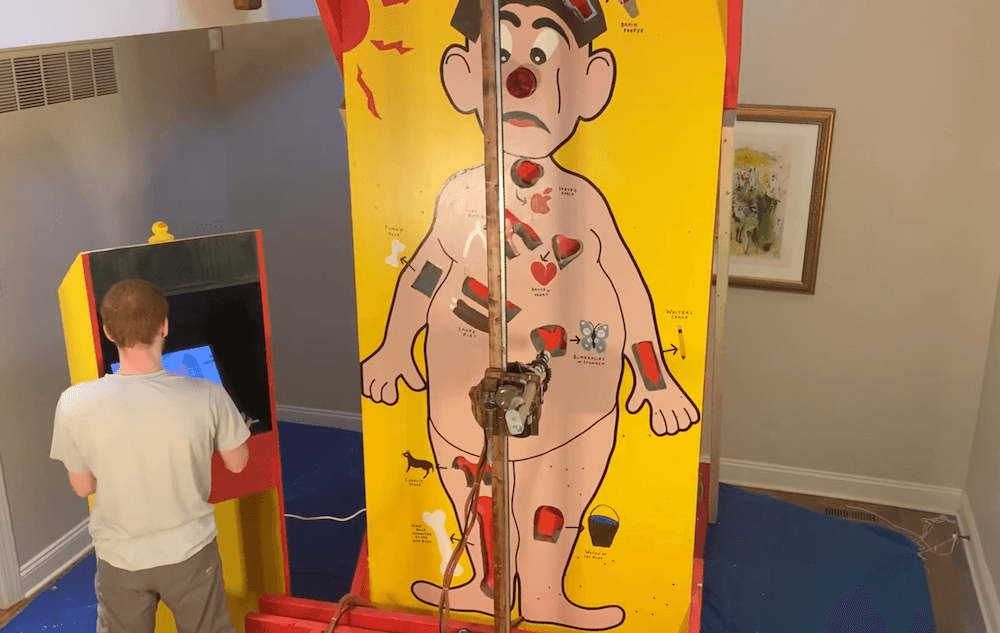
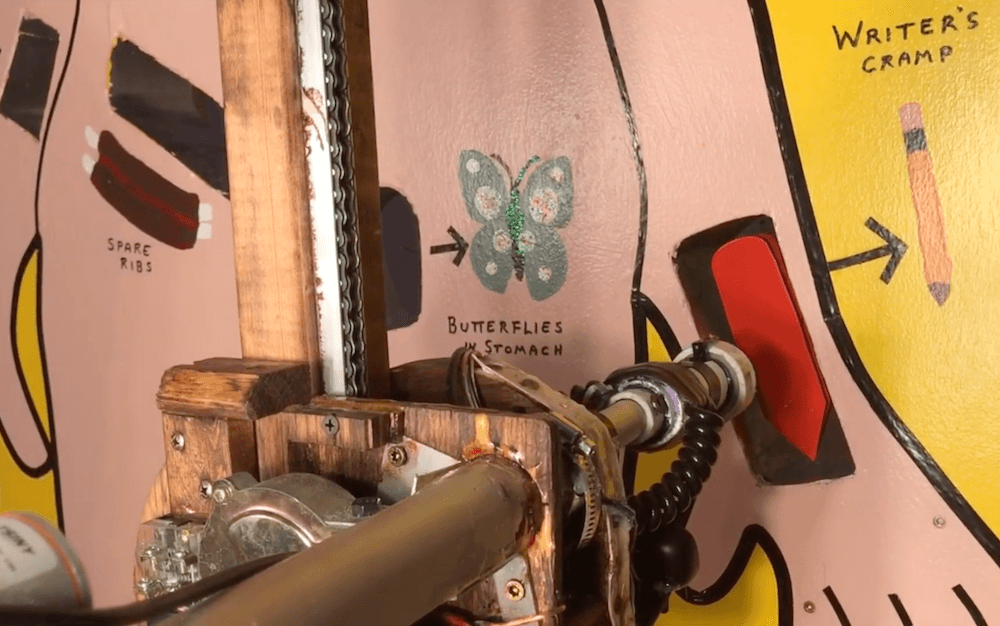
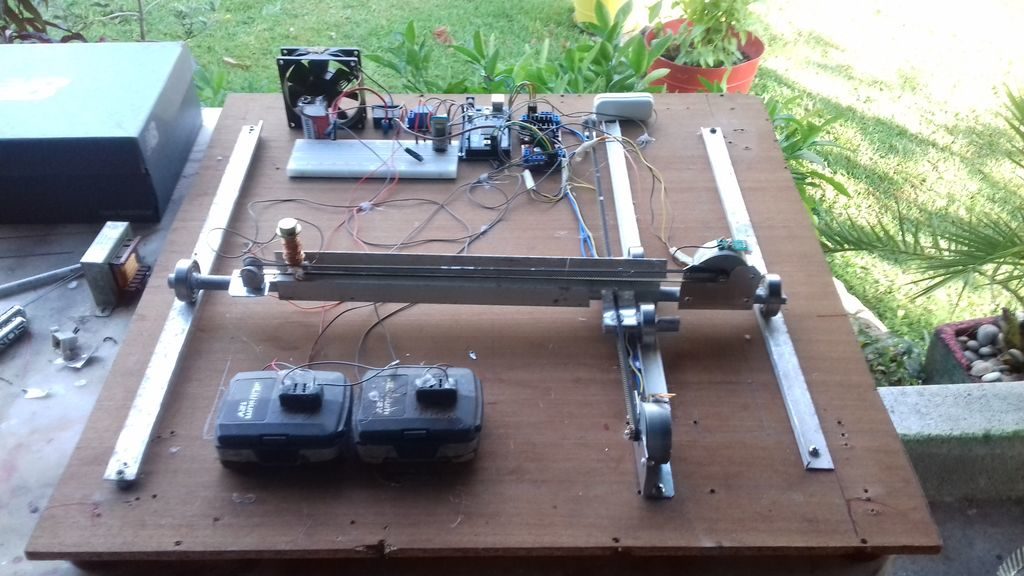
As a kid you may have played Operation, but certainly never anything like this nine-foot-tall version from SPOT Technology. This device is not only impressively large, but assists doctors in their surgical pursuits with a CNC gantry setup to pull out obstructions.
In the game, amateur surgeons control the system using a small arcade cabinet next to the patient (Sergio), moving a magnetic gripper with a joystick and buttons. A camera rides along and transmits images to the cabinet, hopefully leading to a clean extraction. If the gripper isn’t aligned correctly, a button on the plunger reports the doctors error, and Sergio’s nose lights up red to indicate a failed surgery. Two Arduino Megas are implemented, one on the CNC playfield itself, another in the cabinet.
The project will be on display at the Philadelphia Mini Maker Faire on October 6th if you’d like to see it in person.
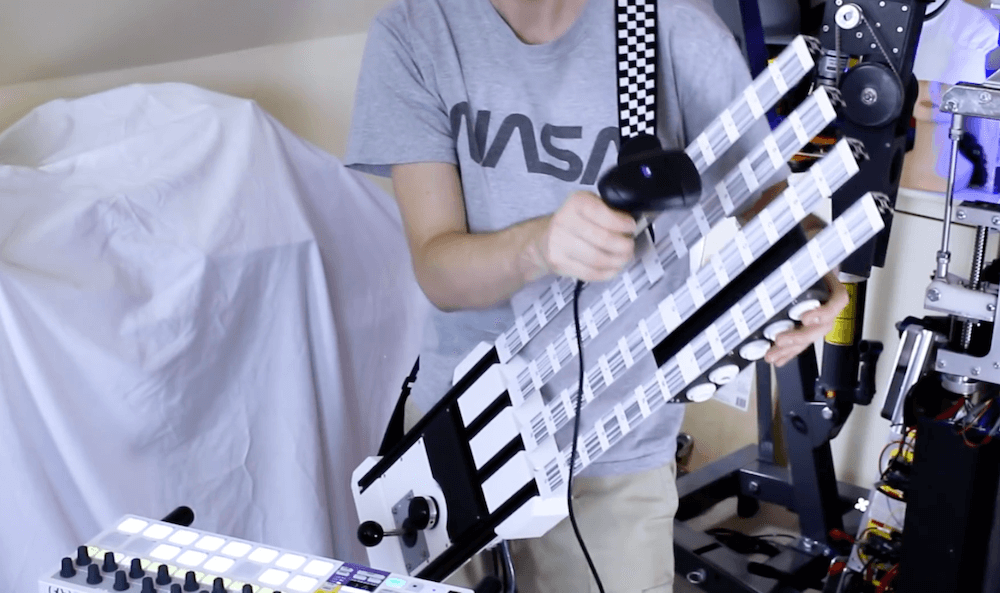
You’ve seen barcode scanners register the price for your groceries, and likely in many other applications, but did you ever consider if one could be made into an instrument? Well we now know the answer, thanks to this MIDI guitar by James Bruton.
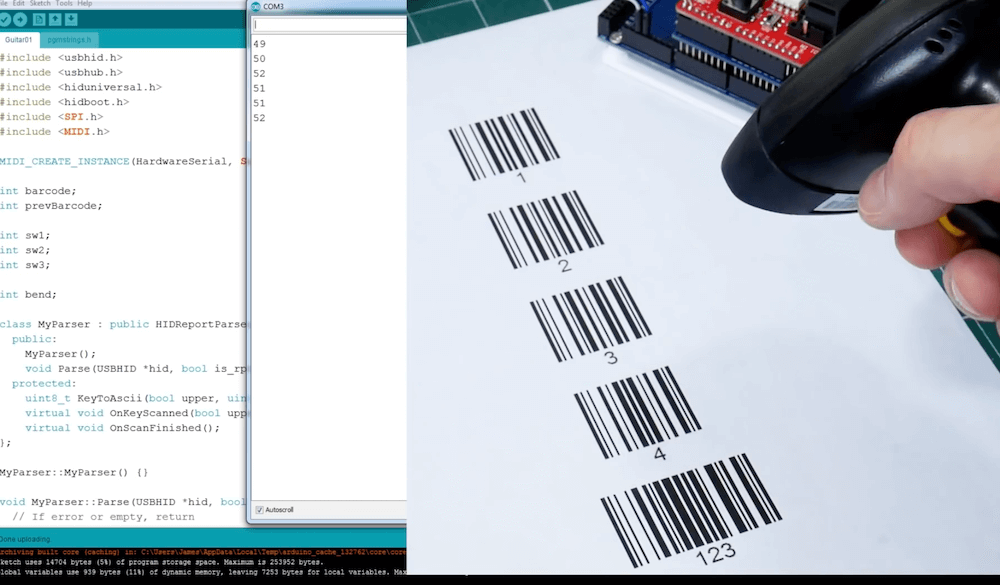
Bruton’s amazing device presents a matrix of barcodes arranged on the instrument’s four necks, allowing him to select the note to be played with a scanner gun.
The scanned code then triggers a note that’s piped to an output device via an Arduino Mega and MIDI shield. A joystick, spinner, and arcade buttons are also available for functions such as note cutoff, changing the octave, and pitch bends.
What has a dozen servos, a camera, and an Arduino Mega for a brain? Nevon Projects’ snake-bot, of course!
This impressive robot uses a total of 12 servos for locomotion and can travel across a variety of surfaces under the control of Android app, or autonomously via a sensor mounted to a smaller servo on the head.
The snake’s electronics are split up between a head section that houses batteries and the sensor, and a tail bearing electronics including the Arduino.
The project is available as a kit, or could certainly provide inspiration for your own project if you want to start from scratch. Check it out oscillating across the ground on tiny rollers in the video below, along with a surprising transformation into a square shape at just before the 1:45 mark.
Consider the game of chess. It’s a game that flexes one’s “mental muscles” rather than relying on brute strength, but if you don’t have the ability to actually move the pieces, things get a bit more challenging. If you’re playing against another human opponent, he or she could move for you based on what you say, but with this chess machine by ‘diyguypt,’ the board does the job for you!
The system uses an Android-based Arduino Voice Control app to take in commands, and passes this information along to the Arduino Mega concealed under the board via an HC-05 Bluetooth module. It then controls a pair of stepper motors to move an electromagnet into place, which pull the pieces across the grid as if by magic!
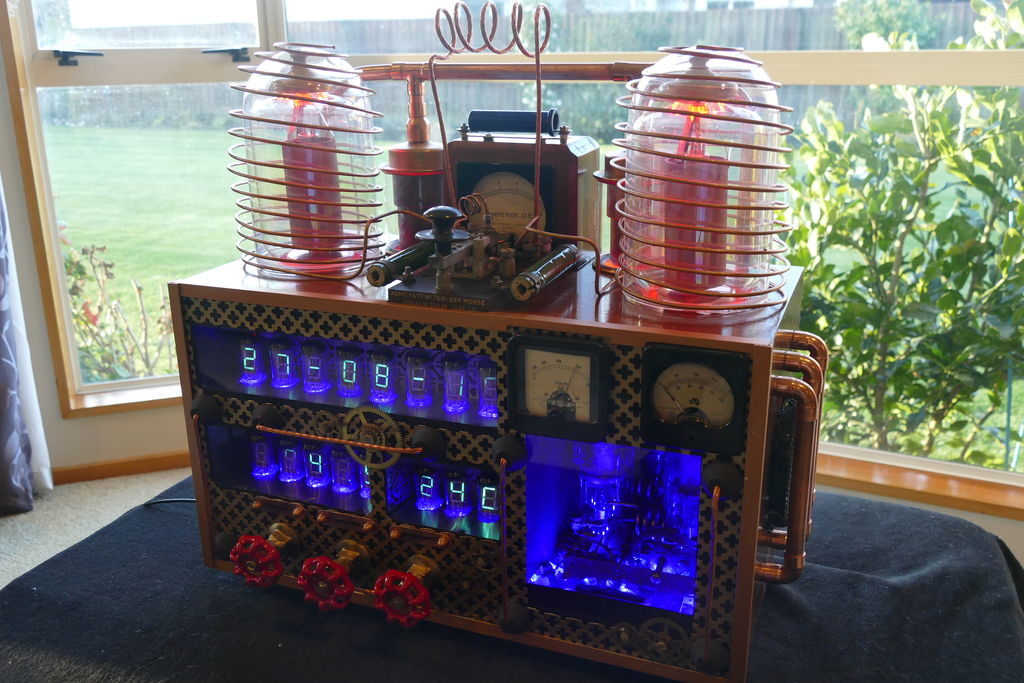
If you want to create your own steampunk/mad scientist entertainment center, it would be hard to top this radio/clock setup by Christine Thompson.
Her device displays the time and date on eight VFD tubes, arranged on top of another eight that show the radio frequency and volume, along with the ambient temperature and pressure read by a BMP280 sensor.
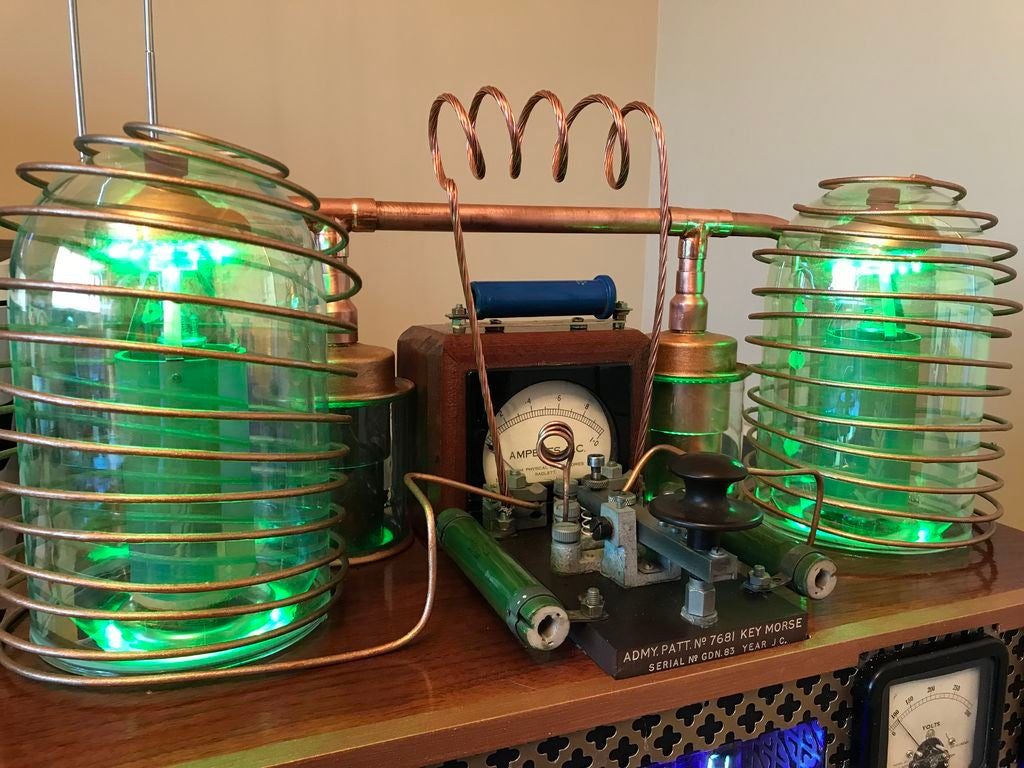
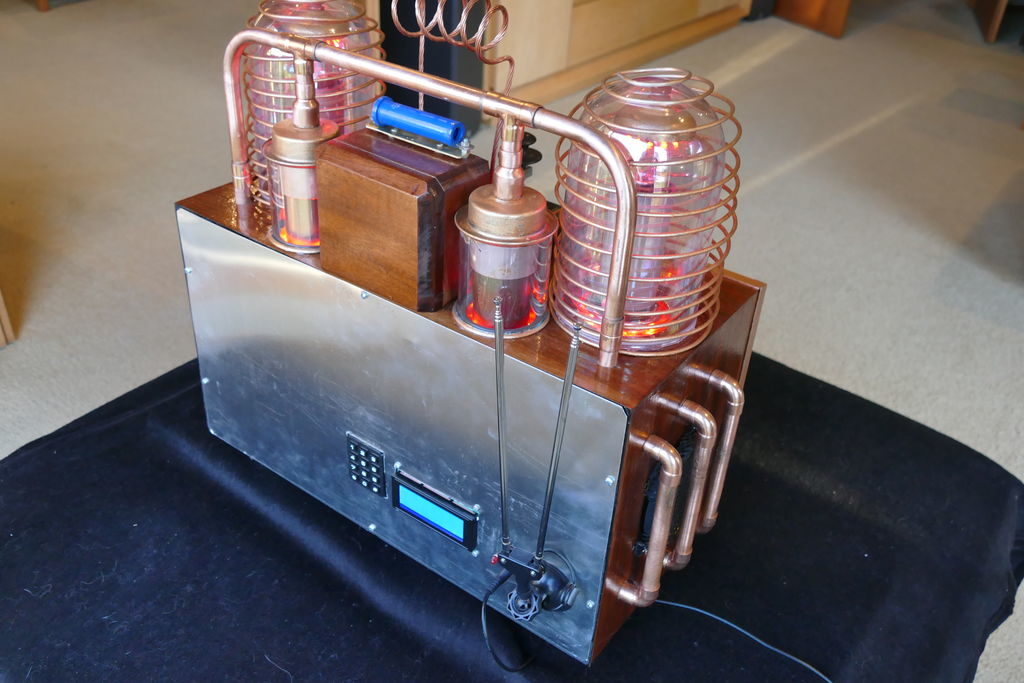
A wide variety of lighting effects, motor-driven clockwork, coils, and even an automated Morse key cement its steampunk theme, and it’s nicely housed in a restored radio cabinet.
The project is controlled by a pair of Arduino Mega boards linked together via I2C, and Thompson’s write-up has all sorts of tidbits for potential retro-display builders.
This project is without doubt the most complex I have undertaken, with sixteen IV-11 VFD tubes, two Arduino Mega cards, ten LED Neon light circuits, a servo, an electromagnet, two MAX6921AWI IC Chips, five DC power supplies, a HV power supply, two DC Volt meters, a DC Amp meter, FM stereo radio, 3W power amplifier, LCD screen, and keyboard. Apart from the above parts list, two software programs had to developed from scratch and finally the construction of the entire radio required about 200 hours of work.
I decided to include this project onto the Instructables site not expecting members to reproduce this project in its entirety but rather to cherry pick the elements that where of interest to them. Two areas of particular interest to the site members may be the control of the 16 IV-11 VDF tubes using two MAX6921AWI chips and its associated wiring, and the communications between two Mega 2650 cards.
The various components included into this project have been sourced locally, except the IV-11 tubes, and the MAX6921AWI chips both obtained on EBay. I wanted to bring back to life various items that would otherwise languish in boxes for years. All of the HF valves where sourced with the understanding that all where failed units.
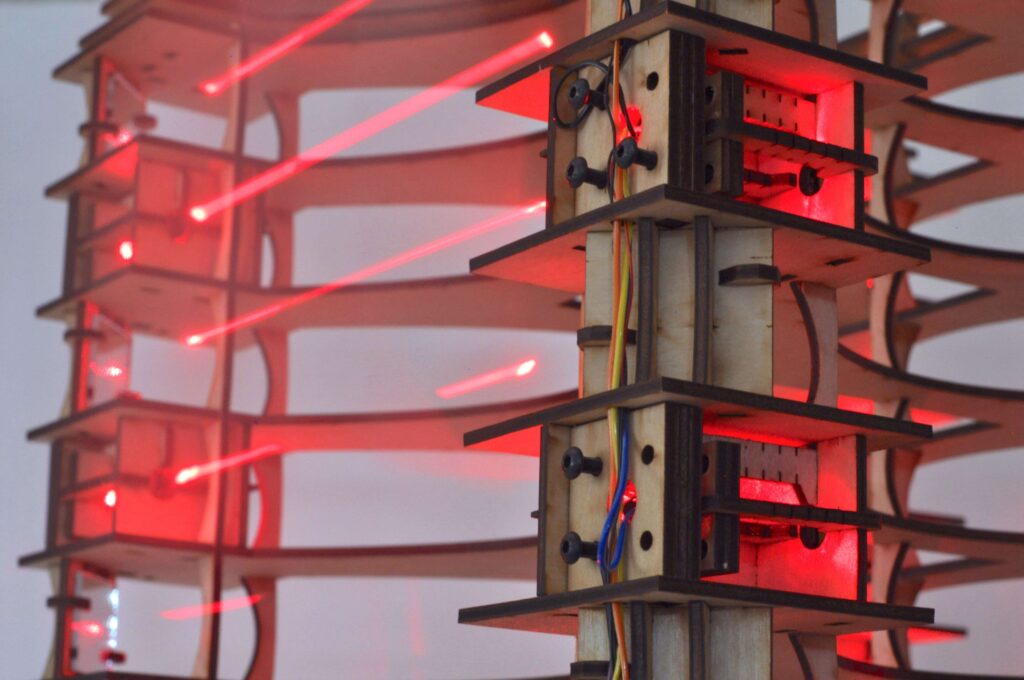
Apparently not content with a traditional laser harp, Jonathan Bumstead set out to take things in a different direction. What he came up with is a device whose laser strings are arranged horizontally, and loop though its boxy structure for an amazing audiovisual effect.
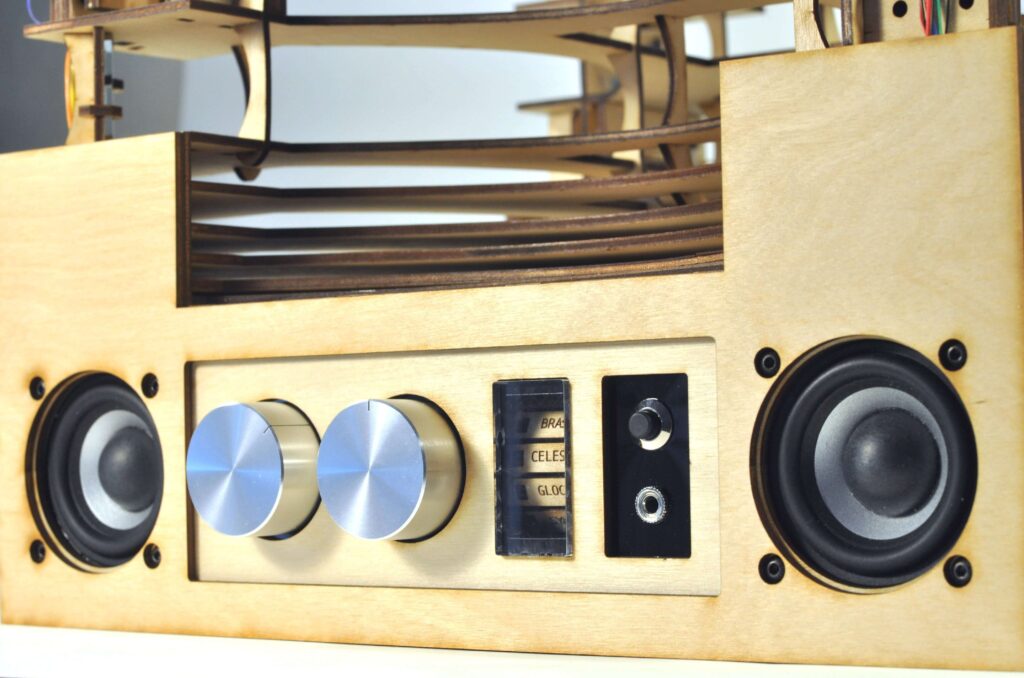
The aptly named Upright Laser Harp is divided up into six rows, which each contain two laser/photoresistor pairs for an instrument total of 12 notes. Each laser is reflected once before hitting its photoresistor to wrap the entire structure in light, and values are sensed by an Arduino Mega as note inputs. Sounds are then generated by an Adafruit Music Maker Shield, and different MIDI instruments are selected with a rotary switch and a stepper-based electromechanical display system.
Laser harps are musical devices with laser beam “strings.” When the beam is blocked, a note is played by the instrument. Usually laser harps have the beams travel vertically in the shape of a fan or vertical lines.
In this project, I built a laser harp with stacked laser beams that propagate horizontally. The beams reflect off mirrors to form square shaped beam paths. Instead of a MIDI output like my previous laser harp, this device has built-in MIDI player so the output is an audio signal. This means the device does not have to be connected to a computer or MIDI player (e.g. keyboard) to play sound. Both built-in speakers and audio output jack are available for playing music.
Be sure to check out the mini-concert and build details in the video below!
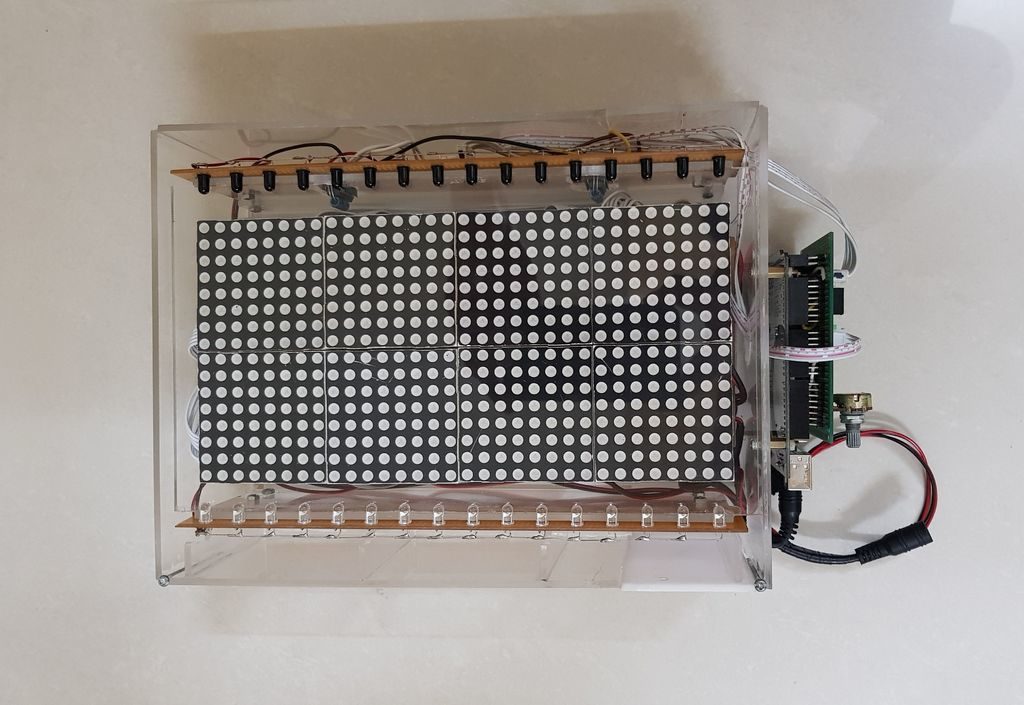
The setup uses 16 pairs of IR emitter and receivers arranged down the length of the bi-color 16×32 matrix to tell when one has inserted a finger or other object into an area. When sensed, it changes the corresponding column on the display from red to green or back again.
An Arduino Mega is used for overall control of the device, along with shift registers and multiplexers/demultiplexers to account for the massive amount of IO needed.
Code for the build is available on GitHub, and you can see it demonstrated in the video below.
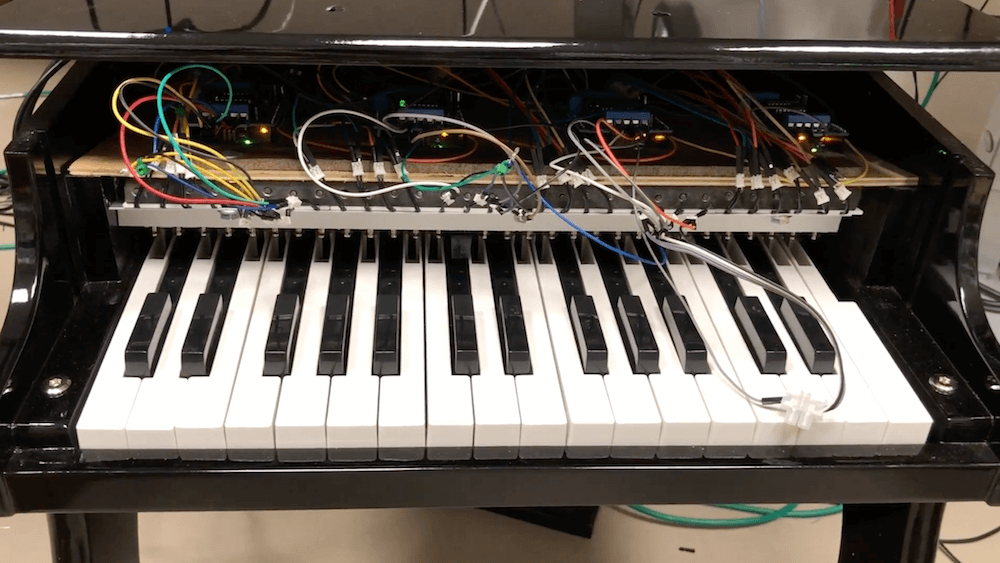
Upon obtaining a small toy piano, Måns Jonasson went to work “Arduinoizing” it with 30 solenoids to hammer out tunes.
A MIDI shield is used to pipe commands from a computer to the Arduino Mega that’s used for control, and after experimenting with discreet wiring and electronics for each of the solenoids, he switched to motor shields as outlined here to simplify the setup. This, along with a new version of the solenoid holders he designed, cleaned up the build nicely, allowing it to play a plinky version of the Super Mario Bros. theme song.
Be sure to check out the Mario themed auto-concert in the video below, plus a video outline of its construction, below.
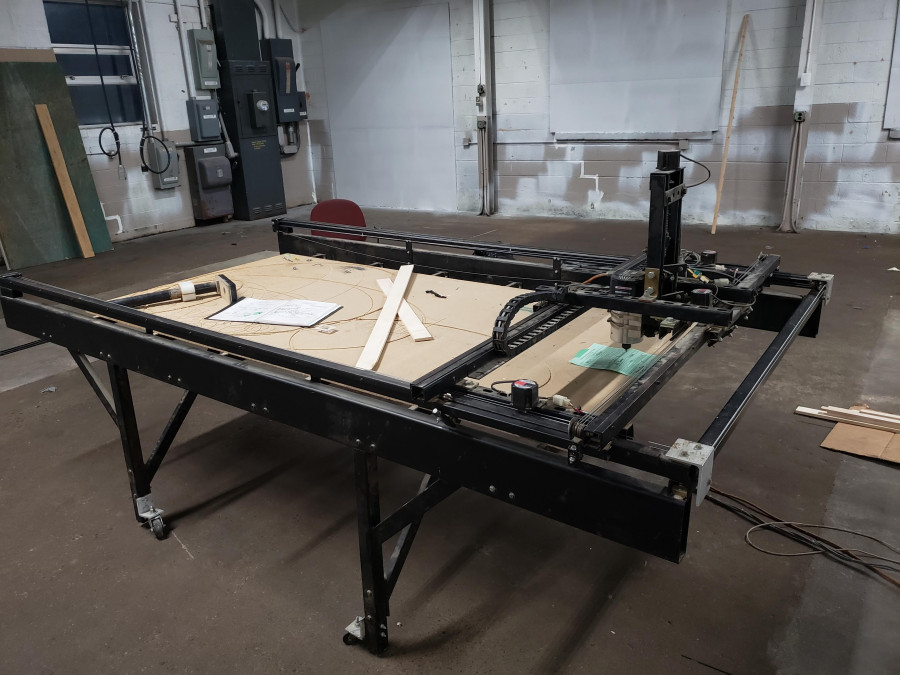
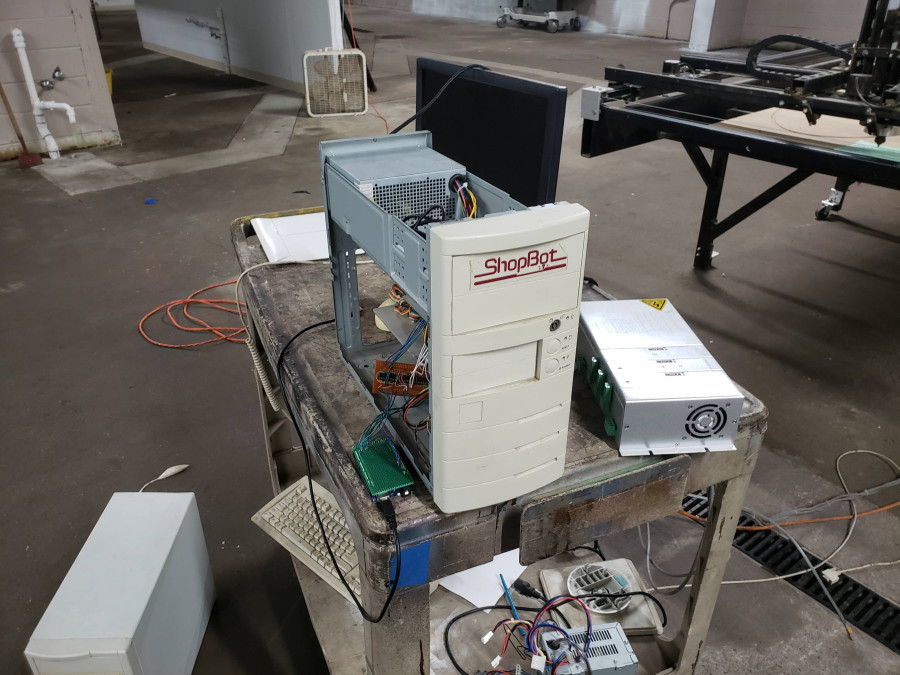
Makerspace i3Detroit was the recent recipient of a free yet non-functioning CNC router. While out of commission when received, the device’s mechanical components and motors appeared to be in operational condition, plus it had a large work surface. The decision was made to get the CNC up and running for now, with the eventual goal of turning it into a plasma cutter.
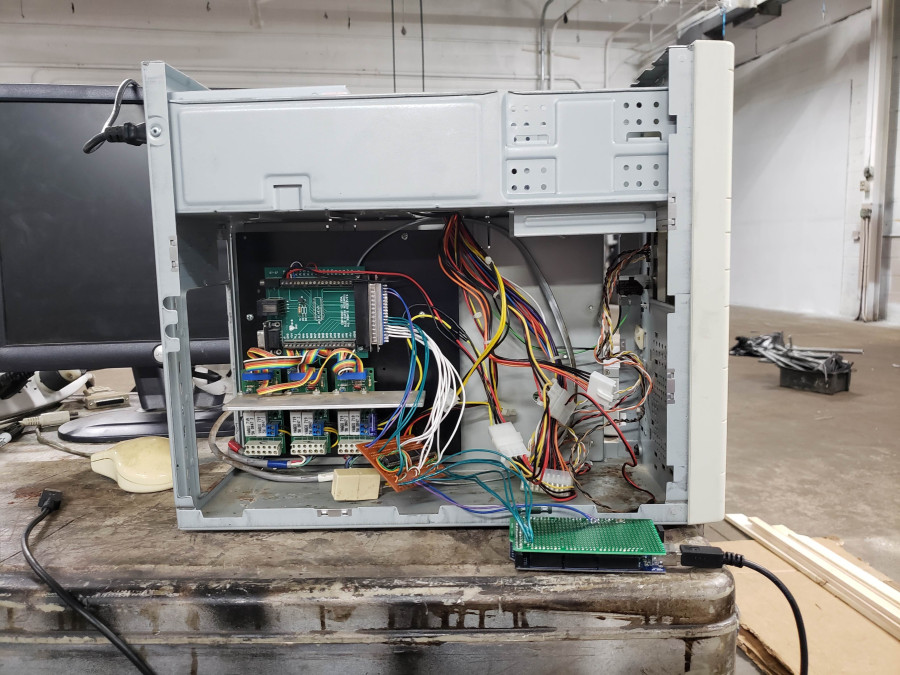
First, they booted up its (Windows 95) computer and replaced a power supply on the controller. An adapter board for the controller was then built using info from this Arduino Forum post, allowing the router to be controlled with an Arduino Mega running grbl firmware.
Although there is still some work to do, it can be seen happily jogging along in the video below, and appears well on its way to becoming a usable machine!
Marcelo Ávila de Oliveira likes to practice basketball, and while most of us would be content to shoot and hopefully improve, he actually tracks his workouts. While figuring out the number of made baskets, misses, times, etc. is useful, it’s also quite boring and difficult, so he came up with a real-time scoreboard system to take care of this for him.
The device is mounted to an enclosure under the hoop, and uses an IR proximity sensor poking through Jerry West’s head to know when a ball has gone through. It also employs a vibration sensor to detect if the ball has hit the rim, and if the IR sensor isn’t triggered within three seconds, a miss is counted.
The setup’s Arduino Mega communicates with a custom smartphone app over Bluetooth, and displays statistics on the practice session. It even plays notification sounds for scores and misses, as shown in the video below.