Posts with «featured» label

Harry Potter fans create a fully-functioning smart wand

In the Harry Potter series, a Muggle is a person who lacks any sort of magical ability. Growing up reading these books, one can only imagine what it would be like to cast spells using a wand. Well, wonder no more as a group of NYC Muggles decided to build their own smart wand that can ‘magically’ control devices over Wi-Fi.

The 3D-printed wand is equipped with a voice recognition module that lets users cast spells of their own with a flick of the wrist, like ordering takeout from delivery.com, turning the lights on and off, as well as playing and silencing music.

Other components include (what appears to be) a MKR1000 board, a LiPo battery, a PowerBoost, a microphone, a switch, and a vibrating motor that indicates when a command is recognized.

Those wishing to buy one are out of luck, as the creators reveal this was merely a fan-made project to celebrate the Harry Potter prequel Fantastic Beasts and Where to Find Them.”  You can read more about the Muggle Wand here! 

A 3D-printed lunar phase clock for your nightstand

“Since there isn’t a supermoon everyday, make one for your bedside table!” This is exactly what G4lile0 set out to do using a 3D printer, an Arduino and some open-source tools.

The result was a moon phase clock consisting of a 3D-printed model and an LED strip to create the lunar phases. The lights are driven by an Arduino that precisely calculates which phase to show, as well as controls a 0.96″ OLED display revealing the date and time. Other electronics include an RTC module, a DTH11 sensor, a buzzer, and three push buttons.

The clock also features several modes, including an alarm, a wake-up light, a lamp, a thermometer, and a hygrometer. It can even help set the mood or start your next lunar rave with its relaxation and party-like special effects.

You can read all about this project on Thingiverse and find its code over on GitHub.

The Library Manager is now available on the Web Editor!

The Arduino Web Editor has got some exciting new features! 

First of all, you just need to have Arduino account to use it. We completely removed the invite system, making it accessible to everyone. (Don’t have an Arduino account? Sign up!) This Arduino profile can also be used to post on our official Forum, buy products on our online stores, add comments on our blog, as well as create tutorials on the Arduino Project Hub.

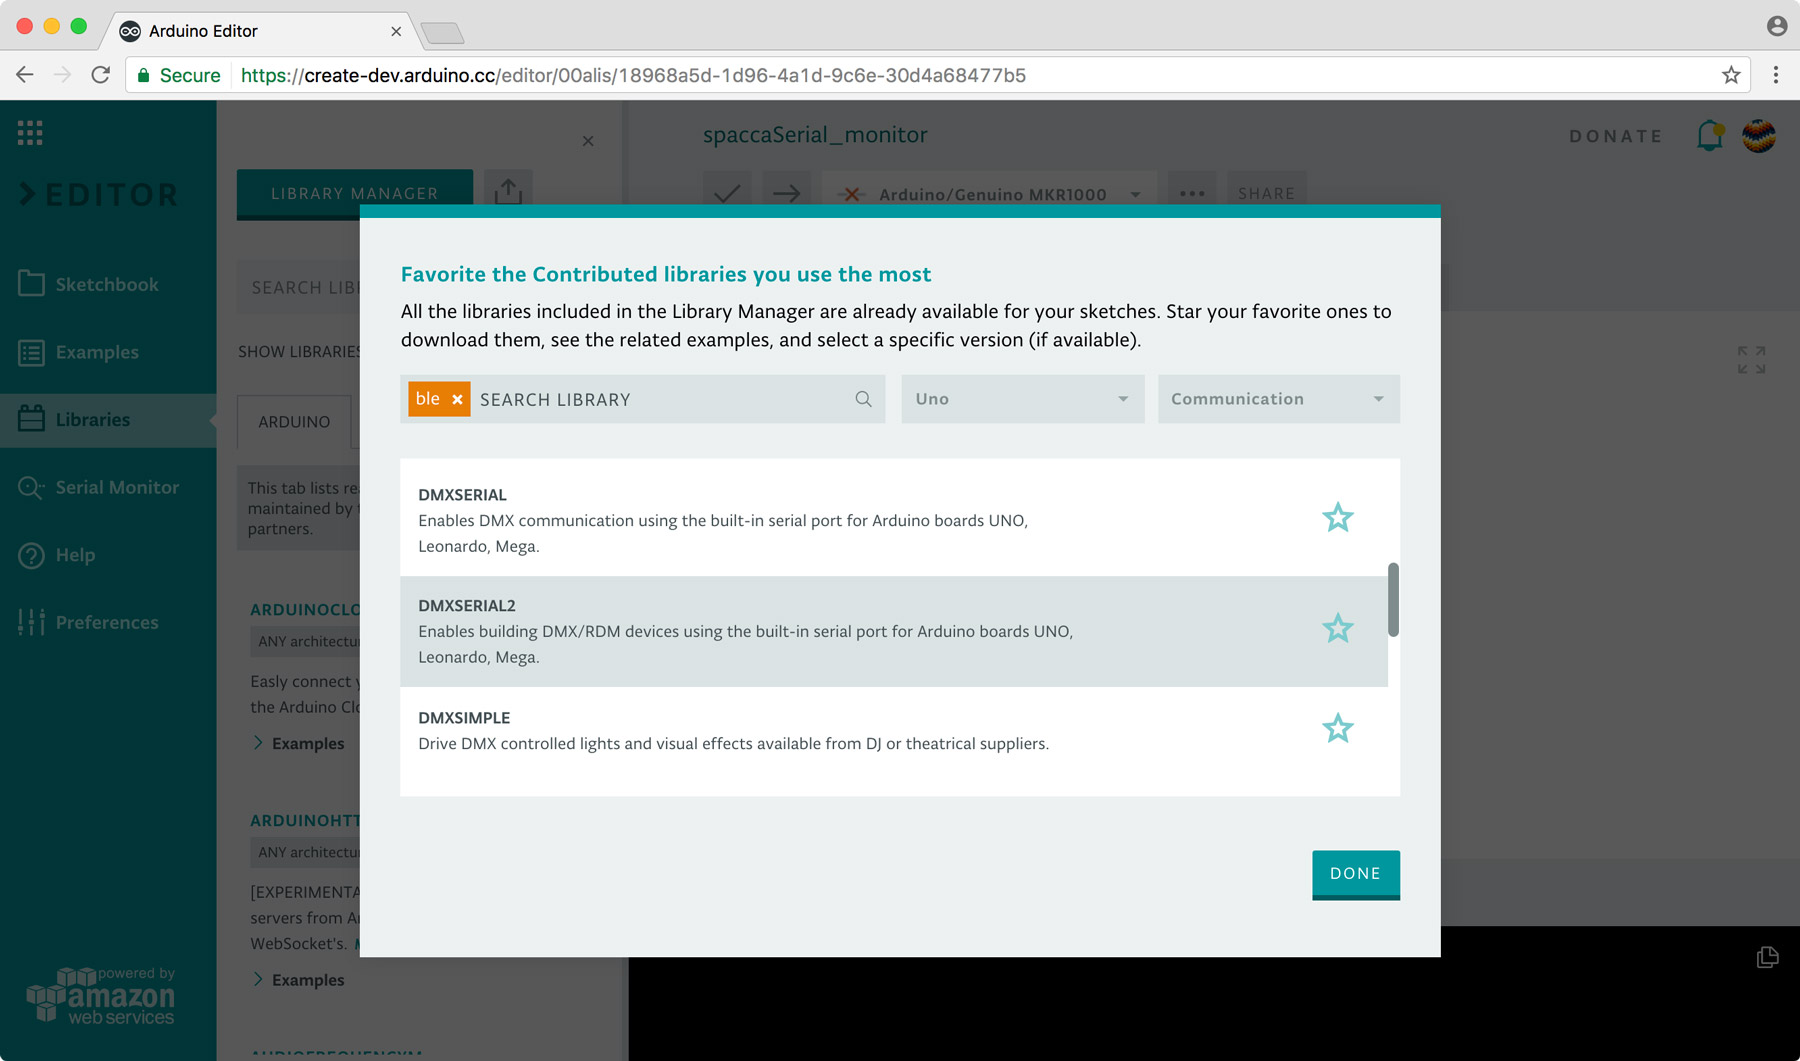
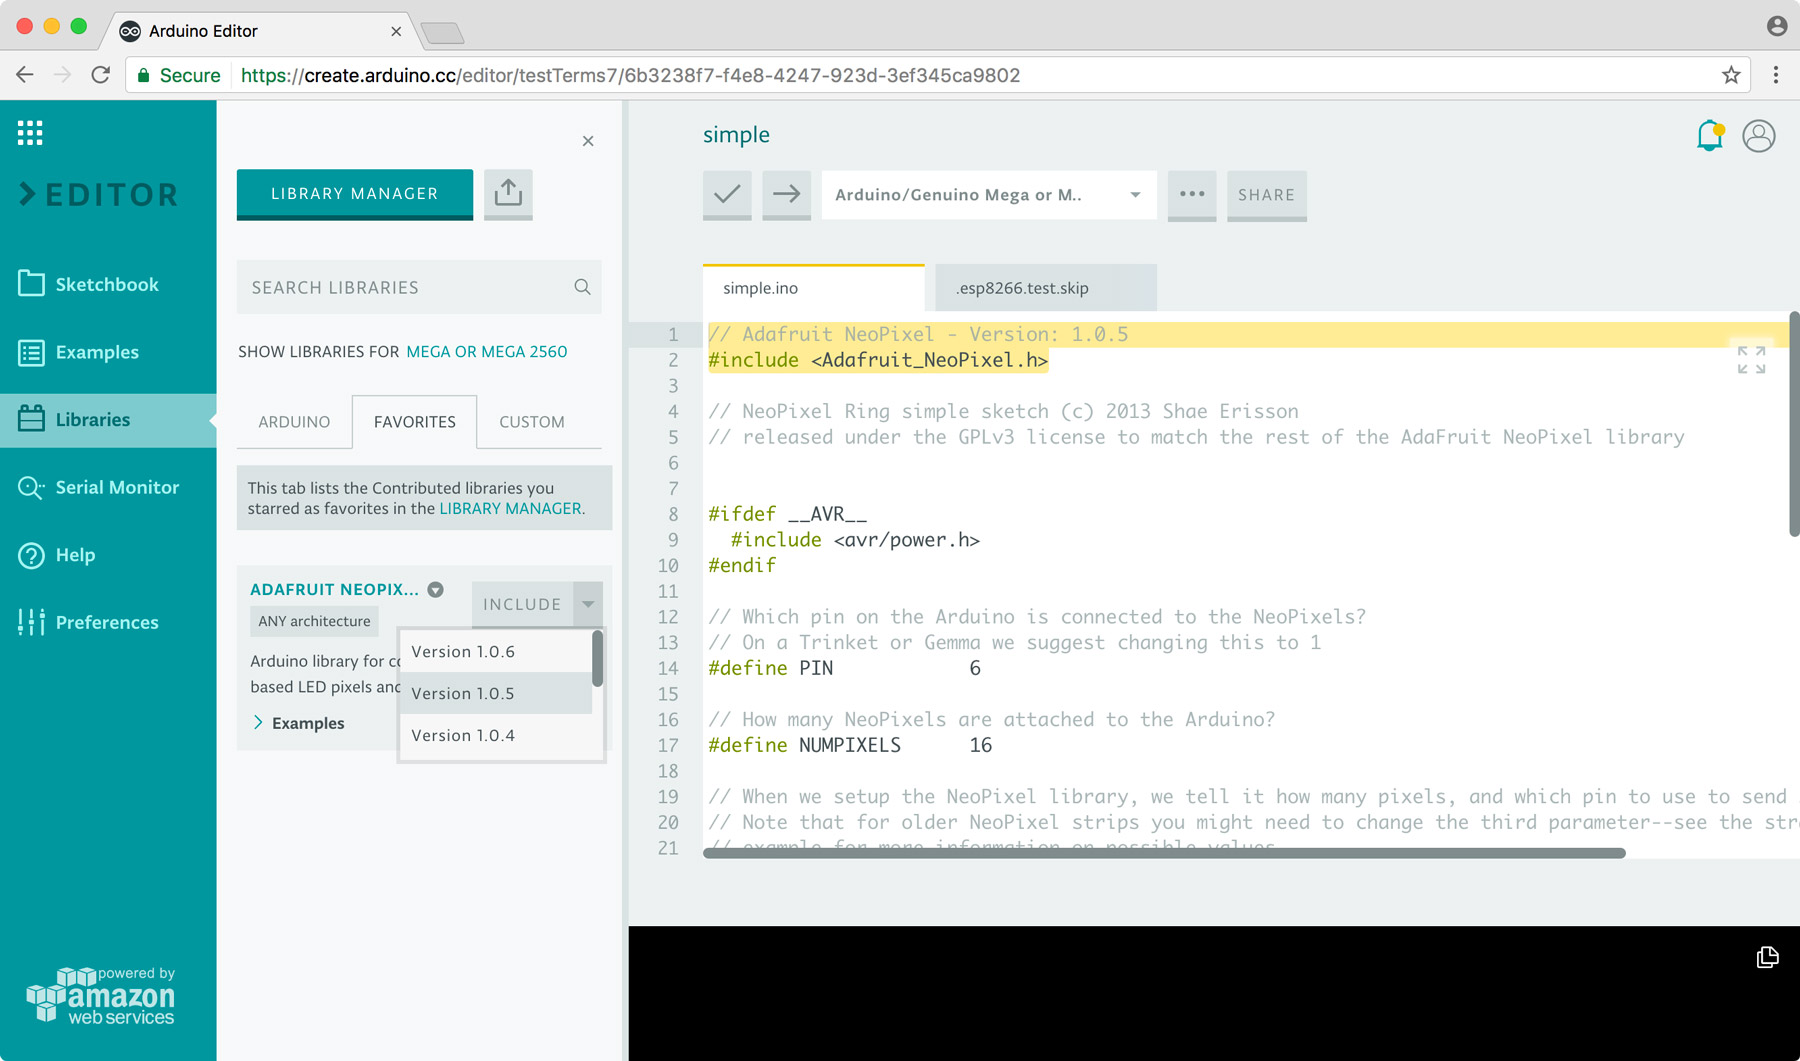
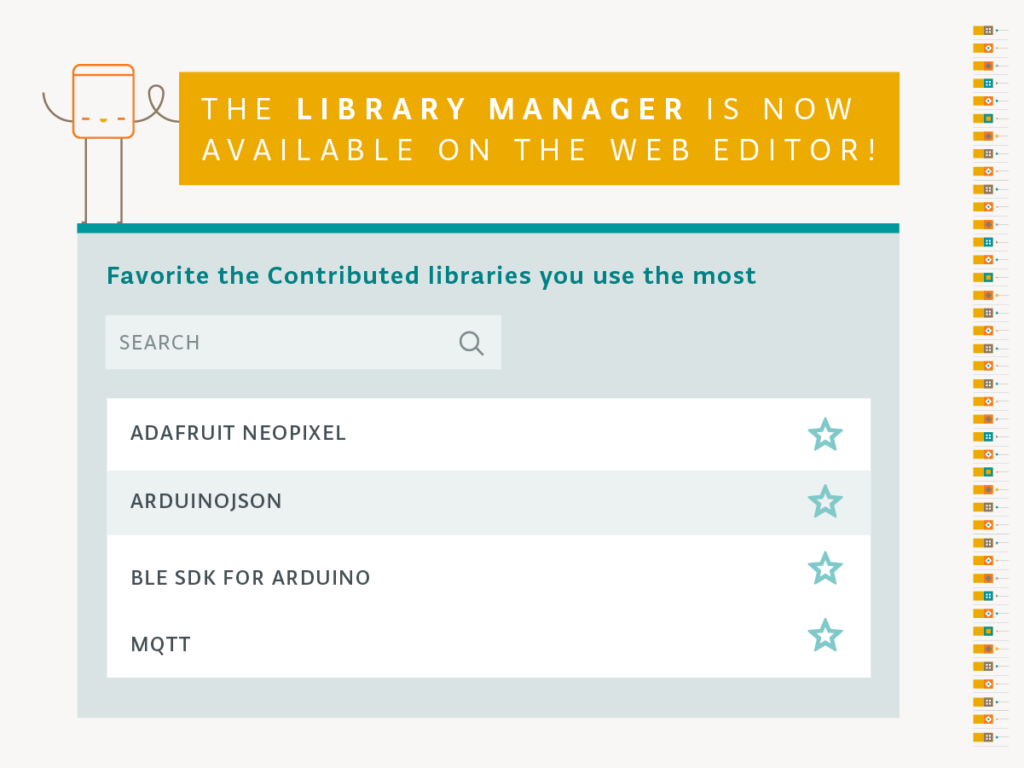
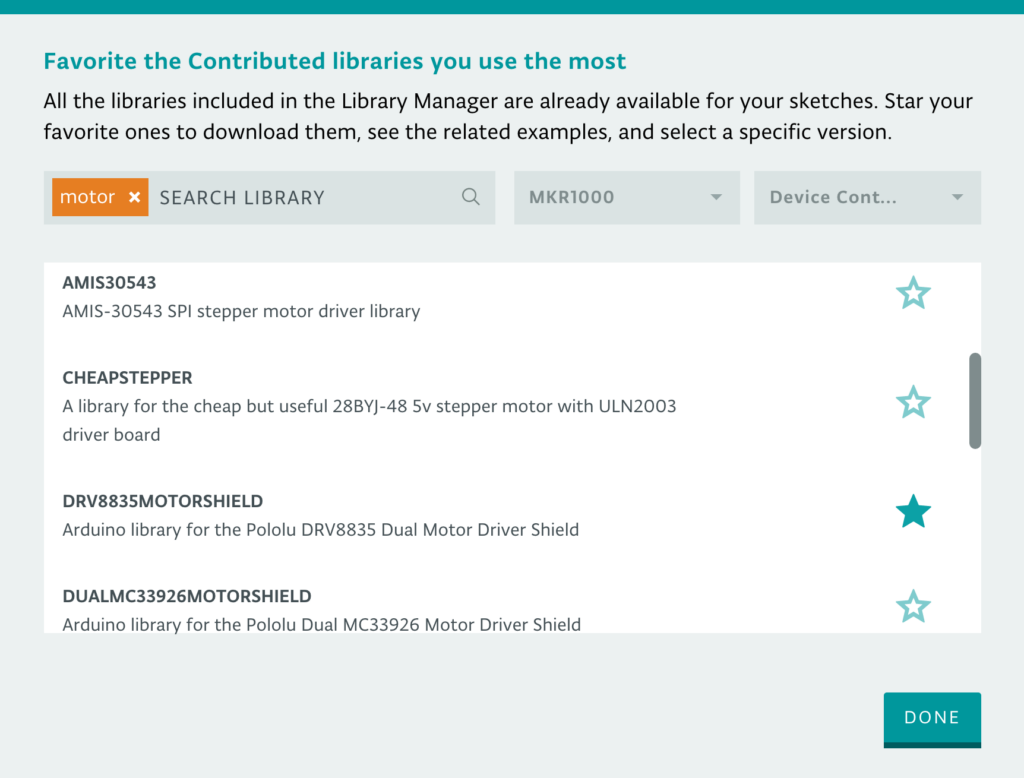
What’s more, we’ve added the Library Manager to the online IDE; meaning, all the community-generated libraries are now available for your sketches without having to install anything. The Arduino community has written over 700 libraries, which you can browse through in the Library Manager and favorite the ones you like the most. All the libraries available in the Library Manager are automatically detected, so you’ll never need to install them to get your code to compile.

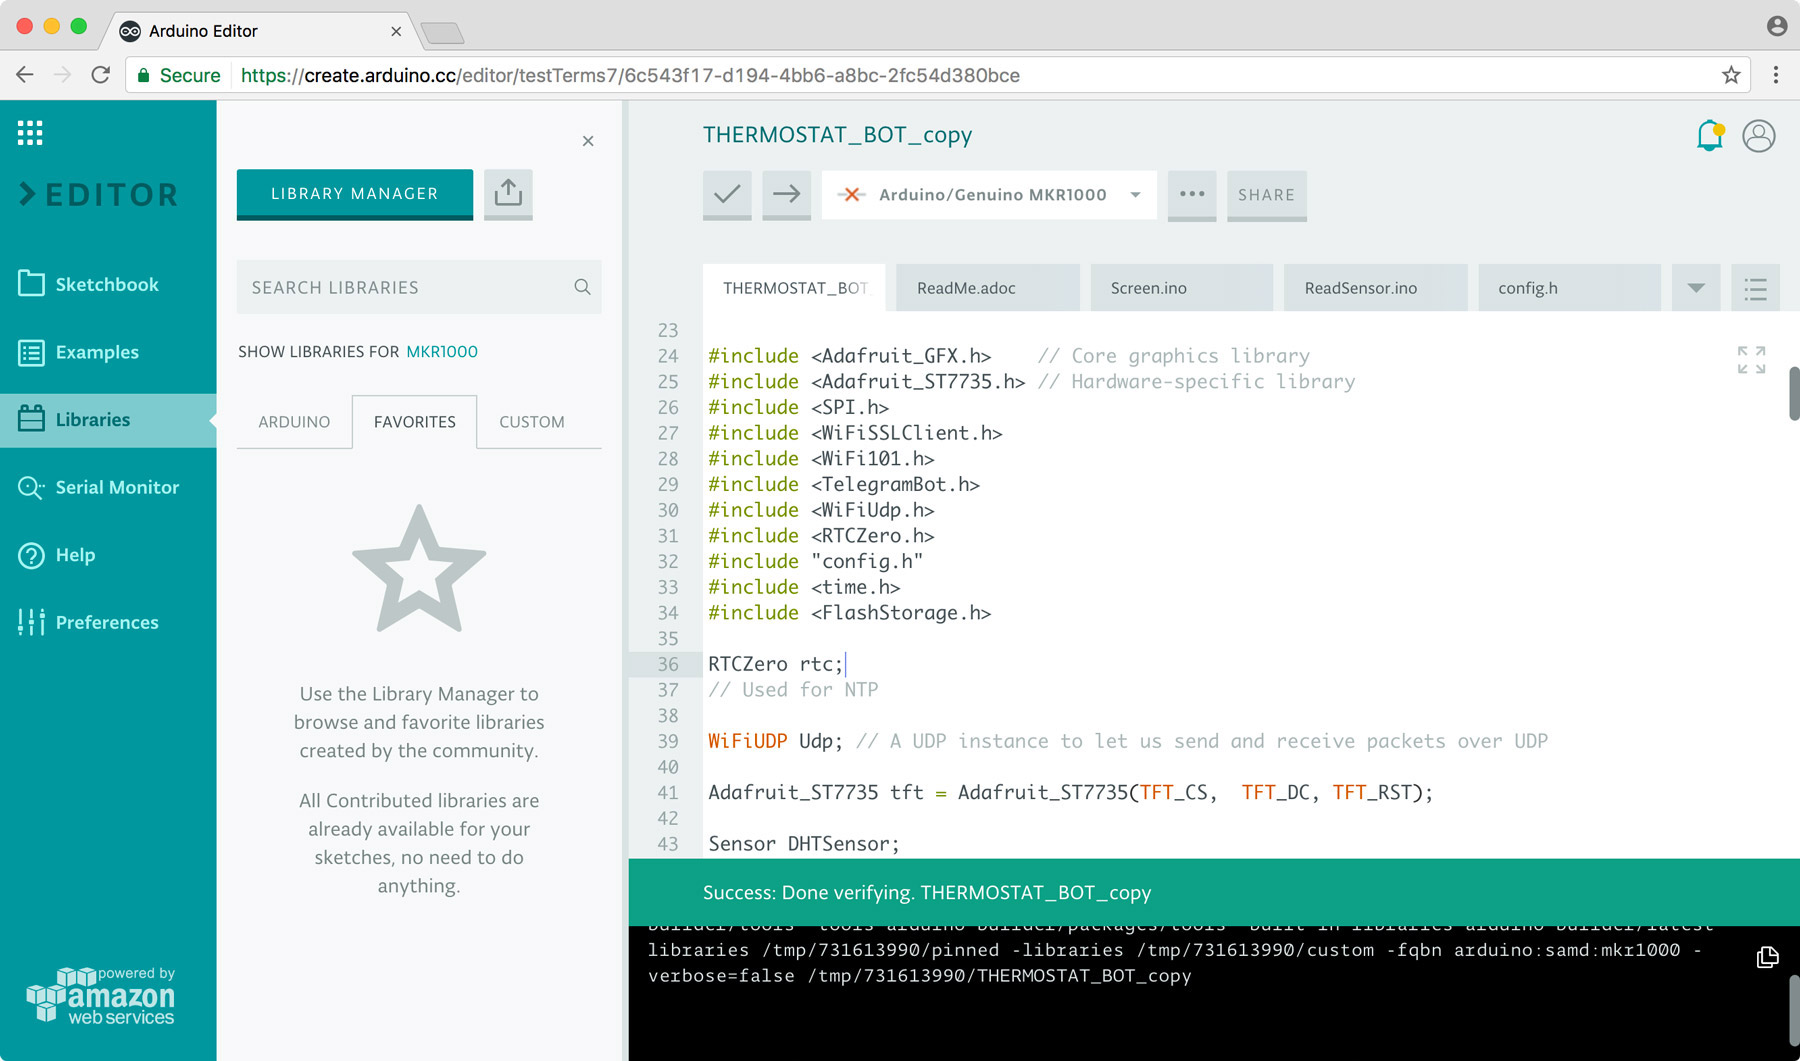
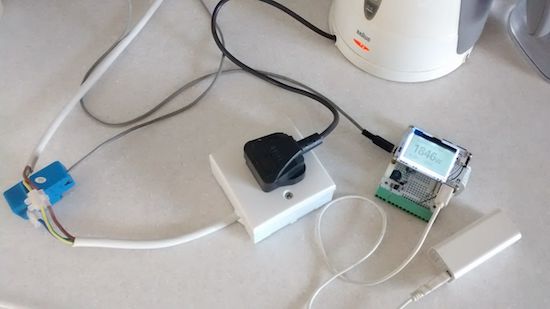
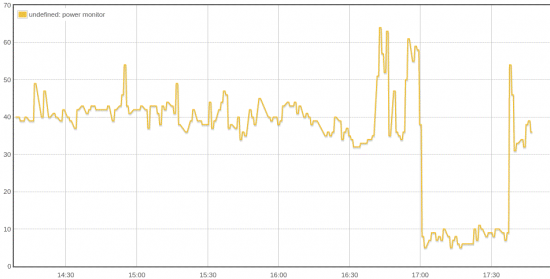
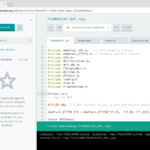
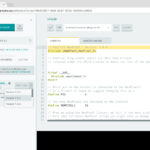
Since all the contributed libraries are up on our servers, if you use them and then you share your sketch with someone, they could simply add a copy of your code to their sketchbook and will be able to compile it without having to do anything else. We know that sharing a sketch and its related libraries can be cumbersome; fortunately, the Web Editor can really speed up this process. Take this Themostat Bot sketch, for instance, which uses a variety of contributed libraries.


But what if you want to select a specific version of a library? Look for it on the Library Manager and star it. It will show up on the the “favorites” tab of the “libraries” panel. From there, you can choose a particular version and include it in your sketch. We are adding metadata to the sketch about the version number, so we can tell the Arduino Builder to pick the one you really want.

When building your sketch, we will always look at your custom libraries first, your favorites next, and then Arduino built-in libraries. If you favorite a library, you can see its related examples, get more information and a link to the GitHub repository, and download it.

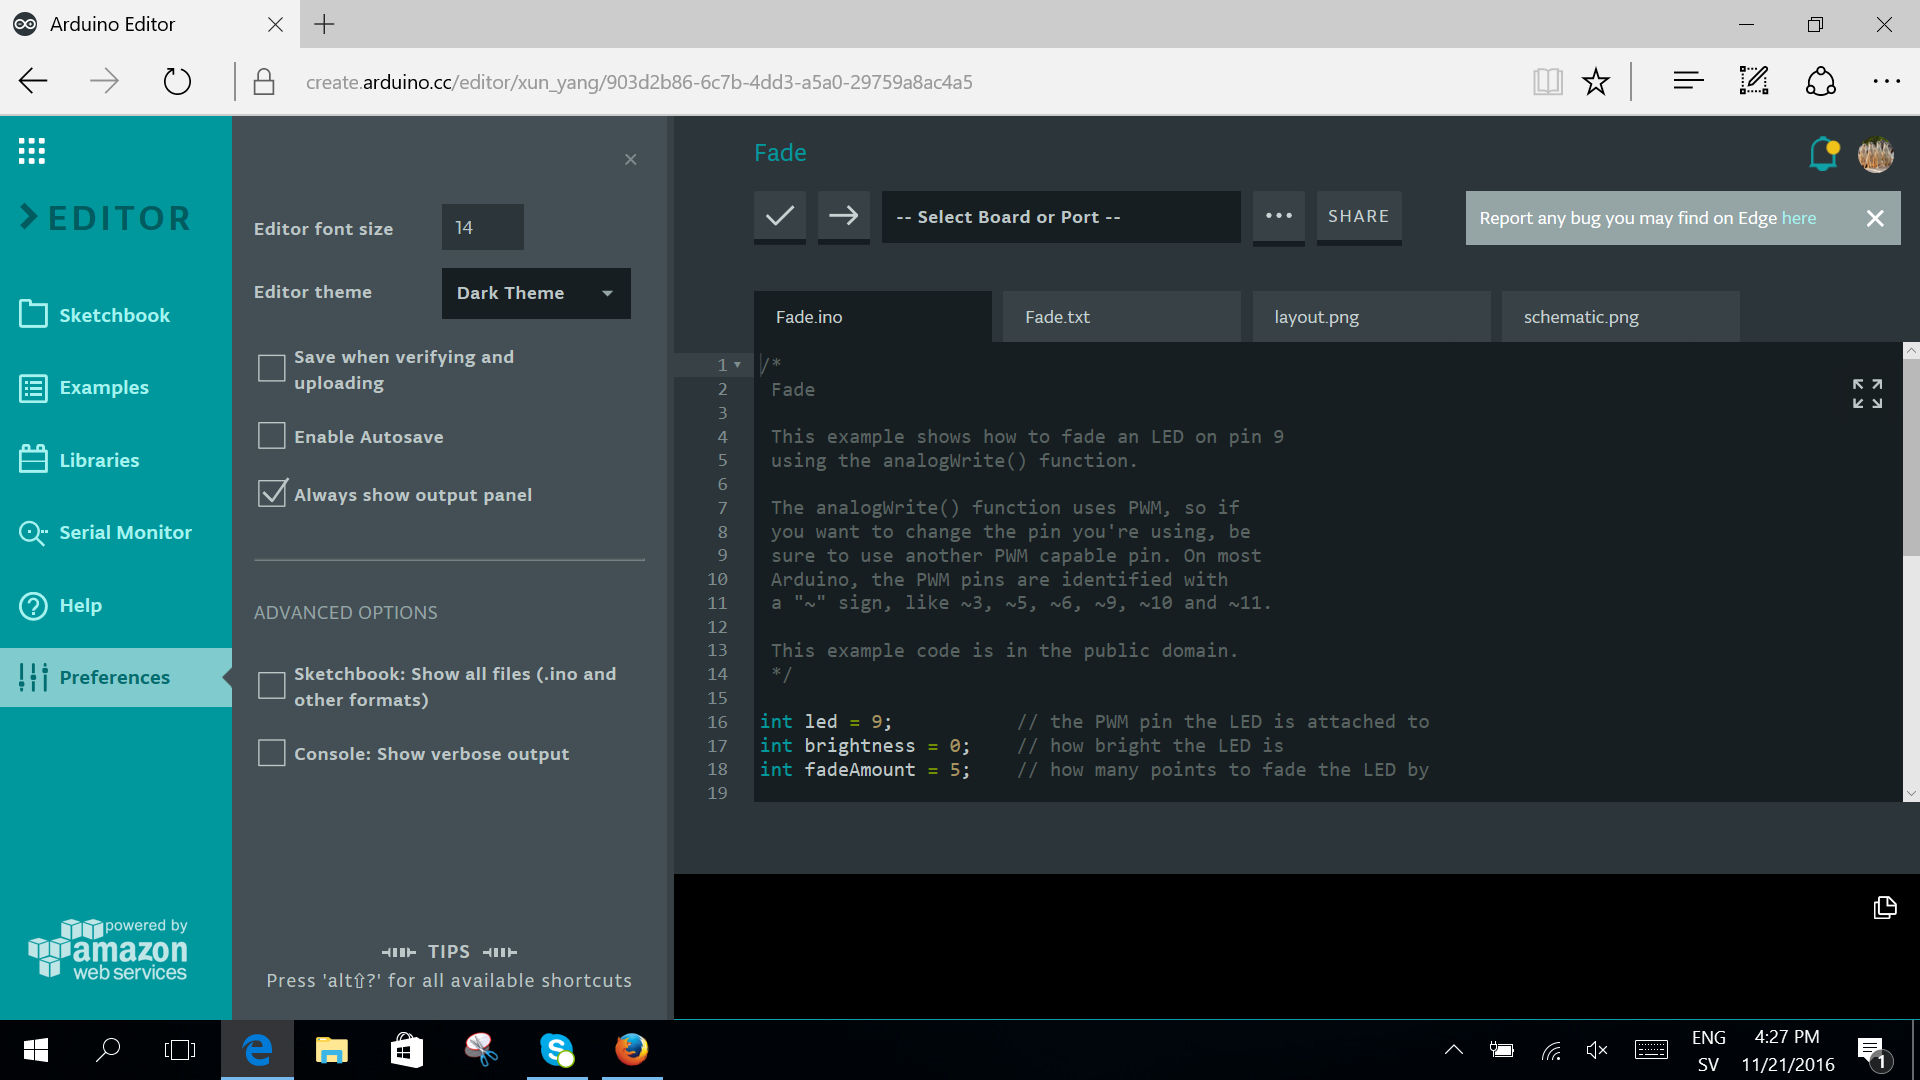
Last but not least, you now can use the Arduino Web Editor on Microsoft Edge.

What’s next?
We are adding a quick way to import your whole sketchbook in one click, so you can save all your sketches and libraries in the cloud, having them available on any device and backed up. In addition to that, we are working on a feature that will allow you to see a library source code and modify it, as well as a ‘secret tab’ where you will be able to store all your sensitive data and share them securely.

As aforementioned, all the sketches you create on the Arduino Web Editor are public–anyone with the link can access them. We are also developing a private sketch feature… more on that soon.

We would love to hear your feedback!
We are keeping a close eye on the Web Editor’s Forum page, and would love to hear from you if you encounter any bugs, have any input, or want to share a couple ideas with us. Interested in learning more? You can find a getting started guide on how to use the Web Editor here.

Tech notes
We are happy to announce we are completely decoupling frontend and the backend of the Arduino Web Editor, resulting in a faster loading time. In the future, the new architecture will let us distribute the application all over the world using a CDN. On the server side, we now have a set of full REST API for both compiling and obtaining user info like sketches and libraries. The full REST API will enable our Web Editor to speak with a new ecosystem of applications and third party integrations.


Arduino Blog 22 Nov 19:37
create  featured  

Create your own Red Dwarf Talkie Toaster replica

In the Red Dwarf TV series, Talkie Toaster is a monomaniacal talking toaster that tries to steer every conversation to the subject of toast. Now, YouTuber “slider2732″ has gone ahead and built a chatty appliance of his own.

To accomplish this, the Maker embedded a PIR sensor into the toaster’s lever that communicates with an Arduino Pro Mini whenever someone is nearby. The Arduino then reads sound files loaded onto an SD card and plays them through a 3W amplifier out to a speaker underneath. The replica is also complete with a circular panel on front, made out of “laptop screen material” with a sour cream tub’s lid, and equipped with a couple LEDs.

The Arduino code uses the TMRpcm library and is a simple case of responding to the PIR sensor going high or low. The samples are loaded from the SD card. The front grill area has the speaker underneath, with two white 5mm LEDs that are connected to the Pin 9 output from the Arduino. The former laptop screen material was cut out and then fitted. The main surround is from the lid of a sour cream tub, sprayed with a Krylon brown rattle can paint. The our legs are from a window blind, cut to the right sizes and similarly sprayed, then glued with Fix-All.

The samples were recorded in Audacity, normalized and saved out as 11025Hz, 8-bit WAVs due to buffer constraints of the Arduino Pro Mini.

slider2732 walks through the entire build and shows it off in the video below!

The Orbitalochka is a solar-powered satellite synth

This model satellite is both strange and mesmerizing with folding solar panels and a FM transmitter.

Media artist Dmitry Morozov, aka ::vtol::, is back with his latest kinetic sound object, this one resembling a satellite. The Orbitalochka hangs from the ceiling and broadcasts sound via an FM transmitter and a built-in speaker. These noises are based on the position of the satellite in space, and it can even transmit a pre-recorded lecture by Sergev Kasich, who appears to reside in the satellite’s clear bubble.

::vtol:: bases the sound signals on the generative sound processes created with Patchblocks, a modular mini-synth kit. The signals also react to a light intensity sensor, which responds to how the satellite’s position in space changes.

This happens due to mass redistribution as the solar cell changes location. The solar cells operate as sensors and produce CV (control voltage) to change sound program parameters.

Aside from its unusual sounds, what is really interesting about this synthesizer are the solar panels, which autonomously move around via four servo motors. The Orbitalochka is equipped with an Arduino Nano as well.

You can see the apparatus in action below, and read all about it on ::vtol::’s page here.

(Photos: ::vtol::)

Measuring AC power with the Industruino PROTO

Industruino PROTO–now available on our online storejoined the AtHeart Program back in 2015 with hopes of combining industrial automation components and the simplicity of Arduino.

This robust DIN-rail mountable, Leonardo-compatible controller enables you to take your existing Arduino projects and swiftly transform them into permanent installations. The prototyping area and screw connectors allow you to install your own circuitry and reliably connect to accessories.

In the video below, Industruino co-founder Loic De Buck discusses these key features and more with Davide Gomba. (You can also find an extended version here.)

The team recently created an excellent tutorial showing how you to build an Arduino-based electricity consumption monitor with the Industruino PROTO platform. You can use it to measure AC power of your appliances, including a water cooker, TV, laptop charger, or anything else plugged into a wall socket. Alternatively, you can even use it in your electricity cabinet to evaluate the power consumption throughout your entire house (at least one phase).

The challenge is to measure an AC of a relatively high voltage (220-240V) with a direct current 5V Arduino MCU.

This may seem dangerous, but we will use a non-invasive Current Transformer (CT),  so our Arduino remains galvanically isolated from the high voltage AC.

This prototype is based on the excellent open source project OpenEnergyMonitor. It uses parts of the its standard emonTx hardware and software to report the AC apparent power consumption, based on measurements of a Current Transformer as in the picture on the left. The original project also allows to measure 3 phase and/or real power, but for our prototype here we are only measuring the current of one phase, not its voltage which would require an AC/AC adaptor.

Want to make one yourself using the Industruino PROTO? You can find all the necessary documentation, including schematics and code, on the Industruino blog!


Building a “laser sky” effect generator with Arduino

Bouncing a laser off of a spinning mirror creates an amazing effect with smoke and fog, but YouTuber “Normal Universe” made it even better with an Arduino.

This video starts out by introducing the concept of “laser sky,” which seems like a fun idea. There is, however, a chance that the mirrors wouldn’t spin, potentially pointing a laser continuously at a bystander, possibly damaging his or her eyes. To prevent this, the YouTuber added a photoresistor and LED to sense the spinning mirrors, then programmed an Arduino Uno to cut off the laser if it’s stopped for whatever reason.

Normal Universe goes on to explain the electronic concept behind it as well as the Arduino code involved, so even if this effect isn’t your cup of tea, the photoresistor/voltage divider setup could still be quite useful.

You can find a detailed breakdown of the project in the video below!

Teslapathic! Hackers build a brain-controlled Tesla

Using an electroencephalography (EEG) headset and gyroscopic tracking, researchers have created a mind-controlled Tesla Model S.

Self-driving cars seem to be all the rage these days in technology circles, but, as part of Cal Hacks 3.0, researchers have instead figured out how to drive a car using brain waves. This hack takes the form of an EEG headset that translates brain signals into “stop” and “go” commands, with a head-mounted gyroscopic sensor used to tell the steering wheel how to turn.

A radio link using an Arduino transmits these signals to the car’s new physical controls. This takes the form of linear actuators for the brake and accelerator pedal, and a windshield wiper motor for the steering wheel.

As seen in the video below, it works, but looks slightly terrifying! You can find out more about this particular project here.

(Photos: Devpost)

Teen helps friend with a brain injury communicate again

After an accident, Ethan Kadish was paralyzed. His friend, 14-year-old Jacob Smilg, came up with a simple device to help him communicate.

Several years ago, Kadish was struck by lightning, and lost control over his body. Communication with the world took the form of eye blinks for “yes” and “no,” which gave Smilg an idea for a revolutionary, Arduino Uno-based gadget that could help him communicate with people not familiar with this method.

It uses two pads, which Kadish can press with his head. When pressed, the device displays “yes” or “no” on a small LED screen. This allows him to have conversations in a more natural way, which, as seen in the video below around 4:00 it appears to make him very happy!

You can read more about the project on Make:, and keep up with Kadish’s story and progress on the Team Ethan blog. More pictures and videos can be found on Smilg’s Facebook page.

Arduino Blog 17 Nov 19:38

A wakeup light for kids

In order to convince his kids to stay in bed just a little longer, Maker Ralph Crutzen has created a “wakeup light” using an Arduino Mega and an RGB LED strip.

Those of us that have toddlers know that they can wake up very early. If you’d like to get some more sleep without leaving them unsupervised to dangerously play with your electronics and power tools, then a “wakeup light” could be a good solution.

Crutzen’s system uses an Arduino Mega with a real-time clock to control a strip of LEDs, along with an LCD display to change settings. Besides a reminder to kids to “please stay in bed a few minutes longer,” perhaps a similar setup could be used as alternative alarm clock for adults as well.

You can find instructions for this build on Instructables, or check out the project’s code on GitHub. Finally, if you’d like to print an enclosure to protect humans and electronics, Crutzen used this design.