Posts with «featured» label

Puzzle-locked geocache provides an extra challenge

Using an Arduino Uno and a servo motor, hacker “Cliptwings” came up with a surprise for treasure hunters!

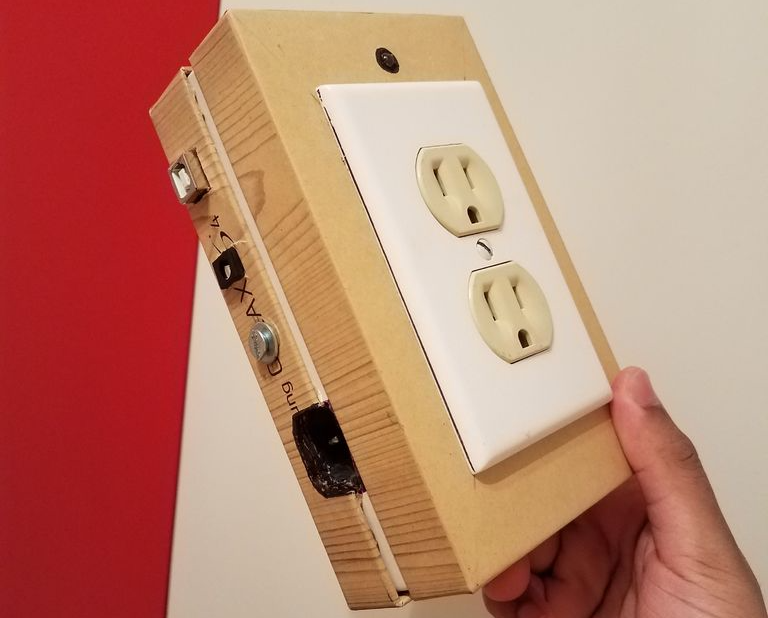
Geocaching is a game where amateur adventurers find caches in different locations using a GPS receiver. Though this can be a fun way to get outside, once you find the storage box, the challenge is pretty much over. Cliptwings decided to take things in a different direction, and made his cache—which importantly contains a battery on the outside—lock until the retrieving party solves a hangman game.

Once this Arduino-based puzzle is solved, the gadget unlocks with a small servo, revealing the contents inside, most likely a logbook!

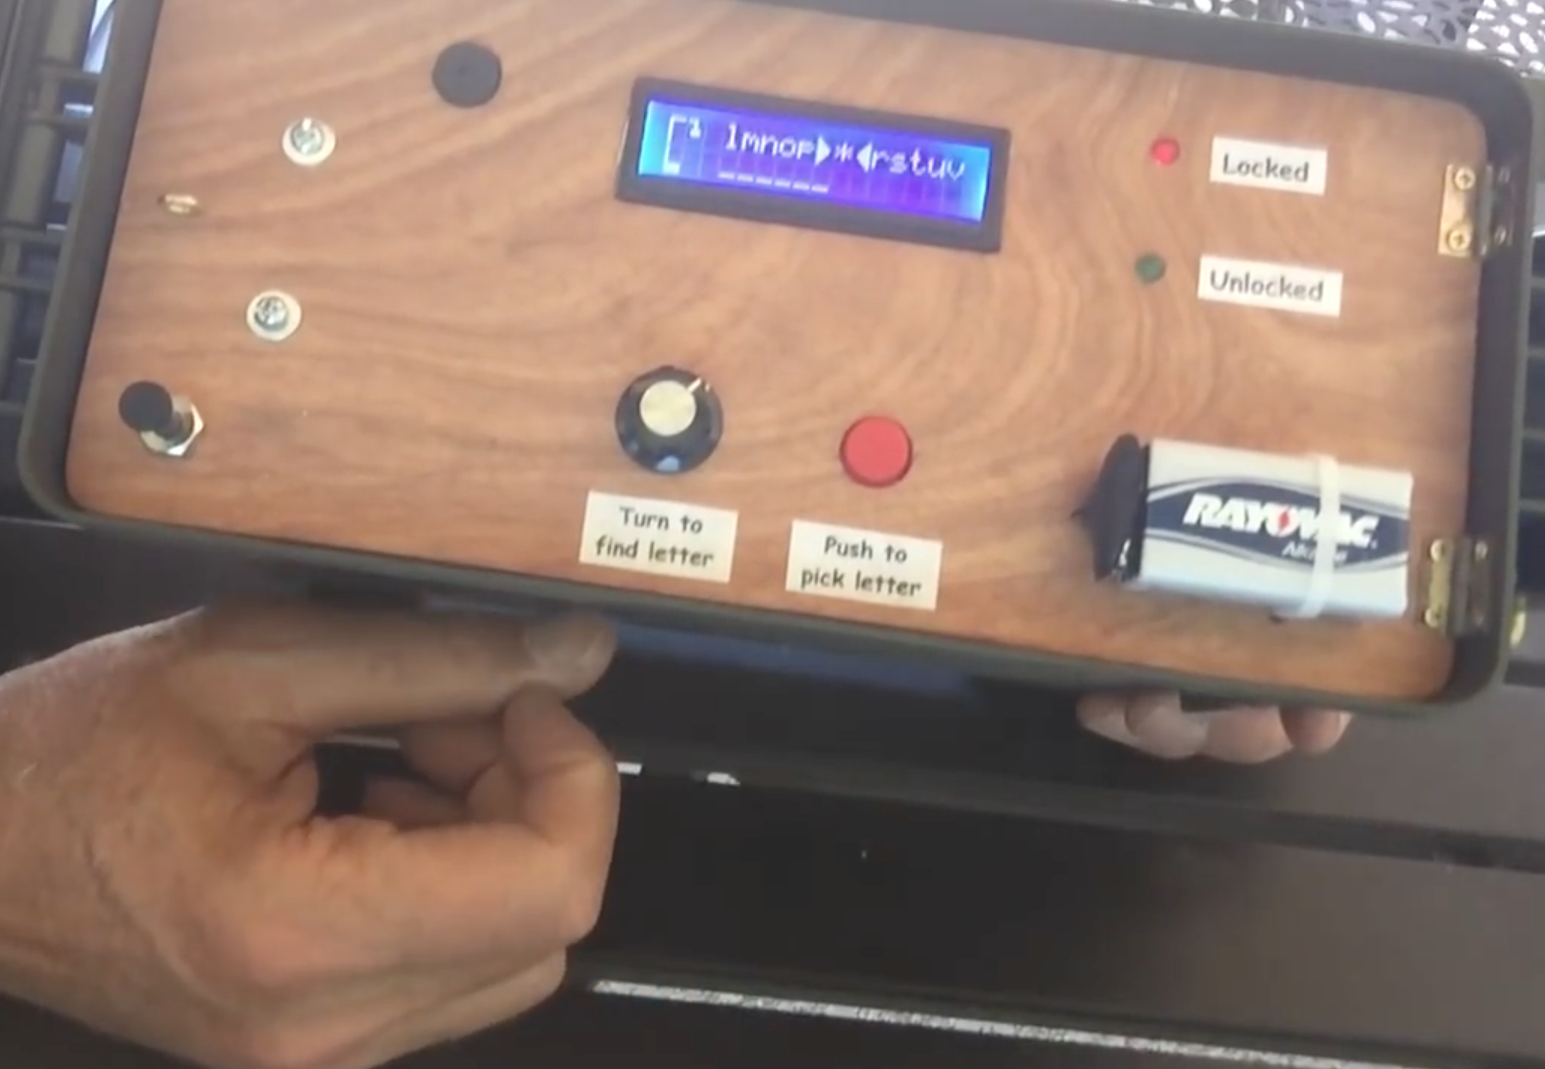
The number of this geocache is GC72AFD. The object of the cache is to play and win a game of hangman in order to open the container. An Arduino is used to store five random words. The player uses a knob to turn to a letter, then presses a button to see if it is contained in the word. When the player gets all the words correct, the box opens. If too many wrong words are guessed, access is denied and the box remains locked.

You can find more info on this device in the video below, or check out Dan Wagoner’s hangmanduino code, a modified version of which powers this box!

A LoRa home environment monitoring gateway

When you’re away from your home, perhaps you’d like to know what is going on there. A camera system is one solution, but is fairly data-intensive and might not be the right method if you’d like to monitor information like temperature and humidity in several zones. For this, Rod Gatehouse decided to build his own LoRa environment monitoring system using an Arduino Mega.

To keep an eye on things, Gatehouse (aka “RodNewHampshire” on Instructables) came up with an excellent LoRa IoT gateway that can be controlled via four push buttons and an LCD screen. This device can take input from remote stations wirelessly, and can put this data online or push it to a user as a text message.

The system enables a homeowner to monitor the home environment via an Internet accessible dashboard, receive periodic SMS environmental notifications, receive real-time SMS alerts when monitored environmental parameters exceed preset thresholds, and log environmental data to the cloud.

For more details on how Gatehouse set up this project and on his design choices, check out his Instructables page here.

Enhance your keyboard with the SlideBar

Using a keyboard and mouse usually gets the job done, but if you want to navigate around a website or video, the process could be a little more efficient. It may not be a big deal to reach over and use your mouse and scroll wheel, but if you had this control on your keyboard, that tiny bit of time savings could add up over the thousands of times you do this.

For this purpose, Imgur user “Electricrelay” added a motorized force feedback slider to his keyboard using an Arduino Nano for control. This easily customizable device can scroll through pages, or switch between open browser tabs or programs. It can also act as a mechanical display, shaking for notifications, or sliding with keystrokes like an old-school typewriter. The Maker even created a plugin for timeline scrubbing in Adobe Premiere.

Check out lots of example animations on the project’s Imgur page here and see it in action below!

Unlock your garage door with a fingerprint

Using an Arduino Micro for control, French teenager “Joebarteam” came up with a way to biometrically secure his garage.

If you need to get into your locked garage, what could be better than using your fingerprint? To this end, Joe’ came up with a system that unlocks his door using a fingerprint scanner, and a bistable relay to disable communication between the scanner and the Arduino if there’s a problem.

It’s a really professional-looking build, and the locking mechanism is especially interesting. Two rack-and-pinion devices plunge shafts into the ground, making the door impossible to open (it has to pull out before going up). If there is an issue with the system, the pins can be physically unlocked and disabled as needed.

You can find more details on the project’s Instructables page here.

The Lake Erie Mamba is a 12-servo snake robot

If you want to build a robot that moves across the ground, the normal options are wheels or legs of some kind. Maker “joesinstructables,” however, decided to do something a bit different. He created a versatile, slithering system, which he calls the “Lake Erie Mamba.”

He put a dozen Arduino Mega-controlled servos together in a reptile configuration to allow the robot to move via serpentine motion (like a normal snake), rectilinear motion (like a worm), or sidewinding (which snakes use in shifting terrain). It can also twist itself into a wheel and roll in this rather unnatural, though quite interesting way.

The Lake Erie Mamba contains 12 segments, each consisting of a servo motor, a C-bracket, a side bracket, a wire clip, and a set of LEGO wheels. The reconfigurable robot is not only controlled using a four-button key fob remote, but can move about autonomously via an IR sensor as well.

You can see more of this build on its Instructables page here and in action below!

Scare your friends with a 3D-printed animatronic eyeball

With October still six months away, you may not be thinking about Halloween decorations just yet. However, this Arduino-based ocular assembly could make for a spooky yet simple prop!

There are few things more unnerving than an eyeball or three looking at you from some concealed position—such as under clothing as in the project’s video. If you’d like to scare friends, family, or random visitors, Maker Will Cogley has the perfect solution with his 3D-printed animatronic eye and eyelid mechanism.

A joystick moves the eyeball around, while a small push-to-make switch blinks the eye and another potentiometer adjusts how wide open the eyelids are by default. The device itself, which can be controlled with any Arduino board capable of supporting four servos, took him a day to design and build, and should take much less time using his instructions, code, and STL files.

Want to create your own? You can find more details over on Cogley’s Instructables page here.

Teenage Maker builds his own Arduino drone

When most people decide they’re going to build a quadcopter, they likely go to their favorite online retailer or hobby shop, and get the correct parts to connect together.

17-year-old Maker Nikodem Bartnik instead decided to customize things further, programming an Arduino to act as his flight controller, and constructing a transmitter (or “pilot” as he refers to it) from scratch. Finally, he attempted to 3D print the frame, but after some difficulty chose to just buy one.

The rest of the electronics consisted of four motors, four ESCs, some propellers, two nRF24L01 radio modules, an MPU-6050, a LiPo battery, and a bunch of other small components. You can see more of Bartnik’s project over on Instructables, as well as check out “Ludwik” (named partially as a nod to Nikodem’s friend “lukmar”) flying quite nicely in the video below.

A robotic dancing teapot

You may have seen robots that wobble around, such as BOB, OTTO and ZOWI. Though their locomotion style of shifting the unit’s weight on huge feet is clever, they all share a rather similar look. French computer scientist Paul-Louis Ageneau decided to do something about this and created his own biped in the form of a dancing teapot a la Disney’s Beauty and the Beast.

To accomplish this, he attached four servos to the robot’s hips and ankles, which were connected to an Arduino Pro Mini and powered by a 9V alkaline battery. All the electronics are housed inside the 3D-printed teapot. It’s a neat build in itself, and in a separate post he goes over how to play music on an Arduino, which should make this little guy even more entertaining!

You can find Ageneau’s original blog here, as well as the Disney-like bot’s code on GitHub.

An Arduino Final Countdown Timer

While playing a game called slither.io, Nathan Ramanathan was asked by his father to turn on a wet grinder for “exactly 45 minutes.” As explained, this device uses stones to grind rice into dough, producing material for delicious-looking Dosa cakes.

Deliciousness aside, Ramanathan would rather have the grinder stop automatically than wait around for it, and came up with his own Arduino Uno-based outlet timer controlled via smartphone over Bluetooth. As a bonus, it plays “The Final Countdown” by Europe when only a few seconds remain. 

His write-up includes some discussion about multitasking and the perils of using the delay() function, so be sure to check that out if you’d like more information. Also, when dealing with outlet/mains power, use extreme caution and get help from someone qualified if needed.

DIY panoramic thermal imaging

Using an Arduino Nano and two rotary stages, this Maker hacked together a panoramic thermal imaging camera.

After ordering and finally receiving a thermopile (infrared thermometer) in the mail, the author of this project set to work to construct his own scanning thermometer. This type of setup acts like an IR camera, but instead of taking one instantaneous picture, it stores thermal data points that are then resolved into a coherent image.

Though the panoramic results can be fantastic, since the thermometer has to be rotated to each point individually via stepper motors on the rotary stages, a single image capture can take over an hour.

You can find more details of the build here.