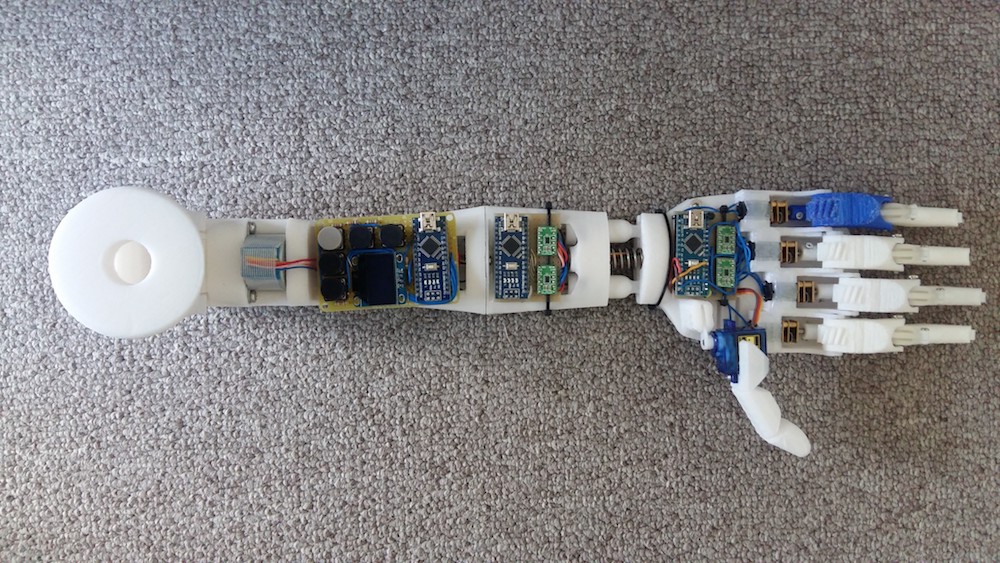
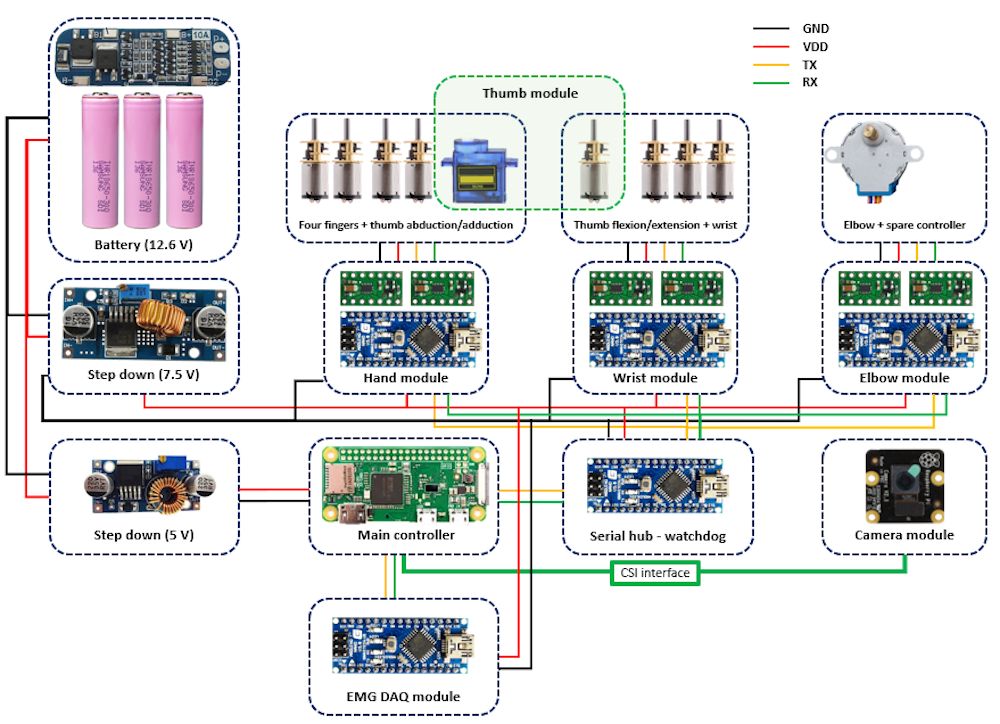
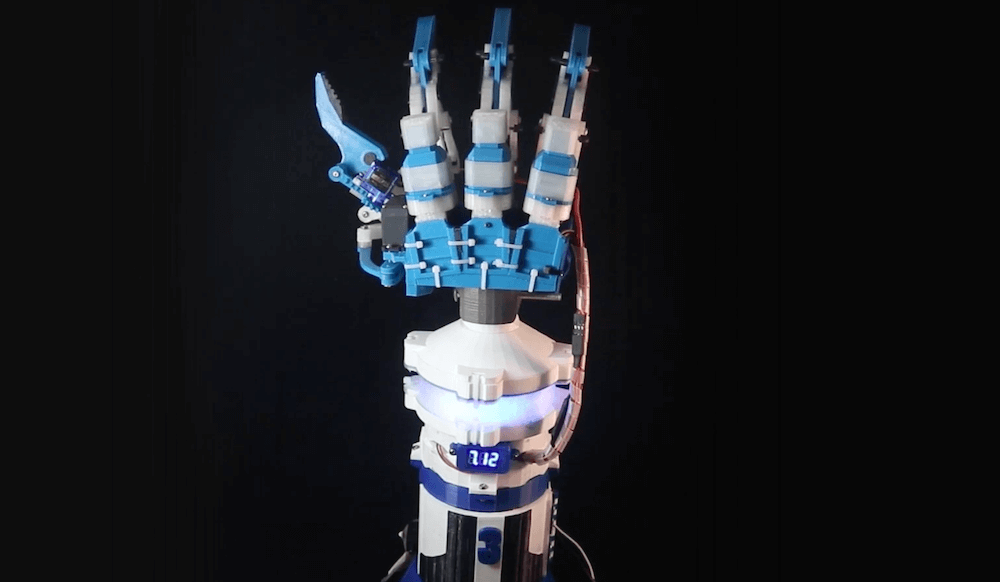
To help a patient in his country with a congenital limb deficiency, Buzi Nguyen has designed a 3D-printed transhumeral—above the elbow—prosthesis prototype. The device features 10 degrees of freedom, including independent control of four fingers and a thumb, along with movement capabilities for the wrist and forearm.
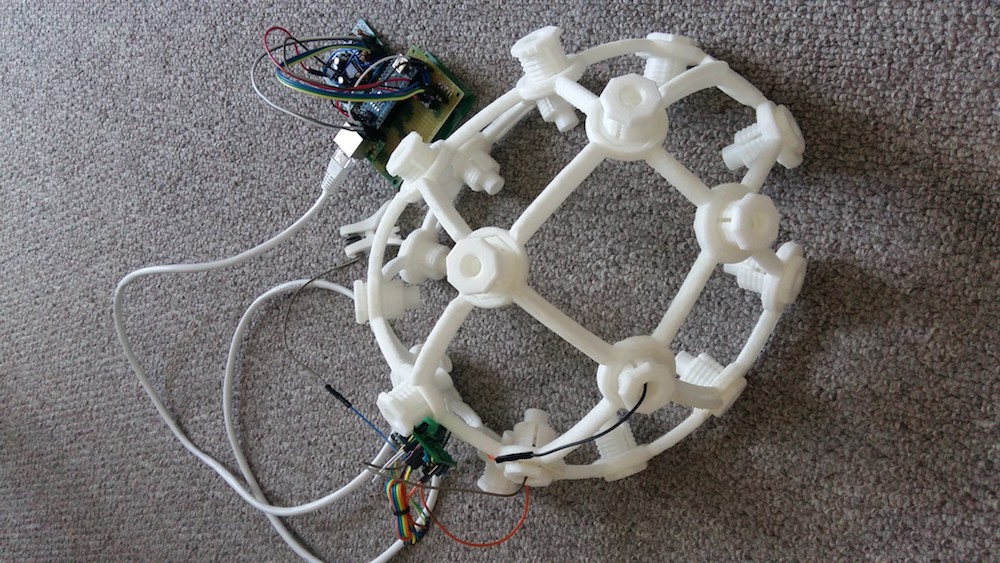
The prosthesis is powered by a number of Arduino boards and a Raspberry Pi, and equipped with computer vision to track and choose grip patterns for object handling. It can also potentially be operated via brain-computer interface and electromyography.
A demonstrate of all the currently supported features can be seen in the video below.
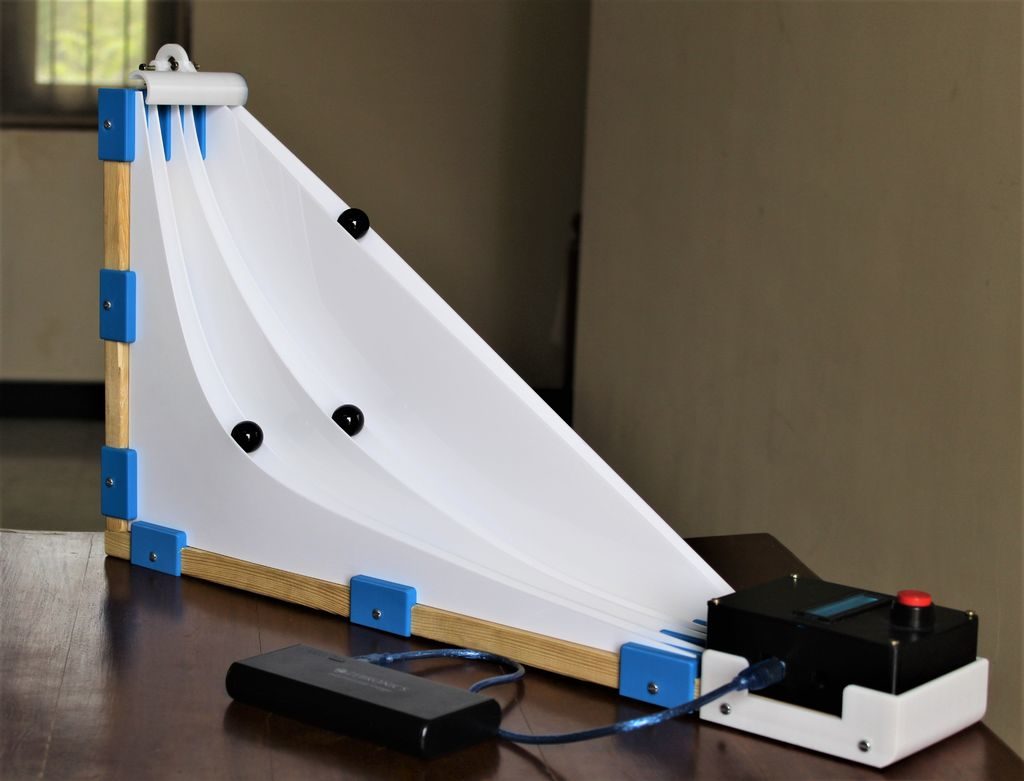
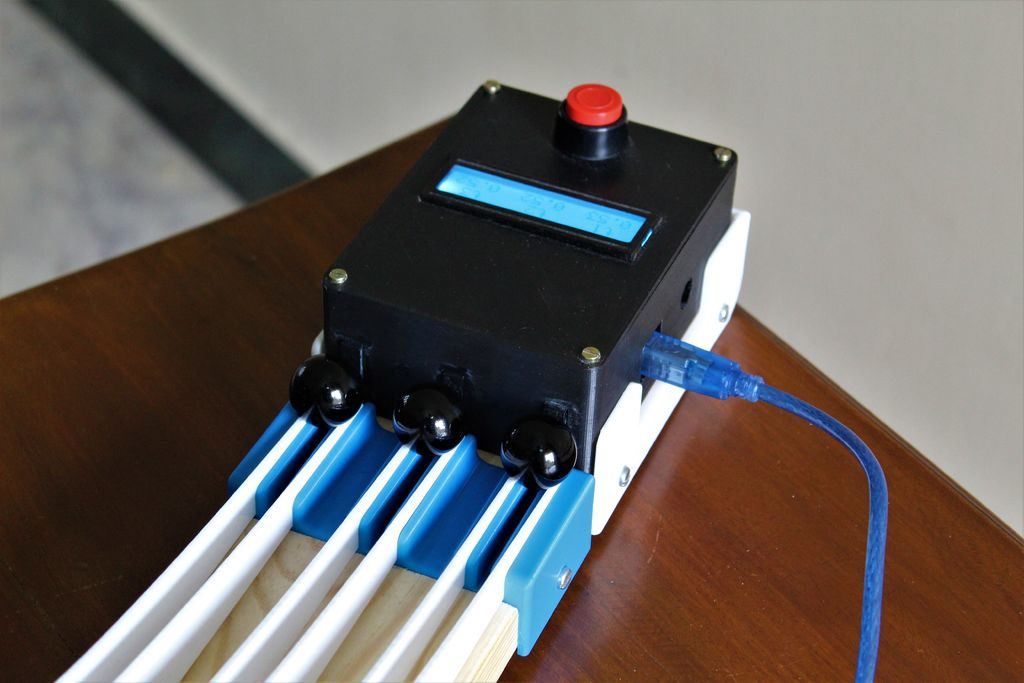
As described in this project’s write-up, “The brachistochrone curve is a classic physics problem, that derives the fastest path between two points A and B which are at different elevations.” In other words, if you have a ramp leading down to another point, what’s the quickest route?
Intuitively—and incorrectly—you might think this is a straight line, and while you could work out the solution mathematically, this rig releases three marbles at a time, letting them cruise down to the Arduino Uno-based timing mechanism to see which path is fastest.
The ramps are made out of laser-cut acrylic, and the marbles each strike a microswitch to indicate they’ve finished the race. The build looks like a great way to cement a classic physics problem in students’ minds, and learn even more while constructing the contraption!
Learning about how computers work and coding skills will be important for future generations, and if you’d like to get your kids started on this task—potentially before they can even read—the Ifs present an exciting new option.
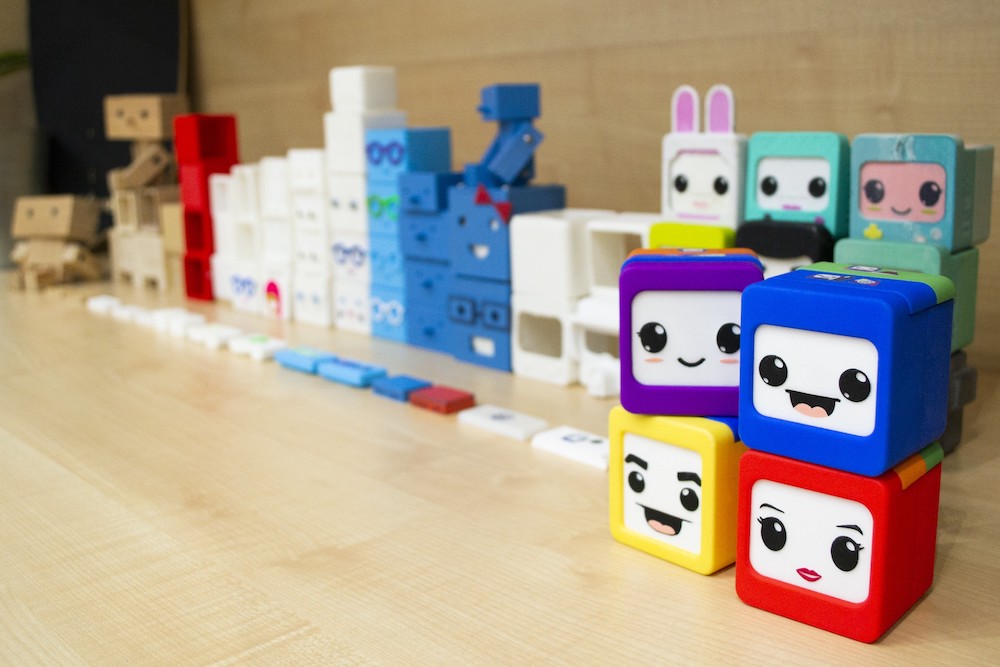
The Ifs are a series of four character blocks each with their own abilities, such as reproducing sound, movement, or sensitivity to light and darkness.
Children can program the blocks to accomplish tasks based on instructions that snap onto the top of each using magnets, and the whole “family” can communicate and work together to accomplish more advanced actions as a team.
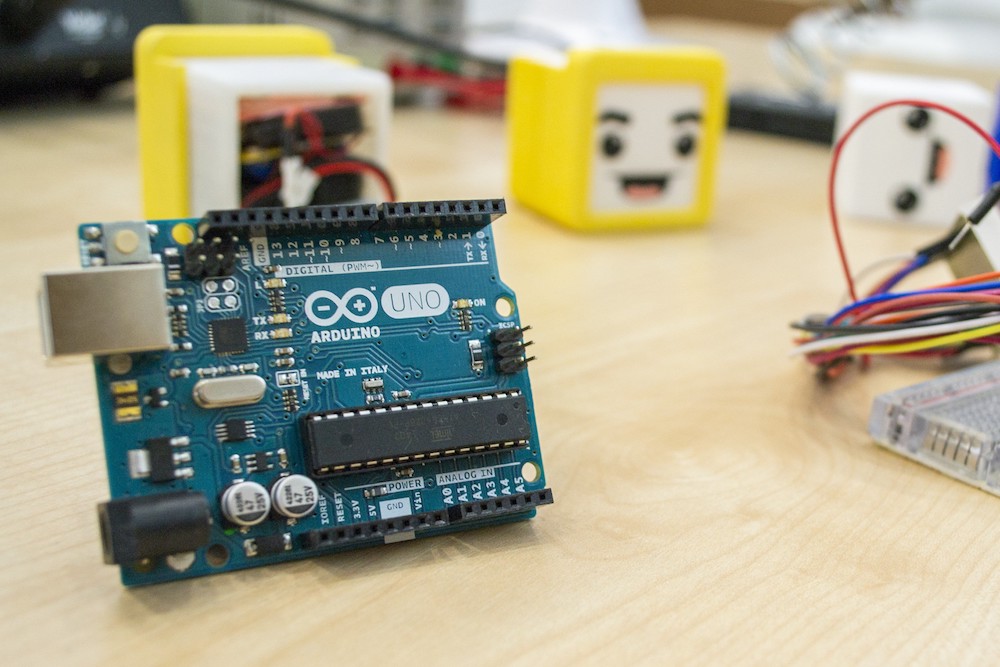
As outlined in more detail on this project page, the devices were developed using Arduino technology, and you can sign up here to be notified when they’re ready for crowdfunding.
The Ifs are full of sensors and actuators but they need some instructions in order to function.
Programming is as simple as placing physical blocks in their heads with the help of magnets. No screens are involved. Each block has a different image serving as an intuitive symbol to represent an instruction. This makes the game suitable for children from the age of three, even before learning to read or write.
We only need different color pieces that are placed on their heads. The different color pieces are instructions that are combined as if it were a code, from being able to light them when it’s dark to making them communicate with each other. This allows kids to play with loops, statements, algorithms while also inventing their own stories. Their imagination is the only limit.
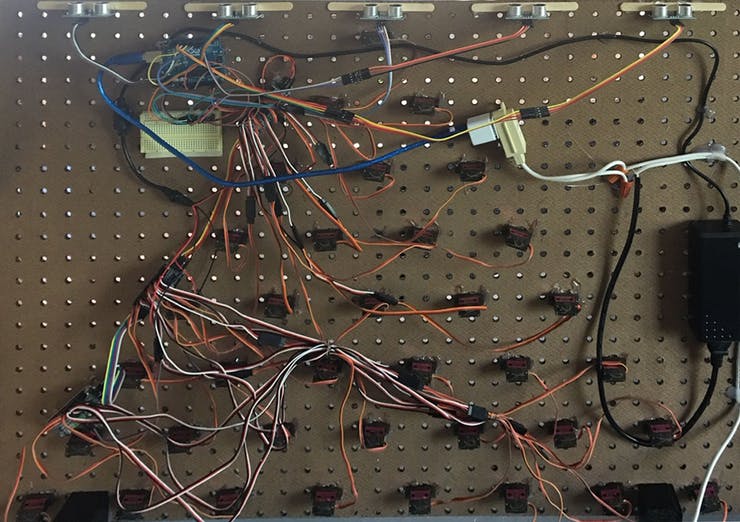
The device features 36 servo motors arranged on a pegboard to produce various patterns, and can even be used in an interactive mode where it follows a person’s hand around with the help of ultrasonic sensors.
Everything is driven by an Arduino Uno along with three 16-channel PWM control modules, and popsicle sticks show the servo movement to onlookers.
Details, including Arduino code, can be found in the Domke’s write-up. To really appreciate this project’s visuals, be sure to take in the coordinated movements in the video below!
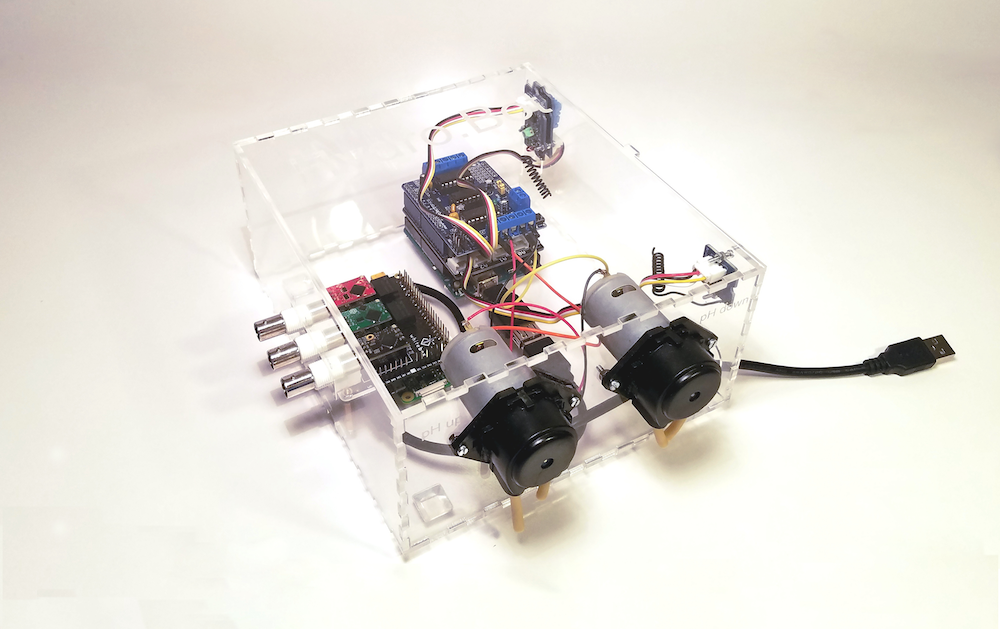
Hydroponics seems like a great way to get fresh vegetables at a cheap price, but as Scott Paterson and Max Knight found out, doing this type of gardening well can take a lot of work. To help take the guesswork and hassle out of the process, the duo has created HydroBot — an automated garden minder that uses an Arduino Leonardo along with a Raspberry Pi Zero for control.
HydroBot allows you to remotely monitor your setup, and automate tasks using wireless switching for lights and fans, as well as two pumps built into the apparatus’ housing to add nutrients to your grow-water.
The device is currently available on Kickstarter, and is also open source project, so you’ll be able to fix any bugs or even modify its behavior as needed!
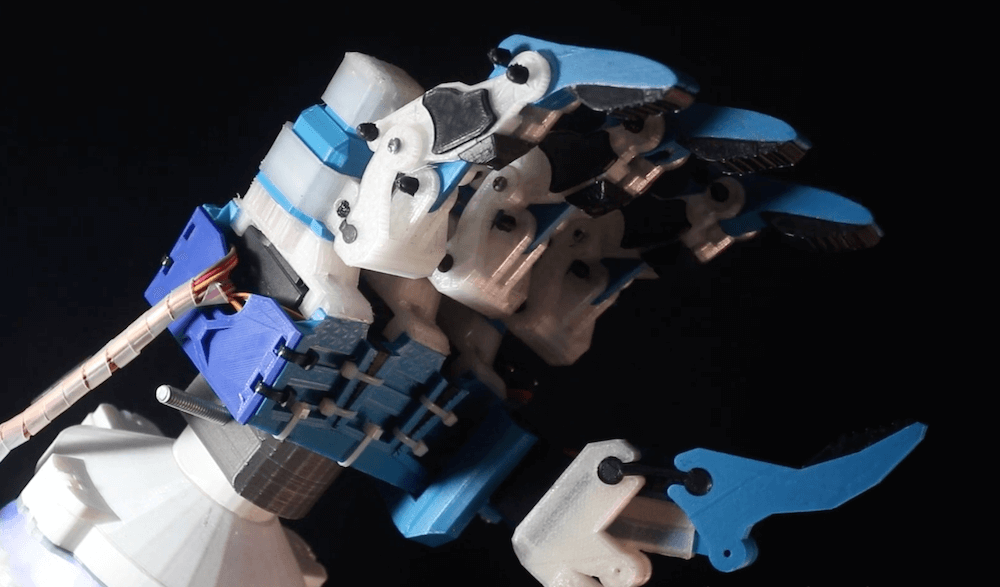
Gray Eldritch (AKA The Technomanc3r) has been working on a robotic hand for some time now, and has settled (so far) on a design with three independent servo-actuated fingers and a thumb. He’s also implemented a wrist assembly to rotate it back and forth, with an Arduino Uno hidden inside for an entirely self-contained gripper unit.
Each of the three fingers is controlled by a single MG996R servo, as is the wrist, while the thumb adds a second SG90 servo to allow it to move on two axes. The fingers are modular, so they can be swapped out as needed, and you even change the thumb position for ambidextrous operation.
It remains to be seen what Eldritch plans to do with the gripper, but it looks brilliant by itself in the video below.
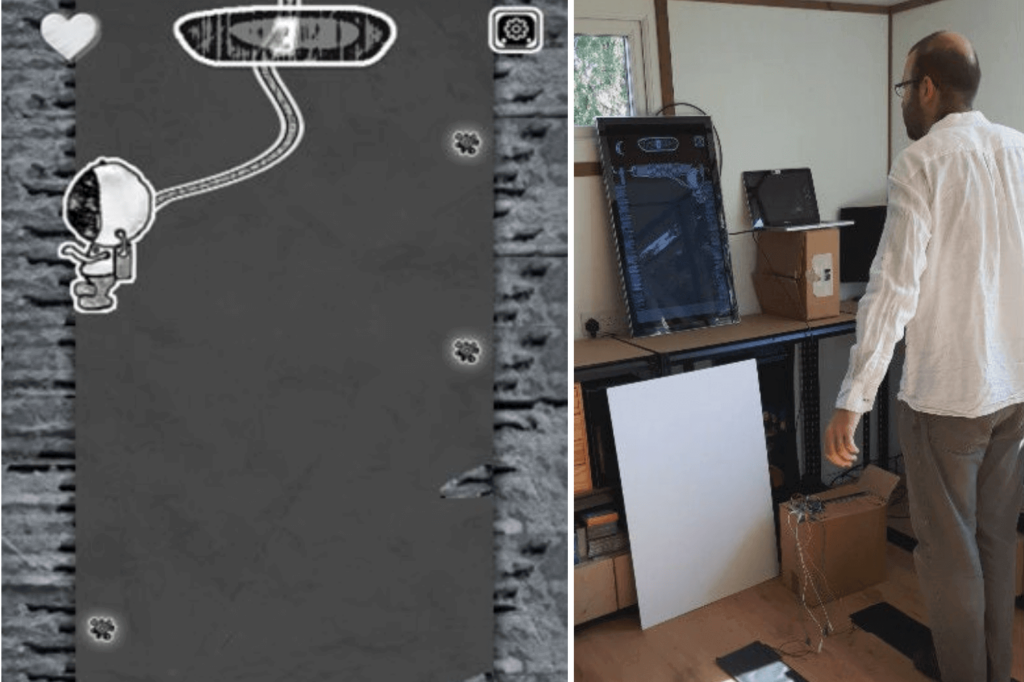
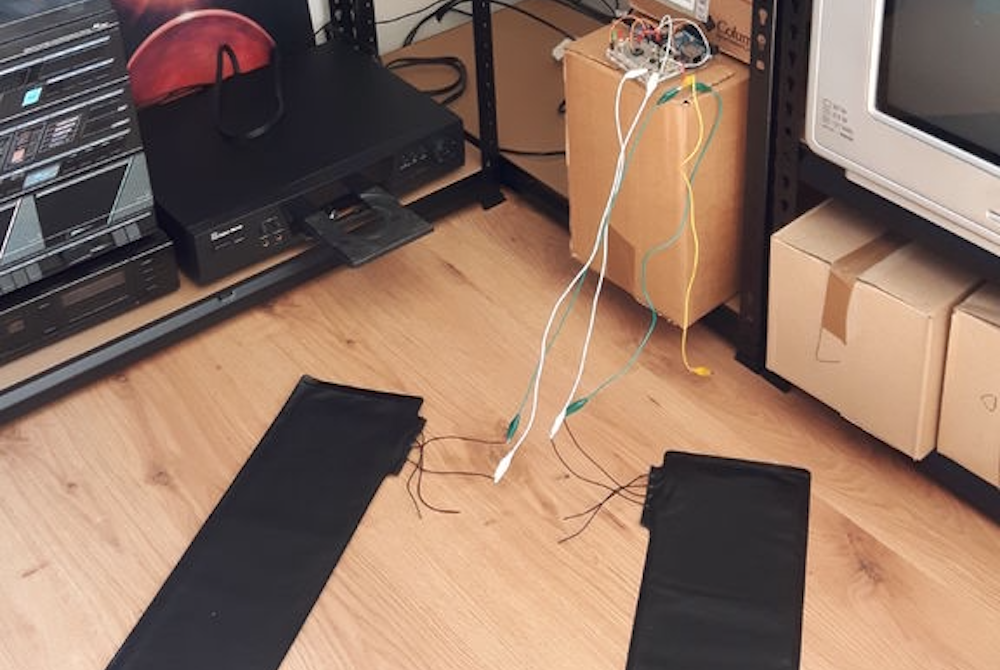
Steven Goodwin wrote a JavaScript game called Space Bounce where a character in a space suit has to jump from one side of a mine shaft to another, collecting roughly star-shaped objects, while avoiding spikes. It’s a simple yet rather entertaining game, and since there’s really only one type of interaction (jumping) he decided to make things a bit more interesting by adding a physical controller.
His custom device employs a pair of pressure mats on the ground to sense a player standing on one or the other, and when one’s feet leave the mat, the on-screen player jumps to the opposite wall. Players must then recover and balance on the other mat, and jump back when needed.
An Arduino senses this interaction using the standard Firmata firmware, whilee a PC running the Johnny Five library and a Node server passes commands on to the game itself via WebSockets.
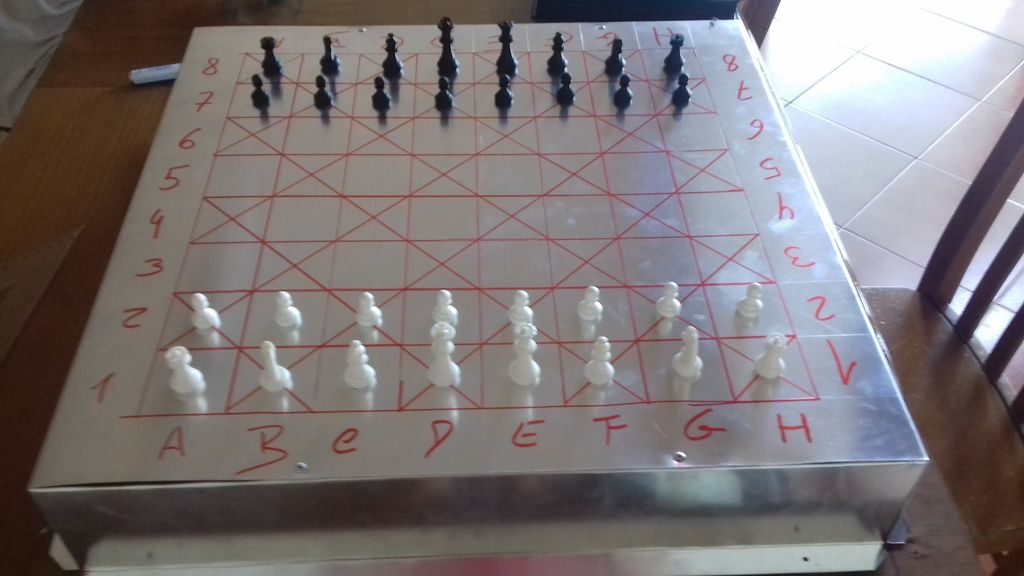
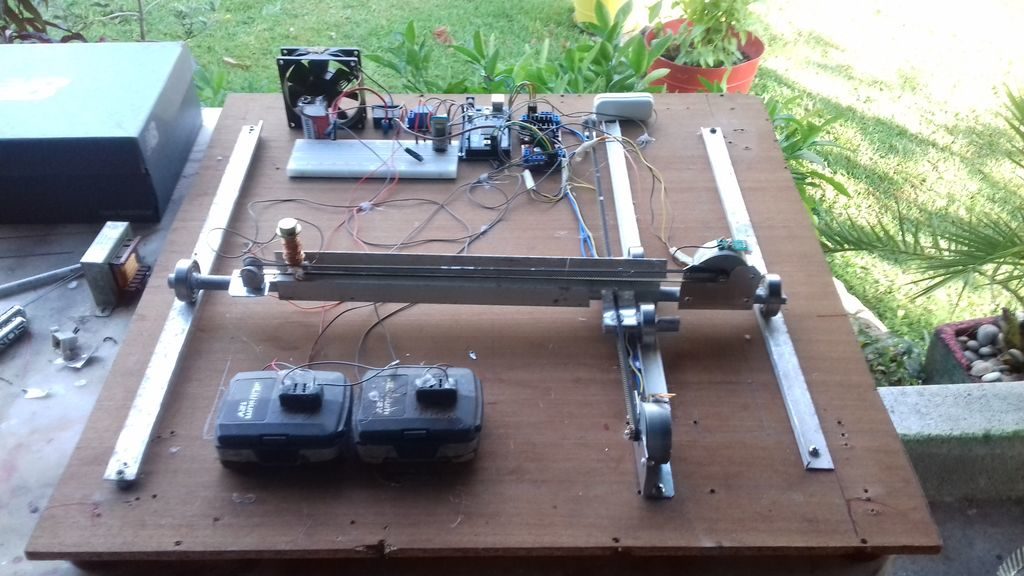
Consider the game of chess. It’s a game that flexes one’s “mental muscles” rather than relying on brute strength, but if you don’t have the ability to actually move the pieces, things get a bit more challenging. If you’re playing against another human opponent, he or she could move for you based on what you say, but with this chess machine by ‘diyguypt,’ the board does the job for you!
The system uses an Android-based Arduino Voice Control app to take in commands, and passes this information along to the Arduino Mega concealed under the board via an HC-05 Bluetooth module. It then controls a pair of stepper motors to move an electromagnet into place, which pull the pieces across the grid as if by magic!
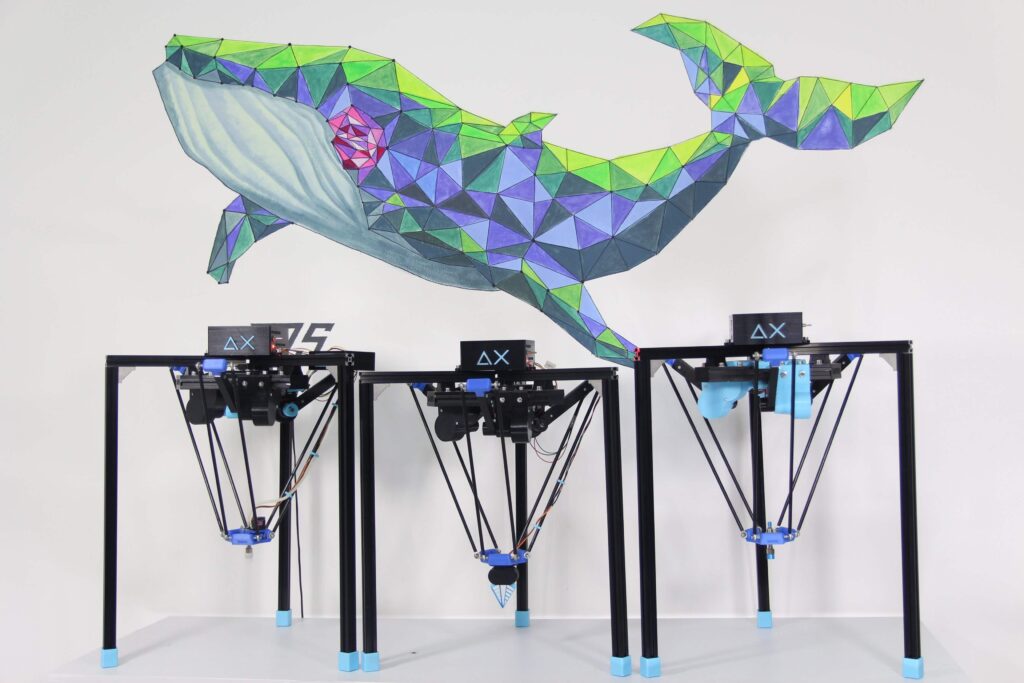
If you’ve ever seen a delta 3D printer work, you’ve certainly been amazed at the careful coordination of three motors to accurate position a carriage. While impressive in this role, delta robots can be used for much more, from laser engraving, to pick-and-place operations, to automated phone testing, or even playing the piano.
To make these systems a bit more accessible, Doan Hong Trung has developed an open source delta robot — dubbed Delta X — based on an Arduino Mega and a RAMPS 1.4 board that can do all of these jobs and more.
Details on the modular kit are available here, along with many more clips of it in action. It’s slated to debut on Kickstarter soon, and you can sign up on deltaxrobot.com to be notified when it launches. Design files for the build will be released when successfully funded.
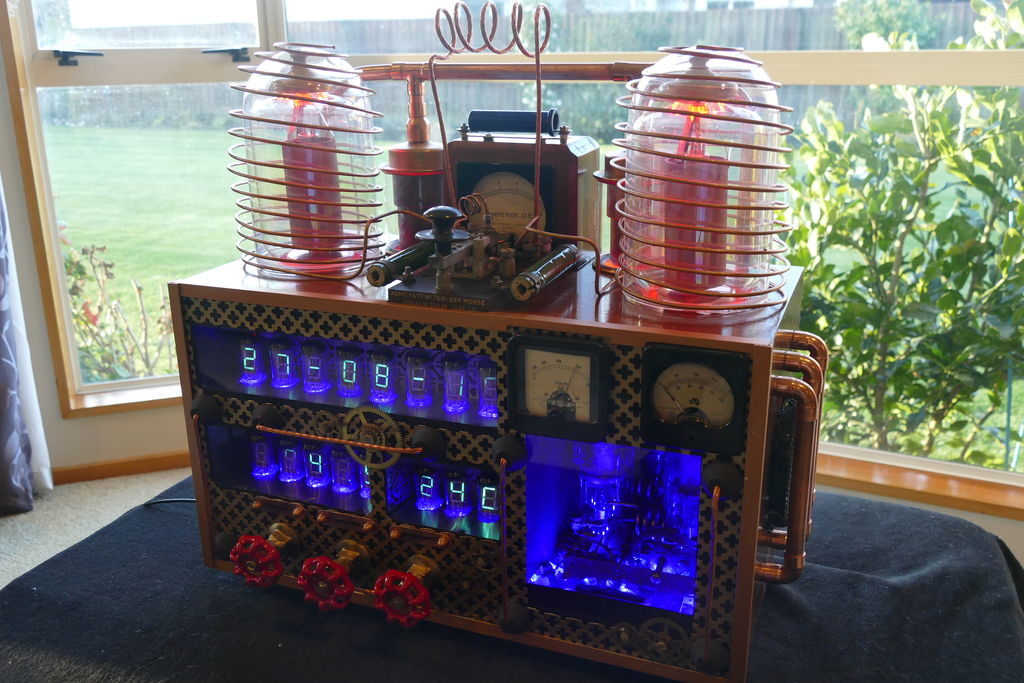
If you want to create your own steampunk/mad scientist entertainment center, it would be hard to top this radio/clock setup by Christine Thompson.
Her device displays the time and date on eight VFD tubes, arranged on top of another eight that show the radio frequency and volume, along with the ambient temperature and pressure read by a BMP280 sensor.
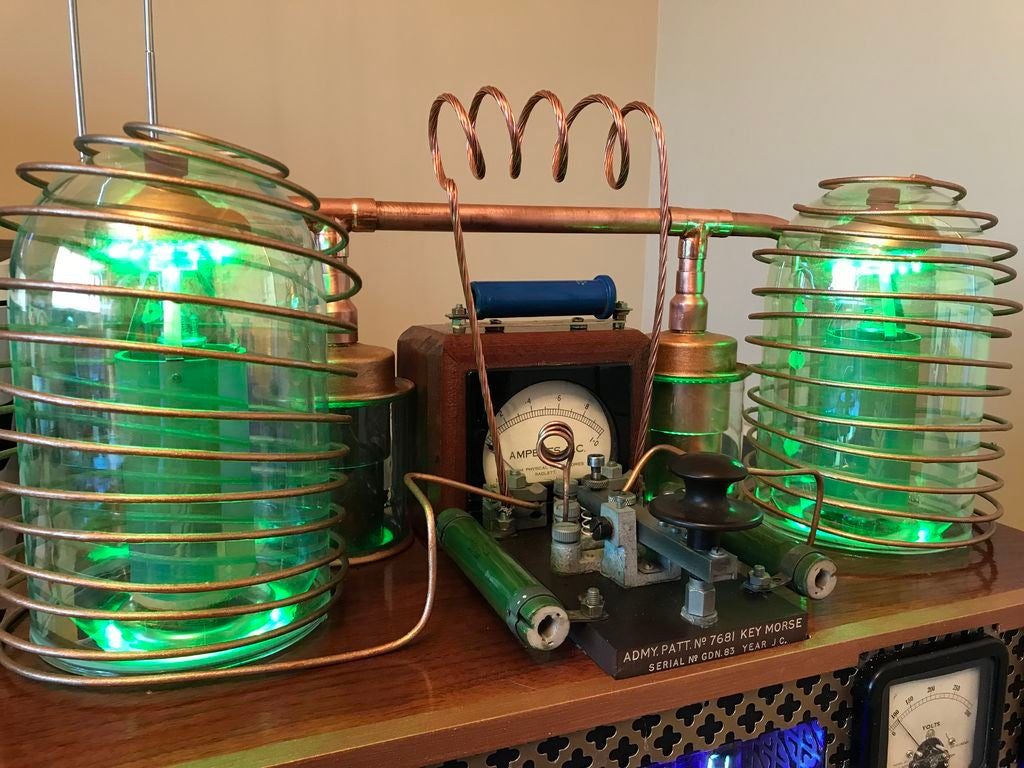
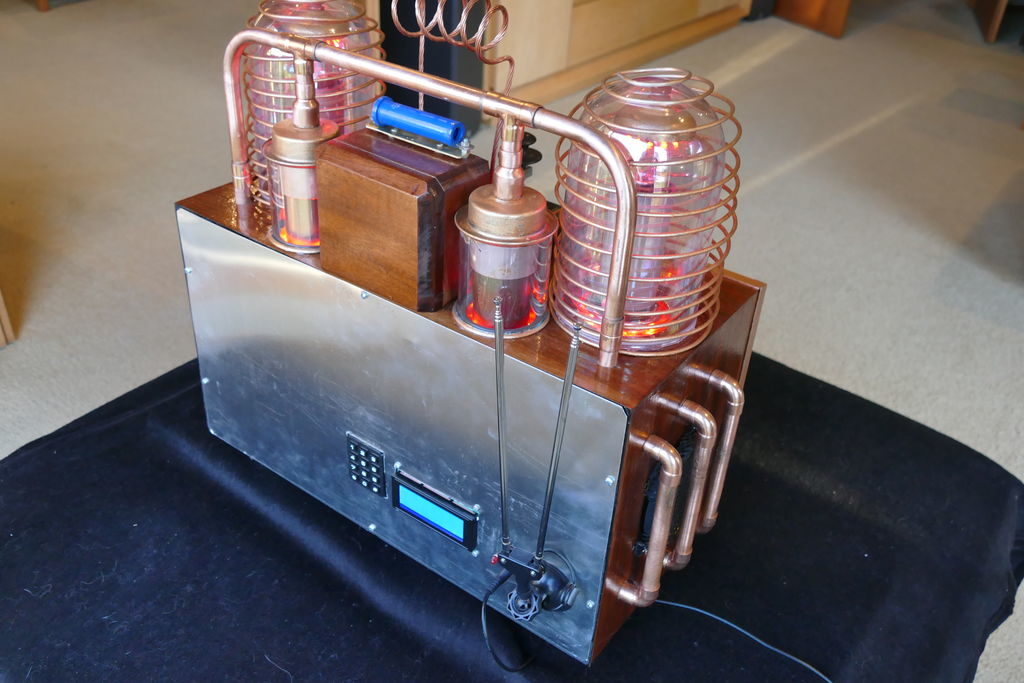
A wide variety of lighting effects, motor-driven clockwork, coils, and even an automated Morse key cement its steampunk theme, and it’s nicely housed in a restored radio cabinet.
The project is controlled by a pair of Arduino Mega boards linked together via I2C, and Thompson’s write-up has all sorts of tidbits for potential retro-display builders.
This project is without doubt the most complex I have undertaken, with sixteen IV-11 VFD tubes, two Arduino Mega cards, ten LED Neon light circuits, a servo, an electromagnet, two MAX6921AWI IC Chips, five DC power supplies, a HV power supply, two DC Volt meters, a DC Amp meter, FM stereo radio, 3W power amplifier, LCD screen, and keyboard. Apart from the above parts list, two software programs had to developed from scratch and finally the construction of the entire radio required about 200 hours of work.
I decided to include this project onto the Instructables site not expecting members to reproduce this project in its entirety but rather to cherry pick the elements that where of interest to them. Two areas of particular interest to the site members may be the control of the 16 IV-11 VDF tubes using two MAX6921AWI chips and its associated wiring, and the communications between two Mega 2650 cards.
The various components included into this project have been sourced locally, except the IV-11 tubes, and the MAX6921AWI chips both obtained on EBay. I wanted to bring back to life various items that would otherwise languish in boxes for years. All of the HF valves where sourced with the understanding that all where failed units.