Making the threat of radiation visible with lightmapping
Even three decades after the Chernobyl disaster and five years after the incident at the Fukushima Daiichi power plant, each of the surrounding communities are still impacted by dangerous radiation levels. However, since the source of the problem is invisible, the relative risks remain difficult to communicate. As a result, the motivation and urgency to help those affected continue to diminish.
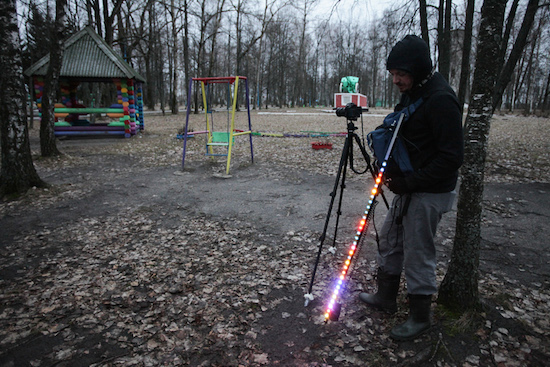
In order to visualize the threat, photographer Greg McNevin has mapped real-time measurements using long-exposure photographs of areas in Fukushima and Russia’s Bryansk region. To do this, McNevin and his team combined a custom Geiger counter with an LED stick and an Arduino-based controller. The detection device picks up radiation levels as it is moved around and outputs this data as an analog signal, which is then converted into white, orange or red lights — based on the severity of the reading.
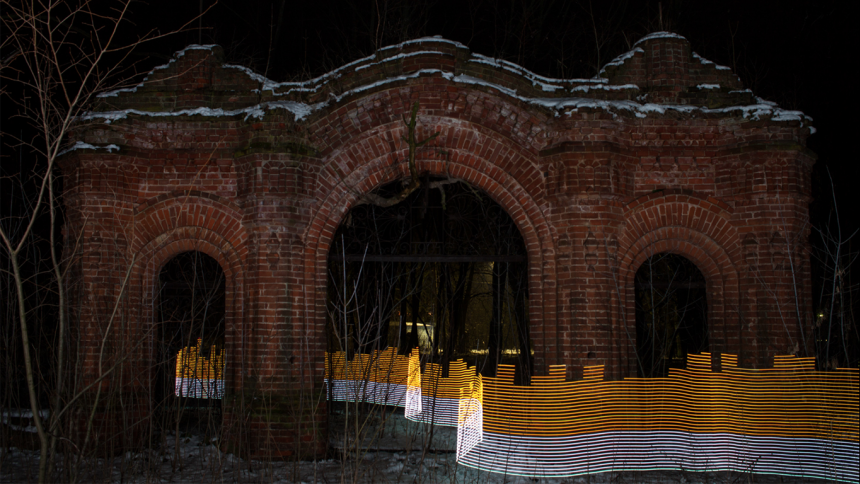
Walking through a photo with shutter open anywhere from 20 seconds to five minutes allows us to create dynamic walls of undulating light, highlighting contamination in the environments it exists.
White shows levels under 0.23uSv per hour (1mSv per year), which is the Japanese government’s guideline for decontamination (which assumes people spend 8 hours a day outside and 16 hours inside). Russia’s official “norm” level is roughly the same, 0.20uSv/h.
Orange shows contamination levels elevated above this, up to 1.0uSv per hour (roughly 5mSv per year) – a range where protective measures to minimise radiation exposure should be considered. Protective measures can include resettlement, decontamination, special health services, food controls, etc. Russian communities are obligated to be resettled above this level.
Red shows radioactivity greater than 1.0uSv per hour (upwards of 5mSv per year) – a level where protective measures to minimise radiation exposure are necessary.
Using this tool in areas affected by Chernobyl and Fukushima, we found that places decontaminated by the authorities consistently exhibit radiation levels elevated above official guidelines. We also found that using the same scale, places in Russia’s Bryansk region demonstrated comparable levels of contamination now, 30 years later, as places in Fukushima do today.
As the photographer explains, this project is not a critique of the government’s decontamination efforts, but rather a demonstration of the long-term effects radioactivity has on the environments and those living within them. Be sure to check out all of McNevin’s photos, as well as learn more about the project here.
(Photos: Greg McNevin/Greenpeace)