Posts with «featured» label

Turn your old cellphone into a smartwatch

Do you have an old cellphone lying around somewhere? Don’t know what to do with it? Time to blow off that dust and convert the ‘dumb’ device into a smartwatch? This is exactly what Tinkernut has done. His DIY wearable not only tells time, but connects wirelessly to his smartphone over Bluetooth and notifies him of incoming calls and text messages via light and vibration.

The build itself uses an LCD screen and vibrating motor from a Nokia 1100 along with an Arduino Pro Mini to drive the system. A 3.7V 1100mAh rechargeable battery powers the gadget. All the electronics are soldered together to a perfboard, and housed inside a 3D-printed case.

Have an obsolete phone you’d love to repurpose into modern-day tech? Tinkernut has put together a detailed three-video series that explains everything from extracting the display, to connecting it to the Arduino, to creating an app in the MIT App Inventor. Admittedly, this project kept things simple; however, there are plenty of other features you can add, including a pedometer to count steps or a real-time clock module so you can keep time without having the watch tethered to your mobile device.

Getting Started with Johnny-Five for IoT (Part 1)

Interested in the world of hardware hacking, but feeling left out because you just don’t have the time to learn another language? Or maybe you aren’t comfortable using Sketch to program? Have no fear, you can easily use JavaScript to program boards like Arduino and Genuino. Yes, just JavaScript!

In this series of video, PubNub’s Tomomi Imura shows you how to start hacking an Arduino with Node.js using Johnny-Five, a JavaScript Robotics Framework.

Part one of this tutorial covers:

  1. Setting up a board.
  2. Building the Hello World of hardware, a LED blink.
  3. Writing your Johnny-Five code to make it blink programmatically.

Enjoy the tutorial!


Lawn Da Vinci is an open-source, remote-controlled lawn mower

Inspired by the one seen in Honey, I Shrunk The Kids, Blake Hodgson has built a remote-controlled lawn mower of his own dubbed ”Lawn Da Vinci.”

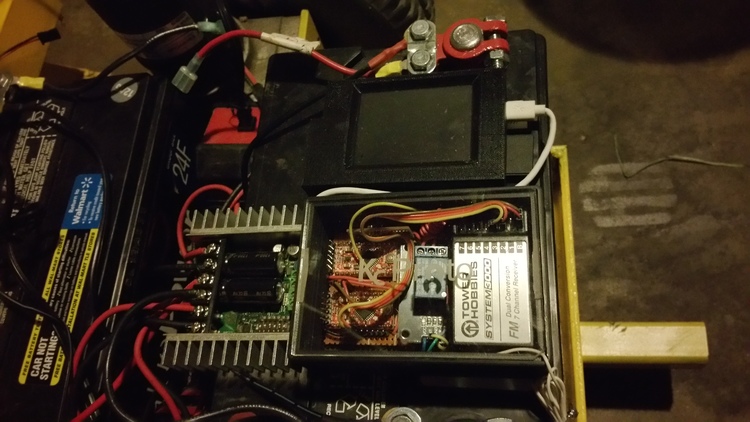
The robotic machine’s frame is made from angle iron and steel, while its wheels and motors were taken from a mobility scooter. Power is supplied by a pair of 12V car batteries wired in series, and it’s driven across the yard with an RC airplane remote.

The Lawn Da Vinci has two Arduino Pro Minis and a Raspberry Pi for a brain–one Arduino is used for the motors and RC signal, the other for the kill switches. Meanwhile, the Raspberry Pi is tasked with streaming video from an attached webcam to his phone.

To improve reliability and reduce complexity, the motor driver now gets its signal directly from the RC receiver once it goes through the two relays controlled by the Arduino, which is always looking for a good signal. The Arduino and Raspberry Pi are powered off of a disassembled car cigarette lighter USB charger which takes the 12v of the batteries down to a clean 5v. I originally had it powered off of the Sabertooth but have better reliability this way. There are many ways to kill the motors.  You can turn the remote off, push the trainer button, left with the right joystick, or push a button separate key fob and all of these will kill it.

Rather not to push a mower around all summer long? Check out Hodgson’s entire project–complete with its code–on his blog here, or read more on Hackaday.

OMG, this DIY split flap display is awesome

Let’s face it, there’s something magical about split flap displays. Common throughout older airports and train stations, the electromechanical devices are used to show changeable alphanumeric text (e.g. arrival and departures), fixed graphics, or in Jonathan Odom’s case, Internet slang.

With three-letter abbreviations like BRB, LOL, OMG and SMH commonplace in today’s smartphone and online conversations, the Maker decided to bring text and animation back to its mechanical roots with his own split flap display. As you can see in the video below, an arcade button under each frame enables him to cycle through all 26 letters to spell out his thoughts in acronym form, while a fourth frame reveals an animation of the very first cat video (by Eadweard Muybridge).

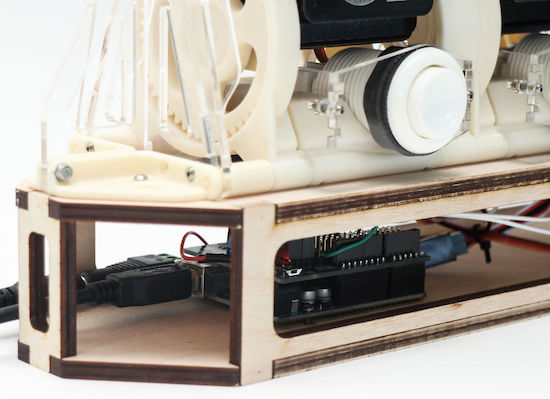
Structurally, the DIY gadget consists of 3D-printed parts, laser-cut acrylic for the tongue, flaps, brackets, wheels and spars, and plywood for the base. Everything is assembled by hand using screws and nuts. In terms of electronics, an Arduino Uno and Adafruit Motor Shield control a set of servo motors.

The configuration I built has four modules, but you could build as many as you want and connect them. The Arduino motor shield has 16 channels, so if you want more than than that you’ll have to find another means of controlling the rotation.

Want one for your desk? You can find all the necessary files and code on its project page, and see the final product in action below!

Maker uses Arduino to get revenge on his noisy neighbors

For our throwback project of the week, we stumbled upon a YouTube video that dates all the way back to 2012. And while the viral clip itself (which has over 1.4M views) may be a few years old, the problem it solves is timeless.

Unfortunately, you don’t get to choose your neighbors; however, what can choose is how you put up with them. After growing tired of the folks next door failing to turn down their stereo, Maker “Jamil” came up with an ingenious way to put an end to the noisy behavior: fight the loud music with, well, even louder music.

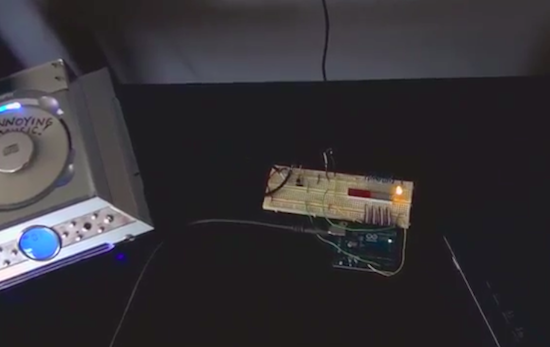
As you can see in the video below, Jamil programmed an Arduino Uno with a microphone sensor to detect whenever the nearby resident’s tunes exceeded his preferred threshold. When this occurs, it triggers a CD player to play incredibly annoying music through his massive speakers. His track of choice? “Who Let the Dogs Out?” by The Baha Men.

Maker builds his own Ghostbuster proton pack

Anyone who has ever watched Ghostbusters is surely familiar with the iconic proton pack–a handheld wand connected to a backpack-sized particle accelerator used for capturing ghosts. With a remake of the ‘80s flick about to hit theaters, what better time for a DIY prop equipped with full-featured user control and Hollywood-like effects?

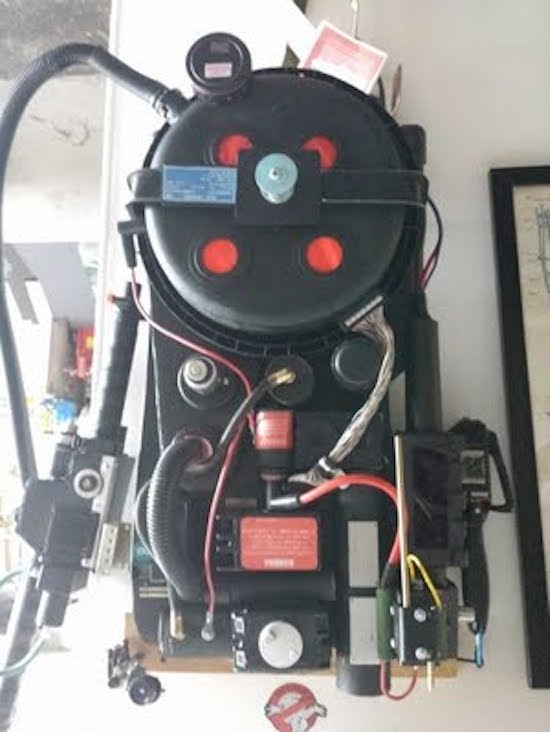
That’s exactly what John Finocchiaro has done using a bunch of household items, including a five gallon bucket for the cyclotron, a garlic powder container for the N-Filter, a hairbrush for the PKE meter, spark plug wire, cardboard tubes, pill bottles, handles from power tool cases, a couple electrical boxes, and some other miscellaneous parts.

The proton pack is based on an Arduino Uno along with a Seeed Studio SD card shield containing .WAV files. The Arduino supplies all of the sound and light effects, except for the cyclotron lights which use a 555 timer and 4017 decade counter. The sound is amplified through an old computer speaker board, while two homemade boards control the lights.

The red lights on the cyclotron area are supposed to be asymmetrical. This project took two weekends to make, one for the pack and one for the gun. It is attached to a homemade  PVC “ALICE” frame. I tried to make it as light as possible, the whole unit weighs just 13 lbs. Its not fully “screen accurate” but more like a “Model 3″ version. The addition of a bunch of actual electronic components make it look more like it is a  functional unit instead of a prop.

The power meter on the gun and pack are synced to show an accumulating “charge” while a generator sound plays. When armed, the lights on the gun blink and the generator sound intensifies. When it’s fired, the barrel lights and the blast sound plays as the charge meter decreases to zero. It then shuts off and recharges.

It came out so well I also made a PKE meter (ghost detector) that also functions with lights and sound. The arms are powered by a small gear motor. The lights are a blinking LED and 10 green LEDs that sequence via a 555 timer/4017 decade counter. It’s crammed into a hairbrush.

I also have made a ghost trap and pedal that opens and closes via a servo mechanism. The interior of the ghost trap is made from an old laser disc lit with a row of LEDs, so it looks “deeper” inside than it should. It works with the pedal as it does in the movie. It’s not full height, I am trying to keep all this stuff compact. Anyway, after 30 years I’m sure there would be some miniaturization in the equipment by now!

And what would a full Ghostbusters getup be without some Ecto Goggles? Finocchiaro constructed his own pair from scratch using foamboard and paper with aluminum strips for strength. The outside is textured to resemble a military-type finish, while the lens tubes illuminate green to add a “glow,” and a red LED blinks on the side.

Whether a fan of the movie, a fan of cosplay, or simply a fan of making, you’ll want to check out the entire build here.

Interactive sidewalks plays music to your shadows

Designed by Montreal studio Daily tous les jours, Mesa Musical Shadows is a public installation which turns several blocks of pavement in Arizona’s Mesa Arts Center into a super-sized dance pad that reacts to your moving shadow with the sounds of singing.

Shadows cast on different tiles trigger different voices, all while singing in harmony. Length of shadow is dependent upon the season, the time of day and the weather; meaning, a visitor may never quite cast the same shadow twice. The sounds themselves also change with the angle of the sun, which makes interacting with the installation a dynamic experience in the morning, midday, evening, and in the middle of the night. As the day turns into night, the tracks shift from upbeat, Pitch Perfect-like acapella to creepier, ominous tones.

Though all the audio originates with recordings of the human voice, a large variety of sounds and moods are created throughout the day. The sounds triggered in the morning are peaceful and ethereal: sustained choral tones that follow your long shadow, singing you into your day. Later, when the sun is hot overhead, and shadows are shorter; the sounds are chopped and frenetic, creating a rhythmic, energetic soundtrack. As the shadows become long again toward sunset, clusters of complementary, interlocking melodies are triggered. Finally, after dark, the sounds harken toward the natural landscape: Insect or bird-like vocal sounds evoking a nocturnal meadow are triggered by users navigating their way through the night.

The system itself consists of sensors that respond to changes in light, which prompt a range of melodic or percussive sounds emitted through speakers embedded in the colorful fabricated tiles. As Creative Applications details, Mesa Musical Shadows is controlled by a MaxMSP patch linking Arduino Mega boards via OSC.
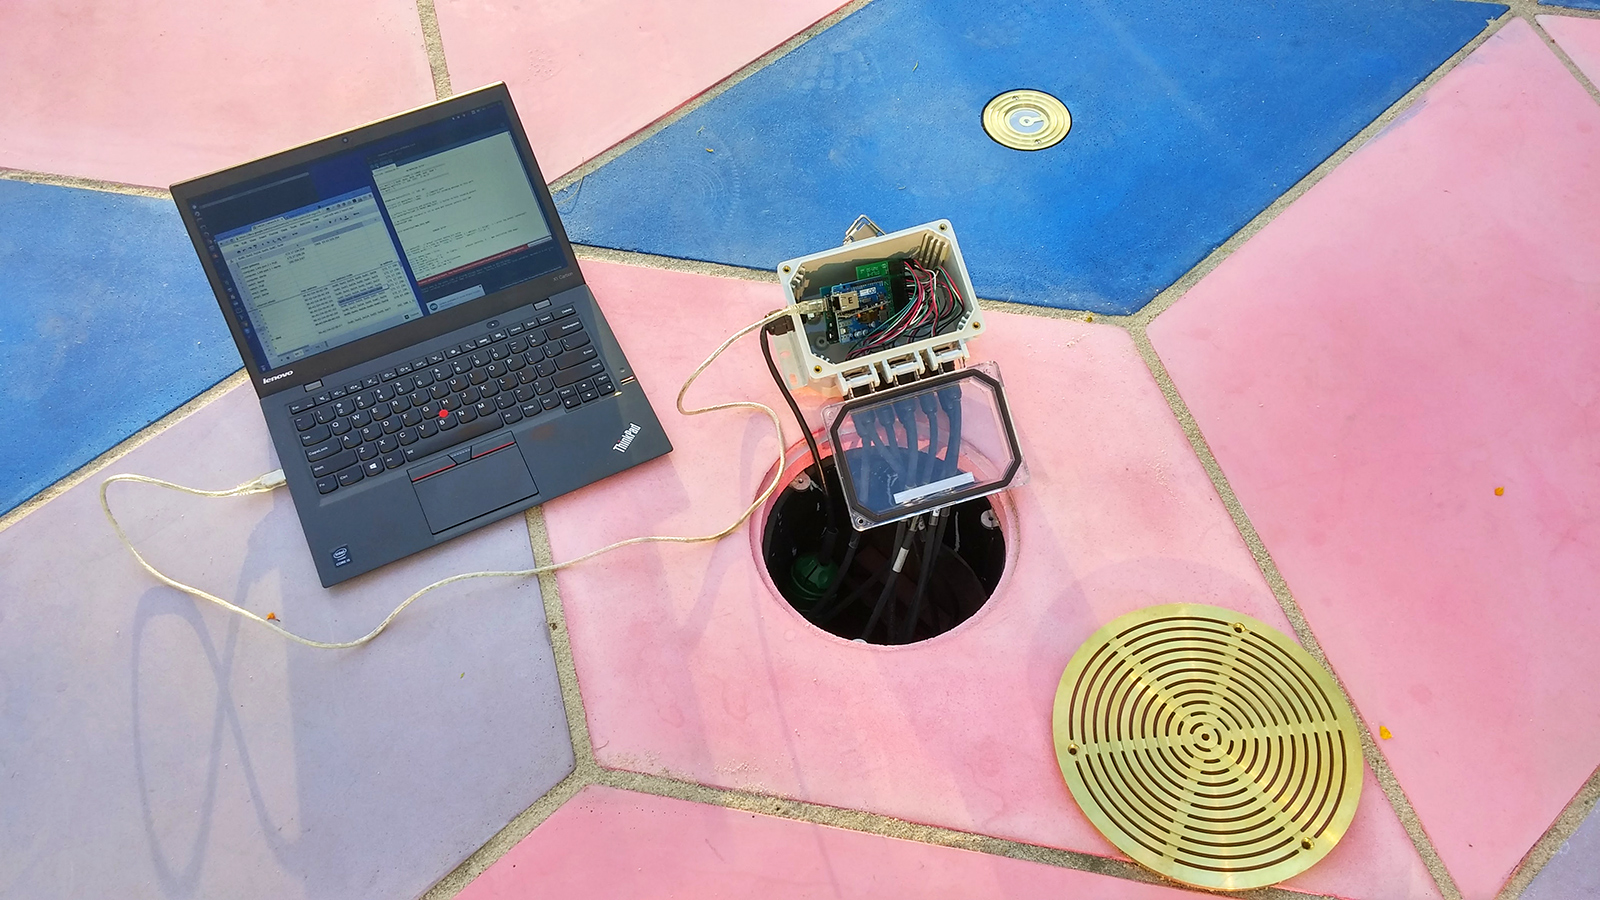
The installation’s 47 sensors are run through six control nodes, comprised of an Arduino Mega, Ethernet shields, and custom connector shields – each of which is protected in a waterproof enclosure, placed underneath the tiling. Each sensor unit has a custom PCB with a light sensor on top and an LED on its bottom, for nighttime illumination and the more sensitive gear (computers, amplifiers, etc.) is all installed in the museum.

If this musical public display seems a bit familiar, that’s because you may recall Daily Tous Les Jours’ earlier project, 21 Swings, which used playground swings to form a giant collective instrument. Read more about the singing sidewalk here, and see it in action below!

Arduino door lock is activated by opening an incognito window

Mike, CEO of the Useless Duck Company, continues to make us laugh with his hilarious Arduino innovations. Despite all the comical projects, which range from a fedora that tips itself to an automated toilet paper-dispensing machine, he may be onto something with one of his more recent contraptions: a door that locks itself whenever you’re shopping for gifts for your wife or significant other.

If you don’t want Google Chrome to save a record of what you visit and download, you can always browse the web in incognito mode However, what happens if your loved one bursts into the room and catches you in the act of making a purchase?

To solve this common problem, Mike has hooked his PC up to an Arduino Uno that’s connected to a servo-controlled lock. A self-written program then checks all of the browsers running on his computer, and if it finds one in incognito mode, it sends a signal to the Arduino to bolt the door.

Create polarized pictures with your iPhone and Arduino

Taking great pictures means making them more vibrant enhancing saturation and contrast. Ynformatic has published some tips to help you do that by creating a DIY device to control a polarizer using an Arduino Pro Mini, an iPhone, and a screen from an auto-darkening welder’s mask.

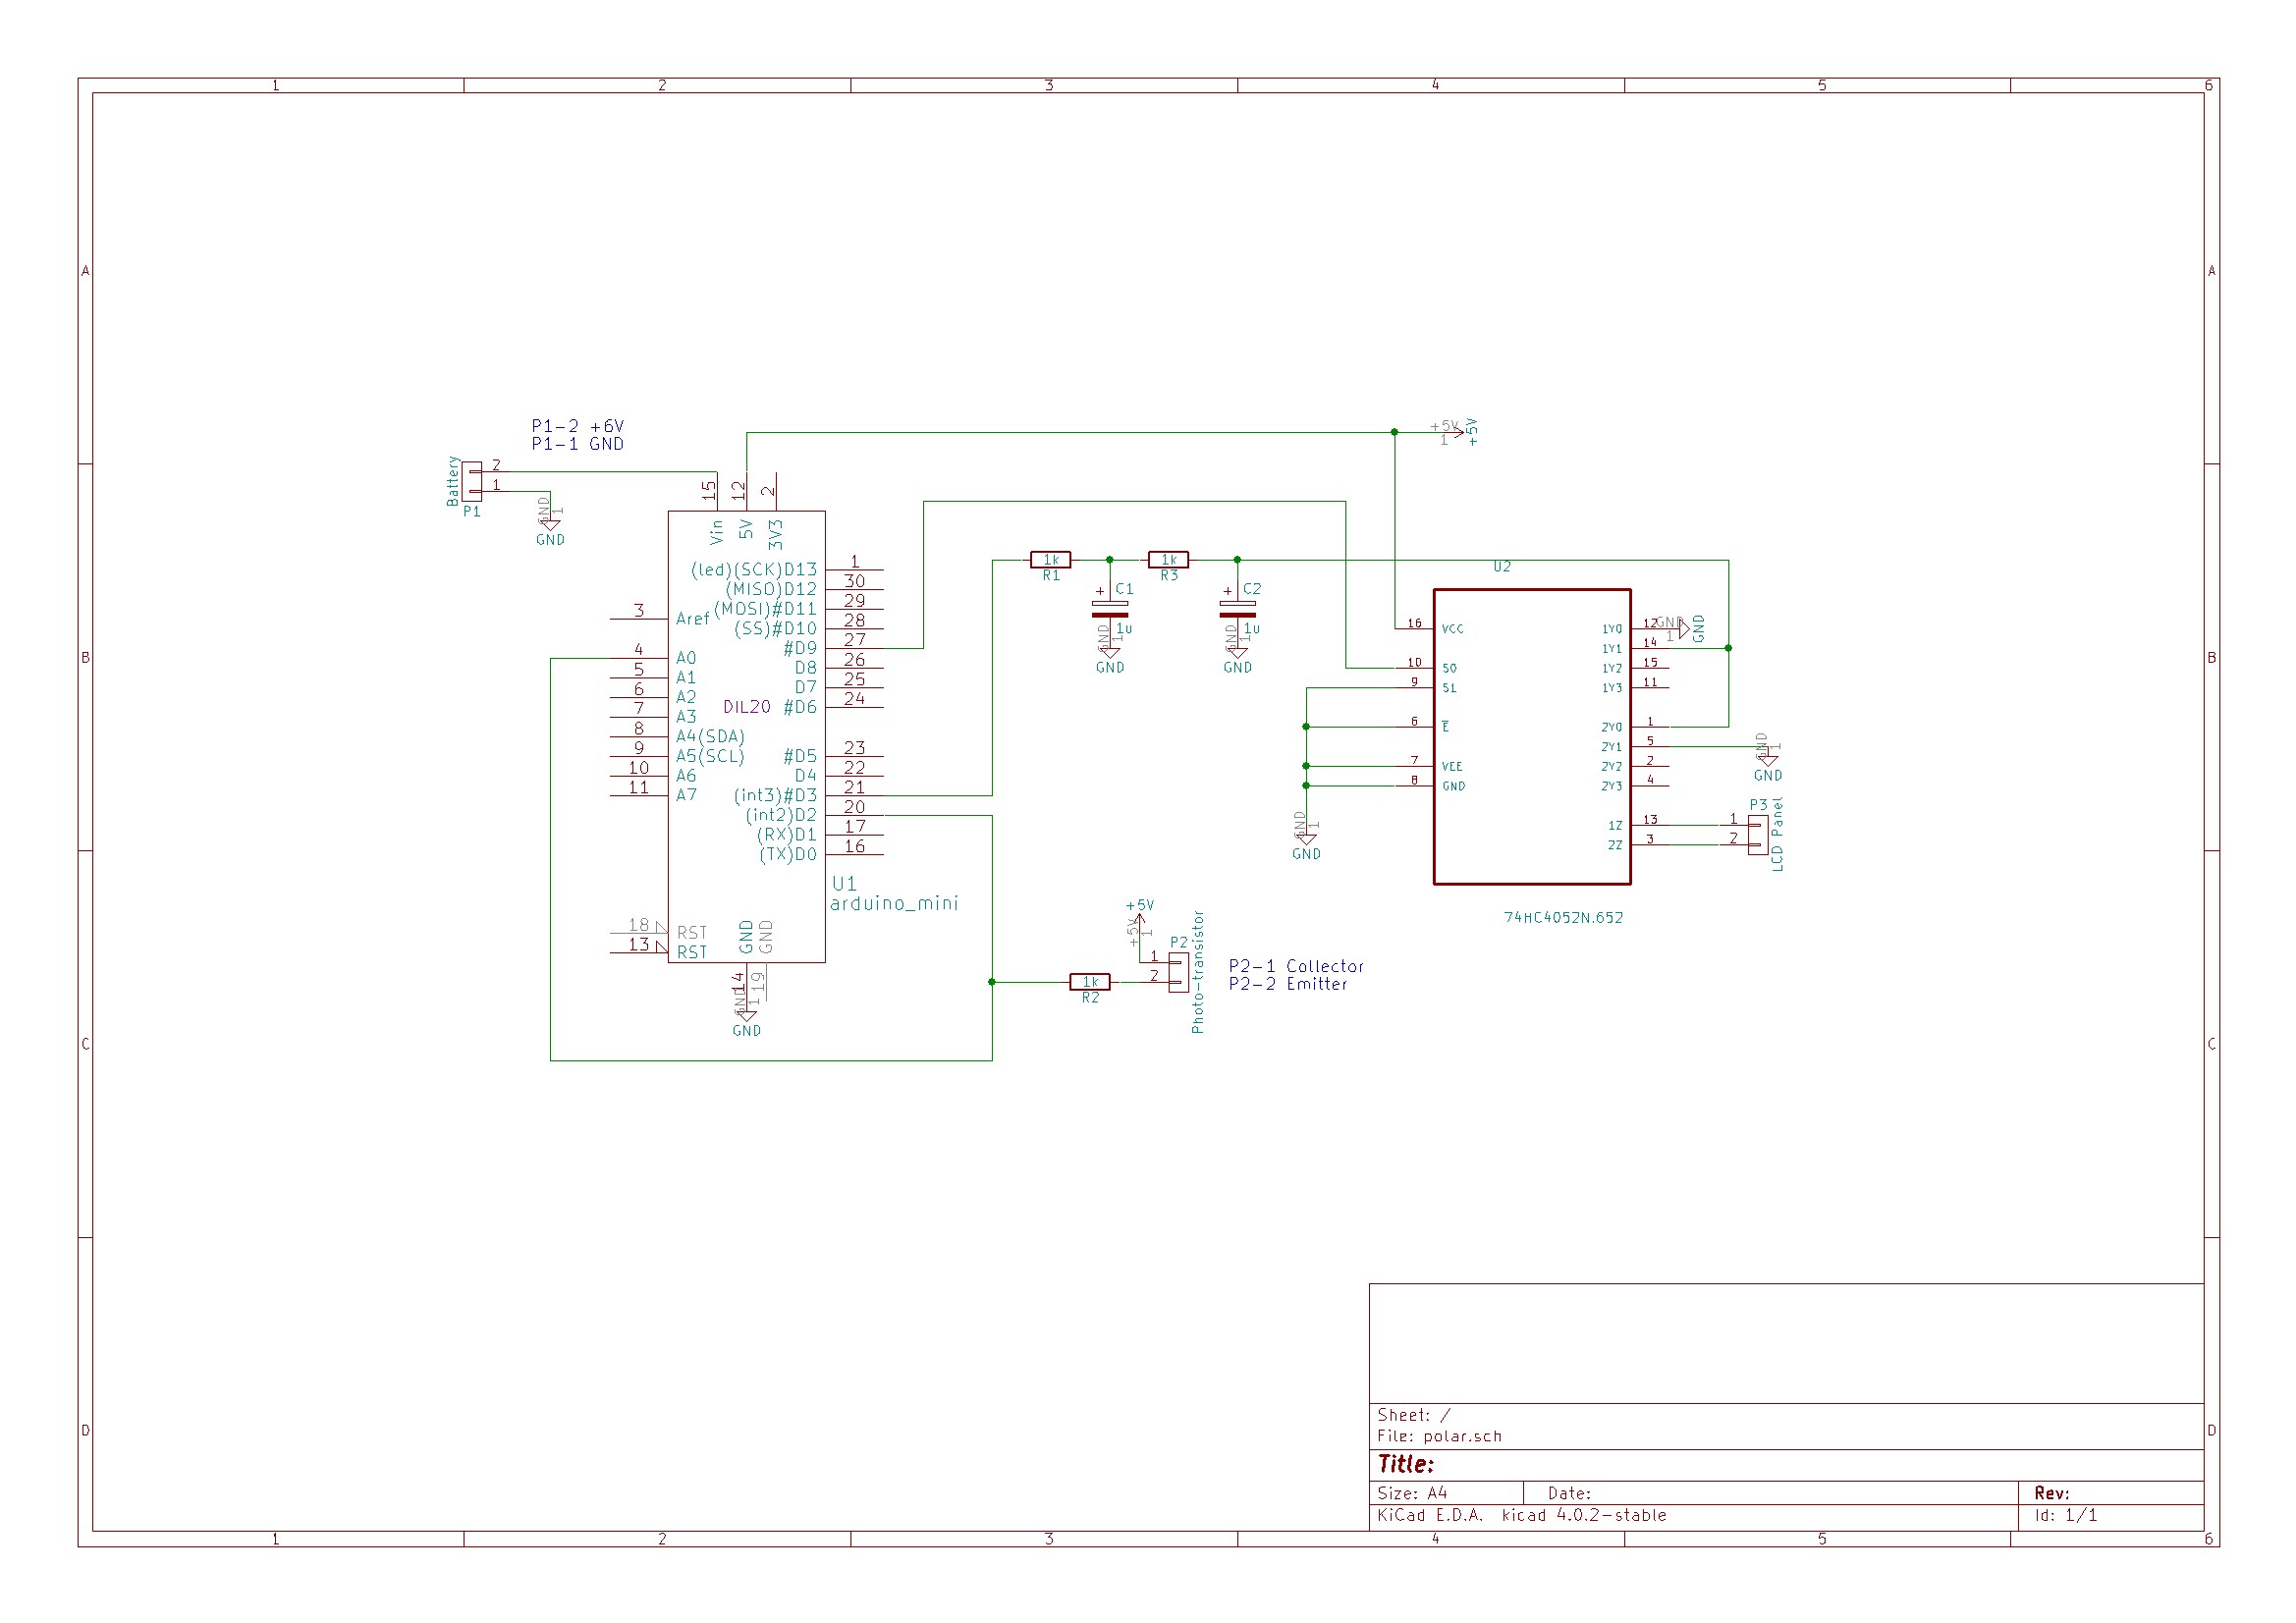
A phototransistor located facing the iPhone’s flashlight LED is connected to both an external interrupt pin and an analog pin. Short pulses on the LED cause interrupts in the Arduino code which are used to synchronize the polarizer. Long pulses on the LED cause the Arduino to enter calibration mode. The time interval between syncrhonization pulses is continuously measured and divided into three equal parts. On receiving a synchronization pulse the voltage is set to 0V for one part, to the 45 degree voltage for one part and finally to 5V for one part. Voltage for the polarizer is supplied from an Arduino PWM output pin. To get a reasonably stable output the PWM frequency was increased to 32 kHz and smoothed with a second order RC filter. The liquid crystal display will be damaged by a constant DC voltage so a CMOS switch is used to alternate the polarity. A 2 kHz square wave generated from a free running Arduino timer is used to drive the switching.

An iPhone app written in Swift is responsible for the user interface and image processing.

Explore the schematic in the picture below, while the full source code for the Arduino and iPhone can be downloaded from here.


Play some Super Arduino Bros. tunes with percussion

Have you ever wished your Arduino project could play tunes, or even just note-based sound effects? Connor Nishijima has, and that’s why over the last three years he has been hard at work developing Miduino–a free web service that enables Makers to automatically convert their MIDI music into ready-made sketches.

Unlike any built-in Arduino noisemaking functions such as tone(), Miduino’s output is polyphonic–meaning you can play up to six notes at once. Most recently, he has added two major updates to the service: percussion tracking and switch to software-based timing.

Now the only thing setting your Arduino apart from an NES is a proper triangle wave! While it’s not fully featured yet for the whole MIDI percussion spectrum, your basic snares, kicks and hi-hats will be joining the music!

Originally I collaborated with Len Shustek to tie his Playtune library into the service, but his library requires a hardware timer for each active note–which has its ups and downs.

With a hardware timer you’ll get extremely crisp sound every time, but an Arduino Uno can only play up to three notes at once and the original code didn’t know what to do with MIDI percussion channels.

Instead, Nishijima is polling for new notes and their expirations at about 22,050Hz using Timer 1 and generating different types of percussion with some RNG tricks. Admittedly it hasn’t been perfected yet, as some songs need the polling frequency turned down to avoid crashes. (Cut the Arduino some slack, it’s not supposed to be good at this!)

To demonstrate his latest upgrades, Nishijima plays Super Mario Bros. theme song with LEDs blinking to the iconic tunes. Although some would argue that this could be faked quite easily, the Maker has gone ahead and shared the code along with a couple other examples for any doubters–these include Van Halen’s “Eruption” and Mozart’s “Rondo Alla Turca.”