Posts with «featured» label

Build an electric go-kart on a budget with Arduino

Growing up, there was nothing cooler than hopping in a go-kart for a quick spin around the neighborhood. But you know what would make it even cooler? If you built your own electric set of wheels. That’s exactly what two engineering students, Adrian Georgescu and Masoud Johnson, have done using commonly available components along with a secondhand frame they picked up for $125 and a few Arduino.

Although they initially targeted a motor power output of 3kW, they were unable to find any that fit their budget. So as any true Makers would do, the duo settled on creating one out of an old Subaru alternator instead. Price tag? $30.

For the rest of their project, Georgescu and Johnson used an electric scooter’s three-phase motor controller, three LiPo battery packs, a trio of Arduino Pro Minis, and an Arduino Mega. The Arduinos are tasked with throttle control, speed sensing, RPM measurement, and transmitting the data over to a virtual dashboard on an Android app.

To finish off the build, the students reupholstered the seat, painted the chassis red and black, and threw on 60 LEDs. You can see the end result in action below, as the e-kart reaches a top speed of roughly 33mph (53km/h).

These Arduino bots move plants to sunny and shady spots

What do you do when you want your plants to grow but you lack a green thumb? Give them wheels and the ability to seek out sunny and shady spots on their own. This was media artist Kathleen McDermott has done.

The aptly named Sunbot and Shadebot are robots that help houseplants tour the outside world. Sunbot uses photocell (light) sensors to look for sunny places to rest, while Shadebot employs the same sensors to locate shadowy spots.

Both platforms are made out of a recycled fan case and wood, along with an Arduino, DC motors, rechargeable batteries and solar panels.

See them in action below!

Arduino Blog 12 Aug 21:21

Build a simple VU meter with an Arduino Uno and LEDs

If you’ve been looking for a simple audio Arduino project, you may want to check out this VU meter from YouTuber RZtronix. The Maker built the device using an Uno along with some LEDs, a couple wires, a breadboard, a sound sensor, and a 5V power supply.

Throwback: Machine pours a drink every time the U.S. wins a medal

What do you get when you combine the Olympics, alcohol, and Arduino? An awesome machine that automatically pours a shot whenever your country wins a medal. Although a throwback, we can’t see why this project can’t be replicated for Rio!

It all began four years ago when a bunch of Makers were given early access to the SmartThings platform. To coincide with the London 2012 Summer Games, the team developed a device that would celebrate a U.S. victory by dispensing one of three different drinks–Goldschläger for gold, Jose Cuervo for silver, and Jack Daniels for bronze–while waving the American flag, turning on a strobe light, and playing the national anthem.

An Arduino is connected to a SparkFun XBee shield and the ZigBee network links it to the SmartThings platform online. The Arduino controls the servos responsible for releasing the liquid into the glass, and the relays that switch the power strip on/off for the party effects. Of course, you can always just pour a drink manually by selecting the appropriate medal on the accompanying SmartThings Medal app.

With the 2016 Games now underway, check out the entire build below to help get you started on a machine of your own!


Arduino Blog 11 Aug 21:43

Control an LED display with your electric guitar!

Have you ever wanted to have a light show that reacts to what you play through you’re favorite electric instrument? Georgia Tech grad student Wil Roberts has, and so he created a guitar-controlled LED display–an impressive project that combines both his Maker and musical chops.

To accomplish this, Roberts used an Arduino Uno along with an Adafruit 16×32 RGB LED matrix panel that responds to the guitar’s signal. The bottom rows are always blue, while the top ones progress from green to red the louder he shreds. The top rows remain red depending on the length of the note being played.

Want one of your own? Roberts has made all of the display’s circuitry and code available on Instructables. In the meantime, be sure to see it in action below!

David Cuartielles judges robots at Hebocon Spain and Tokyo

Being a dumb and clumsy robot has never been as fun as in the stupid robots competition Hebocon. This competition series is described as “robot contests for the technically ungifted” by its creator Daiju Ishikawa, and encourages anyone to join with no prior knowledge of robotics necessary.

What’s neat is that unlike other awards, Hebocon’s are symbolic as they are usually made out of recycled parts from every robot in the competition!

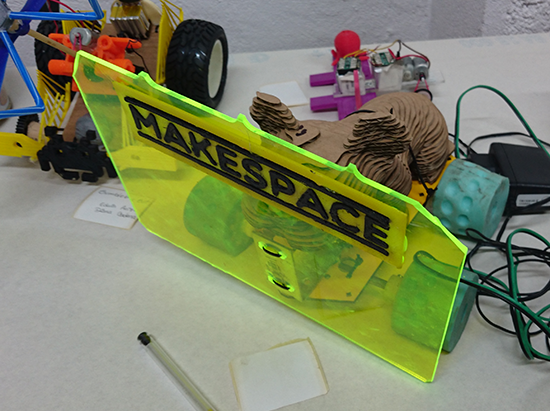
So far there have been two editions of Hebocon in Spain (Valencia and Makespace Madrid) where our very own David Cuartielles participated as a judge.

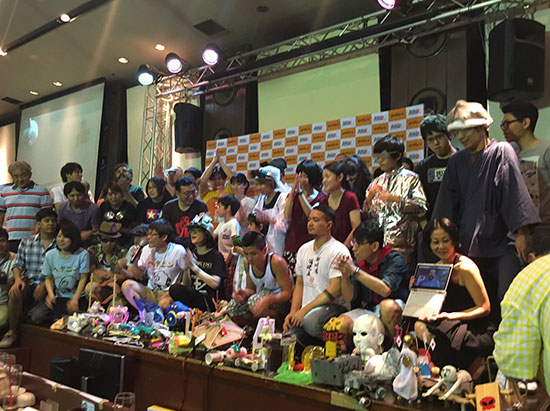
Last weekend, Cuartielles was invited to the Hebocon World Championship in Tokyo where he served on the judging panel alongside Nifty’s Dr. Kunio Matsui and an executive from NicoTsuku (a company dedicated to digital communities). The event drew a total of 32 robots from all across the world, including the United States, Hong Kong, Iceland, France, Singapore, Greece, Taiwan and Japan.

The winners were:

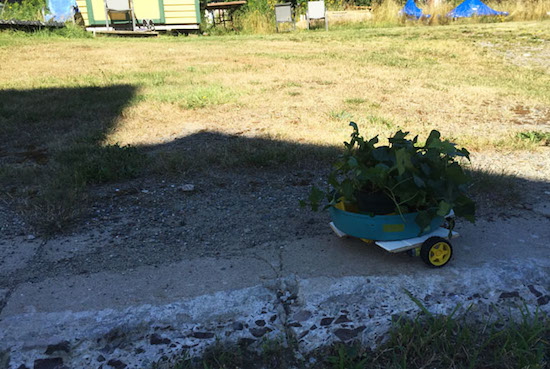
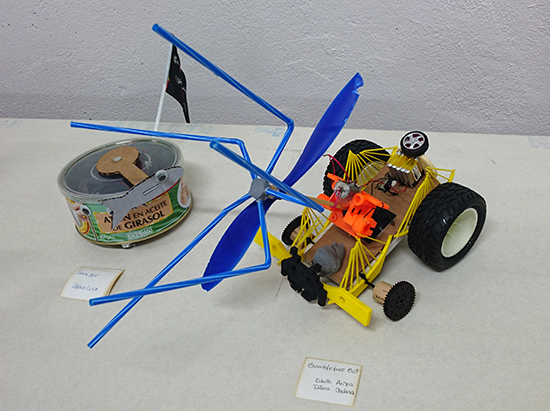
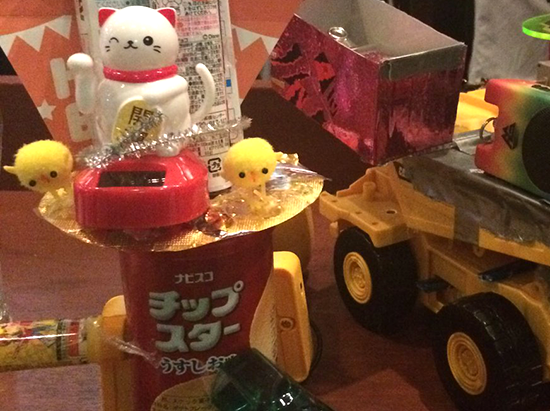
Nifty Award: An unusual car with a spinning doll that shot fake banknotes

NicoTsuku Award: A robot with a middle-age man that turned a table upside down (a literal representation of a Japanese colloquial expression that means getting mad)

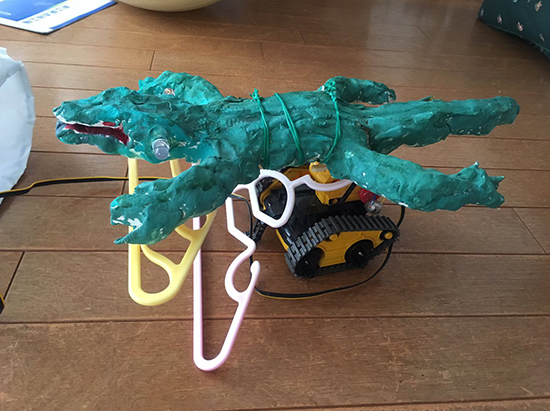
Arduino/Genuino Award: A crocodile robot made by a 10-year-old that previously participated in Maker Faire Tokyo

The ‘Remote-Controlled Robot’ from Hong Kong won the sumo competition and it was about fooling the opponent by switching the roles of the remote control and the robot.

Thanks for inviting us to Hebocon’s World Championship 2016! Check out more on Twitter! 

Arduino Blog 09 Aug 15:21

The Robotic Voice Activated Word Kicking Machine

The brainchild of artist Neil Mendoza, the Robotic Voice Activated Word Kicking Machine is described as the “ideal device for anyone that feels that their verbal communication needs a little extra kick.”

The piece consists of four bells of baritone horns, tubing, microphone, speakers, a mechanical foot and a projector, while its software is written in openFrameworks. When the software starts, it launches a web browser and creates a WebSocket connection to it. As soon as someone starts speaking, the software sends a message to the browser to tell it to start speech recognition. Once the person finishes talking, the browser sends words back as text back over the WebSocket connection. Each word is then added to a Box2D physics simulation as a series of rectangles linked together with springs. There’s a mesh for each letter and shadows are created in GLSL with a shadow map.

When a word is near the foot, the computer sends a message to an Arduino telling it to kick. The foot is actuated with a linear actuator driven by a Pololu Dual VNH5019 Motor Driver Shield. There is also a foot polygon in the physics simulation. Every time the mechanical foot starts to kick, the virtual foot in the physics engine is animated with a timeline that has been matched to the actual movement of the mechanical foot.

Intrigued? Be sure to check out its official page here.

Relive the ‘80s with a MIDI-controlled Scanjet keytar

The ‘80s may be long gone, but James Cochrane is bringing the keytar back with the help of an old HP Scanjet. For this, the Maker has taken an Arduino, a stepper motor shield, an optocoupler and an off-the-shelf MIDI keyboard for input, and integrated it into the flatbed scanner’s original features. The end result: the world’s first (and only) MIDI-controlled HP Scanjet keytar.

As he describes in his YouTube video:

This scanner had a hidden command set within the Scanner Control Language which allows you to send musical notes directly to the stepper motor. This is a tedious method where you have to enter the notes and durations manually into a text file (similar to G-code on a CNC machine). I have always used and will always use this method for my old school music videos; however, I wanted to try and build a MIDI-controlled stepper motor.

One day I had one of my HP Scanjets sitting on its side and for some reason it resembled a Roland SH-101 and that’s when I came up with the idea for the HP Scanjet Keytar. What a great way to merge both into a musical instrument.

Those wishing to relive the days of classic yet quirky keytar are in luck. Cochrane has provided a detailed breakdown of the device in the video below, and has shared its code on GitHub.

Catch ‘em all with an Arduino Pokéball

Like the rest of humanity, Arduino Sweden’s interaction designer Marcus Johansson has been glued to the Pokémon GO app. However, as fun as flicking a digital ball with your finger to catch ‘em all may be, he wanted something a bit more realistic. Enter the Arduino Pokéball.

Based off an Arduino CTC project, an Arduino 101 housed inside some protective casing allows him to physically throw the ball, which is then mimicked within the game. It uses the 101’s IMU and Bluetooth track the toss and then send it to the phone.

See it in action below!

Experimental sound generating boxes for Makers, by Makers

The brainchild of Tomás de Camino Beck, Polymath Boxes are experimental sound boxes. Using a Genuino Uno and 101 along with some 3D printing, these units enable young Makers and adults to experiment with programming and math to produce noises and tunes, from square and triangular waves to sample players and interactive sound generators.

The boxes were originally conceived by Camino Beck as part of an open-source experimental art project with the goal of stimulating STEAM in education, from high school to college, and to allow artists, engineers and computer scientists, or pretty much anyone interested, to explore programming and digital fabrication. They were developed and fabricated in “Inventoria”–Costa Rica’s own idea of a Makerspace.

More than just a finished project, these boxes are designed to be hacked and to help move away from more conventional ways of thinking when it comes to sound.

These boxes use coding as a way to “write music,” and to take advantage of the diversity of physical low cost sensors to trigger sound. Some of the boxes play with basic waves, just creating basic  PWM, and others go from there to create arpeggiator and interactive. They will be used in several workshops and experimental music concerts in Costa Rica.