Posts with «arduino» label

Coding A Dynamic Menu For Character LCDs on Arduino

These days, there’s a huge variety of screens on the market for use with microcontrollers. OLEDs and graphic LCDs abound, while e-ink devices tempt the user with their clean look and low energy consumption. However, for many purposes, the humble HD44780 character LCD does the job just fine. If you’re using such a device, you might want to implement a simple menu system, and in that case, [MyHomeThings] has you covered.

The menu code is simple to modify and implement. It allows the user to define a certain number of menu items, along with button labels and functions to be executed with button presses. By default, it’s set up to work with  left and right function buttons, with up and down buttons to toggle through the menu’s various entries. This suits the commonly available Arduino shields which combine a 16×2 character LCD with a set of four tactile buttons in a cross formation. However, modifying the code to use an alternate button scheme would be simple for those eager to tweak things to their liking.

For the absolute beginner to programming, it’s a great way to put together a simple interface for your microcontroller projects. It’s the sort of thing you might use if you’d built a do-everything Arduino handheld device, as we’ve seen built before. If you find text menus too archaic for your purposes, though, be sure to sound off with your favourite solutions in the comments.

Hack a Day 18 Feb 16:30

Arduino Announces Board Based On Raspberry Silicon

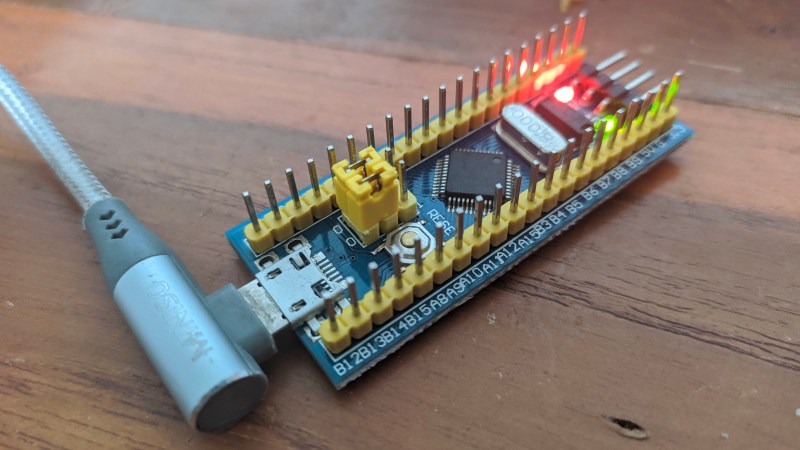
The Raspberry Pi Pico burst onto the microcontroller scene last month with much fanfare, and is already popping up in projects left, right and center. Notable for its high clock speed and exciting IO features, it’s a breath of fresh air in a market slowly weaning itself onto ARM architectures and away from 8-bit staples. Not one to miss out on a slice of the action, Arduino have announced their own upcoming board based on the Pico’s RP2040 chip.

The board is named the Arduino Nano RP2040 Connect, a moniker that’s not just a mouthful but likely to be confused with existing Arduino Nano products. It sports several differences to the Raspberry Pi Pico, namely packing WiFi, Bluetooth, and an IMU on board which should make developing motion-sensitive and IoT projects easier, particularly in cases where the Pico’s flexible IO could be useful.

Naturally, Arduino IDE integration will be a major plus point that gets many makers on board, and we can imagine there will be swift development of libraries leveraging the RP2040’s PIO subsystem. If you still haven’t gotten the low down on the Raspberry Pi Pico yet, though, never fear – our own [Elliot Williams] can tell you everything you need to know!

[Thanks to Darrell Flenniken for the tip, via Tom’s Hardware]

Stray Cat Shelter is Nicer Than Our First Apartment

There are a lot of stray cats roaming around [Red Tie Projects’] neighborhood, and no one seems to care much about what happens to them. Fortunately for the cats, [Red Tie Projects] cares quite a lot, as evidenced by this colossal cat condo they built. The cats retain their freedom, but get food and a warm, sheltered bed whenever they decide to grace [Red Tie Projects] with their presence.

[Red Tie Projects] built this sturdy shelter from pallet wood and did a fine job of it, sealing all the seams and screws up with wood putty and waterproofing it with silicone. Inside there’s a heated pillow, a light, and a remote-controlled camera so RTP] can pan around and keep an eye on the cats. All the wires run out through a weatherproof junction box attached to the side and over to a control box made from an ATX power supply.

Most of the build is made from scrap, including the best part — an Arduino-driven motorized zip line for delivering food from the balcony to the cat porch. Details on the control box and the food delivery system are coming soon, as [Red Tie Projects] teases in the video after the break. We’re looking forward to seeing those. Oh, and don’t worry — there’s more than enough footage to cover the cat tax.

If [Red Tie Projects] ever takes any of those cats in, their demands will only increase. Maybe they can handle the sound of a motorized chair that follows the sun, since they’re tough street cats and all.

Zoom Out of the Classroom with a Mushroom Button

Considering the state of well, everything, we can’t tell you how glad we are to be out of school. That goes double for not being a teacher these days. [Elena] had some awesome light-up tactile buttons set aside for a killer Kerbal Space Program controller, but it’s funny how a pandemic will change your priorities. Instead, those buttons found a good home in this colorful and enticing Zoom control panel.

[Elena]’s ready pile of Arduinos yielded no Leonardos or Pro Micros, but that’s okay because there’s a handy bootloader out there that allows you to reprogram the USB interface chip of an Uno or a Mega and use it as a keyboard. After setting that up, it was mostly a matter of wiring all those latching and momentary buttons and LEDs to the Mega and making them look fantastic with a set of icons. (We all know the big red mushroom button is for aborting the call; so does it really need an icon?)

[Elena] was inspired by the Zoom call-terminating pull chain we saw a month or so ago as well as the pink control box that launched a thousand or so macro keyboards. Have you made your own sanity-saving solution for our times? Let us know!

Transmit Your Gaze to This Fiber Optic LED Lamp

Call us easily amused, but we think it’s pretty amazing what can be done with a microcontroller, some RGB LEDs, and a little bit of plastic. Case in point is [andrei.erdei]’s beautiful and quite approachable fiber optic LED lamp. It’s a desktop-friendly version of a similar piece [andrei] made that is roughly nine times the size of this one and hangs on the wall. The build may be simple, but the product is intricately lovely.

We really like the visual density of this lamp — it’s just the right amount of tubes and strikes a balance between being too sparse and too chaotic. As you might expect, there’s an Arduino and some RGB LED strips involved. But the key to this build is in the 16 pieces of side-glow plastic fiber optic tubing. Side-glow is designed to let light escape along the length of the tube as opposed to end-glow, which is made to minimize light loss from one end to the other like a data pipe. This allows for all sorts of fun effects, and you can watch [andrei.erdei] go slowly and soothingly through the different colors and modes in the demo video after the break. Make sure you watch long enough to see the tubes move like the old Windows 3D pipes screensaver

Already have too many knickknacks and wall hangings? You’re missing out on prime real estate — the ceiling. Check out this fiber optic ceiling installation that reacts to music.

Dr. Squiggles: An AI Rhythm Robot

Build a smart octopus drumbot that listens, learns, and plays along with you

Read more on MAKE

The post Dr. Squiggles: An AI Rhythm Robot appeared first on Make: DIY Projects and Ideas for Makers.

DVD Optics Power This Scanning Laser Microscope

We’ve all likely seen the amazing images possible with a scanning electron microscope. An SEM can yield remarkably detailed 3D images of the tiniest structures, and they can be invaluable tools for research. But blasting high-energy cathode rays onto metal-coated samples in the vacuum chamber of a bulky and expensive instrument isn’t the only way to make useful images, as this home-brew laser scanning microscope demonstrates.

This one comes to us by way of [GaudiLabs], a Swiss outfit devoted to open-source lab equipment that enables citizen science; we saw their pocket-sized thermal cycler for PCR a while back. The basic scheme here is known as confocal laser scanning fluorescence microscopy, where a laser at one wavelength excites fluorescent tags bound to structures in a sample. Light emitted by the tags is collected, and a 3D image is built up from multiple scans of the sample at different focal planes.

Like many DIY projects, this microscope is built from old DVD parts, specifically the pickup heads. The precision optics in these commonly available assemblies, which are good enough to read pits as small as 150 nm on a Blu-Ray DVD, are well-suited for resolving similarly sized microstructures. One DVD pickup is used to scan the laser in the X-axis, while the other head is modified to carry the sample and move it in the Y-axis. The pickup head coils and laser are driven by an Arduino carried on a custom PCB along with the DVD heads. Complete build files are posted on GitHub for anyone interested in recreating this work.

We love tips like this that dig back a bit and find things we missed the first go-around. And the equipment [GaudiLabs] lists really has potential for the budding biohacker, which we also like.

Thanks for the tip on this one, [Bill].

Upgrading An Old Mig Welder Wire Feeder With Arduino

Older industrial equipment is often a great option if you’re on a budget, and you might even be able to add some premium features yourself. [Brett] from [Theoretically Practical] has done with his old MIG welder, adding premium control features with the help of an Arduino.

The main features [Brett] were after is pre-flow, post-flow, and a spot welding timer. Pre-flow starts the flow of shielding gas a moment before energizing the filler wire, while post-flow keeps the gas after the weld is complete. This reduces the chances of oxygen contaminating the welds. A spot welding timer automatically limits welding time, enabling consistent and repeatable spot welds.

The Miller S-22A wire feeder can have these features, but it requires an expensive and difficult to find control unit. All it does is time the activation of the relays that control the gas flow, power, and wire feeder, so [Brett] decided to use an Arduino instead. The welders control circuit runs and 24V, so an optoisolator receives the trigger signal, and relays are used for outputs. Potentiometers were added to the original control panel, and all the wiring was neatly fitted behind it. The upgrade worked perfectly and allowed [Brett] to increase the quality of his welds. See the video after the break for the full details.

Inverter welders can be picked up for ridiculously cheap prices, if you’re willing to live with the trade-offs. We’ve also seen some other DIY welder upgrades, on small and large machines.

LED Hourglass Moves Like the Real Thing

If you want to waste time in a meaningful way, get yourself an hourglass. It’s simultaneously mesmerizing and terrifying to sit there and watch the seconds slip through the threshold that separates possibility from missed opportunity.

[Ty and Gig]’s LED hourglass is equally beautiful to watch. It doesn’t actually tell time, but that’s perfectly fine by us. What it does do is animate the LEDs to approximate grains of sand in gravity, no matter how the hourglass is tilted.

In either vertical orientation, the sand falls as long as there is some in the top. When the hourglass is horizontal, the LEDs settle just like real sand does. [Ty and Gig] achieved this with a whole lot of code that breaks the animation frames into structure arrays.

By contrast, the hardware part of this build is fairly simple: all that’s needed to replicate this build is some RGB LEDs a beefy power supply to drive them, an accelerometer, and a microcontroller.

[Ty and Gig] were planning to use an ESP8266, but misplaced it and went with an Arduino Mega instead. (You know what they say — buy a replacement and the one you lost will turn up almost immediately.) The beautiful frame is made from leftover purpleheart, a hardwood that turns purple with exposure to air. Check out the build video after the break.

Too lazy to reset your hourglass every hour? Here’s one that flips itself.

Arduino Learns the Martial Arts with Nunchucks Input Device

There is a boring part of every computer introduction class that shows how a computer is made up of input, output, and processing. Maybe it wouldn’t be so boring if the input device was a nunchuck. [Brian Lough] thinks so and he belligerently asserts that nunchucks are the best input device ever. With a simple connection to a Wii controller and an associated library, you get access to an analog joystick, two buttons, and an accelerometer.

The nunchuck is meant to plug into a Wii controller and the connection is I2C, so that’s trivial to interface to an Arduino or other small microcontroller. The only issue is making the connection. We might have just snipped the wires, but [Brian] prefers to use a small breakout board that plugs into the stock connector and provides solder points for your own cable. There are options for the breakout boards, and [Brian] has his own design that you can get from OSHPark for about a buck for three boards. You can also just jam wire into the connector, but that’s not always robust.

The controllers use 3.3V which isn’t unusual these days. There’s an available library that makes reading them easy. Obviously, not all applications will be a natural fit, but we did like them on the Tetris game [Brian] created. It is also natural for any kind of motion control like his gimbal mount example.

Even if you don’t have junk Wii controllers hanging around, they are common enough on the resale market and you can buy new third-party controllers without spending much. Makes us sorry we threw away ours in the last move.

If you want to get serious hacking a nunchuck, you can go full custom. Or, just give up, and turn one into a Raspberry Pi.

Hack a Day 27 Jan 06:00