Posts with «arduino» label

There’s More To MIDI Than Music – How About A Light Show?

MIDI instruments and controllers are fun devices if you want to combine your interest in music and electronics in a single project. Breaking music down into standardized, digital signals can technically turn anything with a button or a sensor into a musical instrument or effect pedal. On the other hand, the receiving end of the MIDI signal is mostly overlooked.

[FuseBerry], a music connoisseur with a background in electronics and computer science, always wanted to build a custom MIDI device, but instead of an instrument, he ended up with a MIDI controlled light show in the shape of an exploded truncated icosahedron ([FuseBerry]’s effort to look up that name shouldn’t go unnoticed). He designed and 3D-printed all the individual geometric shapes, and painstakingly equipped them with LEDs from a WS2818B strip. An Arduino Uno controls those LEDS, and receives the MIDI signals through a regular 5-pin DIN MIDI connector that is attached to the Arduino’s UART interface.

The LEDs are mapped to pre-defined MIDI notes, so whenever one of them is played, and their NoteOn message is received, the LEDs light up accordingly. [FuseBerry] uses his go-to DAW to create the light patterns, but any software / device that can send MIDI messages should do the trick. In the project’s current state, the light pattern needs to be created manually, but with some adjustments to the Arduino code, that could be more automated, something along the lines of this MIDI controlled Christmas light show.

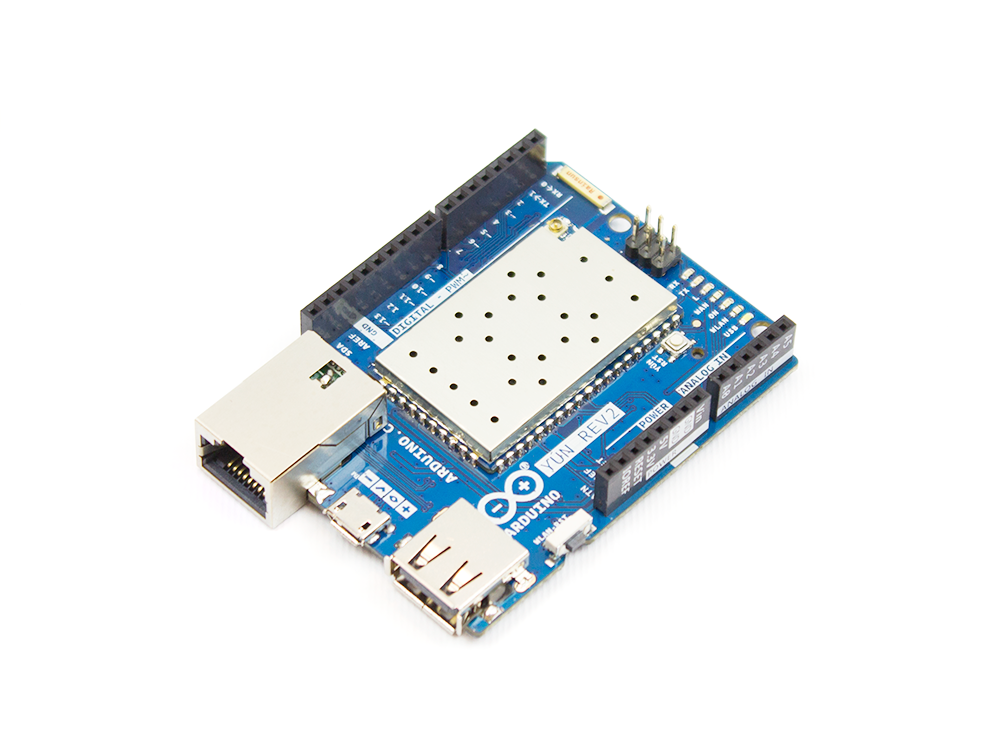
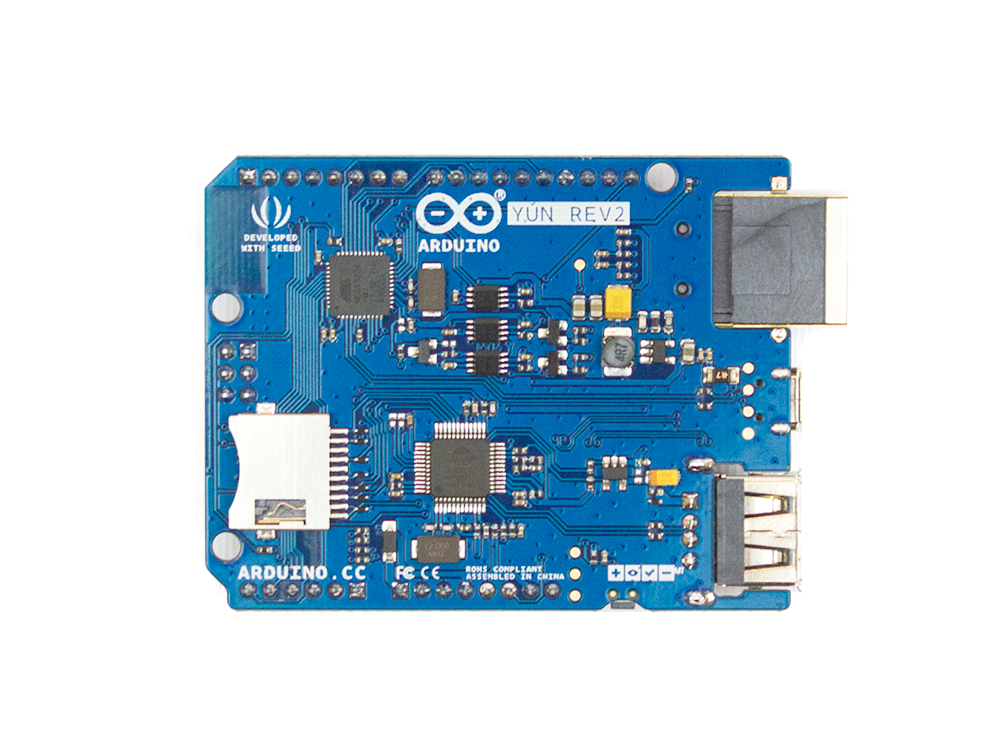
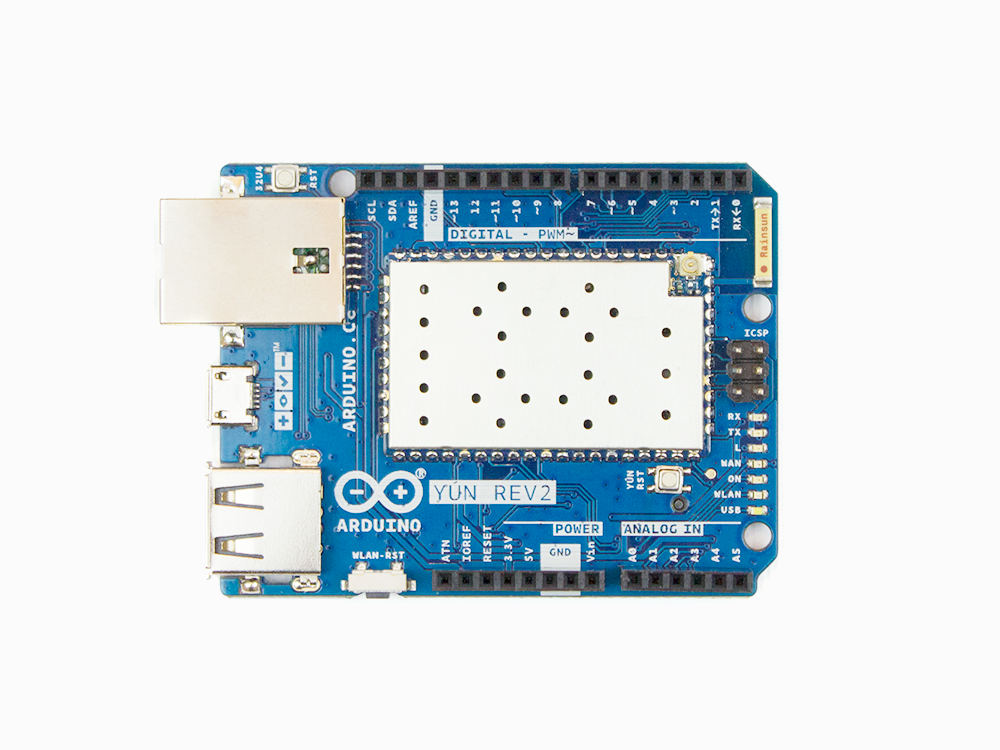
Arduino Yùn Rev.2 is here!

Since its launch in 2013, the Yùn–a small Linux machine and a microcontroller in a small Arduino form factor–found its way into hundreds of thousands of projects and professional applications. Last year, we decided that it was time for a refresh and began working hard to develop a true open-source design, with more compelling features and better overall software support.

The new board, which is expected to hit the market in the second half of April, will include enhanced functionality and compatibility with its predecessor.

Why a New Yùn

The Yùn enjoyed tremendous success; however, it ended up being affected by the internal issues we dealt with over the past couple of years and support has been quite intermittent.

For example, the board was never really an open-source product and the software had some challenges that we wanted to fix, especially from a security point of view.

What’s New in Rev.2

Hardware:  

  • Much better, more robust power supply
  • New Ethernet connector with a clever mounting solution that enables the use of all possible shields with no risk for accidental short circuits
  • Horizontal USB connector to save vertical space
  • Improved USB hub

Software: 

  • Software stack updated to OpenWRT latest version, including all patches
  • SSL support on the bridge Arduino / Linux bridge

Yùn Rev.2 is scheduled to begin shipping in April. Until then, you can stay up-to-date by clicking “NOTIFY ME” on our store

An LED Effect for Every Occasion

Quality software development examples can be hard to come by. Sure, it’s easy to pop over to Google and find a <code> block with all the right keywords, but having everything correctly explained can be hit or miss. And the more niche the subject, the thinner the forum posts get. Bucking the downward trend [HansLuijten] provides an astoundingly thorough set of LED strip patterns in his comprehensive post titled Arduino LED strip effects.

Don’t let the unassuming title lead you astray from the content, because what’s on offer goes beyond your average beginner tutorial on how to setup a strand of NeoPixels. [HansLuijten] is thorough to a fault; providing examples for everything from simple single color fades and classic Cylon eyes to effects that look like meteors falling from the sky. Seriously! Check out the video after the break. Those chasing lights you see around theater signs? Check. Color twinkle and sparkle? Check. Color wipes and rainbow fades? Check, and check.

At this point, an average forum post would be a jumbled mess of source which only works on an authentic Arduino Duemilanove running at 3.3v sitting on top of the 2nd printing of the author’s favorite issue of Make. But not here! These samples work with Adafruit’s easy to use NeoPixel library as well as FastLED, the quickest pixel in the West. On top of that the examples are clear and concise and explanation is plentiful. But the best part is definitely that each effect has a video clearly showing what it looks like.

If only everything were this easy to use, the open source revolution would already be here.

CTC Classics: Finding books with frickin’ laser beams!

CTC, a project from the 2015 edition

CTC stands for Creative Technologies in the Classroom, an initiative from Arduino Education aimed at helping teachers get up to speed with 21st century skills in the context of STEAM. We have been working with CTC since 2013, with our first experience in Castilla La Mancha, Spain. During a varying period of time, teachers are introduced to project-based learning as they run a full course with their students. At the end, teachers and students meet with their partners at a technology faire to show the result of an open-ended innovation process.

In this article series, I present projects made by students and exhibited at CTC faires. At those events, students come and pitch their experiments in front of hundreds of thousands of their peers from schools spanning all across their region. I select some of these projects and reinterpret them as a way to inspire other groups of students and their teachers in making new, interesting, user-centric, and thrilling projects.

What is CTC Catalunya and what makes it different?

CTC Catalunya is the longest of Arduino’s CTC projects, having had faires since 2015. Thanks to the generosity of the EduCaixa Foundation and the help from Cesire, Catalunya’s government department, we have reached out to as many as 200 public schools at the time of writing.

In order to achieve this, we designed a plan where the educators of different regions of Catalunya were trained in becoming trainers themselves, so that they could constitute their own regional support teams as a way to make the project sustainable over time. You can imagine that, after four years, there are many familiar faces. People have grown to like this project, and the CTC faire has become part of the educational landscape to the point that many teachers plan for it within their annual agendas.

What about the project I chose for this blog post 

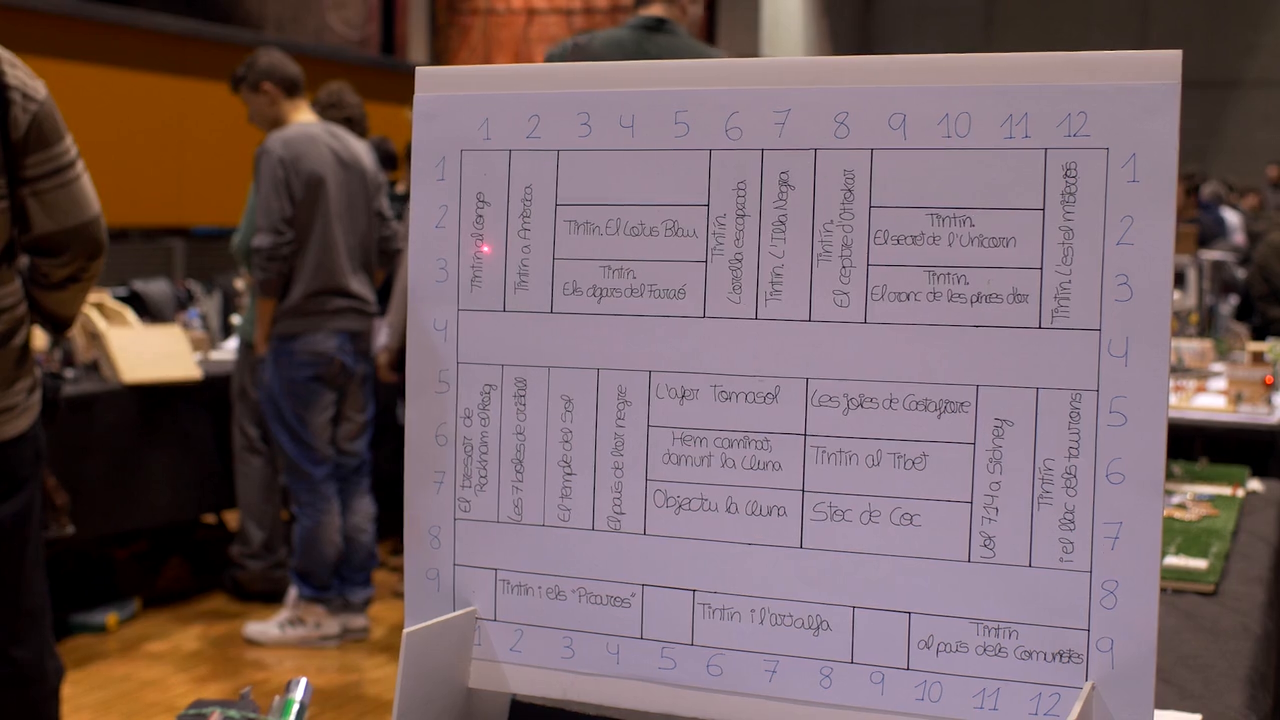
One of my favorite projects of all-time is a system that enables you to look for books on the shelf by means of a laser pointer. Imagine you want to find that one novel; how many times have you had to browse through hundreds of your books and were unable to locate it for a while? Even if you have a database of all of your books, you would still have to make sure you place them in a certain location and need to go looking for it.

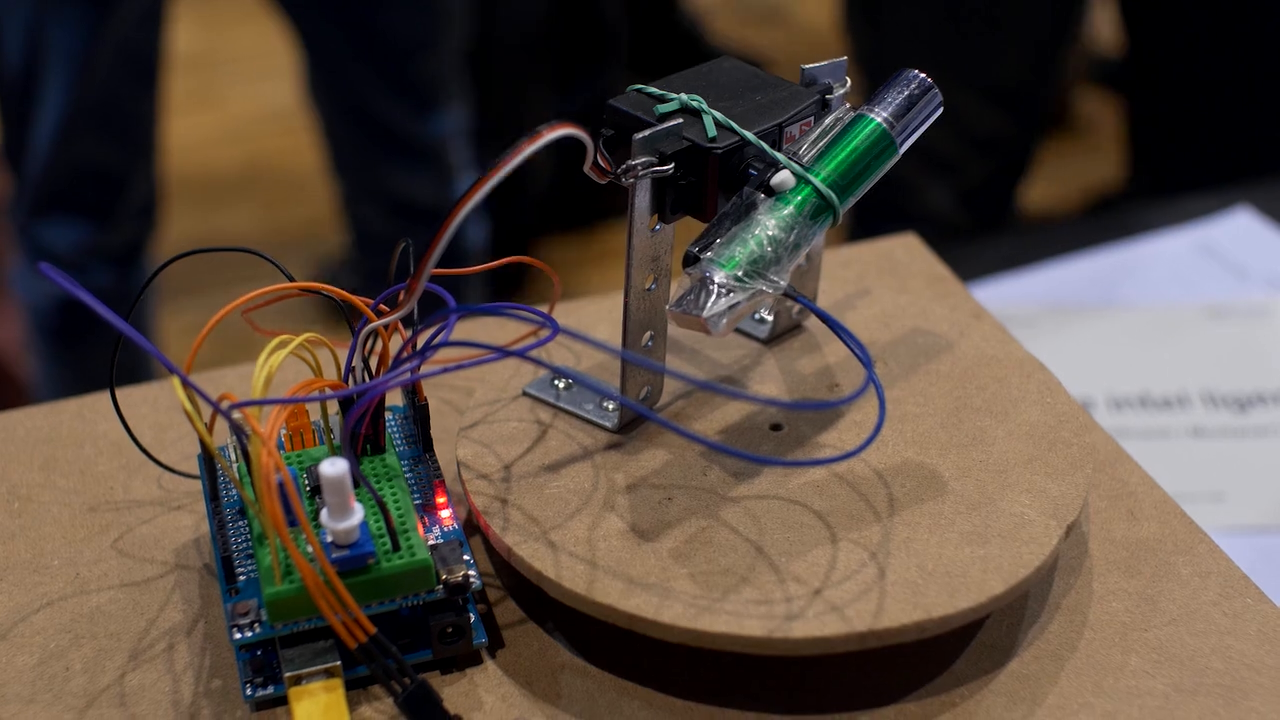
Two students at the CTC Catalunya Faire 2015 conceived the idea of a database of books that connected to an Arduino-controlled laser, which would point to a particular book on the shelf.

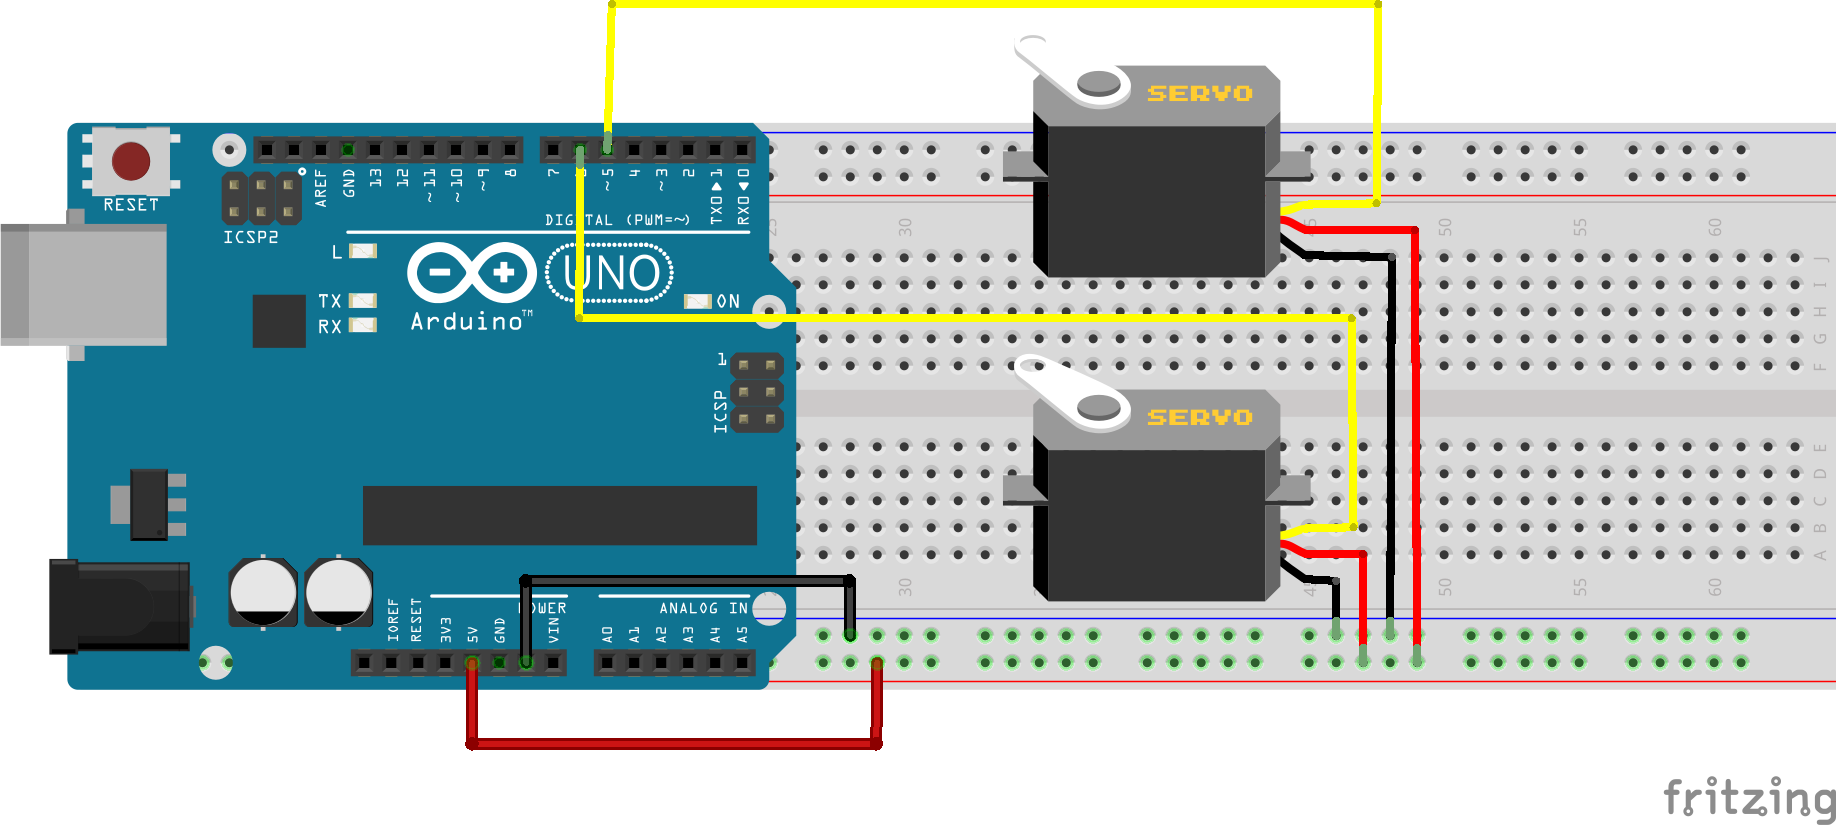
Schematic diagram: lasers, servo motors, and some code

As many years have passed since the project was presented, I don’t have documentation on how it was built. This is going to be a bit of the topic in this series. I am not looking at being super precise in replicating these projects; rather, my aim is provide some guidelines on how this could be made and inspire others to get the idea and improve it. If you want to see how I make things for real, I invite you to follow my livecast sessions every Thursday at 7pm CET. I’ll be implementing one project from scratch each month.

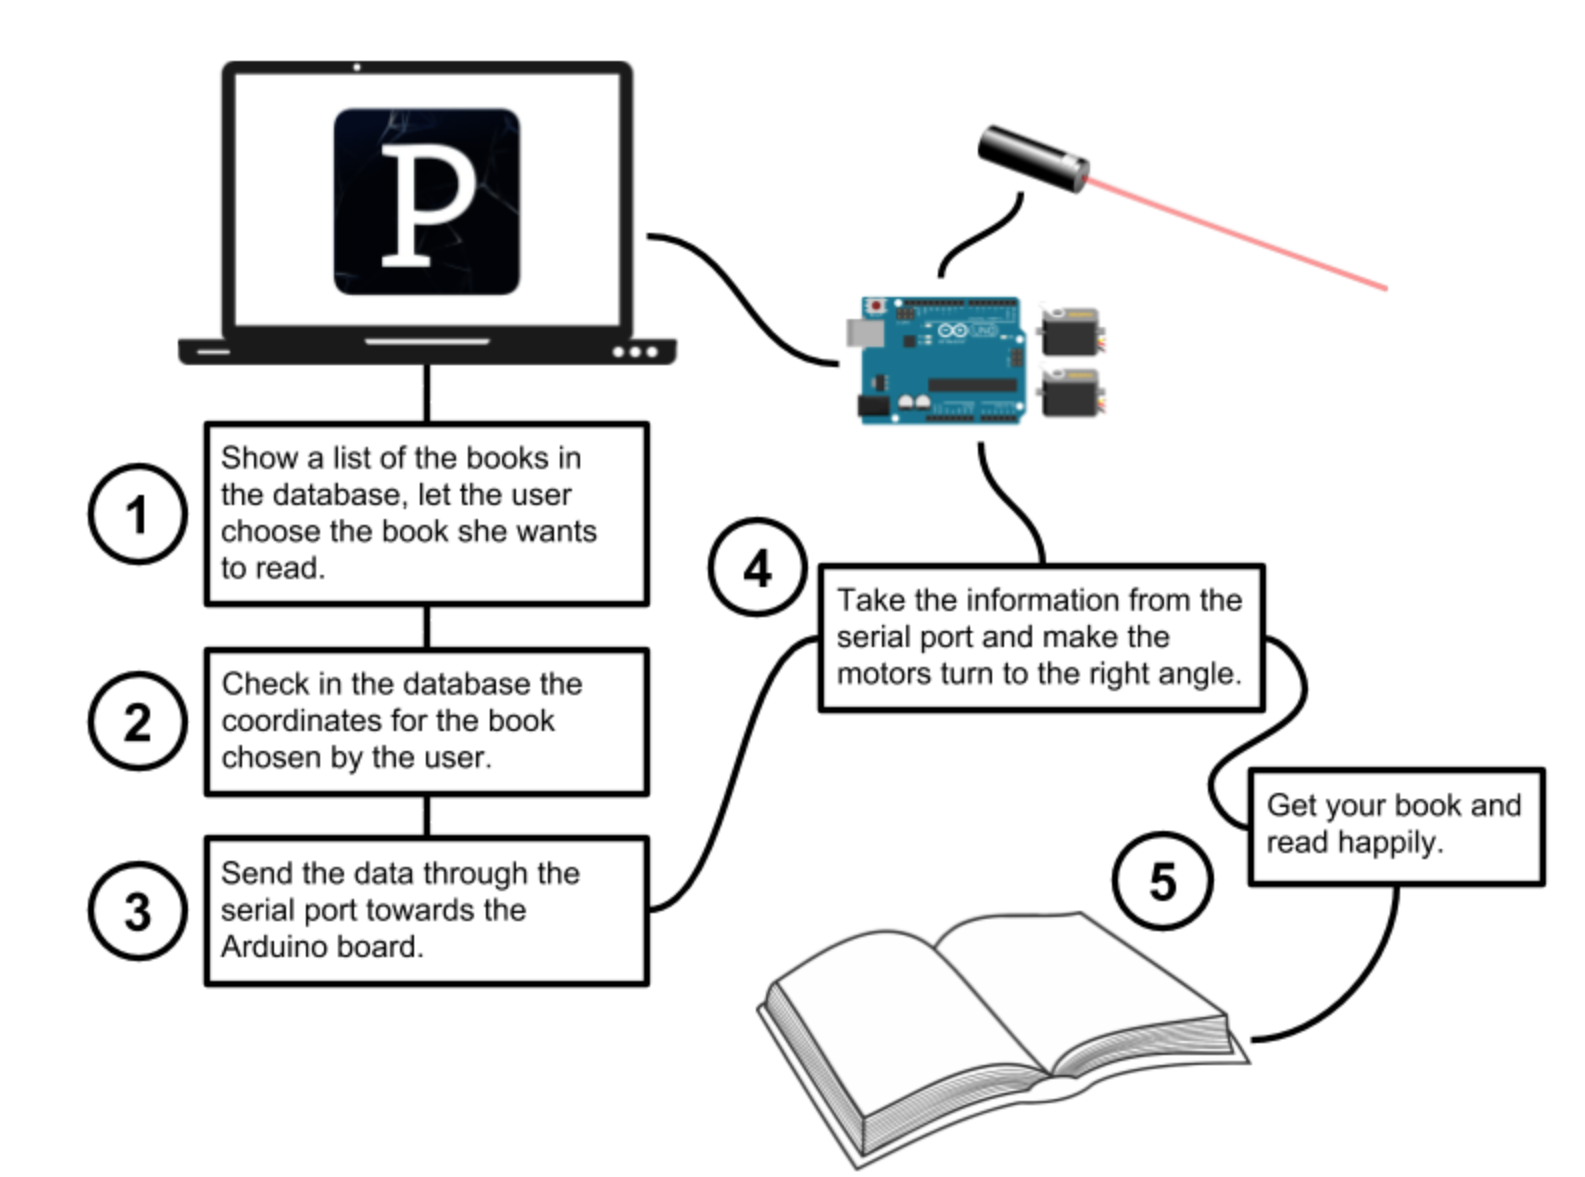
When it comes to my understanding on how this project was built, it is clear that the students used an Arduino Uno board, a Processing sketch, two standard servo motors, and a laser pointer. I have prepared a schematic for you to see how it could work, as well as a diagram that explains the basic interactions between the Processing code and the Arduino one.

(Here is where I have to apologize because of the diagram. I didn’t have a lot of time to enhance its appearance, but CC0 clipart images are your friend and let me make things quickly.)

An idea of how it works

Take a look at the flow chart above, which explains more about the project. The user will interact with the Processing sketch whenever he or she wants to search for a book. It is very likely the project that the students made had everything hardcoded in the program. In other words, the system was not letting you easily add new books to the database, but were stored in a text file that the Processing sketch would load upon boot.

The books were presented in the form of a dropdown list for you to choose from. Once you selected one of the items in the list, the Processing sketch would send the coordinates to the servo motors. Those coordinates also had to be stored in the same text file as the names of the books. With the coordinates, that had to be the angles for each one of the servos, the pointer would be directed towards the shelves, highlighting the location of the book.

Since this had to be shown at a faire where thousands of people would come by over a four-hour period, the students couldn’t prepare a much more complex presentation. This is why I have to make some assumptions about how far they went in their building. I also assume that they had to think through the ways to calibrate everything, since they didn’t have a lot of time to set up. The project worked flawlessly for the entire faire.

This is why I like it so much

At home we like books, we always have. When I was a kid, my parents had books in the living room, the dining room, mine and my brother’s room. As an adult, I have bought thousands of books and read every week. We own a 7m long bookshelf where books are sorted by color. When we discuss a project or think about possible ideas for what to build next, we look through our books. After a while, finding books is a time-consuming activity. I need one of these book-finding robots in my home!

Other projects with lasers?

You’ve likely seen at least one of the servo-controlled laser pointer projects for entertaining your cats here, here, or even here. Those are just one example of the fun things you can do with Arduino and lasers. In the context of CTC, there is actually a whole series of projects using laser diodes for creating music instruments. But that is an entirely different story, If you want to read about it, stay tuned for more adventures in CTC at the Arduino blog!

The CTC Caire was supported by Cesire at the Generalitat de Catalunya and the EduCaixa foundation.

Motorizing a Simple Camera Slider

Improving your shots with a motorized camera slider doesn't have to be complicated! Follow Jeremy Cook's lead and cobble something custom together.

Read more on MAKE

The post Motorizing a Simple Camera Slider appeared first on Make: DIY Projects and Ideas for Makers.

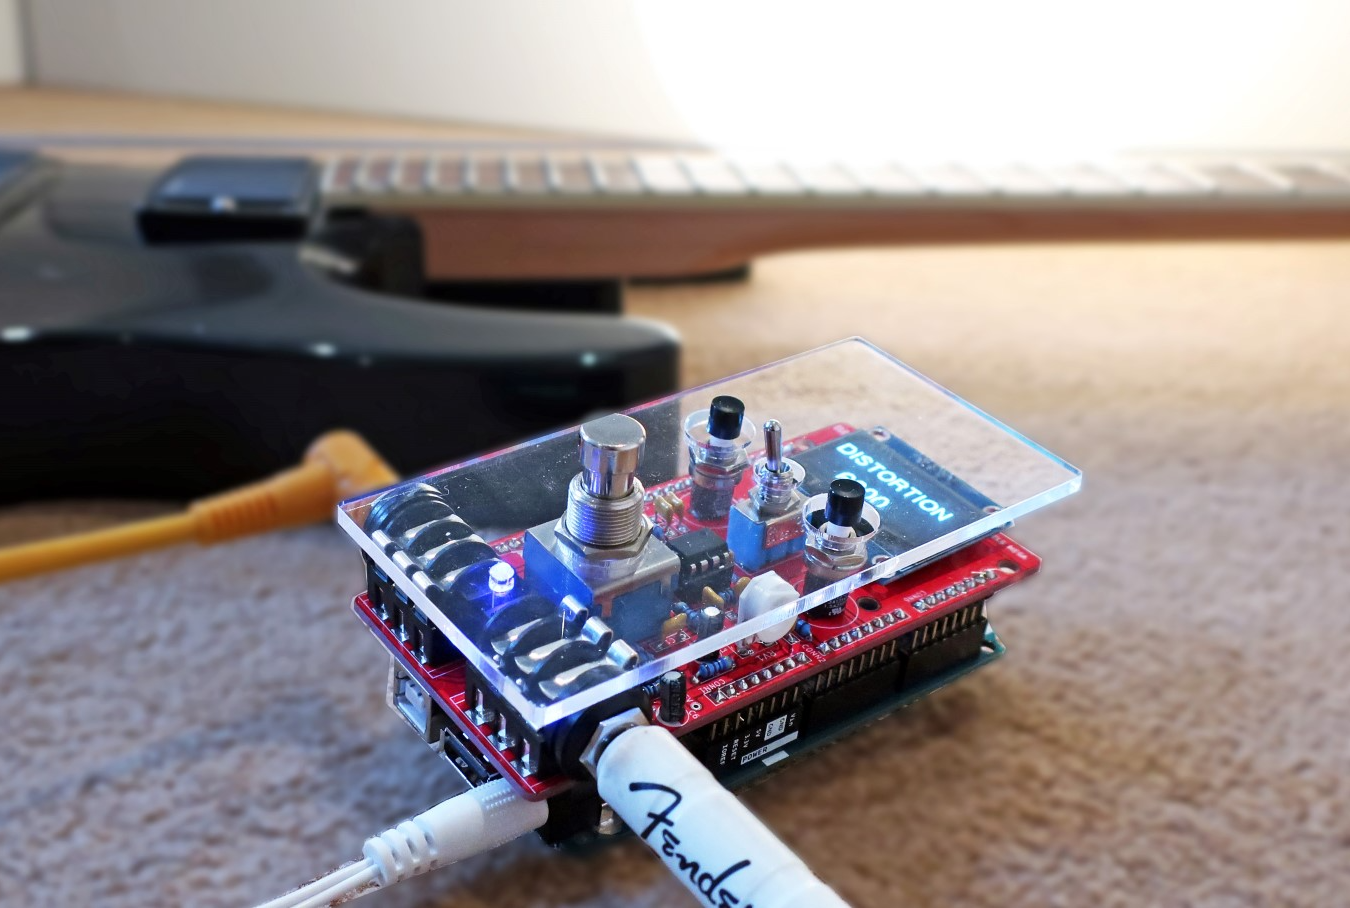
pedalSHIELD MEGA is a programmable guitar pedal for your Arduino

If you want to create new guitar sounds without having to redo your pedal wiring every single time, the pedalSHIELD MEGA from ElectroSmash could be just what you’re looking for.

The pedalSHIELD MEGA takes input from a guitar via a standard ¼-inch cable, and uses an Arduino Mega to process the sounds to your liking. This new sound is then output using two PWM pins for a 16-bit resolution.

The device, which is available in kit form or as a PCB, sits on top of the Mega as an amazing looking shield. In addition to a 3PDT true bypass footswitch, a toggle switch, and two pushbuttons, the pedalSHIELD MEGA features an OLED display for visual feedback. Once assembled, all you need to do for an entirely unique sound is program your own effects in the Arduino IDE!

This shield that is placed on top of an Arduino Mega has three parts:

Analog Input Stage: The weak guitar signal is amplified and filtered, making it ready for the Arduino Mega ADC (Analog to Digital Converter).

Arduino Mega Board: It takes the digitalized waveform from the ADC and does all the DSP (Digital Signal Processing) creating effects (distortion, fuzz, volume, delay, etc).

 Output Stage: Once the new effected waveform is created inside the Arduino Mega board, this last stage takes it and using two combined PWMs generates the analog output signal.

You can find more details on the pedalSHIELD MEGA here, and see it in action below!

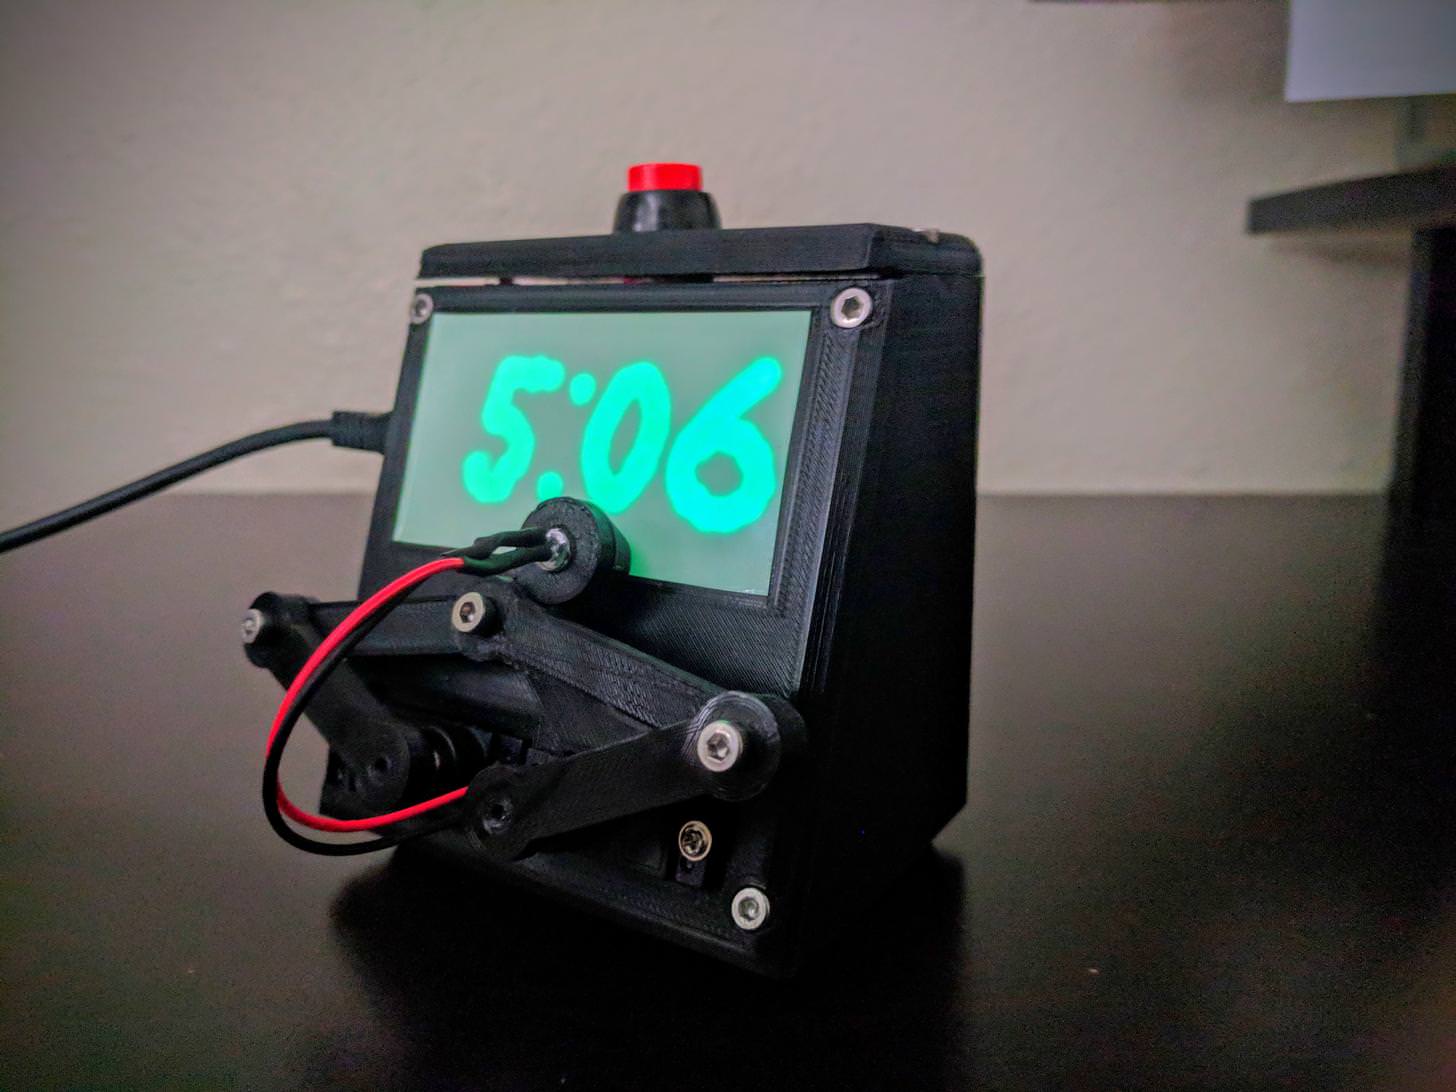
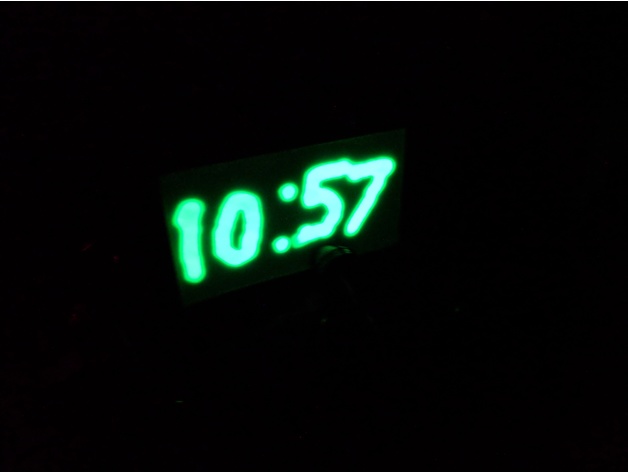
Check the time on a glow-in-the-dark UV LED clock

If you thought plot clocks that write on a tiny whiteboard were cool, this project takes things to the next level, jotting down the time not with a dry-erase marker, but with a UV LED on a glow-in-the-dark sticker.

The device itself uses an Arduino Uno for control, along with a RTC module for timekeeping, and a pair of servos that move the LED with custom linkages.

In addition to an awesome looking glow-surface, the clock has been upgraded with a full 3D-printed enclosure. For a quick overview of the project, you can check it out on Imgur. If you’d like to build your own, all the Arduino code and print files are available on Thingiverse.

Lasers, Mirrors, and Sensors Combine in an Optical Bench Game

Who would have thought you could make a game out of an optical bench? [Chris Mitchell] did, and while we were skeptical at first, his laser Light Bender game has some potential. Just watch your eyes.

The premise is simple: direct the beam of a colored laser to the correct target before time runs out. [Chris] used laser-cut acrylic for his playfield, which has nine square cutouts arranged in a grid. Red, green, and blue laser pointers line the bottom of the grid, with photosensors and RGB LEDs lining the grid on the other three sides. Play starts with a random LED lighting up in one of the three colors, acting as a target. The corresponding color laser comes on, and the player has to insert mirrors or pass-through blocks in the grid to create a path to the target. The faster you hit the CdS cell, the higher your score. It’s simple, but it looks really engaging. We can imagine all sorts of upgrades, like lighting up two different targets at once, or adding a beamsplitter block to hit two targets with the same color. Filters and polarizers could add to the optical fun too.

We like builds that are just for fun, especially when they’re well-crafted and have a slight air of danger. The balloon-busting killbots project we featured recently comes to mind.


Business On The Outside, Electronics Workstation On The Inside

As an electrical engineering student, [Brandon Rice] had the full suite of electronics tools you’d expect. Cramming them all into a dorm room was doable — but cramped — a labour to square everything away from his desk’s top when he had to work on something else. To make it easier on himself, he built himself a portable electronics workstation inside the dimensions of a briefcase.

Built from scratch, the workstation includes a list of features that should have you salivating by the end. Instead of messing with a bunch of cables, on-board power is supplied by a dismantled 24V, 6A power brick, using a buck converter and ATmega to regulate and display the voltage, with power running directly to  12V and 5V lines of a breadboard in the middle of the workstation. A wealth of components are stored in two dozen 3d printed 1″ capsules setting them in loops pinned to the lid.

If all this was not already enough, there’s more!

Since he’ll be soldering a lot, there’s obviously an included soldering station, but were you expecting a helping hand and a carbon-filtered fume extractor? How about a folding overhead light to boot? Spools of wire are off to the rear to be tugged on when needed, and a drawer tucked into the side keeps circuit boards and jumper wires organized. There’s also a power strip along the other side — [Rice] notes that it was handier than he realized — for any other devices you might need. There’s even a built-in Arduino.

Hungry for more? How about a second serving, or even desert?

Stecchino Game is all about Balancing a Big Toothpick

Stecchino demo by the creator

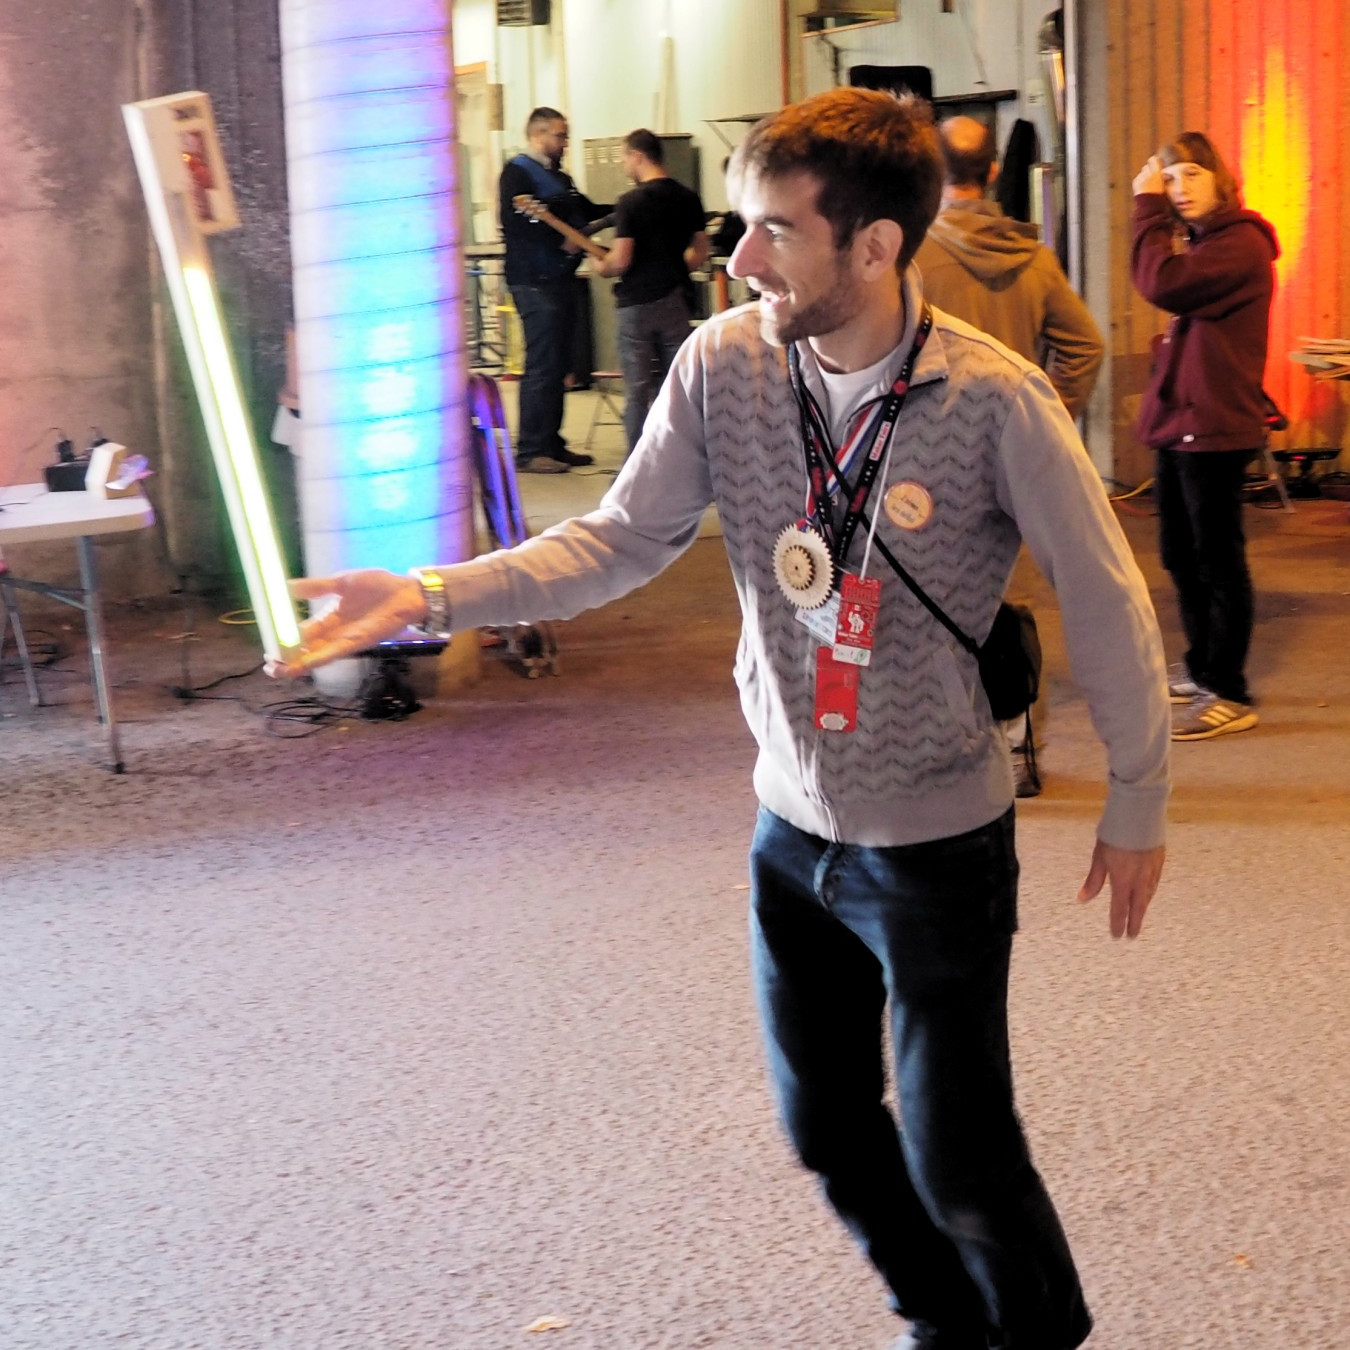
Self-described “Inventor Dad” [pepelepoisson]’s project is called Stecchino (English translation link here) and it’s an Arduino-based physical balancing game that aims to be intuitive to use and play for all ages. Using the Stecchino (‘toothpick’ in Italian) consists of balancing the device on your hand and trying to keep it upright for as long as possible. The LED strip fills up as time passes, and it keeps records of high scores. It was specifically designed to be instantly understood and simple to use by people of all ages, and we think it has succeeded in this brilliantly.

To sense orientation and movement, Stecchino uses an MPU-6050 gyro and accelerometer board. An RGB LED strip gives feedback, and it includes a small li-po cell and charger board for easy recharging via USB. The enclosure is made from a few layers of laser-cut and laser-engraved material that also holds the components in place. The WS2828B LED strip used is technically a 5 V unit, but [pepelepoisson] found that feeding them direct from the 3.7 V cell works just fine; it’s not until the cell drops to about three volts that things start to glitch out. All source code and design files are on GitHub.

Games are great, and the wonderful options available to people today allow for all kinds of interesting experimentation like a blind version of tag, or putting new twists on old classics like testing speed instead of strength.