Posts with «arduino uno» label

Puzzle-locked geocache provides an extra challenge

Using an Arduino Uno and a servo motor, hacker “Cliptwings” came up with a surprise for treasure hunters!

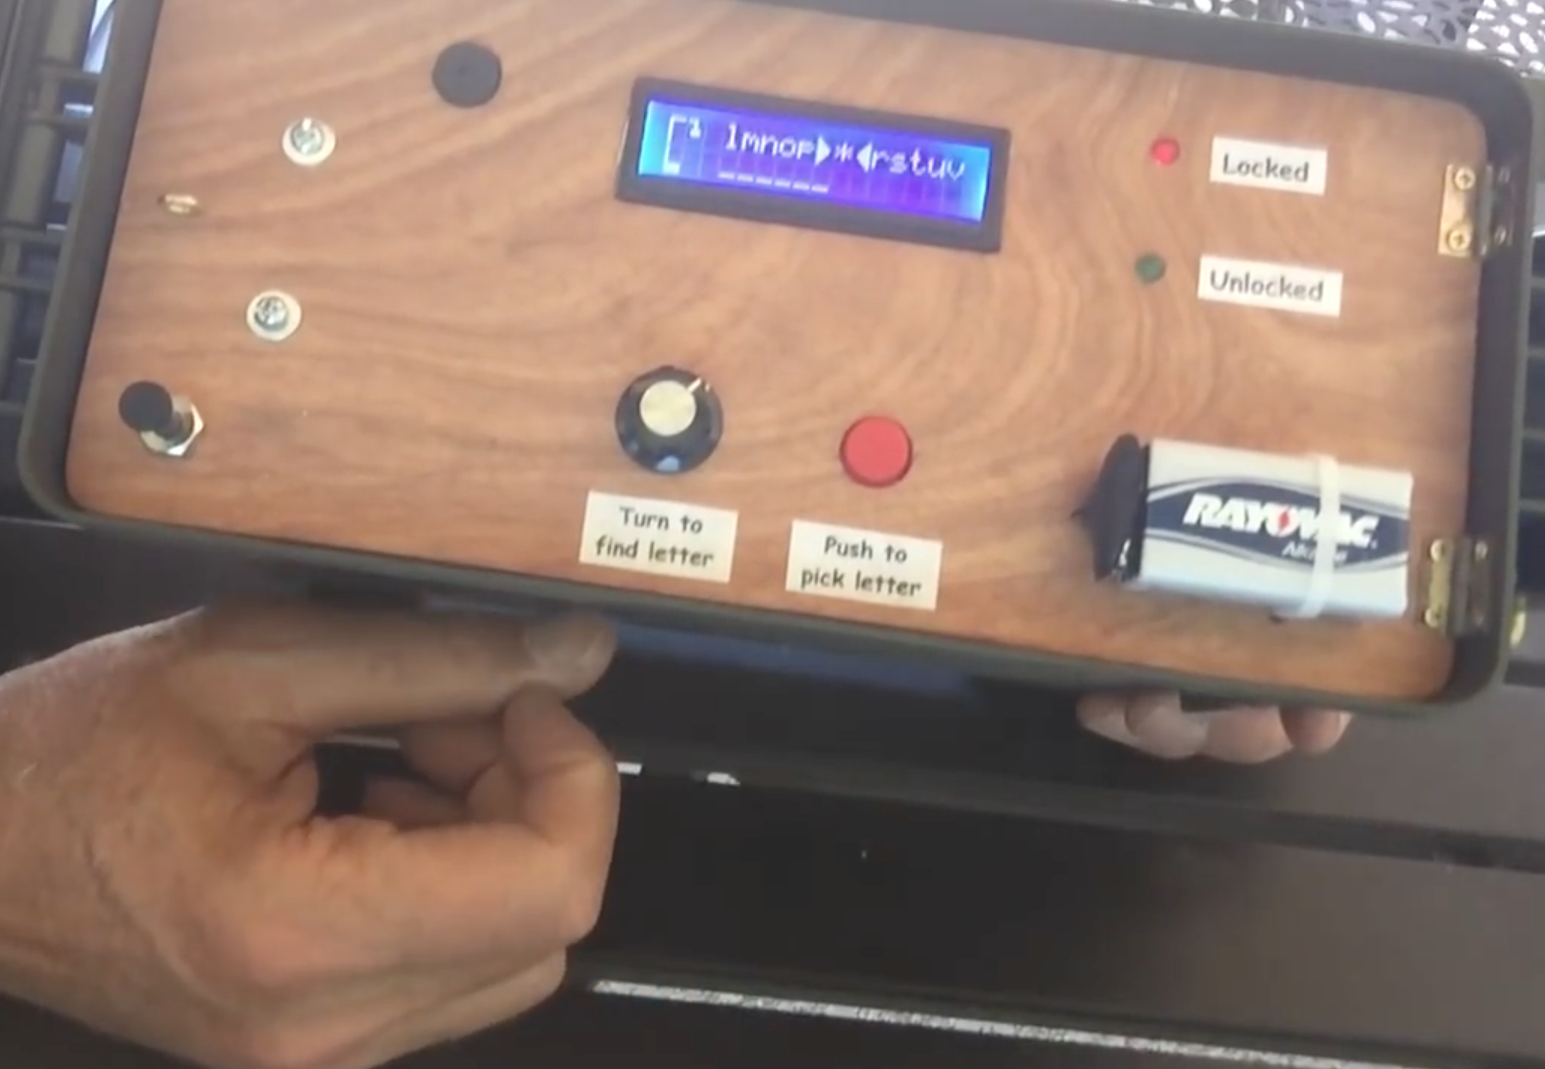
Geocaching is a game where amateur adventurers find caches in different locations using a GPS receiver. Though this can be a fun way to get outside, once you find the storage box, the challenge is pretty much over. Cliptwings decided to take things in a different direction, and made his cache—which importantly contains a battery on the outside—lock until the retrieving party solves a hangman game.

Once this Arduino-based puzzle is solved, the gadget unlocks with a small servo, revealing the contents inside, most likely a logbook!

The number of this geocache is GC72AFD. The object of the cache is to play and win a game of hangman in order to open the container. An Arduino is used to store five random words. The player uses a knob to turn to a letter, then presses a button to see if it is contained in the word. When the player gets all the words correct, the box opens. If too many wrong words are guessed, access is denied and the box remains locked.

You can find more info on this device in the video below, or check out Dan Wagoner’s hangmanduino code, a modified version of which powers this box!

Fire Fighting Robot

Primary image

What does it do?

Navigate a Maze, extinguish a flame, track position

I'm currently a sophomore at Worcester Polytechnic Institute studying Robotics Engineering. The third course in the series, RBE 2002, focusing on sensors. In a group of 4 students, we built a robot that could autonomously navigate a maze, locate a flame, put it out and report its X,Y, and Z position relative to its starting position. The robot was required to use an IMU and a flame sensor provided to us. All other sensors and parts are up to the group to use to complete the challenge.

Cost to build

Embedded video

Finished project

Complete

Number

Time to build

Type

URL to more information

Weight

read more

An Arduino Final Countdown Timer

While playing a game called slither.io, Nathan Ramanathan was asked by his father to turn on a wet grinder for “exactly 45 minutes.” As explained, this device uses stones to grind rice into dough, producing material for delicious-looking Dosa cakes.

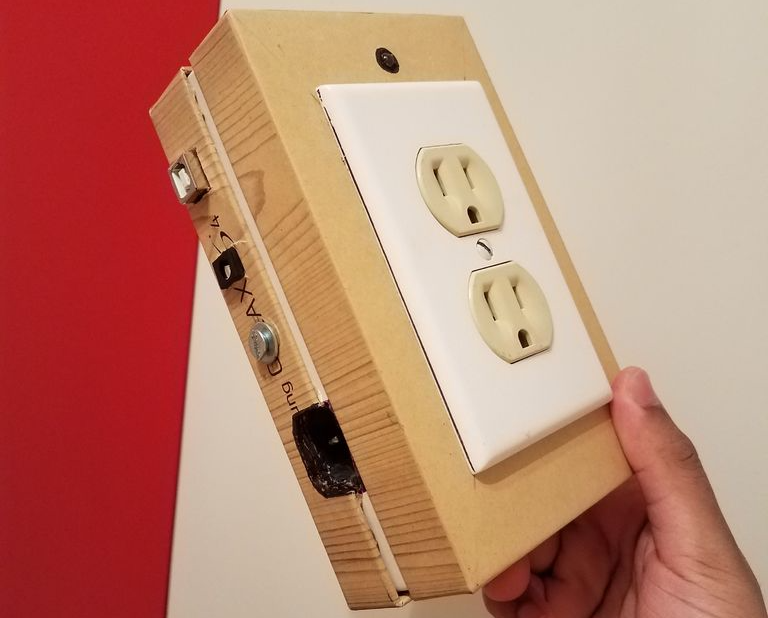
Deliciousness aside, Ramanathan would rather have the grinder stop automatically than wait around for it, and came up with his own Arduino Uno-based outlet timer controlled via smartphone over Bluetooth. As a bonus, it plays “The Final Countdown” by Europe when only a few seconds remain. 

His write-up includes some discussion about multitasking and the perils of using the delay() function, so be sure to check that out if you’d like more information. Also, when dealing with outlet/mains power, use extreme caution and get help from someone qualified if needed.

Multi-player retro gaming on an Arduino VGA console

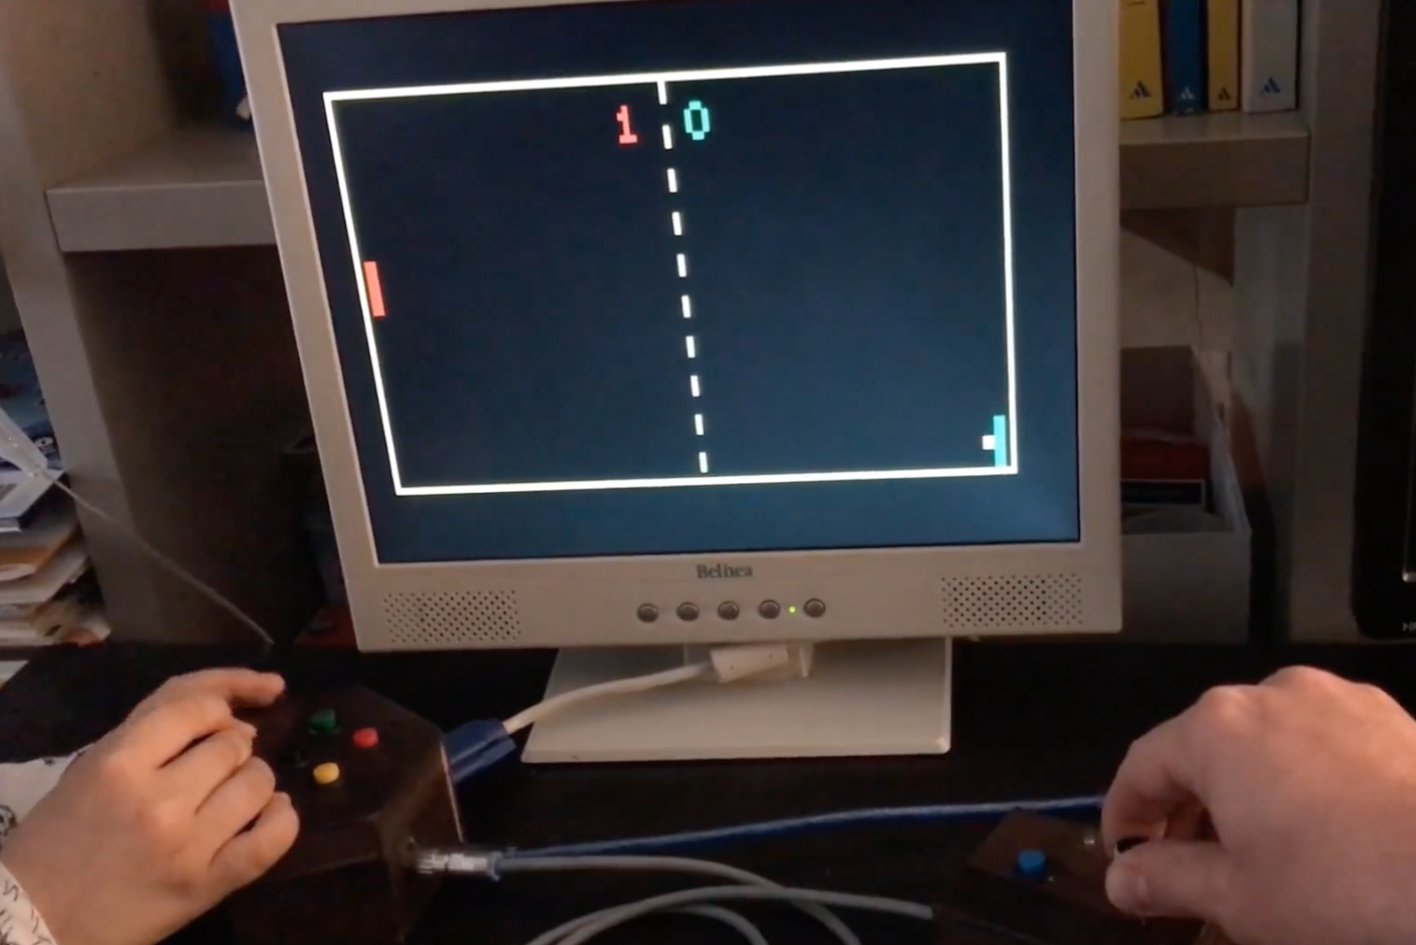
When you’re introduced to an Arduino Uno, perhaps you want to take button inputs, control a few LEDs, or move a hobby servo motor. These boards are quite good at that, but with some creative coding, they can actually control a VGA monitor and even play low-resolution games like Pong, Snake or Tetris.

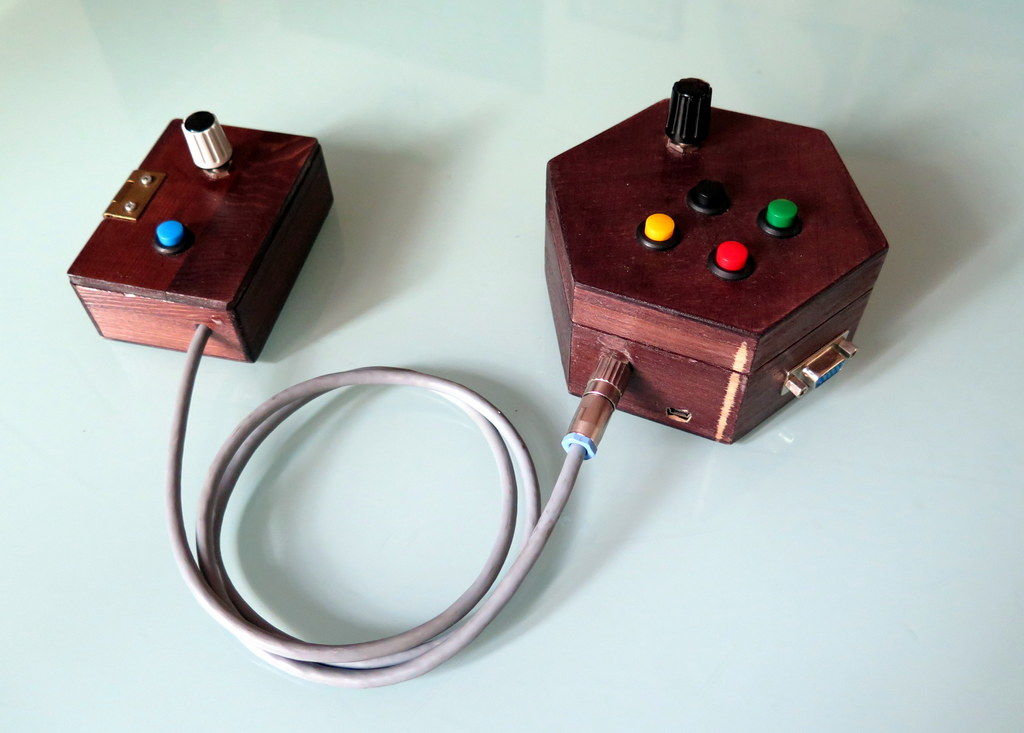
Using Sandro Maffiodo’s VGAx libraries, Instructables user Rob Cai built his own gaming setup, wiring the controls into two separate units. Now, while the base unit hooks up to the actual screen and takes inputs from player one, the second allows player two to participate as well.

I decided to split it in two units: one with a potentiometer and four buttons for the single player games, the other with one button and the second potentiometer for the second player. Thus in total you need 5 buttons, two potentiometers, a VGA connector (DSUB15 female) and, of course, an Arduino! Most importantly, there is no need of supporting IC or special shields!

Want to make one of your own? Check out the DIY VGA console in action below, and find more details on the project’s Instructables write-up. Smaffer’s VGAx libraries can be found here.

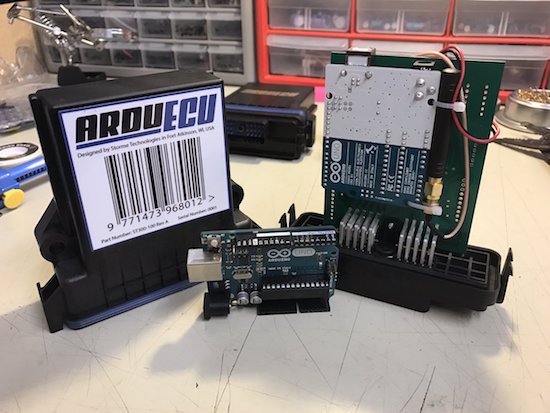
ArduECU is a waterproof and rugged Arduino electronic control unit

Now on Kickstarter, ArduECU is an IP69K-rated waterproof, rugged and impact-resistant electronic control unit (ECU) that enables your Arduino projects to withstand the elements and other harsh environments.

ArduECU is compatible with all 12V to 24V systems, and can be used in a wide range of applications such as vehicle diagnostics and control, stationary machines, remote monitoring, industrial automation, and agriculture to name just a few.

Based on an ATmega328, the ECU can be programmed with the Arduino IDE and also supports CoDeSys, meaning you can now configure your ArduECU with ladder logic, functional block, structured text, instruction list, or sequential function charts.

ArduECU comes in three models–one for basic projects, one for CAN bus vehicle and machine control applications, and another which converts an existing Arduino Uno into a weatherproof, custom-tailored ECU with an on-board prototyping area for your own creations and circuits. Each of these units will have expansion headers to leverage IoT and wireless capabilities, including Wi-Fi, Bluetooth, cellular and GPS, or to house future expansion shields with additional functionality at a later time.

Arduino Blog 05 Apr 20:10

Geared clock measures time linearly

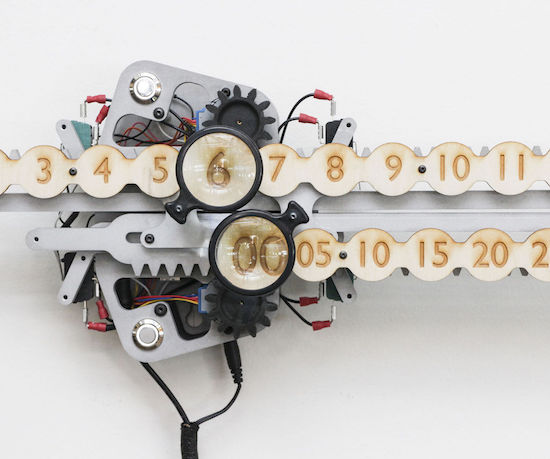
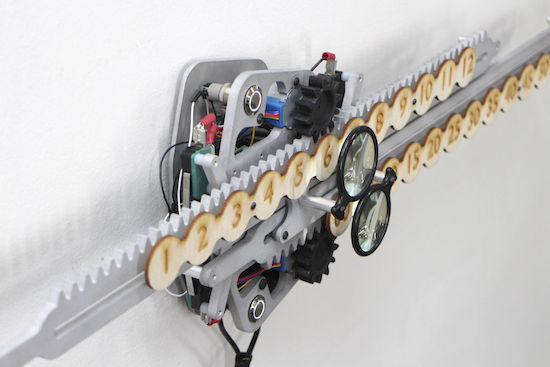
Jonathan Odom, a full-time designer at Instructables who goes by the name “JON-A-TRON,” decided to make a clock illustrating time’s linearity.  What he came up with was a beautifully crafted (robotically manufactured at the Pier 9 workshop, that is) clock that uses two rack and pinion assemblies to move a line of numbers for hours on top of another line signifying minutes.

The minute “hand” is divided up into five-minute intervals, which seems to him to feel less neurotic than being precise down to the exact minute. Magnifying glasses are used to magnify an hour and minute number, reminding onlookers to focus on the present.

The clock is actuated using an Arduino Uno with a motor driver, controlling a stepper motor for each “hand.” It’s an incredible build, and nicely illustrated. Whether or not you have access to the tools needed to recreate this exact clock, perhaps this concept will inspire something similar!

Be sure to check out Odom’s clock Instructables write-up here and see a demo of it below!

Arduino-controlled 360° camera trap for animal photography

Using an Arduino, wildlife observer and hiking hacker Andrew Quitmeyer modified a spherical camera to take pictures when motion is detected.

If you’d like to photograph wildlife without actually being there to scare the animals off (or because you would eventually get bored), a great solution is a camera trap. These devices can trigger a camera when animals move nearby, hopefully capturing interesting images. Generally, you need to point your camera in the right direction, but Quitmeyer got around this by using a 360 camera instead to eliminate this placement bias.

In order to control the device, he rigged up his own system with PIR motion sensors and an Arduino Uno to prompt the camera as well as power it on and off. The hack looks effective, though voiding an expensive camera’s warranty like this will certainly scare a few Makers off!

You can see more about how this project was pulled off on Instructables, and find the Arduino code used on GitHub.

Well Engineered Radio Clock Aces Form and Function

Clocks that read time via received radio signals have several advantages over their Internet-connected, NTP-synchronised brethren. The radio signal is ubiquitous and available over a fairly large footprint extending to thousands of kilometres from the transmitting antennae. This allows such clocks to work reliably in areas where there is no Internet service. And compared to GPS clocks, their front-end electronics and antenna requirements are much simpler. [Erik de Ruiter]’s DCF77 Analyzer/Clock is synchronised to the German DCF77 radio signal, which is derived from the atomic clocks at PTB headquarters. It features a ton of bells and whistles, while still being simple to build. It’s a slick piece of German hacker engineering that leaves us amazed.

Among the clock functions, it shows time, day of the week, date, CET/CEST modes, leap year indications and week numbers. The last is not part of the DCF77 protocol but is calculated via software. The DCF77 analyzer part has all of the useful information gleaned from the radio signals. There are displays for time period, pulse width, a bit counter, bit value indicator (0/1) and an error counter. There are two rings of 59 LEDs each that provide additional information about the DCF77 signal. A PIR sensor on the front panel helps put the clock in power save mode. Finally, there is a whole bunch of indicator LEDs and a bank of switches to control the various functions. On the rear panel, there are RJ45 sockets for the DCF77 receiver antenna board, temperature sensor and FTDI serial, a bunch of audio sound board controls, reset switches and a mode control switch.

His build starts with the design and layout of the enclosure. The front panel layout had to go through a couple of iterations before he was satisfied with the result. The final version was made from aluminium-coated sandwich-panel. He used an online service to photo-etch the markings, and then a milling machine to carve out the various windows and mounting holes. The rear panel is a tinted acrylic with laser engraving, which makes the neatly laid out innards visible for viewers to appreciate. The wooden frame is made from 40-year-old Mahogany, sourced from an old family heirloom desk. All of this hard work results in a really professional looking product.

The electronics are mostly off the shelf modules, except for the custom built LED driver boards. The heart of the device is an Arduino Mega because of the large number of outputs it provides. There are seven LED driver boards based around the Maxim 7221 (PDF) serial interface LED drivers – two to drive the inner and outer ring LEDs, and the others for the various seven-segment displays. The numerous annunciator LEDs are driven directly from the Arduino Mega. His build really comes together by incorporating a noise resilient DCF77 decoder library by [Udo Klein] which is running on a separate Arduino Uno. All of his design source files are posted on his GitHub repository and he hopes to publish an Instructable soon for those who would like to build one of their own.

In the first video below, he walks through the various functions of the clock, and in the second one, gives us a peek in to its inside. Watch, and be amazed.

Thanks for the tip, [Nick]


Filed under: clock hacks

Build an Arduino-powered magnetic drawing machine

As touched on in this video by Charlotte Dann (aka “Charbytes”), she has magnets in her fingers.

This may or may not seem like a small detail, but either way it allows her to draw interesting shapes by passing them over a magnetometer mounted to an Arduino Uno. Dann’s sensor/Arduino package passes serial data to a computer, which does the “heavy lifting,” turning the input into beautiful colors on a computer screen.

It’s an interesting project, and the build process is nicely narrated in her video. A few highlights include a problem with “plastic weld” at 4:00, and a few electrical issues around 7:30 that she eventually solves. You can see more details on this project on its GitHub page, as well as check out Dann’s Twitter account to see what else she’s up to!