Posts with «arduino uno» label

Open Source 3D Printed Rocket Engines controlled by Arduino

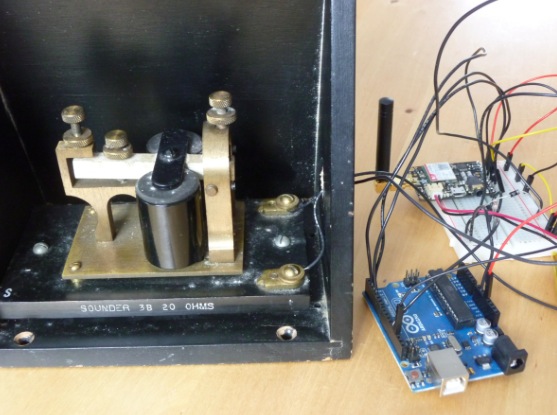
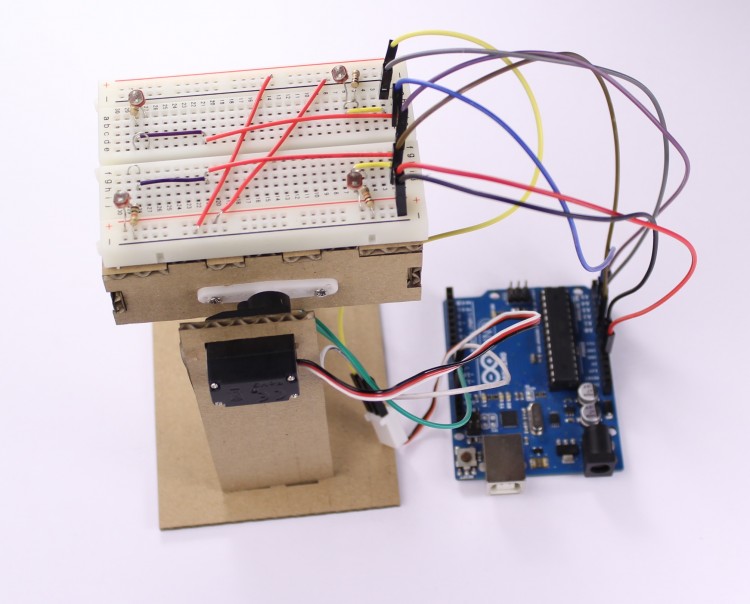
Fubar Hackerspace (New Jersey) member Graham has been working on an open source liquid fuel rocket engine with regenerative cooling and precise flow control build on Arduino Uno.  In order to test it he’s also built a cool rig for testing propellant flow control:

My project is building Open Source 3D Printed Rocket Engines with Arduino microcontrollers. As an individual interested in building liquid fueled rocket engines as a hobby I quickly realized there were almost no resources online or forums to share or learn from others. I decided to combine my interests in Software, hardware and open source projects to develop and build a functioning liquid fueled rocket engine. However, unlike most other projects it had to be open source and easily re-produced.

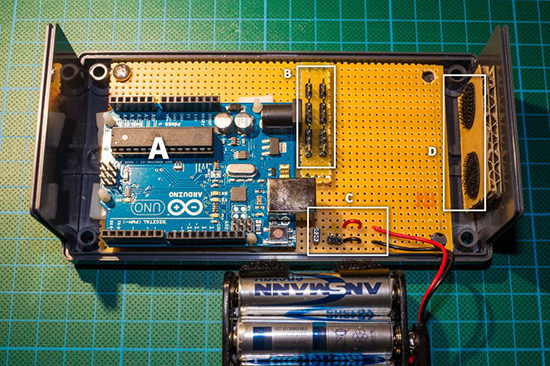
In order to ensure it was as open source as possible I used the Arduino Uno board and IDE to develop software to safely control the engine. To meet the easily reproducible requirement I decided that 3D printing was the right approach rather than labor/time intensive traditional machining.

The end result is an engine that can easily be reproduced or modified. This gives others interested in this hobby a starting point for best practices, safety, etc… so that future projects aren’t starting out from scratch.

All of my design files and software are on GitHub  and a detailed description of the write-up is on the FUBAR labs makerspace wiki 

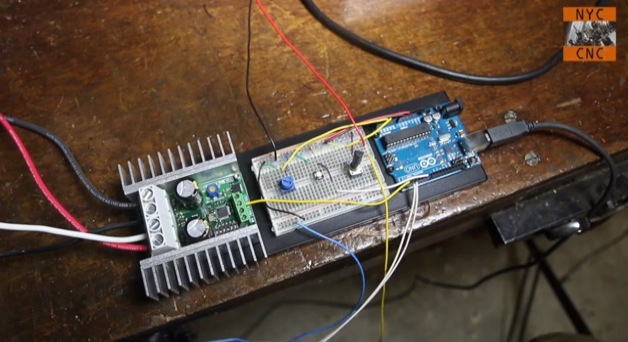
Here’s the video of the testing of the 3D Printed GOX/Ethanol Injector:

Arduino Blog 27 Feb 09:58

Connecting a telegraph with 21st century networks

Twitter telegraph is a project by Devon Elliot making telegraph sounder tap out Twitter messages using Arduino Uno. It’s an interesting attempt to connect technology rooted in the 19th- and early 20th-centuries with 21st-century networks:

A local architectural heritage project spawned a wider interest in railways and roundhouses. One of the related technologies of railways in the 19th century was the telegraph. Having acquired an old telegraph sounder, we wondered if it could tap out Twitter messages.

An Arduino UNO was used to test and control the telegraph sounder. The coils on the telegraph were tested with power drawn from the Arduino’s 3.3V and 5.0V pins. Momentarily powering the telegraph from the Arduino confirmed that the coils still worked, and the device made satisfying clicks in response from the electromagnetic action of the coils.

With it confirmed that the telegraph is still operable, the Arduino UNO was then used to control the sounder. Mark Fickett’s Arduinomorse library was a quick route to controlling the telegraph in Morse code timing. Using that library, string characters are converted into Morse code, and a digital pin on the Arduino goes high and low, as if to turn an LED on and off. That pin became the control pin for the telegraph, and simple circuit was built using a transistor, resistor and diode to control the telegraph without damaging the Arduino’s digital pins. This circuit is common for connecting relays to Arduinos.

The final step was adding an Adafruit FONA to the Arduino. The FONA connects to cellular phone networks, and the Arduino UNO can interact with it by sending and receiving actions to and from the FONA. In this case, the FONA connects to the cellular network and the Arduino checks the FONA periodically to see if there are any SMS messages available. If there are, the Arduino starts to read through them, convert them to Morse code, and tap them out on the telegraph.

The completed device can be operated from batteries if necessary, providing operation anywhere a cellular signal can reach. The cellular connection provides wireless connectivity with the FONA handling the connection, rather than the Arduino.

To package it up, the Arduino UNO and FONA were attached to a piece of acrylic. That board was then mounted under the telegraph sounder’s resonator. Four holes were pre-existing in the resonator’s base and used for mounting, so no permanent alterations were made to the historic components.

See it in action:

Arduino Blog 24 Feb 23:39

A collective instrument capturing breathe with paper windmills

Cata Sopros is interactive sound installation running on Arduino Uno and created by Elas Duas, a multidisciplinary studio based in the city of Guimarães (Portugal). If you translate the title from portuguese it means: Breathe Catchers. In fact the project is a collective musical instrument made with paper windmills transforming the users’ breathe into sounds:

The windmills have inbuilt electret microphones that were connected to an Arduino Uno. The sensor data was then sent to MaxMSP and the sounds were played with Ableton Live. The video was shot at the cloister of the beautiful Alberto Sampaio museum in Guimarães, Portugal.

Enjoy the video:

Secret Attic Library Door

We have a pretty good guess where [Krizbleen] hides away any seasonal presents for his family: behind his shiny new secret library door. An experienced woodworker, [Krizbleen] was in the process of finishing the attic in his home when he decided to take advantage of the chimney’s otherwise annoying placement in front of his soon-to-be office. He built a false wall in front of the central chimney obstacle and placed a TV in the middle of the wall (directly in front of the chimney) flanked on either side by a bookcase.

If you touch the secret book or knock out the secret sequence, however, the right-side bookcase slides gently out of the way to reveal [Krizbleen’s] home office. Behind the scenes, a heavy duty linear actuator pushes or pulls the door as necessary, onto which [Krizbleen] expertly mounted the bookcase with some 2″ caster wheels. The actuator expects +24V or -24V to send it moving in one of its two directions, so the Arduino Uno needed a couple of relays to handle the voltage difference.

The effort spent here was immense, but the result is seamless. After borrowing a knock-detection script and hooking up a secondary access button concealed in a book, [Krizbleen] had the secret door he’d always wanted: albeit maybe a bit slow to open and close. You can see a video of its operation below.


Filed under: Arduino Hacks, home hacks

Global emotional light with Arduino

Based on open source technology and programming, LUZ is a lighting project that product designer Marina Mellado designed and targeted to those people who are physically and psychologically affected by the lack of sun or daylight.

Luz is a one meter diameter ring of light. It connects two LED stripes RGB SMD5050 to an Adafruit TCS34725 sensor ( which I use to get the temperature of colour (K) and the light intensity (Lux) Values ) and an Arduino Uno.

The electronic system is programmed to modify gradually the light-color sensibility of the lamp depending on the weather conditions when the sensor is positioned by the window.

Check the video below to see the lamp in action:

Arduino Blog 21 Nov 15:44

The perfect teal

Last year Massimo Banzi wrote a long post on this blog to explain the genealogy of Arduino.  He described how an open-hardware project, designed to lower the barriers to prototyping interactive projects, was able to find its way into economical sustainability and still keep innovating.

He clearly explained what an original Arduino is, and why its cost is a matter of maintaining an open-source ecosystem, and not only of manufacturing and distributing the boards.

He detailed out what ‘counterfeit Arduinos’ are, and why they are harmful to the whole open-source hardware movement. We release Arduino’s hardware design files so that people could make their own versions, but this doesn’t mean manufacturing boards only for profit and pretending to be Arduino.

 We don’t release any element of the Arduino brand identity (logo and graphics of the boards), so whoever uses the trademarked Arduino graphics makes a deliberate act of Trademark infringement and prevent us in our effort to guarantee the quality of our products, always replaceable if defective.

We also created a page on our website showing how to spot a counterfeit Arduino.

As you can see at the link, we recently upgraded the page with new pictures as we are entering a new phase: we are redesigning the PCB silkscreens of all Arduino boards, in production in the next few months. As you might imagine, this is going to be a long process as it cannot happen in one night. The new silk will be better counterfeit-proof, and will allow you to recognise an original Arduino just by a quick look.

As you can see in the images above (click on the images for hi-res), we changed some graphic elements of the board and also switched to a different shade of teal.

In the next months we will upgrade the pictures of the boards in the product pages of the Arduino website as they roll out and are distributed around the world. It’s a transitioning phase so stay tuned for more news on the blog!

Make your cat behave when you are away using Arduino

The goal of this project was to create a small device, which detects movement in protected areas (e.g. tables) and allows you to speak usual phrases in your voice to the cat to control its behaviour when you are away. It’s called Cat Protector and prototyped on Arduino Uno  by Lucky Resistor, a creative guy who enjoys software development and electrical engineering:

I started with a prototype, using an Arduino Uno and a large breadboard. The first step was to realize an acceptable sound output. To realize this I added a shield with SD card adapter and wrote some optimized code to stream sound from the SD card in 22.1kHz using a 12bit DAC. The amplification to a speaker completed this part of the project where I have two solutions. Next I experimented with different motion sensors to detect the motion of the cat and finished the hardware part using a dual color LED for a simple status display.

Creating a compact device from the prototype was the next challenge, I could place the whole circuit I used on a small prototyping area and squeezed everything in a small casing. From outside, the device looks simple and tidy.

He documented everything in details on his website, especially the software part:

I read so many Arduino related articles and tutorials, but most of them stop when the prototype is running. I hope this documentation helps people to see how to structure Arduino software to make it extensible and keep it readable. This is especially necessary to write more complex logic than just to blink some LEDs. Also I hope to give some inspiration how to develop the prototype to a final device.

Check the full  documentation here.

Arduino Blog 11 Nov 21:06

A simple light follower with Analog 180° Micro Servo

Servos are composed of an electric motor mechanically linked to a potentiometer and they are able to translate the width of the pulse into a position. When you command the servo  to rotate, the motor is powered until the potentiometer reaches the value corresponding to the commanded position.

Today we’d like to share with you a tutorial with the aim of showing how to make a simple light follower made of cardboard using Arduino Uno and a microservo, in this case the Analog 180° Micro Servo.

Follow the step by step lesson to build one yourself.


Arduino Blog 10 Nov 22:18

Control Large DC Motors with Arduino

Arduino boards are able to control small motors very easily and it’s just as easy when you have to deal with controlling large motors. In the following video tutorial by NYC CNC you’ll see two examples. In the first you’ll learn how to get up and running, to start, stop, control direction and speed of a large motor with Arduino Uno. In the second example, how to use two proximity sensors as limit switches and two potentiometers to allow on-the-fly speed adjustment.

Arduino Blog 31 Oct 16:44

Bluetooth-Enabled Danger Sign for Lab

[A Raymond] had some free time at work, and decided to spend it on creating a wireless warning sign. According to his blog profile, he is a PhD student in Applied Physics. His lab utilizes a high-powered laser system. His job is to use said system, but only after it’s brought online by faculty scientists. The status of the laser system is changed by a manual switchbox that controls the warning signs wired around the lab entrances. Unfortunately, if you were in the upstairs office, you only knew this after running downstairs to check. [A Raymond's] admitted laziness finally got the better of him – he wanted a sign that displayed the laser’s status from the comfort of the office. He had an old sign he could use, but he wanted a way for it to communicate with the switchbox downstairs. After some thought, he decided Bluetooth was the way to go, using a pair of BlueSMiRF Bluetooth modules from Sparkfun and Arduino Uno R3’s.

He constructed a metal box that intercepted the cable from the main switchbox, mounting one BlueSMiRF and Uno into it. Upon learning that the switchbox sends 12V AC signals over three individual status wires, he half-wave rectified the wires and divided their voltages so that the Uno wouldn’t fry. Instead, it determined which status wire that had active voltage. and sent a “g(reen)”, “y(ellow)”, or “r(ed)” signal continuously via Bluetooth. On the receiving end, [A Raymond] gutted the sign and mounted the other BlueSMiRF and Uno into it along with some green, yellow, and red LEDs. The LEDs light up in response to the corresponding Bluetooth signal.

The result is a warning sign that is always up-to-date with the switchbox’s status. We’ve covered projects using Bluetooth before, from plush birds to cameras- [A Raymond's] wireless sign is in good company. He notes that it’s “missing” a high pitched whining noise when the “Danger” lights are on. If he decides to add an accompanying (annoying) sound, he couldn’t go wrong with something like this. Regardless, we’re sure [A Raymond] is happy that he no longer has to go back and forth between floors before he can use the laser.


Filed under: Arduino Hacks, wireless hacks