Build your own electronic drum kit using an Arduino Mega
If you’d like to save some money on a drum kit, this one is made using an Arduino Mega, MDF, and even a left sandal!
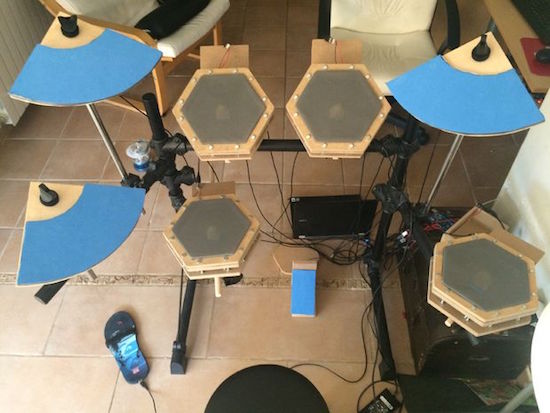
Drum kits can be quite expensive, Maker Victor Herrero has created his own nine-piece set with readily-accessible components. Arduino code was modified from another project by Evan Kale, and is available for download. Although electronics is discussed, the Instructables article focuses on how to physically make the set, mostly out of MDF.
The results are something that looks quite different than a “normal” drum set, with hexagonal drum pads and a flip-flop for hi-hat control! You can find the project on Instructables here, and the code that you’ll need on its GitHub page.