Converting a coffee maker into a 3D printer
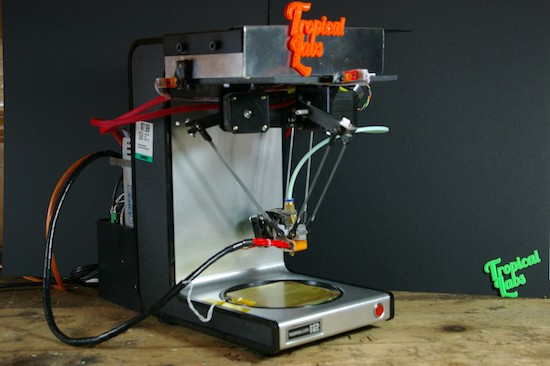
Heavy duty coffee makers are good for, well, making coffee. On the other hand, if you were to look at the frame without the preconception of what it can do, you might notice that there is space on top where equipment could be attached, and space on the bottom with a built-in heating pad on which to place an object… in other words, a perfect 3D printer frame!
Tropical Labs realized this, and turned the ordinary household appliance into a delta printer with three steppers for motion and another to feed the printing media. An Arduino Mega serves as the brains of the operation along with a popular RAMPS 1.4 shield.
Frame aside, it’s a neat mechanism, and definitely worth checking out. You can see more about the project on Hackaday.io.