LED strobe using dimmer board
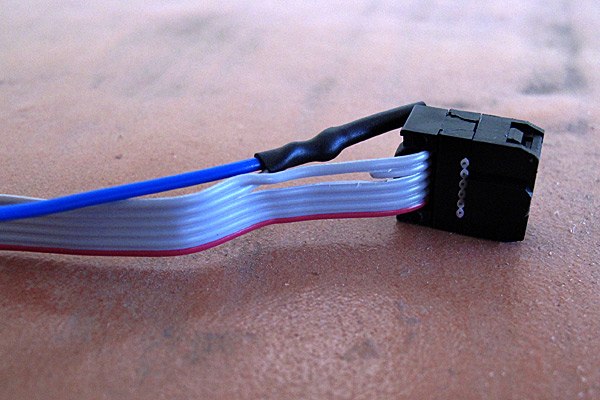
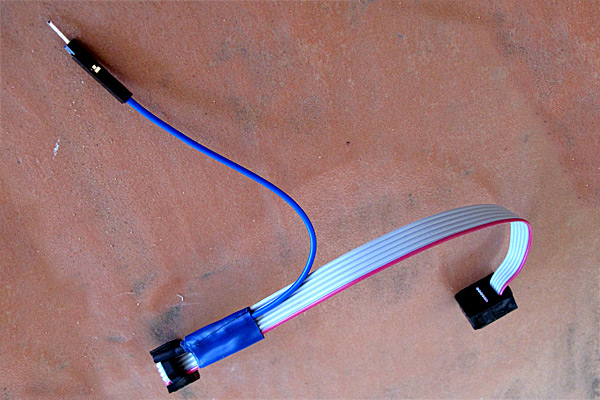
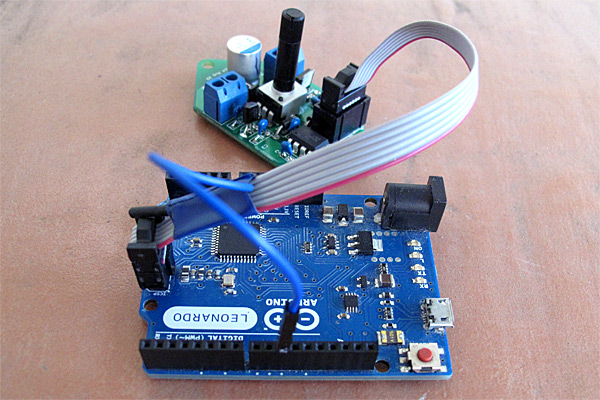
In the evenings this week, I soldered up another PWM controller for the LED lamp projects, and programmed it with the ISP cable I made. The intent was to use this dimmer either with the breakfast-room lighting fixture (which I’ve not made yet) or reprogram it to act as a strobe rather than a dimmer, to replace the Xenon-tube-based Velleman strobe kit that failed last Thanksgiving.
This project took me much longer than expected, because of stupid mistakes I made:
- I forgot that there was a silkscreen error on the dimmer boards that I had designed. The outline for the voltage regulator is flipped, because I had not noticed when reading the spec sheet shows the device from the bottom—I’m used to chip views being from the top. This is the second time that I’ve soldered a voltage regulator on one of the boards backwards, and had to cut it off and replace it with a new one. I guess I’d better take a permanent felt-tip marker and draw the correct orientation on the remaining boards, so that I don’t make that mistake a third time.
- When playing with new code for the strobe, refamiliarizing myself with the ATtiny13A processor, I changed the prescaling on the system clock from the default 1.2MHz down to about 75kHz. What I had not realized is that the on-chip clock is used during the reprogramming also, and the Arduino ISP is not set up for slowly clocked chips. I found code for TinyISP, which has code for 128kHz clocks, but even when I modified it for 75kHz clocks I couldn’t reprogram the chip (always getting the “Yikes! invalid device signature” message with a signature of 0). Eventually, I gave up, unsoldered the ATtiny13A and put in a new one. I’ll be very careful in future not to slow down the system clock so much.
- I got the strobe working this morning, but when I looked at the output pin that was driving the FET gate, it was only going up to 1.3V, not 5V, and the pulse was much longer than I expected. This mystified me for a while, but I finally realized that I had forgotten to turn the pin on as an output, so I was driving the output just through the built-in pullup resistor, resulting in a very large RC time constant. The flat top I was seeing on the pulse was probably the Miller plateau. Enabling the output pin correctly got me back to crisp 5V pulses of the designed duration.
- The designed duration for the pulses was a bit too short, resulting in a somewhat dimmer than desired flash. Lengthening the pulse to 1ms was fine for the slow strobes, but at high flash rates the strobe got too bright. So I reprogrammed the flashes so that the on-time was 1/64th of the off-time, but with a maximum on-time of 1.6ms. (I also tried on=off/128 with a maximum of 1ms, but I liked the 1/64 better).
I timed the strobe pulses from the board (looking at the output of the ATtiny13A pin 6, which is also connected to the MISO pin of the ISP header, so is easy to connect a jumper wire to) with PteroDAQ (through a voltage divider, to drop the voltage from 5V to 2.75V). By triggering the PteroDAQ on edges of the signal, and averaging many measurements, I got very precise timing measurements:
| setup | on-time | off-time |
|---|---|---|
| slowest setting, 1:64 | 1.63745ms | 1.52372s |
| fastest setting, 1:64 | 104.958µs | 6.98761ms |
| slowest setting, 1:128 | 955.277µs | 1.55881s |
| fastest setting, 1:128 | 51.3123µs | 6.99286ms |
The difference in the “slowest” settings is probably just from my inability to set the knob identically—it has to be just above a threshold below which the strobe doesn’t flash at all. In any case, I have a period from 7.1ms (141Hz) to 1.525s (0.6556Hz), which is a pretty useful range. I also made the range very smooth, by taking the 10-bit ADC range and converting it to this 215:1 range sort of exponentially with just a few instructions:
if adc<40, then OFF
exp = adc >> 7
frac = 0xff - (adc & 0x7f)
on_time = (frac << 8) >> exp
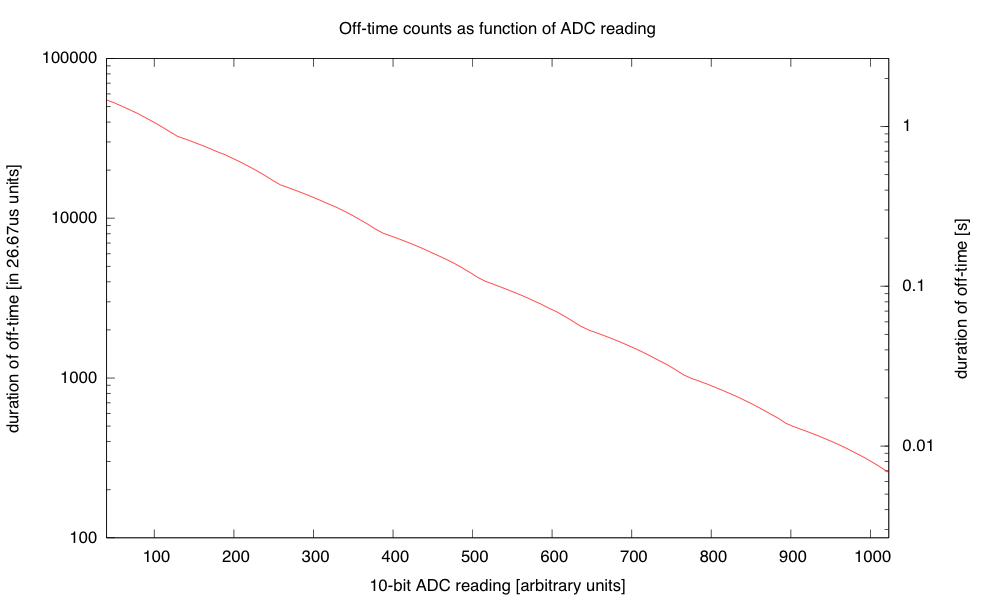
The tiny number of instructions provides a surprisingly smooth and strictly decreasing approximation to the desired exponential.
The transition is smooth because every time an increment increases the exponent, the frac part is doubled (from 0x80 to 0xff).I use a 16-bit word for the on_time and count it down with an interrupt once every 26.67µs (256 of the approximately 9.6MHz clock ticks). I think that I’ll do a similar thing for controlling the duty cycle of the dimmer, rather than the table of bytes that I currently use, though the duty cycle is limited to a single byte, so I’ll only have 256 levels, and not 1024, and I’ll want the duty cycle to increase exponentially, rather than decreasing, but those are easy fixes.
I also reduced the size of the program in flash, by getting rid of some of the overly general code from core13 and just manipulating the peripheral control registers directly. I didn’t need to do this, as the ATtiny13A has 1kB of flash, but I got down to 364 bytes (and could probably strip out another 50–100 by getting rid of even more of core13). The old dimmer code, which doesn’t have much more to do, currently takes 806 bytes, so I might try tightening that up tomorrow.
I also tried powering the strobe off a 9V battery. The LED board takes about 117mA when turned on (see LED board I-vs-V curve), and if I keep the duty cycle below 1.5%, then the average current is dominated by the ATtiny13A’s worst-case 6mA current, and the total current for the board is probably less than 8mA. According to Duracell’s data sheet for their 9V alkaline battery, I should be able to get about 50 hours of life before the voltage drops below 6.7V (at which point the LED board no longer maintains the constant current, but I could run the strobe a bit longer getting dimmer). The 6.7V is also about the voltage where the LDO voltage regulator starts being unable to supply 5V to the ATtiny13A, though that is less of a bottleneck, as the chip can run with the 9.6MHz internal clock down to 3V with no problems.
The battery does not have to provide a full 117mA for the pulses, as there is a 470μF polymer electrolytic capacitor on the dimmer board. Delivering 117mA for 1.6ms is only 187μC, so the voltage on the capacitor would dip at most 0.4V during the pulse, even without the battery. The 9V battery has an internal resistance of 2Ω–4Ω, so it could provide 117mA with about a 0.35V drop, so the capacitor isn’t really necessary for one LED board. It probably increases the efficiency slightly, as the I2R power loss in the internal resistor is reduced if the current is spread out (half the current for twice as long is only half the I2R loss).
I could put more LED boards on the strobe, as the dimmer is designed to handle 5A or more, but battery operation would limit me to about 10 boards before the voltage drop was large enough to cause problems for the current regulation. One LED board is bright enough for a Halloween pumpkin, but I could run wires between pumpkins to power several off the same controller. (I could also keep the controller in the house, powered by a wall wart, and run wires out to the LED boards—I could then power 40 or 50 LED boards off the strobe, though I’d have to watch out for IR drop in the wiring.)
I might try wiring up 10 boards tomorrow, and see whether a battery really can power that many.
Filed under: Uncategorized Tagged: Arduino, Arduino as ISP, ATtiny, dimmable LED lamps, lamp, strobe, stroboscope