

Assembling the Pro Mini OLED clock shield kit
Customers complained about the lack of documentation on the Pro Mini OLED clock kit.
I listened and I agree. Even though the silkscreen should provide the necessary directions for soldering the parts on the shield itself, adding the Pro Mini board and the OLED display are still ambiguous, especially because there are multiple options.
Here is a quick, but hopefully adequate, step-by-step guide on one way to assemble this clock kit.
1. Make sure you source the correct Pro Mini board, that looks similar to the one in the photos below. It features an ATmega328 clocked at 16MHz.


2. Program the board itself with the OLED Clock sketch. In Tools/Board, select "Arduino Duemilanove w/ ATmega328". Upload using the FTDI adapter. This step is important because you want to make sure your Pro Mini works before you mount/solder it.
3. Make sure you source the correct I2C 128x64 OLED display, like the one shown below.

The pins at the top must be in the order (left to right) VCC-GND-SCL-SDA or VCC-GND-SDA-SCL.
In case your display has a different arrangement of the pins, e.g. GND-VCC-SCL-SDA, you will need to swap the leftmost two pins, by rewiring the traces (cut, then reconnect) on the shield's PCB (not on the display, which remains untouched).
4. Solder the DS1307, paying attention to the correct orientation (notch up), then the 2 resistors and the crystal.
5. Solder the 2 jumper bridges according to the OLED display you are going to use.
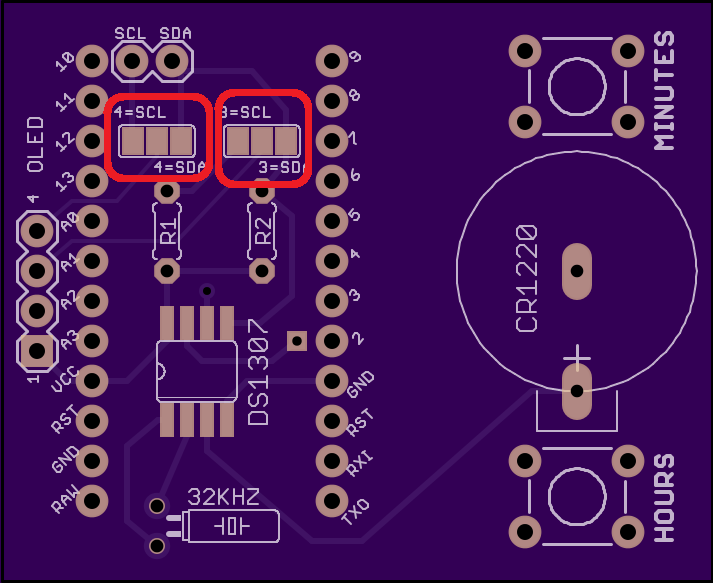
If your OLED has pin 3 and 4 configured as SCL and SDA respectively, then solder the right bridge of the left jumper and the left bridge of the right jumper (see the photo below).

6. Only if necessary
Remember, the Pro Mini OLED shield was designed for I2C OLED displays that have pin 1 as VCC and pin 2 as GND. If that is not the case, those first 2 pins must be rewired, as shown below (after the traces had been cut and pins isolated).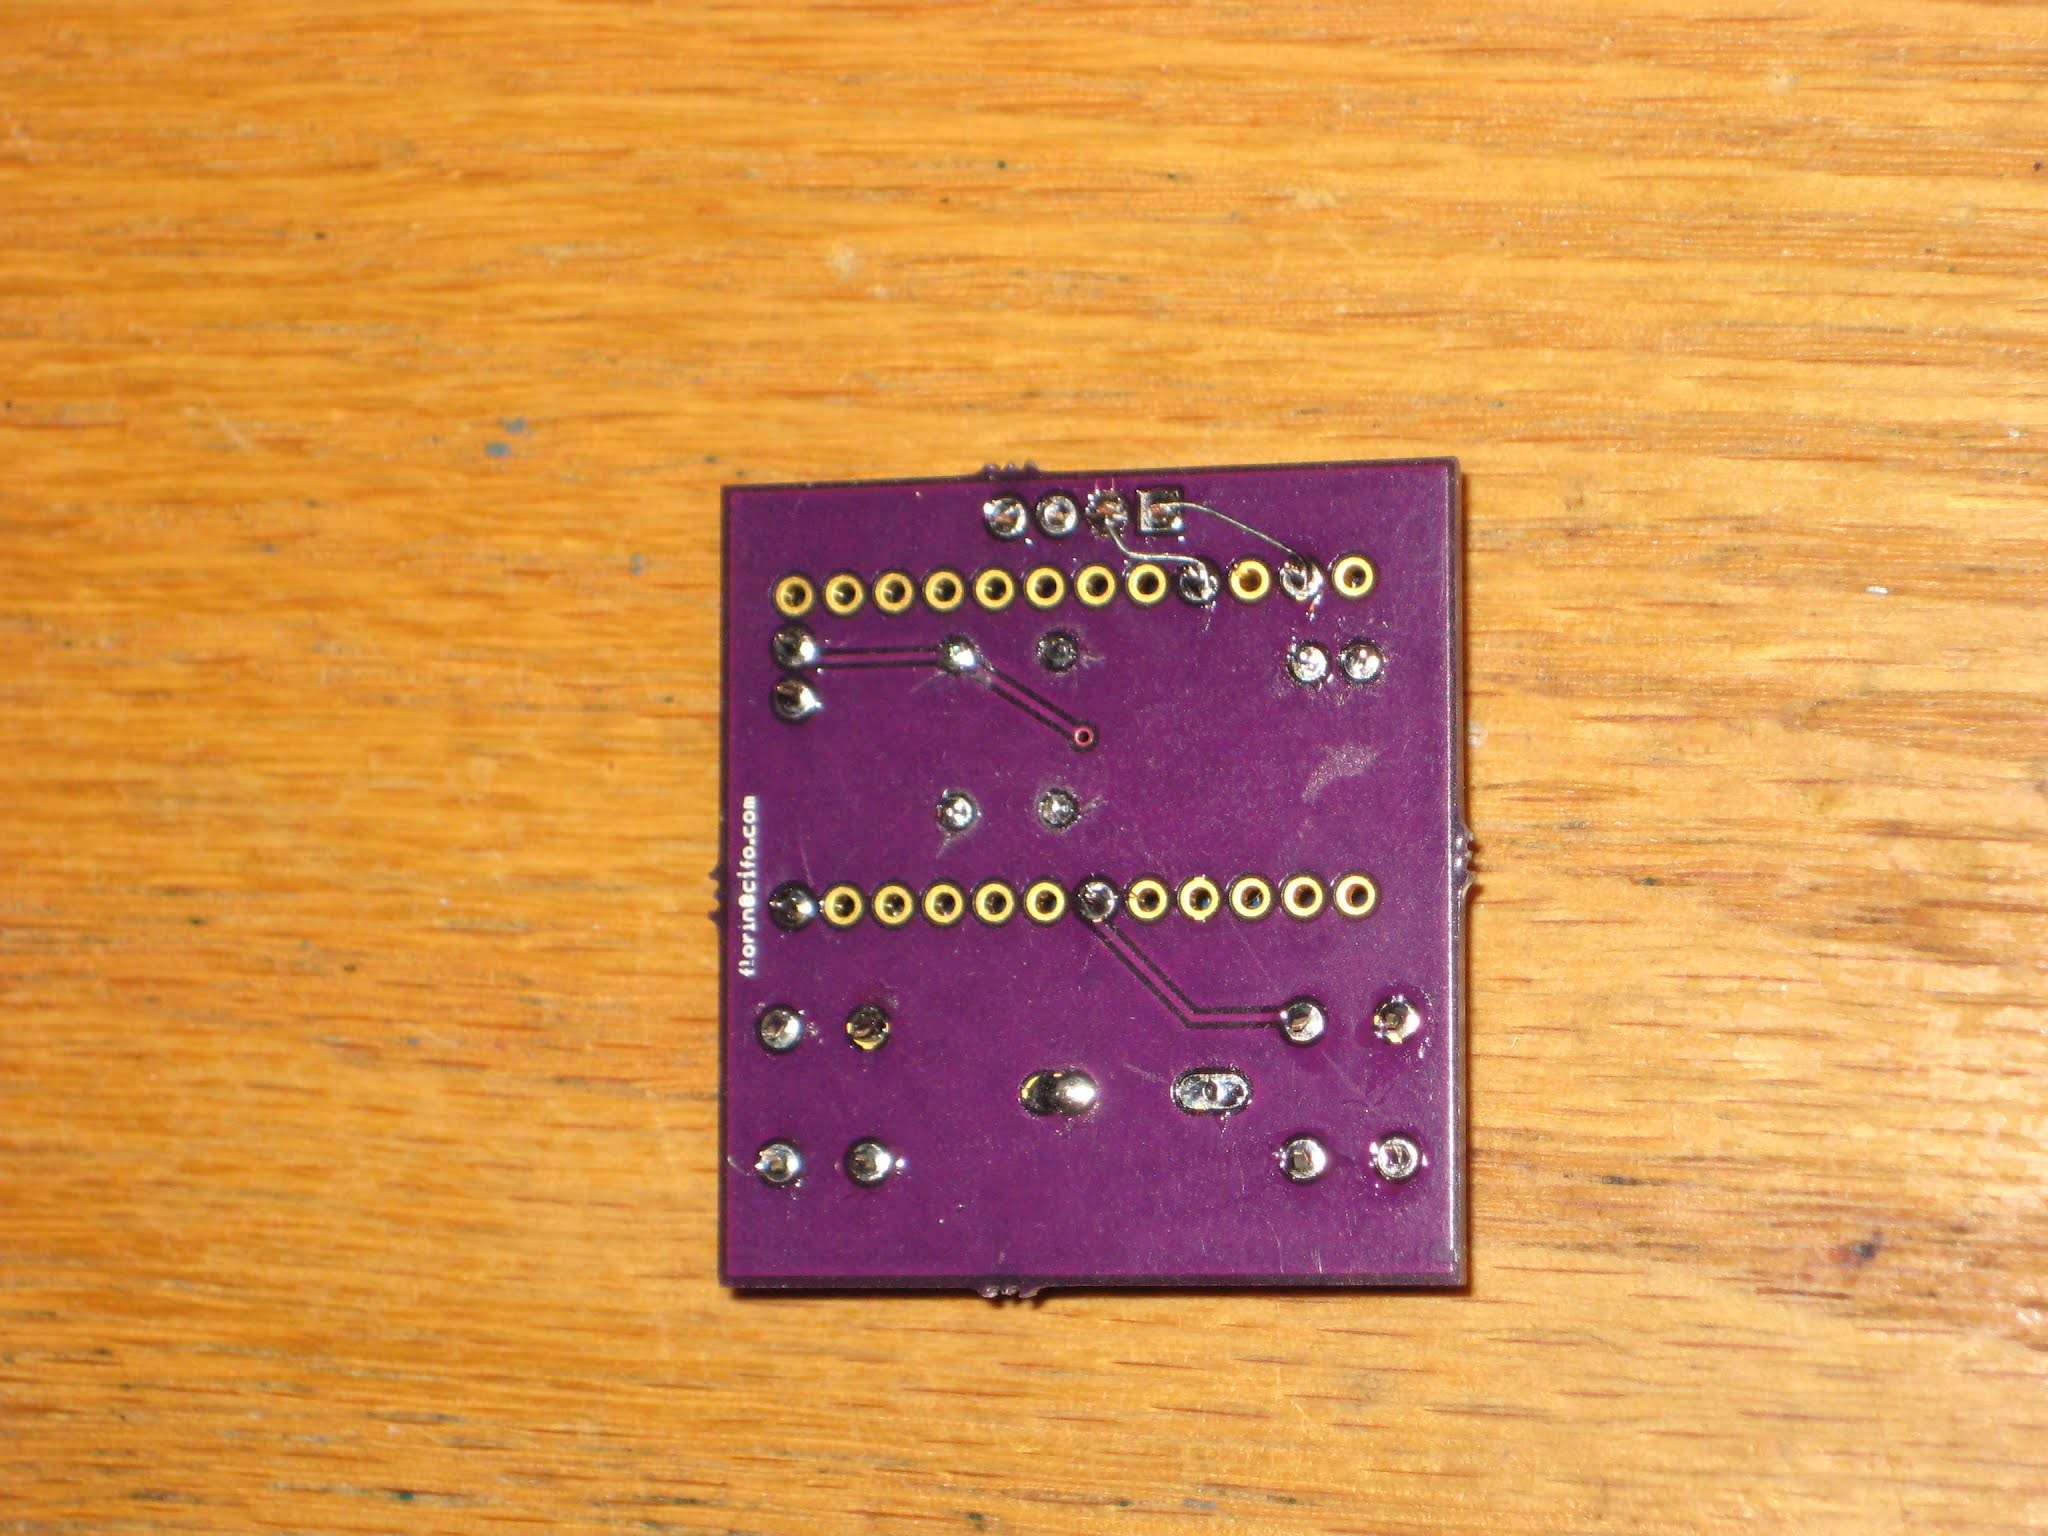
7. Solder the Pro Mini board on top and close to the OLED shield, using machined male pins (included in the kit). Only the relevant pins, highlighted in the photo below, need to be soldered.
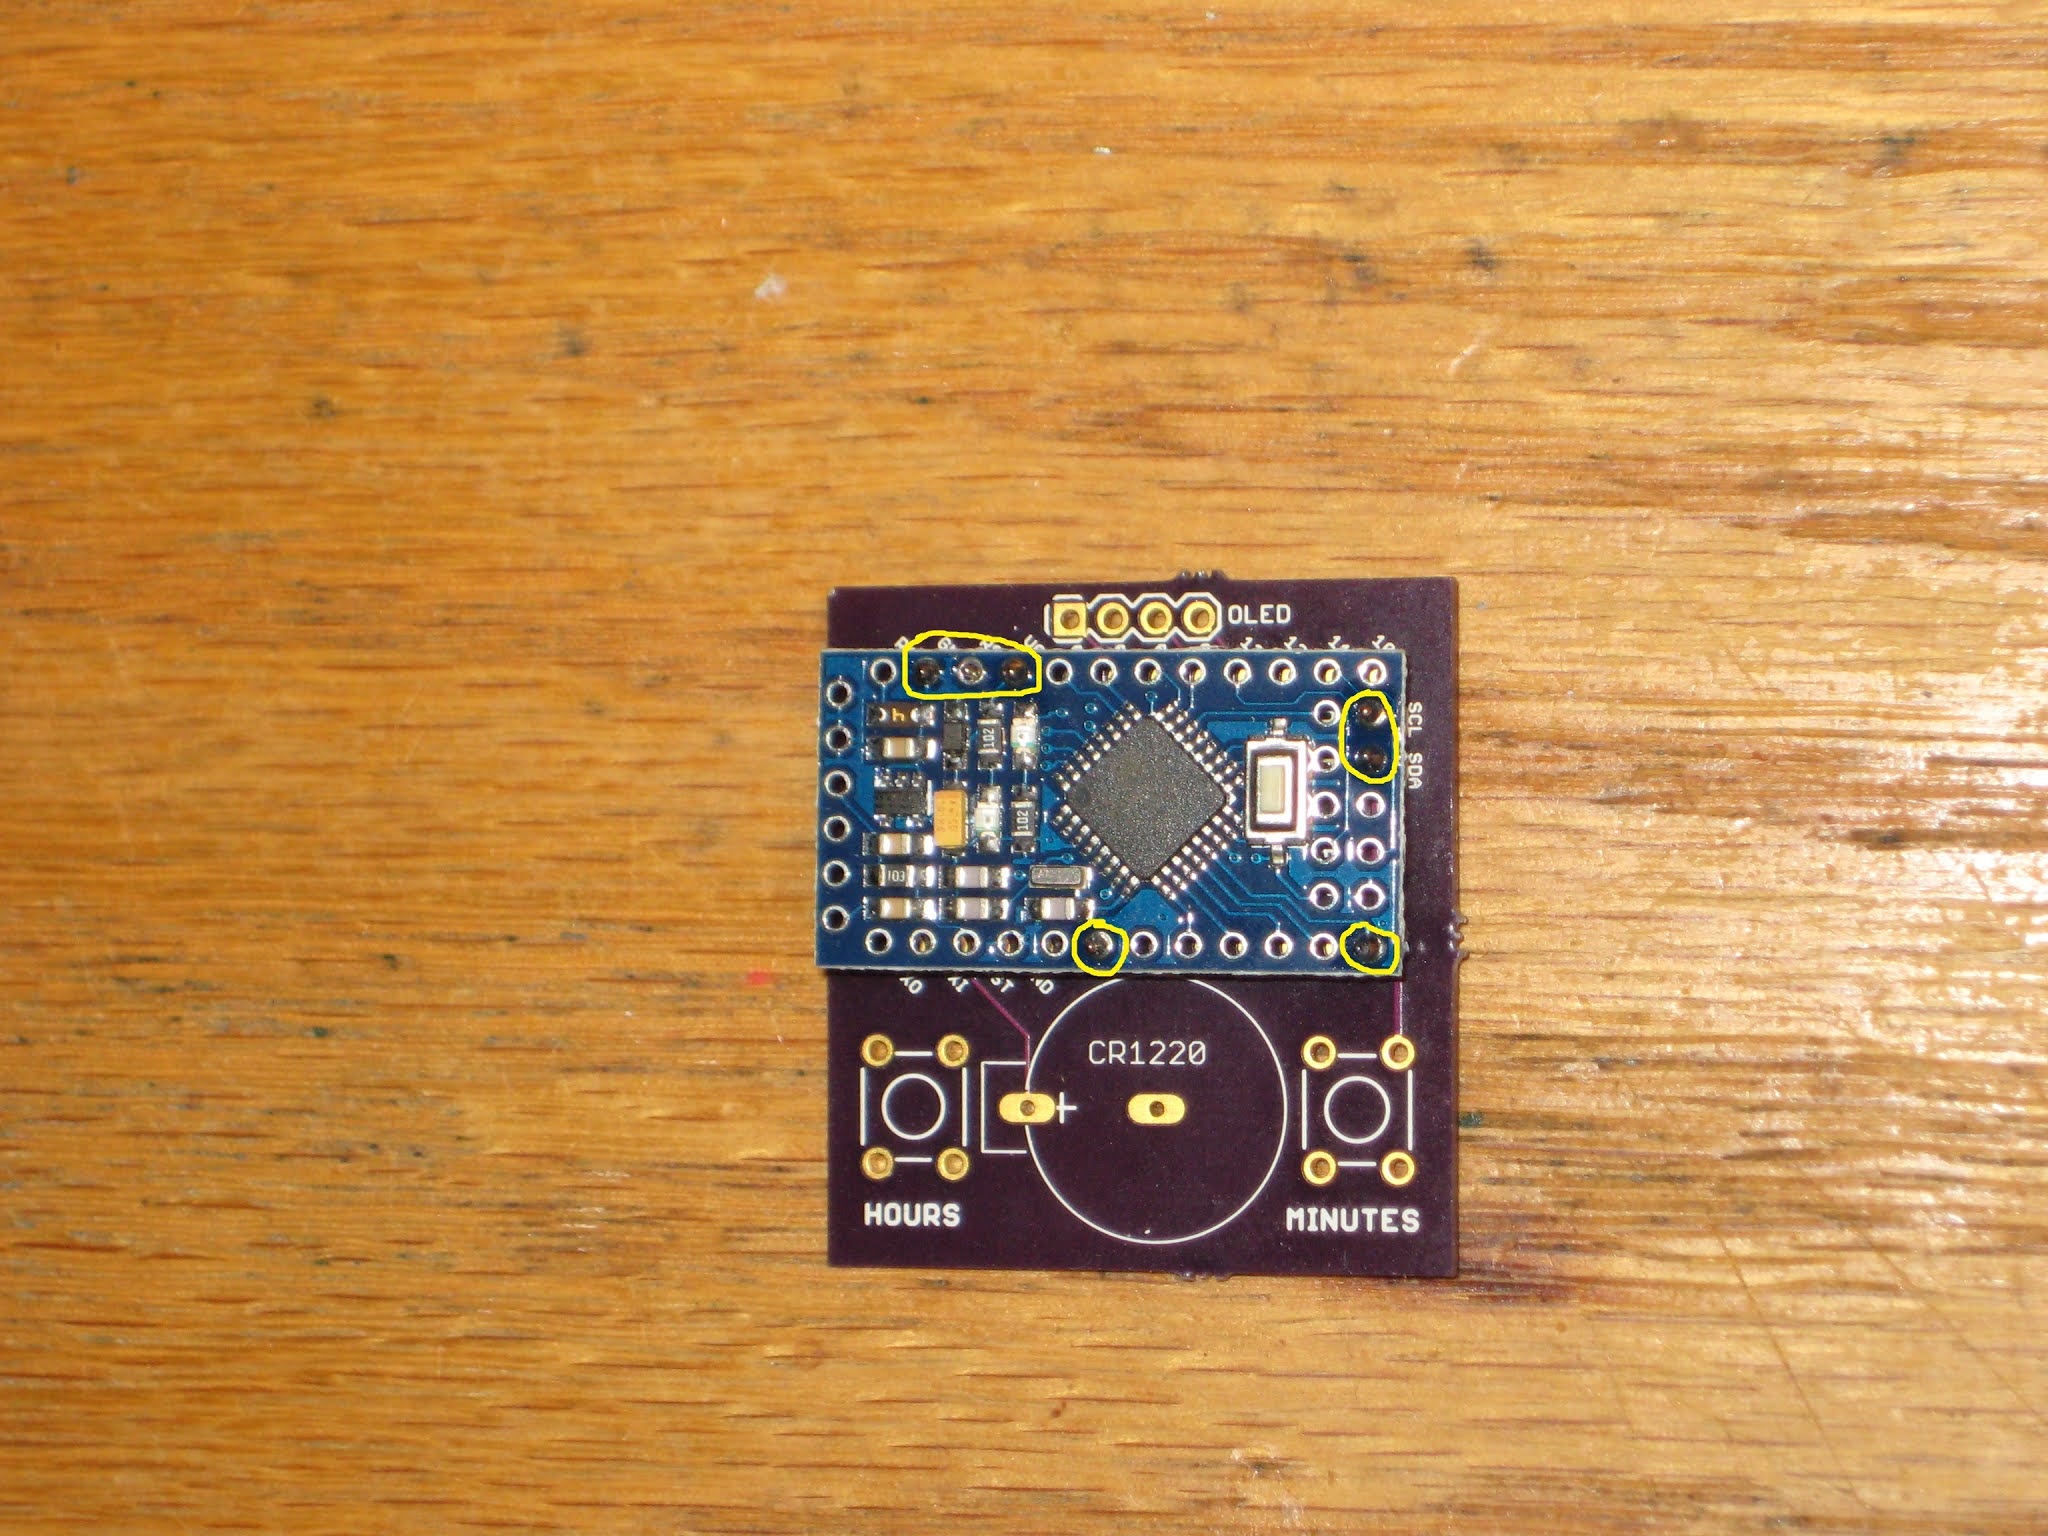
Pay attention, since this is a hard-to-reverse move. Fixing a mistake here involves de-soldering. Also, the parts underneath cannot be (easily) accessed anymore.
8. Solder the 4-pin female header, the 2 buttons and the battery holder, then insert the CR1225 battery, with the correct polarity (+ on top).
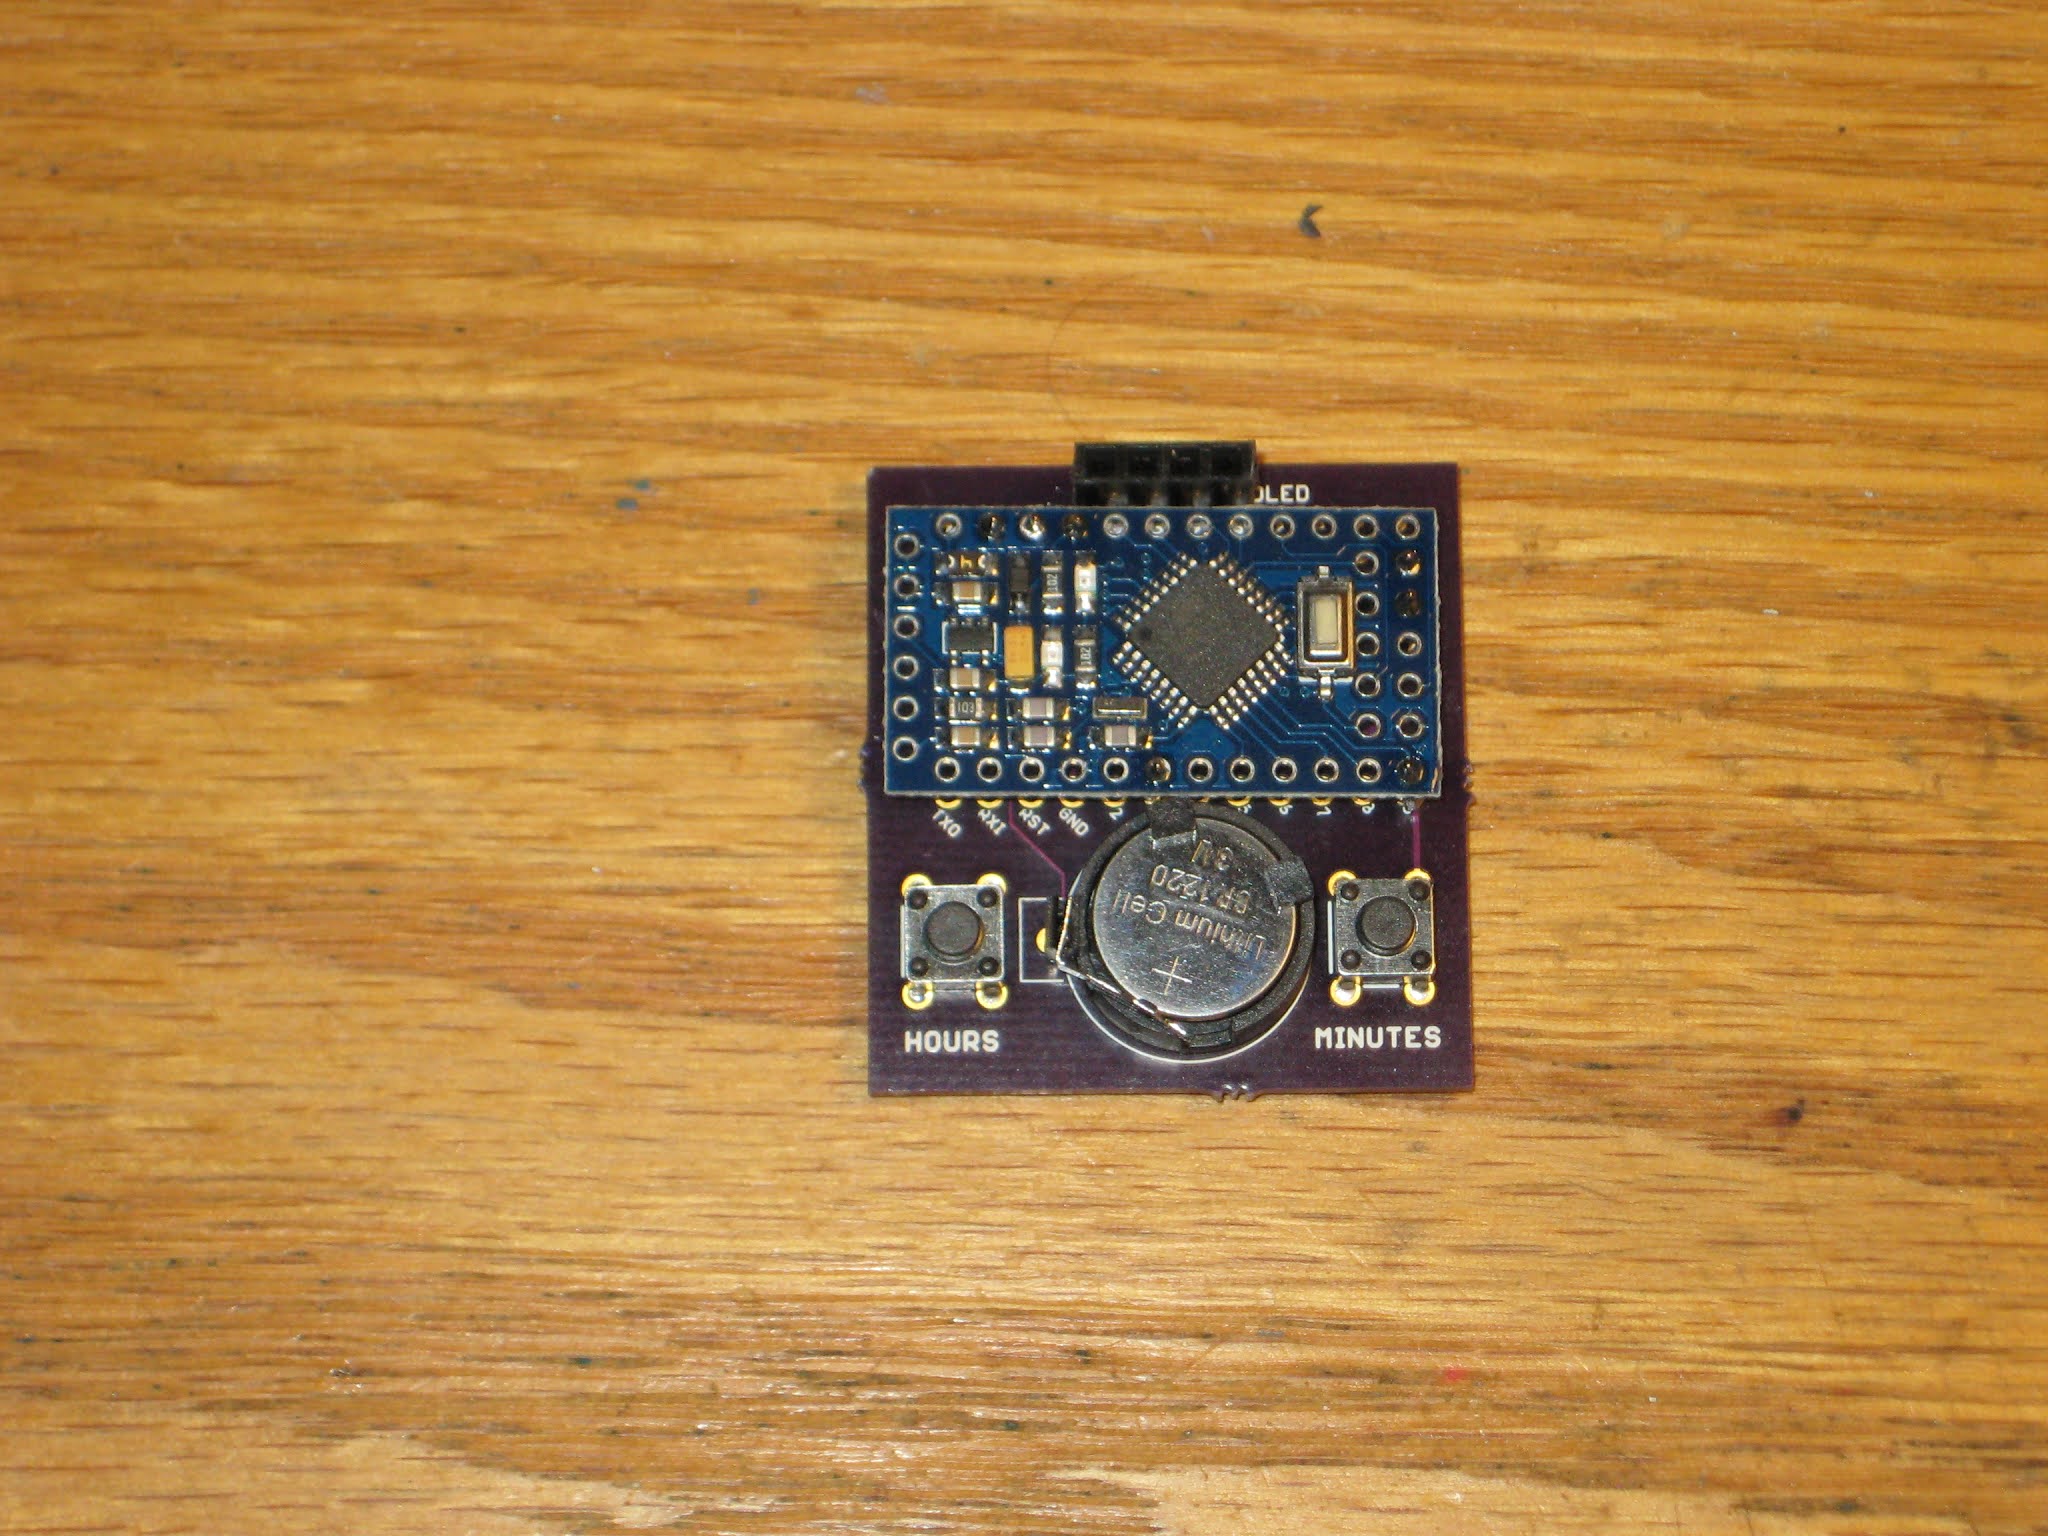
9. Insert the OLED display.
10. Power the clock through the FTDI breakout (observe the correct orientation) or by directly wiring VCC and GND to a 5V or battery source.

[original story: Wise time with Arduino]
