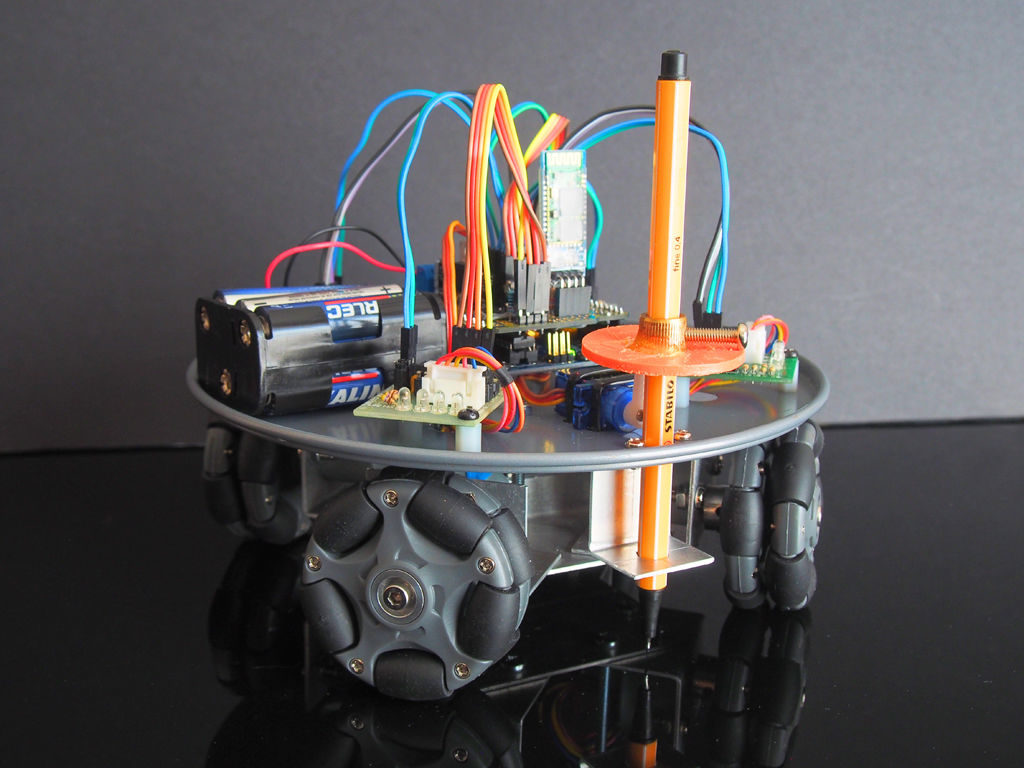
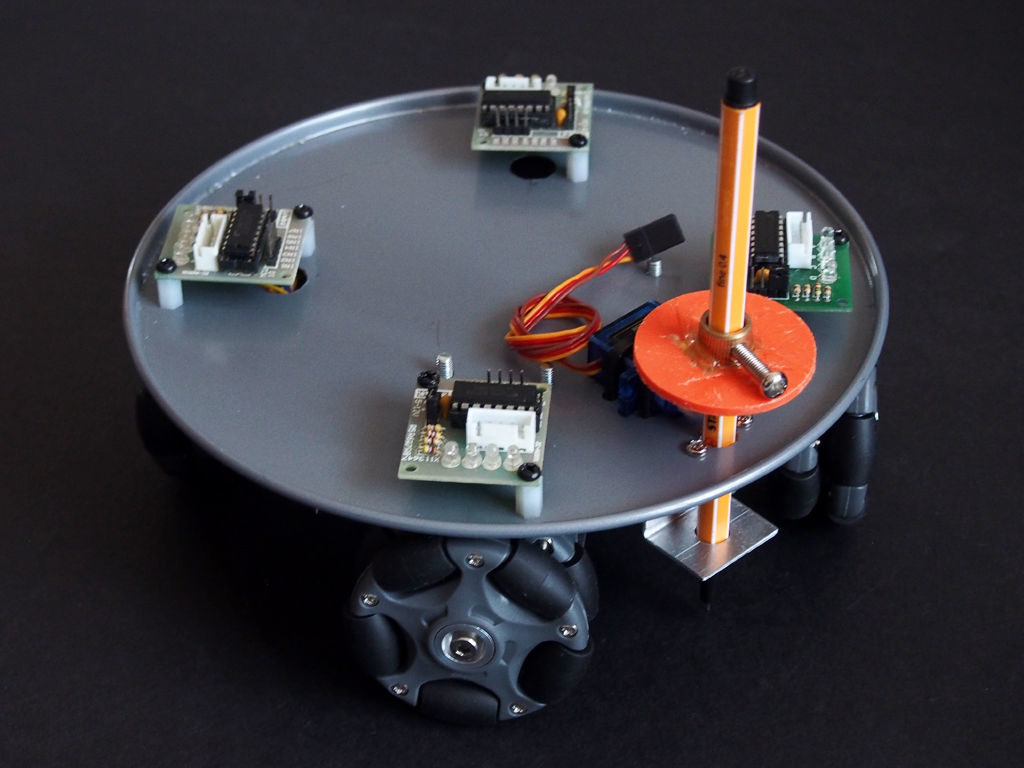
Retired maker “lingb” created an omni-bot, with four wheels that allow sliding motion in the X/Y plane courtesy of their perpendicular rollers. While that alone would have been a fun build, he also attached a pen, along with a servo-based lifting mechanism, turning this robot into a free-range plotter!
The device is controlled by an Arduino Uno and Bluetooth module, and takes movement commands via a linked smartphone or tablet. Four 28BYJ-48 stepper motors with ULN2003 drivers move each wheel, though outputs are shared between opposite motors to save on I/O.
This means that rotating the robot isn’t possible, but as shown in the video below, this isn’t needed to plot straight and curved lines with good accuracy.
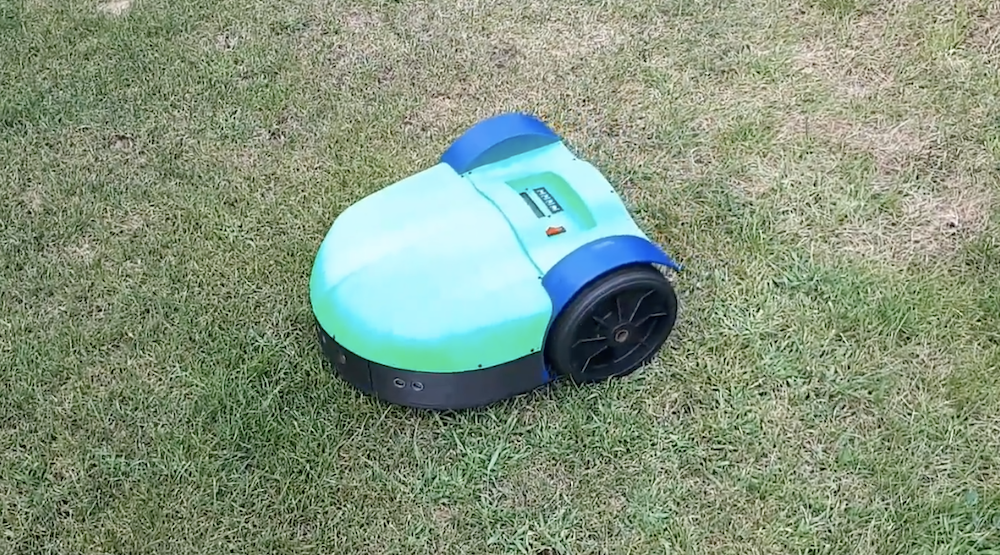
Do you enjoy mowing your lawn? No? Well now you can ‘simply’ print a robot to do it for you, based on German mechanical engineer Philip Read’s design. His Roomba-esque device uses a pair of gearmotors for movement, an array of three ultrasonic sensors for obstacle avoidance, and a perimeter wire/sensor to keep it within the designated boundary.
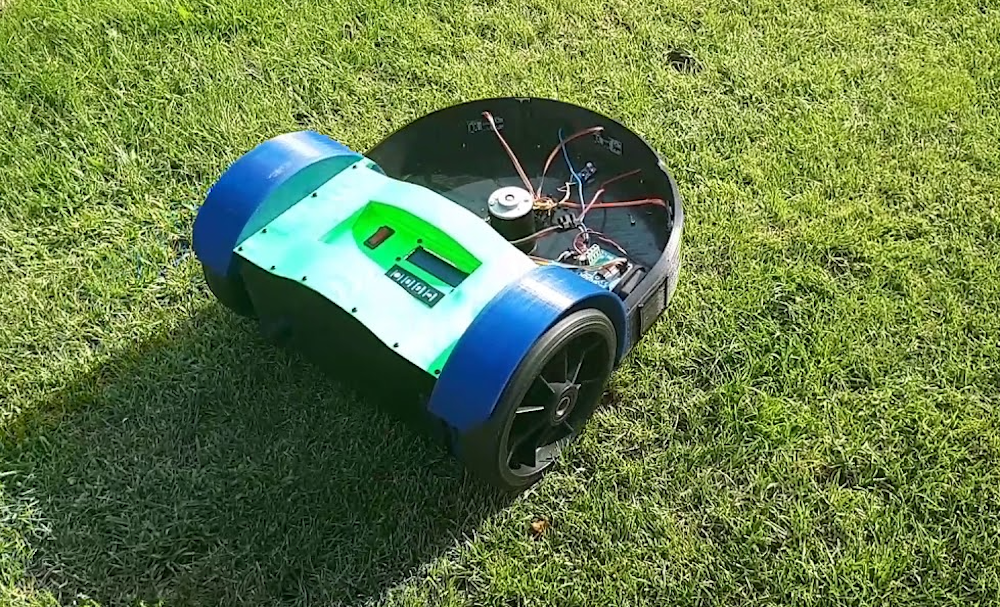
An Arduino Mega is employed as the main processing unit for the robotic mower, however a separate Nano onboard helps measure battery voltage as well as current when charging. Meanwhile, an Arduino Uno along with a motor driver are used to control the perimeter wire setup.
Extensive build info is available on the project’s write-up, and a short demo can be seen in the video below.
Fully autonomous robot lawn mower. The mower project includes the mower itself a boundary wire control station and an optional charging station. The mower navigates within the boundary wire which is positioned (pinned) around the perimeter of the garden. Once the mower senses the perimeter wire, it stops reverses and moves off in a new direction. The mower also has 3 sonar sensors to detect objects in the mowers path. Once the mowers battery is exhausted, the mower uses the boundary wire to navigate itself back to the charging station. All this can be customised in the Arduino software or completely re-written to your personal preferences.
Commercial mowers with this specification cost upwards of 600€ ($680).
Obviously, you’ll want to use such a device in an area devoid of kids or pets
Sphero's been amusing us with its collection of robotic balls, like its adorable BB-8, for eight years. But lately the company has been getting away from the toy aspect of its products and embracing its educational potential. It's had an app that can be used to program many of its current bots for a while now, but that's only for budding coders — what do kids interested in hardware have to tinker with? Indeed, Sphero is about to release its first robot specifically made to be physically modded, called the RVR.
Sphero's been amusing us with its collection of robotic balls, like its adorable BB-8, for eight years. But lately the company has been getting away from the toy aspect of its products and embracing its educational potential. It's had an app that can be used to program many of its current bots for a while now, but that's only for budding coders — what do kids interested in hardware have to tinker with? Indeed, Sphero is about to release its first robot specifically made to be physically modded, called the RVR.
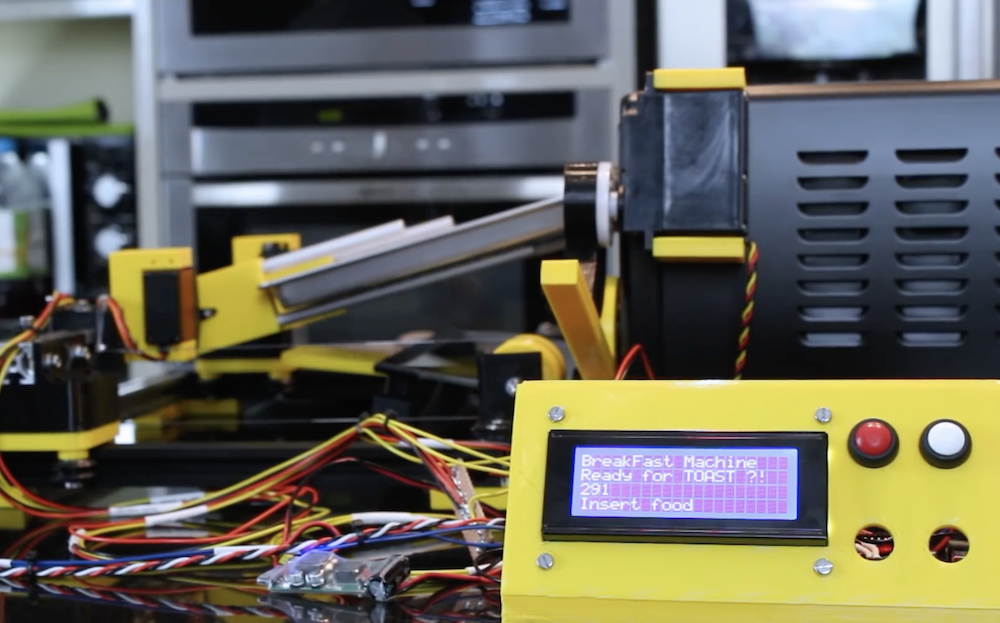
As seen in our earlier post, James Bruton has been working on a breakfast-making robot, and has now moved from boiling eggs to making toast… or apparently hot dogs/sausages as shown in the video’s demo.
What he’s come up with uses a one degree-of-freedom gantry assembly to move servo-powered forks into position. These can then manipulate a cooking tray as needed to heat food up, flipping it out into a hand-held container when done. Two other servos take care of turning the device on and opening the door.
The control setup looks extremely similar to the previous build, with control via buttons, an Arduino Mega, and a small LCD display. Bruton notes that the Mega is used here because of its multiple serial ports, which will be useful to link everything together in the future.
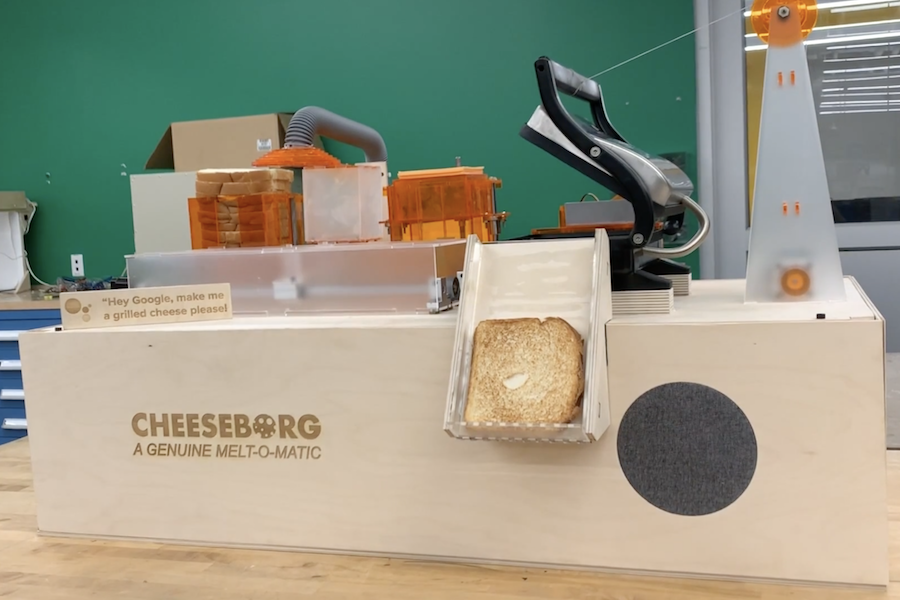
Do you like grilled cheese? Would you rather not make it yourself? If so, then the Cheeseborg by Taylor Tabb, Mitchell Riek, and Evan Hill could be the perfect device for you!
This assembly line-like robot first stacks bread-cheese-bread using a vacuum gripper, and passes the unheated sandwich onto the grill via a pusher mechanism. Butter spray is first added to the bottom of the grill, then the top of the sandwich when present in order to coat both sides. Upon heating, the finished sandwich is pushed into a “food slot” for consumption.
Electronics are controlled using an Arduino Mega, while Google assistant running on a Raspberry Pi allows for voice activation. So the next time you’re hungry, all you have to do is ask, “Hey Google, make me a grilled cheese please!”
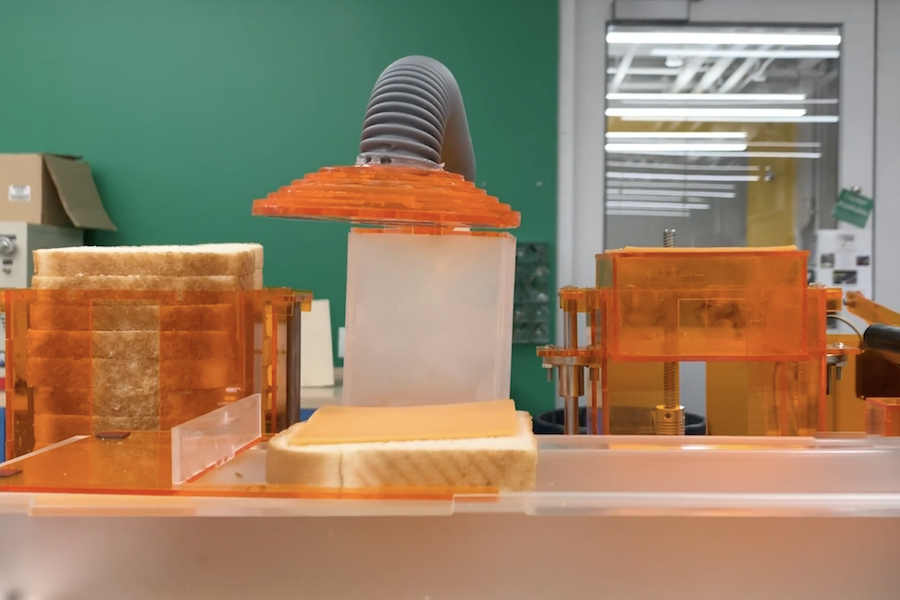
Our goal was to make an easy snack even easier. The design combines 7 individual subsystems enabling the assembly, cooking, and serving of a perfect, repeatable, tasty grilled cheese.
A big learning was how challenging it is to manipulate bread and cheese repeatedly. After several iterations, we converged on a vacuum lift mechanism, inspired by industrial robotic manipulation of small electronics. Due to the porosity of bread and the gloss of cheese, it was very challenging to find a mechanism working for both, but vacuum certainly seemed to do the trick!
For the actuation of of the electromechanical subsystems, we use stepper motors and servos combined with linkages, lead screws, linear bearings, a winch, and other mechanical components. For buttering (not pictures) we have a delightful spray butter can attached to an acrylic stand beside the grill.
Beyond the mechanisms, which are controlled by an Arduino Mega, the system is enabled with Google Assistant SDK running on an Raspberry Pi 3B, so the whole thing can be activated just by saying “Hey Google, make me a grilled cheese please!” From there, the machine stacks the bread, cheese, bread, then slides over the platform toward the grill as the buttering station sprays the bottom of the grill. Once the sandwich is placed on the grill, the butter sprays again (to coat the top of the sandwich). Then the grill closes, and cooks for the precise amount of the time for the perfect gooey grilled cheese! Then the grill opens and the sandwich is kicked to the serving slot for a hungry friend to enjoy.
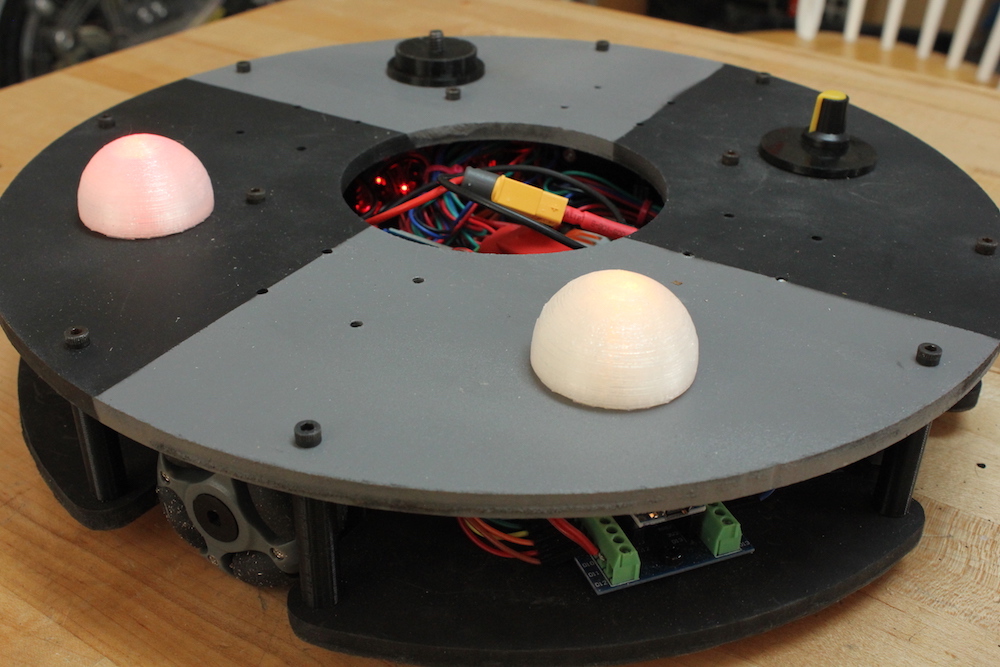
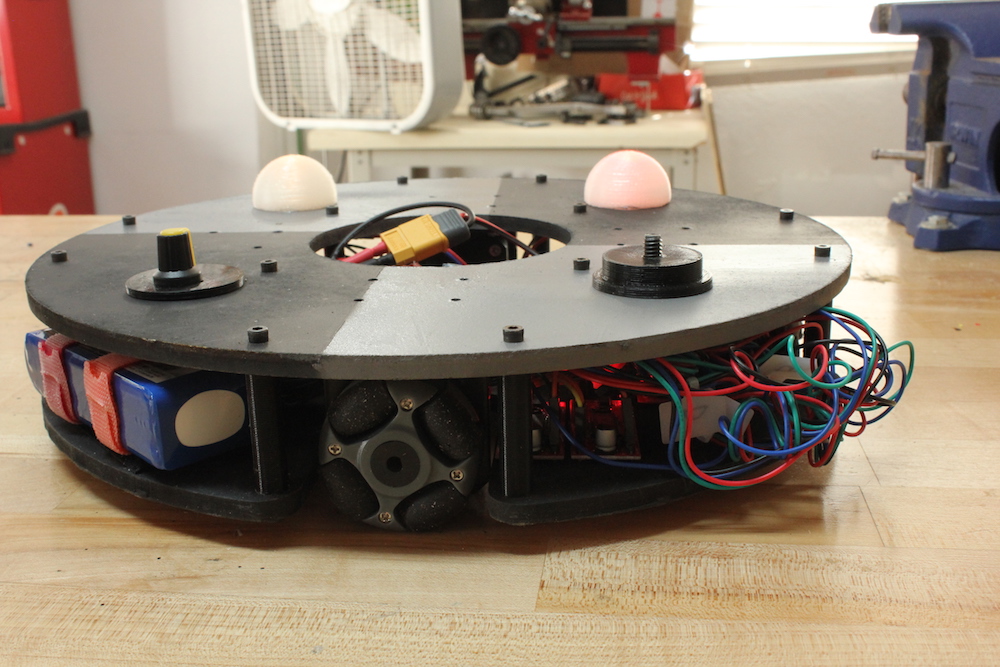
When we last saw this omni robot by Jeremy S. Cook, it was lurching around under Arduino Nano and Bluetooth command. After much work, he finally has it to a state where it rolls nicely on a flat surface—even carrying a little strandbeest at just after 8:30 in the demo video.
The biggest revision for the robot was new “grippier” wheels, but electronics were also enhanced, including a LiPo battery (with a voltage divider monitoring circuit), potentiometer for speed control, and LED eyes.
Changes were facilitated by a screw terminal board attached to the Nano, which minimized solder work, while keeping the robot’s wiring secure. More details and code are available here, while the upgrade/troubleshooting process can be seen in the video below.
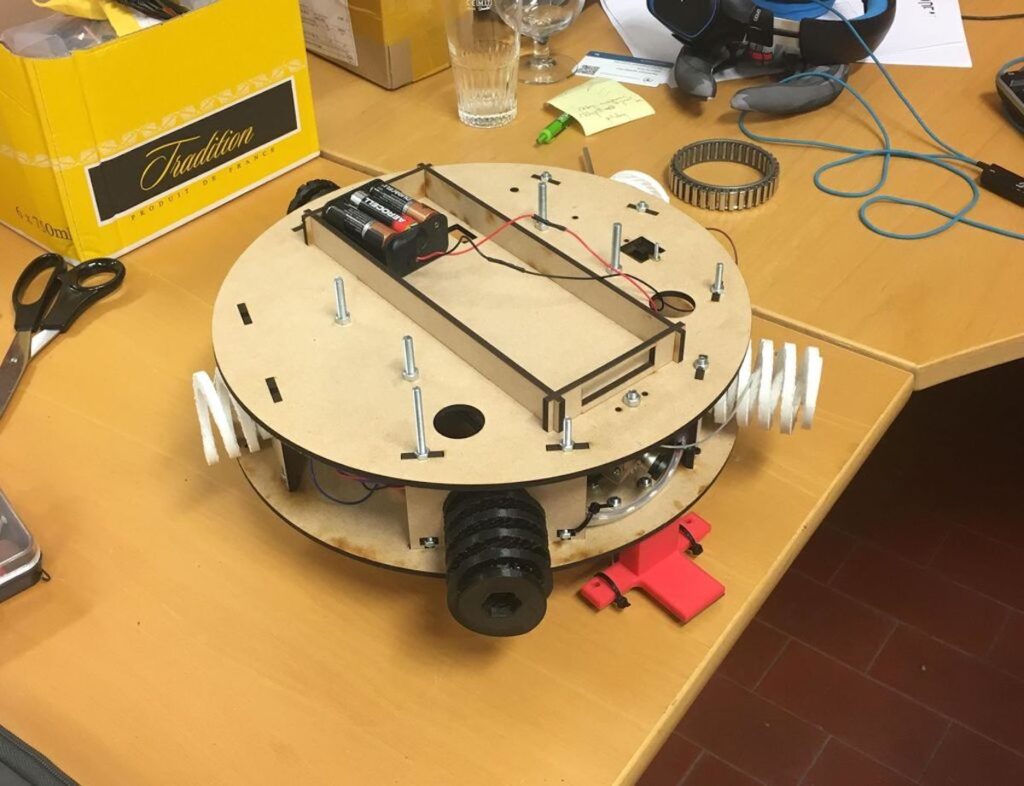
If you’ve ever been to an escape room, you’ve undoubtedly had to deal with a wide variety of puzzles that you have to solve in order to get out of the “prison” that you’ve willingly thrown yourself into. Beyond the puzzle that you’re trying to decode, the mechanisms used can be extremely clever, and coming up with a new device to use in these scenarios was a perfect challenge for this team of Belgian college students.
Based on the project requirements, they created a Roomba-like circular robot controlled by an Arduino Uno and motor shield that drives a pair of DC motors. The idea, while not fully implemented due to time constraints, is that it can be remotely operated only after solving a riddle and within a certain time period, then drive itself back to a designated spot once the game is over.
Here is a summary of what happens in the robot:
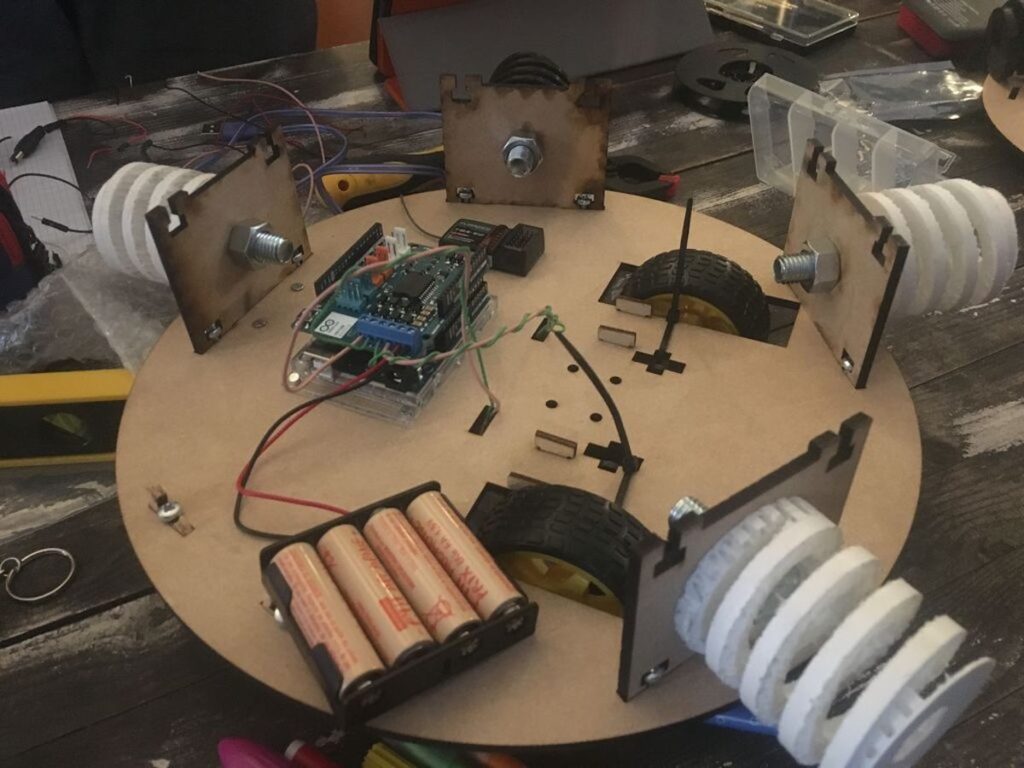
– The non-autonomous part: a remote controller is linked to Arduino through a receiver. Players control the remote and therefore control the Arduino which controls the motors. The Arduino is turned on before the game starts, but it enters the main function when players solve a riddle on the remote controller. An IR wireless camera is already turned on (turned on at the same time as the “whole” (controlled by the Arduino) when switch on/off turned on). Players guide the car with remote controller: they control the speed and the direction. When the timer that starts when the main function is entered is equal to 30 minutes, the control from the controller is disabled.
– The autonomous part: the control is then managed by the Arduino. After 30 minutes, the IR line tracker sensor starts following a line on the ground to finish the parcours.
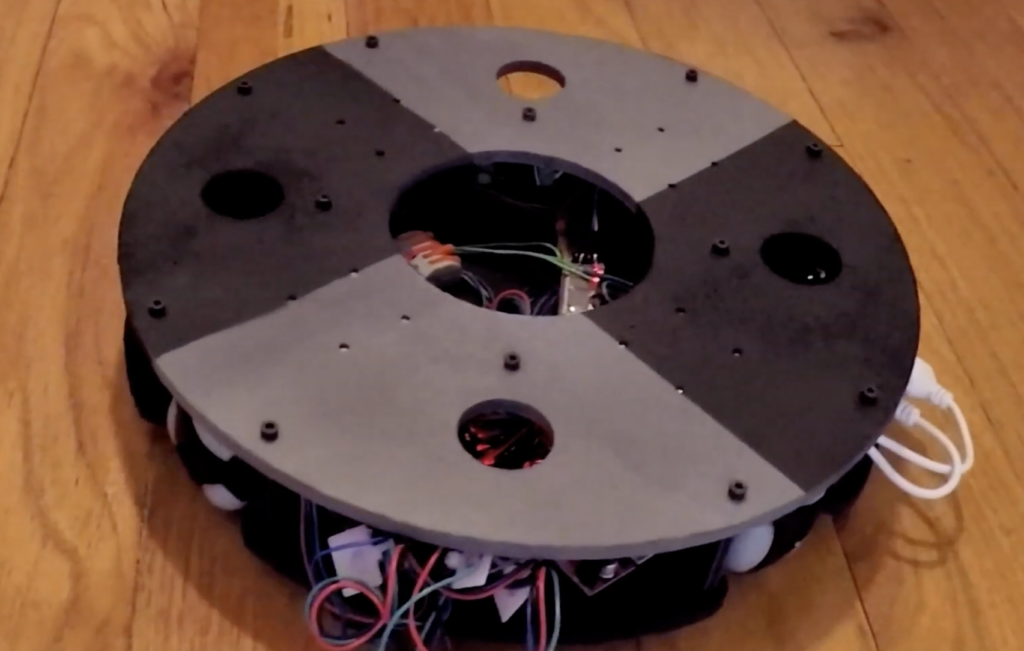
Omni wheels are devices that look like wheels with extra rollers positioned along their circumference. This allows robots to move forwards and backwards, as well as slide and spin depending on how the wheels are powered. Maker Jeremy S. Cook decided to create his own version, and after some consideration and careful design work, constructed a cylindrical frame out of MDF and PLA.
The Roomba-like unit features an Arduino Nano, which controls four NEMA 17 stepper motors via Easy Driver boards, while a Bluetooth module enables smartphone operation. Once a few intermittent motion issues are worked out, the stepper motors should provide precise positioning for further robotics experimentation.