Posts with «robots hacks» label

A Robot In A Day

While building a robot (nearly) from scratch isn’t easy, it needn’t be a lengthy process.  Is it possible to build a bot in a single day? With some musical motivation (a 10 hour loop of the A-Team theme song), [Tyler Bletsch] answers with a resounding ‘yes’ in the shape of his little yellow robot that he built for a local robotics competition.

Designing and fabricating on the fly, [Bletsch] used Sketchup to design the chassis, and OpenSCAD to model the wheels while the former was being 3D printed. Anticipating some structural weakness, he designed another version that could bolt to wood if the original failed, but the addition of some metal support rods provided enough stability. Mouse pad material gave the wheels ample traction. An Arduino with the L298 control module receives input via an HC-06 Bluetooth board. Eight AA batteries provide 12V of power to two Nextrox mini 12V motors with an integrated voltmeter to measure battery life.

Lacking a proper drive belt provided a bit of a challenge, so [Bletsch] — in an ingenious expression of resourcefulness — cobbled together an effective solution with some superglue and 3D printing filament packaging; the heat pressed parts proved to be strong and flexible. Waste not maker skills in action!

Arduino code was borrowed from a TerrorBytes student — the organization hosting the competition — and adapted by [Bletsch]. A python script combined with a joystick emulator he made in Google App inventor and some control equations from WPILiB allowed him to control his new robot from his phone.

Whether they are expressing your maker skills, assisting with your luggage or with your board meetings, robots can be a valuable inclusion in everyday life — or just a fun way to spend one day of it.


Filed under: robots hacks

Multipurpose Robot For the Masses

As the cost of almost every technology comes falling down, from electronics to batteries to even tools like 3D printers, the cost to build things formerly out of reach of most of us becomes suddenly very affordable. At least, that’s what [John Choi] has found by building a completely DIY general purpose robot for around $2000.

OK, so $2000 isn’t exactly “cheap” but considering that something comparable (like Baxter) costs north of what a new car would cost means that [John] has dropped the price for a general-purpose robot by an order of magnitude. And this robot doesn’t skimp on features, either. It has a platform that allows it to navigate rooms, two manipulating limbs with plenty of servos, a laptop “head” that allows for easy interface, testing, and programming, and an Arduino Mega that allows it to interface with any sensors or other hardware with ease. It’s also modular so it can be repaired and transported easily, and it uses open source software and open hardware so it’s easy to build on.

This robot is an impressive piece of work that should help bring this technology to more than just high-end factories and research labs. They’ve already demonstrated the robot watering plants, playing the piano, picking things up, and many other tasks. We’d say that they’re well on their way to their goal of increasing the number of students and hobbyists who have access to this technology. If the $2k price tag is still too steep, though, there are other ways of getting into robotics without diving headfirst into a Baxter-like robot.


Filed under: robots hacks

Open Source Robotics With WireBeings

Everyone needs a cute robotic buddy, right? [Matthew Hallberg] created WireBeings, an open source 3D printed robotic platform. Looking like a cross between Wall-E and Danbo, WireBeings is designed around the Arduino platform. We do mean the entire platform. You can fit anything from an Arduino micro to a Mega2560 stacked with 3 shields in its oversized head. There’s plenty of room for breadboards and custom circuits.

WireBeings is designed to be 3D printed. All the non-printable parts are commonly available. Gear motors, wheels, the ubiquitous HC-SR04 ultrasonic sensor, and a few other parts are all that is needed to bring this robot to life. Sketches are downloaded via USB. Once running, WireBeings can communicate via an HC-06 Bluetooth module.  If the Arduino isn’t enough power for whatever project you’re working on, no problem. [Matt] designed WireBeings to carry a smartphone. Just connect the robot and phone via Bluetooth, and let the phone’s processor do all the heavy lifting. What if you don’t have a spare phone? Check our report on hacks using prepaid Android Smartphones.

We could see WireBeings as the centerpiece for a “learn Arduino” class at a hackerspace. Start with the classic blinky sketch on one of the robot’s eyes. Build from there until the students have a fully functioning robot.

There is definitely room for improvement on the WireBeings project. [Matt] made the rookie mistake of going with a single 9-volt battery to power his creation. While a 9V is fine for the Arduino, those motors will quickly drain it. [Matt’s] planning on moving to a LiPo in the future. Why not stop by the project page and give him a hand?


Filed under: robots hacks
Hack a Day 13 Apr 12:00

Pipe in (Robot) Hand

How do you make a robot hand? If you are [Robimek], you start with some plastic spiral tubing, some servo motors, and some fishing line. Oh, and you also need an old glove.

The spiral tubing (or pipe, if you prefer) is cut in a hand-like shape and fused together with adhesive. The knuckle joints are cut out to allow the tubing to flex at that point. The fishing line connects the fingertips to the servo motors.

The project uses an Arduino to drive the servos, although you could do the job with any microcontroller. Winding up the fishing line contracts the associated finger. Reeling it out lets the springy plastic pipe pull back to its original position.The glove covers the pipes and adds a realistic look to the hand.

Granted, this is probably more practical as a display piece than a working hand. We’d like to put it in our next Halloween project. We’ve seen some simple hand builds before, but the glove is a nice touch. For some reason, many of our robot hand projects like to make rude gestures. You can see a video of [Robimek]’s hand working below.


Filed under: Arduino Hacks, robots hacks

Tiny Open Source Robot

We watched the video introduction for this little open source robot, and while we’re not 100% sure we want tiny glowing eyes watching us while we sleep, it does seem to be a nice little platform for hacking. The robot is a side project of [Matthew], who’s studying for a degree in Information Science.

The robot has little actuated grippy arms for holding a cell phone in the front. When it’t not holding a cellphone it can use its two little ultrasonic senors to run around without bumping into things. We like the passive balancing used on the robot. Rather than having a complicated self-balancing set-up, the robot just uses little ball casters to provide the other righting points of contact.

The head of the robot has plenty of space for whatever flavor of Arduino you prefer. A few hours of 3D printing and some vitamins is all you need to have a little robot shadow lurking in your room. Video after the break.


Filed under: robots hacks
Hack a Day 08 Mar 00:00

Arduino Makerbeam Live Plotter Controlled By HTML5 Canvas and Java Website

We’ve never seen someone build a plotter out of buzzwords, but [roxen] did a really good job of it. The idea is simple, place the plotter over a sheet of paper, open a website, draw, and watch the plotter go. Check out the video below the break.

The user draws in an HTML5 Canvas object which is read by a Java Web Server. From there it gets converted to serial commands for an Arduino which controls the steppers with two EasyDrivers.

The build itself is really nice. It perfectly meets the mechanical requirements of a pen plotter without a lot of fluff. The overall frame is T-shaped, for the x- and y-axis. The movements are produced by two steppers and acetal rack and pinion sets. The pen is lifted up and down by a hobby servo.

We like the use of rubber end caps to hold the frame fixed with friction against the table and a single ball bearing to to contact the table in the direction of its movement. This has the added benefit of being a 3-point contact that automatically squares the assembly to the same plane the paper is in. Any twisting of the frame will have little effect on its drawing ability since it’s end-effector is a ballpoint pen.

We really enjoyed this project, and think it would be fun to play around with. You could hack it to take text input, and output the handwriting you would have if you were replaced by a unconvincing robot copy of yourself.

Thanks for the tip [Daniel R.]!


Filed under: robots hacks
Hack a Day 04 Mar 21:00

Robot Does the Worm to Get Around

Walking, jumping, rolling, flying, swimming – robotic locomotion is limited only by the imagination of the inventor. [Roger Rabbit] apparently has a pretty vivid imagination, because he’s building robots that move like worms.

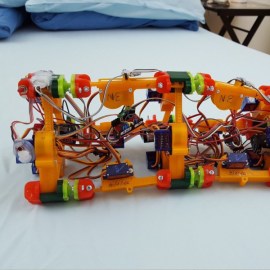
Version 1 of [Roger]’s robot is only semi-vermiform and is more of tube climber. It has a pair of 3D-printed pantographs that expand and contract with servos and move along the robot’s axis on a stepper-driven lead screw. An Arduino reads sensors and coordinates the expansion of the pantographs to grip the internal diameter of a pipe and push the worm-bot along. It’s a slow but effective way to get around in the limited confines of a pipe.

The next iteration, dubbed [Wolly],  is much more worm-like and not restricted to pipe-running. It has four expandable triangular frames connected to each other with rack-and-pinion backbones. The first frame contracts, the racks push it forward, it expands, the next contracts, and soon it’s doing the worm across the floor. Still slow, but pretty neat to watch, and you can see how it can be steered. It might even be able to roll around its long axis, and it’d make a decent tube climber as well.

This creepy autonomous worm-bot seems very similar to [Wolly], but aside from that we haven’t covered too many robots like these. There’s a lot of thought and effort in these worm-bots, and we’re keen to see where [Roger] takes this unique robot body plan.


Filed under: robots hacks
Hack a Day 11 Feb 09:01

Robot Listens to Commands–Literally

Where you might see a can, [Adam Kumpf] sees a robot. [Adam’s] robot (named [Canny]) doesn’t move around, but it does have expressive eyebrows, multicolored eyes, and a speaker for a mouth. What makes it interesting, though, is the fact that it receives audio commands via the headphones it wears. You can see [Canny] in action in the video below.

The headphones couple audio tones to [Canny’s] microphone using AFSK (audio frequency shift keying). [Canny] uses an opamp to bring the microphone level up and then uses a 567 PLL IC to decode the audio tones. [Adam] selected two clever frequencies for the mark and space (12345 Hz and 9876 Hz). In addition to being numerically entertaining, the frequencies are far enough apart to be easy to detect, pass through the headphones with no problem, and are not harmonically related.

The 567 IC detects only one of the tones. Ignoring one tone is not always great for noise rejection, but for this use should be more than adequate and cuts the parts count down. To avoid false commands, the data contains markers, lengths, and checksums. The 567 feeds the Arduino, which handles all the robot control.

How do you create the sounds that go to the headphones? You use a Web page. Of course, you could generate the low baud rate tones in other ways, too. AFSK modems are common in Ham radio circles, and there are certainly plenty of modem designs. Then again, there is something pleasing about the simplicity of this circuit. The appeal of [Canny] doesn’t hurt any, either.


Filed under: Arduino Hacks, robots hacks
Hack a Day 10 Dec 09:01

Robotic Wheatley from Portal 2

It’s been over 4 years since Portal 2 launched, but Wheatley, the AI character with a British accent, remains a captivating character. [Evie Bee] built a Wheatley replica complete with sound, movement, and one glowing eye.

The body of Wheatley is made out of blue insulation foam, also called XPS foam, laminated together with UHU Polyurethane glue. This formed a sphere, which was then cut into a detailed body. Papier mache clay was used to strengthen the thin foam.

The electronics for this build provide light, motion, and sound. The eye is moved by a total of 3 Arduino controlled servos: two for the movement of the eye, and one to allow it to open and close. Movement is controlled by two joysticks. Sound is provided by the Adafruit Sound Board, which connects to a speaker and a Velleman Sound to Light Kit. This kit controls the LEDs that light the eye, making it react to the voice of Wheatley.

You can watch this Wheatley rant at you after the break. Of course if you’re going to have a Wheatley you need a GLaDOS potato as well.


Filed under: robots hacks
Hack a Day 30 Nov 12:01