Posts with «raspberry pi» label

540 LEDs On A Geodesic Sphere

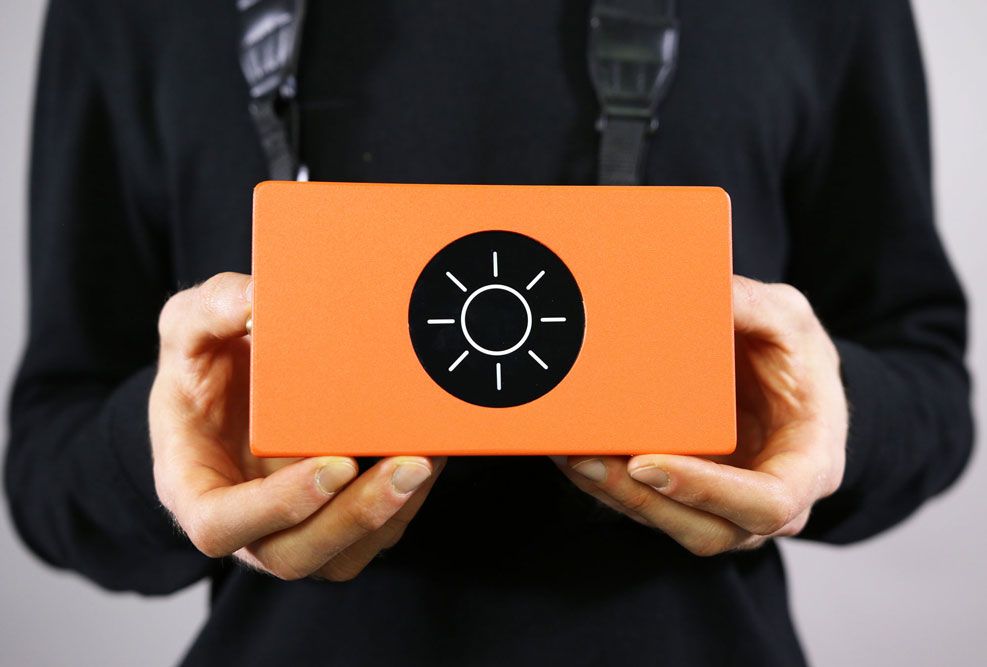
[burgerga] loves attending Music Festivals. He’s also a MechE who loves his LED’s. He figured he needed to put it all together and do something insane, so he build a huge, 15″ geodesic sphere containing 540 WS2812B addressable LED’s. He calls it the SOL CRUSHER. It sips 150W when all LED’s are at full intensity, making it very, very, bright.

As with most WS2812B based projects, this one too is fairly straightforward, electrically. It’s controlled by four Teensy 3.2 boards mounted on Octo WS2811 adapter boards. Four 10,000 mAh 22.2V LiPo batteries provide power, which is routed through a 5V, 30Amp heatsinked DC-DC converter. To protect his LiPo batteries from over discharge, he built four voltage monitoring modules. Each had a TC54 voltage detector and an N-channel MOSFET which switches off the LiPo before its voltage dips below 3V. He bundled in a fuse and an indicator, and put each one in a neat 3D printed enclosure.

The mechanical design is pretty polished. Each of the 180 basic modules is a triangular PCB with three WS2812B’s, filter capacitors, and heavy copper pours for power connections. The PCB’s are assembled in panels of six and five units each, which are then put together in two hemispheres to form the whole sphere. His first round of six prototypes set him back as he made a mistake in the LED footprint. But it still let him check out the assembly and power connections. For mechanical support, he designed an internal skeleton that could be 3D printed. There’s a mounting frame for each of the PCB panels and a two piece central sphere. Fibreglass rods connect the central sphere to each of the PCB panels. This lets the whole assembly be split in to two halves easily.

It took him over six months and lots of cash to complete the project. But the assembly is all done now and electrically tested. Next up, he’s working on software to add animations. He’s received suggestions to add sensors such as microphones and accelerometers via comments on Reddit. If you’d like to help him by contributing animation suggestions, he’s setup a Readme document on Dropbox, and a Submission form. Checkout the SolCrusher website for more information.

Thanks [Vinny Cordeiro], for letting us know about this build.


Filed under: led hacks
Hack a Day 12 Jun 12:00

Foxes Like Beacons explores alternative navigation systems

Jochen Maria Weber’s Foxes Like Beacons is an exploratory project using open data of public radio stations with inexpensive, low-power signal detection in order to create an open positioning system. According to the designer:

Today’s satellite based GPS enable and augment uncountable everyday processes, ranging from logistics to fitness trackers and even intimate dating applications. These proprietary systems are mostly invisibly controlled and curated by governments, military and economic actors. Since GPS ubiquitously affect our interactions and experiences with our environment, economy and privacy, Foxes Like Beacons questions this present model, thus opening up space for speculations about alternative navigation systems and new models for interaction.

Open data about public radio stations, transceivers and open source signal detection can be used to calculate geo positions.

So, Jochen developed three example devices based on the same technical structure using very low-power, open and off-the-shelf technology. This consists of an omnidirectional antenna, a 4.3″ TFT screen, a compass, gyroscope and barometric altitude sensor, a radio frequency tuner, a battery, an Arduino Nano (for signal processing), and a Rasperry Pi 2.

Precision and miniaturization can be extremely increased using customized parts, and by building on the distributed infratructure of public broadcast radio, Foxes Like Beacons is not subject to any kind of central control or curation.

First, Device No.1 measures the received signal strengths and decodes the identifiers of minimum three stations. Open data about their transceiver locations and respective transmission power is used to calculate distance to each transceiver and which can therefore be triangulated, in order to get a users geo location. Incorporating more stations leads to a higher resolution and more accurate geo locations.

Next, Device No.2 enables users to navigate by pleasing of sound rather than geographical information, following “geo-acoustic” maps. It automatically adjusts the volumes of simultaneously played stations according to proximity.

Finally, Device No.3 speculates about further applications by analyzing and interpreting signal modulations which occur due to factors like electromagnetic radiation, weather, and geographic conditions. These modulate radio signals in characteristc ways which can be interpreted and incorporated in navigation/exploration.

Foxes Like Beacons is part of the ongoing project “Stupid, Messy Networks,” which investigates the process of digital networks becoming ubiquitous infrastructures and moreover how these new infrastructures empower or constrain actors in economical, political and social interactions.

(via Creative Applications)

Hackaday Prize Entry: The Green Machine

For Hackers, rapid prototyping is made easier using basic building blocks such as the Raspberry Pi, Arduino and the huge variety of add on shields for home brew projects. But we don’t see too many real world Industrial applications or machines built using these off-the-shelf electronics. [SlyScience] built The Green Machine – an industrial grade, automated spray painting device to help coat polycarbonate tubes consistently.

The Green Machine is essentially a linear drive that can move a spray gun across a spinning clear tube and coat it evenly with the desired color. These tubes are used as color filters – they slide over standard T5, T8 or T12 fluorescent lamps – and are used in advertising, special effects, films and similar applications. For almost 10 years prior to this machine, the task was done manually. The HPLV (high pressure, low volume) spray gun used for this process needed skilled hands to get consistent results. It was easy to ruin a tube and cleaning them was not possible. [SlyScience] figured things out on the go – teaching himself and figuring out all of the software and hardware pieces of the puzzle. The welded steel frame is about the only “custom” part in this build. Everything else is COTS. Check out the video of The Green Machine in action below, and if you have any tips to help improve the build, chime in with your comments.

The HackadayPrize2016 is Sponsored by:

Filed under: The Hackaday Prize

Shower Thoughts in Your Car

The subreddit for Shower Thoughts offers wisdom ranging from the profound to the mundane. For example: “Every time you cut a corner you make two more.” Apparently, [Harin] has a bit of an addiction to the subreddit. He’s been sniffing the CAN bus on his 2012 Hyundai Genesis and decided to display the top Shower Thought on his radio screen.

To manage the feat he used both a Raspberry Pi and an Arduino. Both devices had a MCP2515 to interface with two different CAN busses (one for the LCD display and the other for control messages which carries a lot of traffic.

The code is available on GitHub. There’s still work to do to make the message scroll, for example. [Harin] has other posts about sniffing the bus, like this one.

We’ve covered CAN bus quite a bit, including some non-automotive uses. We’ve even seen the CAN bus for model railroading.


Filed under: Arduino Hacks, car hacks, Raspberry Pi

Turn body movement into music with Arduino

Calvin Cherry has created a wearable instrument programmed to respond to body movement. The Maker, who is a grad student at the University of Wisconsin-Madison, calls his device “Music from Motion,” or “mFM.” It consists of small electronic sensors Velcro-ed onto his wrists and ankles that, with every move, alter a synthesized track playing on a loop over a set of speakers.

Various motions correspond to different sounds. For instance, increasing the pace with his left foot adds more drum. Picking up the movement with his right foot throws in a cymbal. When he rotates his right hand, it makes the track a bit woozier through an audio mixing process called flanging. When he moves his left hand, it prompts a wah-wah effect.

And what would a musician be without his or her fans? Cherry points out that there are specific triggers, including an audio clip of a roaring crowd whenever he claps his hands. According to a recent article, there’s a monitor that displays real-time information on the music — an interface he devised with Pure Data.

At the heart of the project lies a Raspberry Pi and Arduinos. An Arduino on the sensor receives data relating to how quickly the body parts are accelerating, and wirelessly sends that information over radio to a small device housed inside a LEGO case. That receiver features a Raspberry Pi that translates the acceleration data into an output — the changes in the audio itself.

Cherry hopes to make mFM open-source in the near future, so he could see what other Makers are able to do with it. You can read all about the project here.

(Photo: Saiyna Bashir / The Capital Times)

Don’t Take Photos of Your Arduino 101 Either, Its Light Sensitive

Wafer level chips are cheap and very tiny, but as [Kevin Darrah] shows, vulnerable to bright light without the protective plastic casings standard on other chip packages.

We covered a similar phenomenon when the Raspberry Pi 2 came out. A user was taking photos of his Pi to document a project. Whenever his camera flash went off, it would reset the board.

[Kevin] got a new Arduino 101 board into his lab. The board has a processor from Intel, an accelerometer, and Bluetooth Low Energy out of the box while staying within the same relative price bracket as the Atmel versions. He was admiring the board, when he noticed that one of the components glittered under the light. Curious, he pulled open the schematic for the board, and found that it was the chip that switched power between the barrel jack and the USB. Not only that, it was a wafer level package.

So, he got out his camera and a laser. Sure enough, both would cause the power to drop off for as long as the package was exposed to the strong light. The Raspberry Pi foundation later wrote about this phenomenon in more detail. They say it won’t affect normal use, but if you’re going to expose your device to high energy light, simply put it inside a case or cover the chip with tape, Sugru, or a non-conductive paint to shield it.


Filed under: Arduino Hacks
Hack a Day 06 May 00:01

Autograph: A String Art Printer

“String Art” is the name of the art form that transforms thousands of nails and just as many feet of thread into unique masterpieces. Some artists have developed techniques to create photorealistic string art works, but until now, there was no way around the tedious and time-consuming manufacturing process. Depending on the size, it can take months to complete a single piece by hand.

The threading process as shown in this video(c) Laarco 2016.

Now, you might think, wouldn’t it be great to build a sophisticated “nail and thread”-machine that takes care of the whole assembly process, from placing the nails on the board to winding the string around the nails? The people behind Laarco, a design studio in London, UK, did exactly that. Their project “Autograph” is effectively a large scale “printer” for string art, capable of satisfying the increasing demand for this form of image reproduction.

While they are not shy to show their amazing results, mostly string-art-converted photographs of celebrities, we will probably not get a full documentation on the hardware and software behind Autograph. After all, it took them four years of development to build this fully automated machine, and they are about to turn their string boss-ness into a strong business: You can now buy their unique string art pieces starting at $1,100.

String path and height visualization – (c) Laarco 2016

Too expensive? Well, you can still build your own: The brain of the machine is a Raspberry Pi which sends commands to an Arduino Mega equipped with a 3D printer shield. The gantry design looks very similar to a popular low-cost CNC-mill, however, they added a custom tool head to position and uncoil the thread while keeping it under tension.

In preparation of an assembly pass, the nail positions are derived from Voronoi diagrams, an unknown mechanism then picks and places the nails into pre-drilled holes. During the threading run, the height of the tool head increases as the process progresses to avoid collisions with previous string segments.

We’ve seen drawing-bots, polar graphs and robotic artists in various forms in the past, but it’s probably safe to say that this is the first string art machine ever built. That said, enjoy the video:


Filed under: cnc hacks, Raspberry Pi
Hack a Day 28 Apr 12:01

Hack Your Pebble Steel to Control Your Raspberry Pi

If you already have a Raspberry Pi running a Node.js server, you're already on your way to controlling your home with a smartwatch.

Read more on MAKE

The post Hack Your Pebble Steel to Control Your Raspberry Pi appeared first on Make: DIY Projects and Ideas for Makers.

Arduino Comes To The Raspberry Pi, Linux ARM Devices

Arduino is the perfect introduction to microcontrollers and electronics. The recent trend of powerful, cheap, ARM-based single board Linux computers is the perfect introduction to computer science, programming, and general Linux wizardry. Until now, though, Arduino and these tiny ARM computers have been in two different worlds. Now, finally, there are nightly builds of Arduino IDE on the Raspberry Pi and other single board Linux computers.

The latest Arduino build for ARM Linux popped up on the arduino.cc downloads page early this week. This is the result of an incredible amount of work from dozens of open source developers across the Arduino project. Now, with just a simple download and typing ‘install’ into a terminal, the Arduino IDE is available on just about every single board Linux computer without having to build the IDE from source. Of course, Arduino has been available on the Raspberry Pi for a very long time with sudo apt-get install arduino, but this was an older version that cannot work with newer Arduino boards.

Is this distribution of the Arduino IDE the same you would find on OS X and Windows? Yep, everything is the same:

While this is really just arduino.cc improving their automated build process and putting a link up on their downloads page, it does make it exceptionally easy for anyone to set up a high school electronics lab exceptionally easy. The Raspberry Pi is almost a disposable computing device, and combining it with Arduino makes for a great portable electronics lab.


Filed under: Arduino Hacks, linux hacks, Raspberry Pi

Control Robots to Solve Puzzles in This Twitch-Style Robot Livestream

Robotics is a booming field that gets everyone excited, but when the talk comes to real life applications the response is a bit more tepid. Pundits tend to point to the “3 D’s”—dangerous, dirty and dull—but they often overlook a market with short term payoff: Entertainment. We are beginning to see some […]

Read more on MAKE

The post Control Robots to Solve Puzzles in This Twitch-Style Robot Livestream appeared first on Make: DIY Projects and Ideas for Makers.