WALTER - The Arduino Photovore Insect Robot
Primary image

What does it do?
Navigate around and seeking light
[Please excuse my English]
Cost to build
Embedded video
Finished project
Complete


[Please excuse my English]

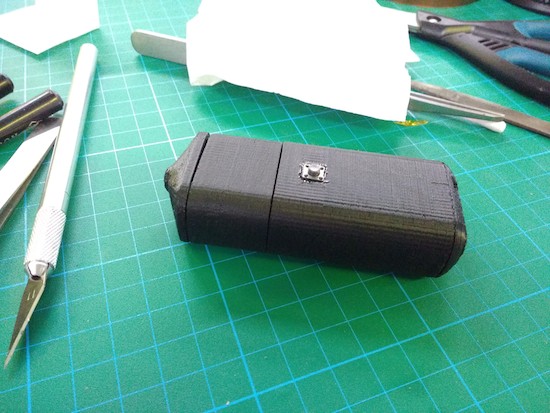
In the Red Dwarf TV series, Talkie Toaster is a monomaniacal talking toaster that tries to steer every conversation to the subject of toast. Now, YouTuber “slider2732″ has gone ahead and built a chatty appliance of his own.
To accomplish this, the Maker embedded a PIR sensor into the toaster’s lever that communicates with an Arduino Pro Mini whenever someone is nearby. The Arduino then reads sound files loaded onto an SD card and plays them through a 3W amplifier out to a speaker underneath. The replica is also complete with a circular panel on front, made out of “laptop screen material” with a sour cream tub’s lid, and equipped with a couple LEDs.
The Arduino code uses the TMRpcm library and is a simple case of responding to the PIR sensor going high or low. The samples are loaded from the SD card. The front grill area has the speaker underneath, with two white 5mm LEDs that are connected to the Pin 9 output from the Arduino. The former laptop screen material was cut out and then fitted. The main surround is from the lid of a sour cream tub, sprayed with a Krylon brown rattle can paint. The our legs are from a window blind, cut to the right sizes and similarly sprayed, then glued with Fix-All.
The samples were recorded in Audacity, normalized and saved out as 11025Hz, 8-bit WAVs due to buffer constraints of the Arduino Pro Mini.
slider2732 walks through the entire build and shows it off in the video below!

If you grew up in ’80s or early ’90s and owned a Nintendo system, chances are you’ve played Duck Hunt. In the classic light gun shooter video game, players would aim their NES Zappers at duck targets as they appeared on the TV screen. So what do you do when you still own the once-popular accessory? If you’re Warner Skoch, you turn it into a controller for your lamp and small devices.
The setup consists of a couple Arduino Pro Minis. Skoch embedded one board in the Zapper with an IR emitter and another in a box with an IR receiver, which also has an outlet for him to plug in his lamp or other gadget.
The receiver watches for a signal from the Zapper, which then triggers the relay inside the box on and off. The actual IR receiver part is separate, however, mounted behind a Duck Hunt duck made from Perler beads.
Spark up some NES nostalgia and watch Skoch’s project in action below!
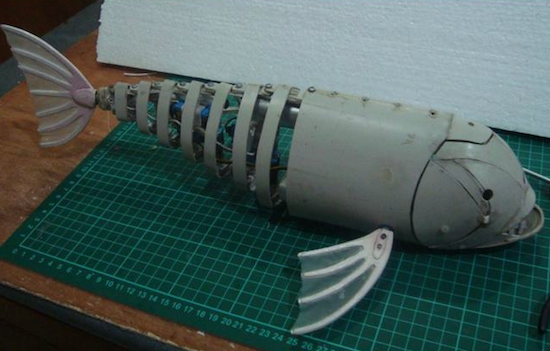
This robotic fish is made from bent PVC pipe and moves its tail for locomotion.
If you’re going to build an underwater vehicle, propeller control is the conventional solution. Eric Dirgahayu, however, created his underwater creature in the form of a fish, complete with a tail that powers it through the water, and pectoral fins that could, in theory, steer it in the correct direction. There is also a ballast tank to adjust its buoyancy. Interestingly, control of this “fish” is accomplished via a TV remote, so the surrounding water would need to be relatively clear.
Now we already have a complete fish robot body, we need to provide it with life! We will use the Arduino Pro Mini because the shape is small and can fit into safety box. In addition, you also need Pro Mini Arduino Motor Driver for control of ballast tanks, UBEX for power protection and two cell LiPo battery 1000mAh for power.
Here’s Dirgahayu’s general project description. If you’re interested in making a fish like this yourself, the physical build is seen here, and the electronics are found on this page.
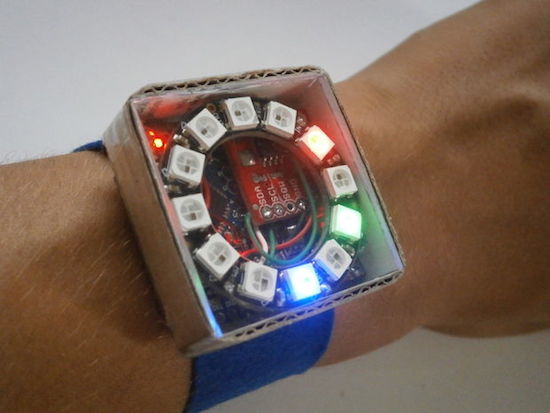
Not looking for a smartwatch? PIXIE is an Arduino-based NeoPixel wearable device that not only keeps time, but will also keep your geek cred intact.
You won’t find any numbers on this watch; instead, PIXIE uses LEDs to reveal the time–hours in blue, minutes in red, and seconds in green. Beyond that, a capacitive touch switch on its strap will activate a flashlight mode.
In terms of electronics, PIXIE is equipped with an Arduino Pro Mini, an Adafruit NeoPixel Ring, a real-time clock module, and a few other components–all housed inside a simple cardboard box with a piece of transparent plexiglass.
Sound like you’d like around your wrist? Check out its Instructables page here.
Spectroscopy is an incredible tool for chemical analysis–and now you can make your own Bluetooth-enabled device with an Arduino Pro Mini.
If you took advanced chemistry classes, you may have had the opportunity to work with a spectrometer. It probably seemed like a magical gadget, identifying the chemicals in a substance through its light characteristics unlike the experimental methods you previously had to use.
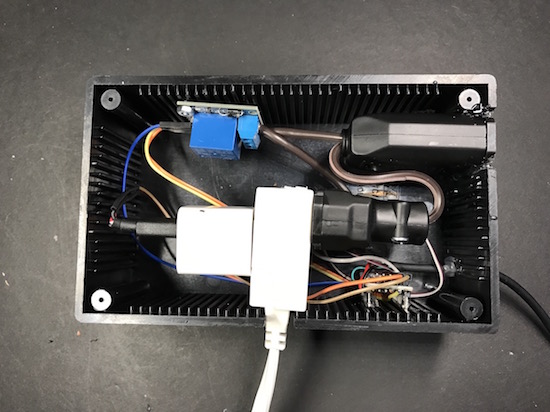
Using off-the-shelf components–including an Arduino, a Bluetooth module, an LED, optical filters, and a LiPo battery–housed inside a 3D-printed case, the WiSci aims to take this tool out of the lab, and into the “real world.” By following the instructions on its project page, you can build one for just under $250.

What’s really neat is that the portable spectrometer can even scan a fruit and then wirelessly send the data over to an accompanying Android app to tell you whether or not the fruit is ripe. (You can view its IEEE Spectrum article for a little more background on that!)
A spectrometer is a very powerful tool. By analysing intensity/wavelength pairs of the interacted EM radiation with the material under study, detailed information like its chemical composition, crystal structure and other elemental information can be extracted. It can also be used for food analysis. For example, it can reveal adulteration in milk or oil and analyse toxins to understand causes of food poisoning to name a few uses.
To create your own, check out its Hackaday.io page here.
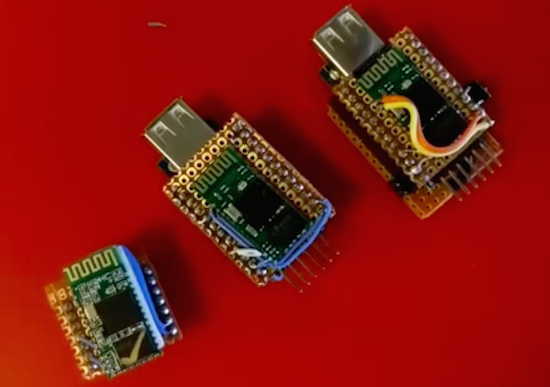
If you have an old keyboard lying around and wish it were wireless, Maker DastardlyLabs has a solution.
The “HID Relay” is a small adapter that uses an Arduino Pro Mini, a Bluetooth module, a USB host shield, and a few other components to upgrade any USB keyboard to Bluetooth. DastardlyLabs has made three videos to explain the entire “Bluetooth-ification” process–which can be found below.
So far, the method has worked with all of the keyboards that DastardlyLabs has tested it on, as well as most mice (except for one “gamingish” USB mouse). The Arduino source code and build notes are available on GitHub. The HID Relay was inspired by a recent Arduino hack by Evan Kale.

Growing up, there was nothing cooler than hopping in a go-kart for a quick spin around the neighborhood. But you know what would make it even cooler? If you built your own electric set of wheels. That’s exactly what two engineering students, Adrian Georgescu and Masoud Johnson, have done using commonly available components along with a secondhand frame they picked up for $125 and a few Arduino.
Although they initially targeted a motor power output of 3kW, they were unable to find any that fit their budget. So as any true Makers would do, the duo settled on creating one out of an old Subaru alternator instead. Price tag? $30.
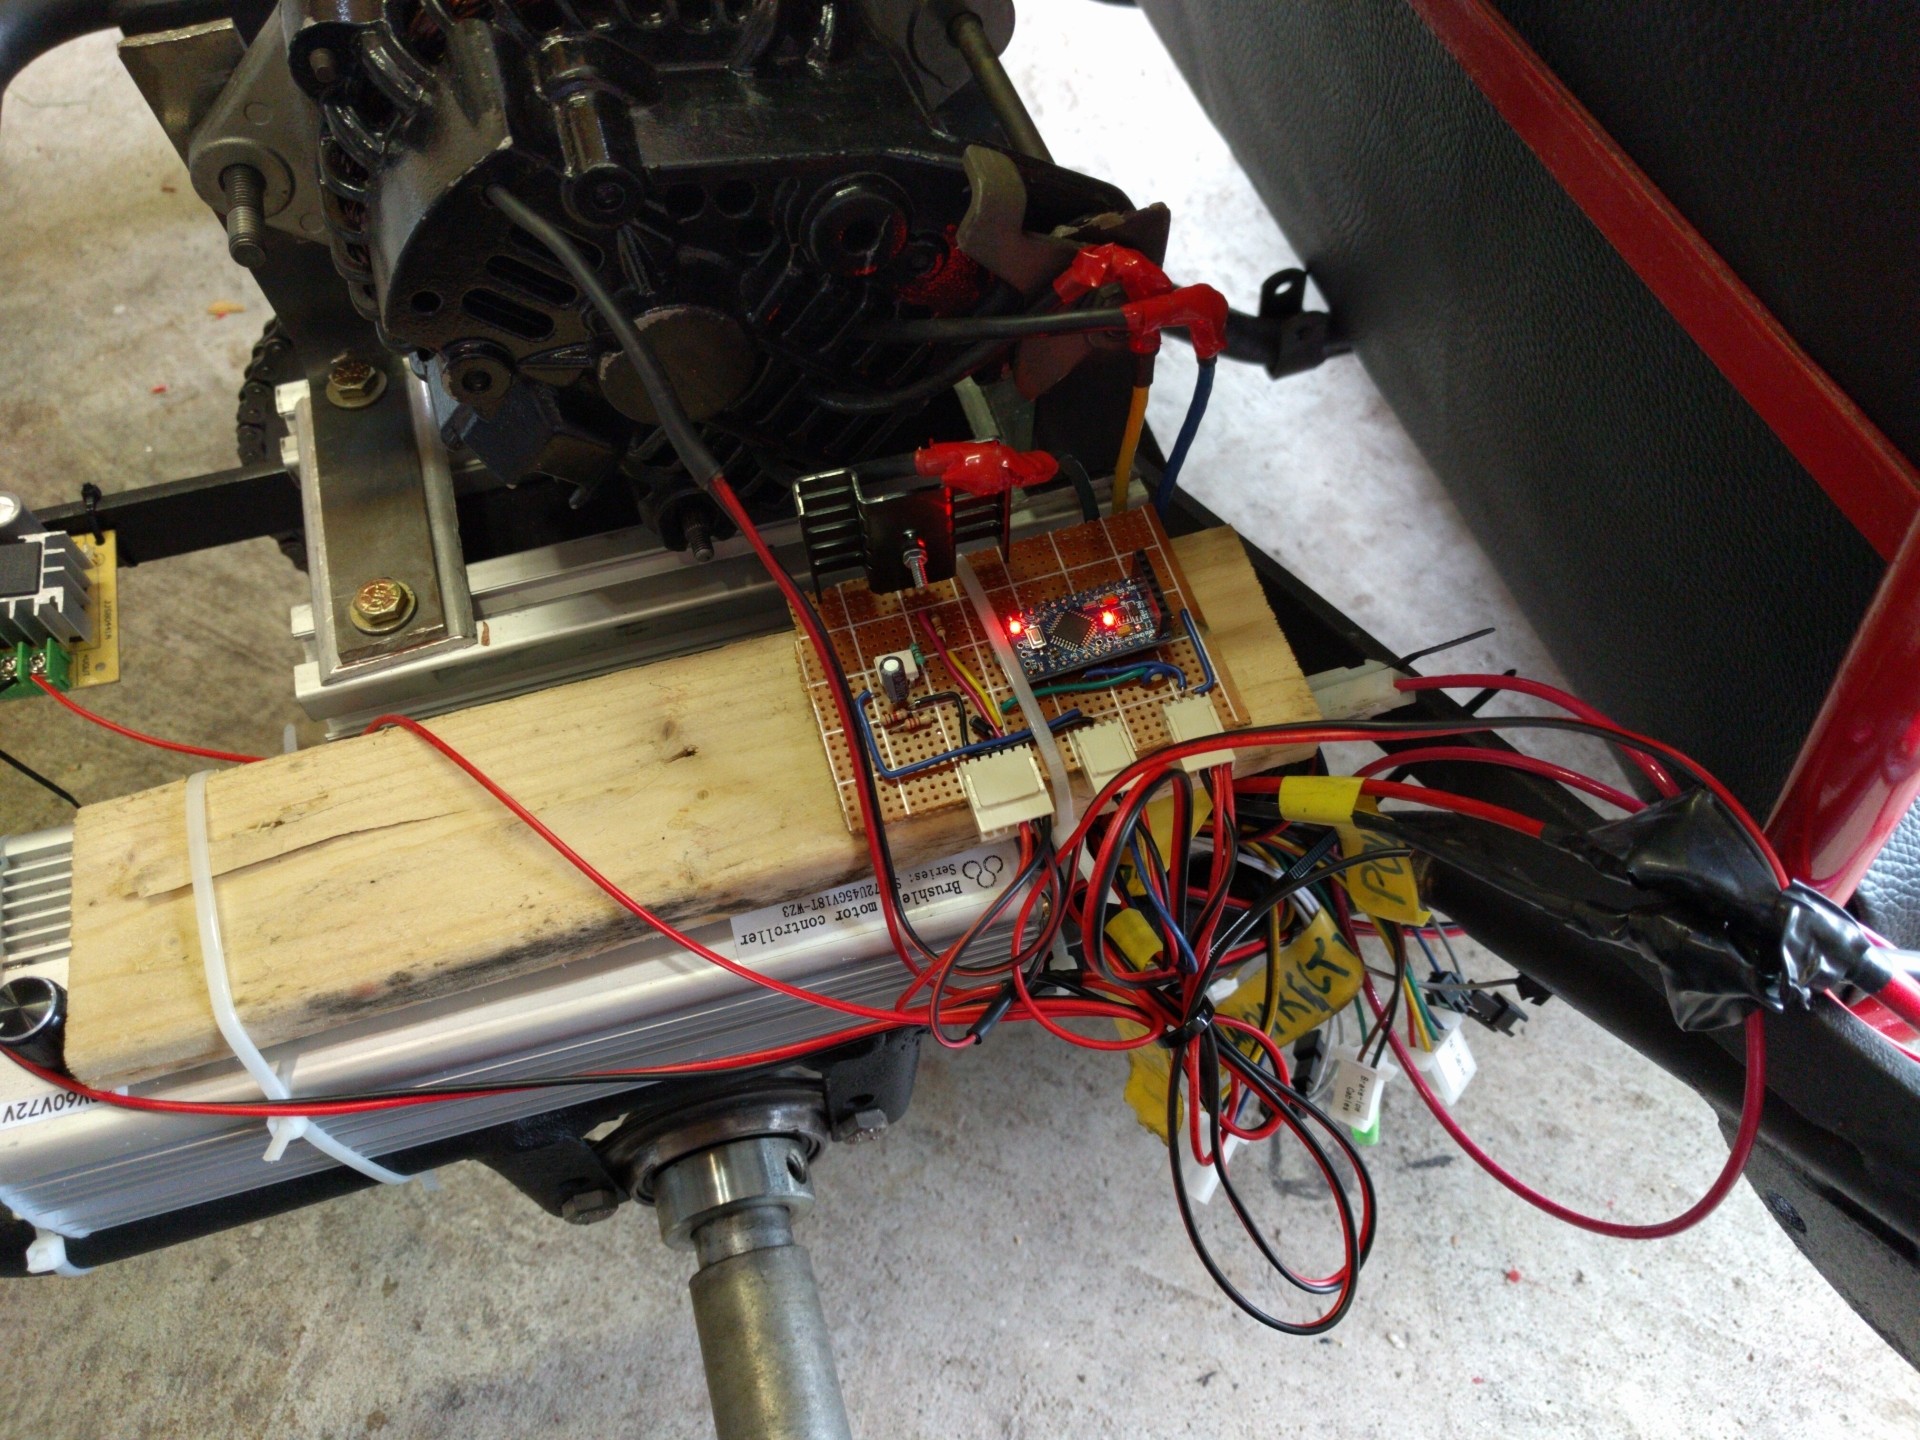
For the rest of their project, Georgescu and Johnson used an electric scooter’s three-phase motor controller, three LiPo battery packs, a trio of Arduino Pro Minis, and an Arduino Mega. The Arduinos are tasked with throttle control, speed sensing, RPM measurement, and transmitting the data over to a virtual dashboard on an Android app.
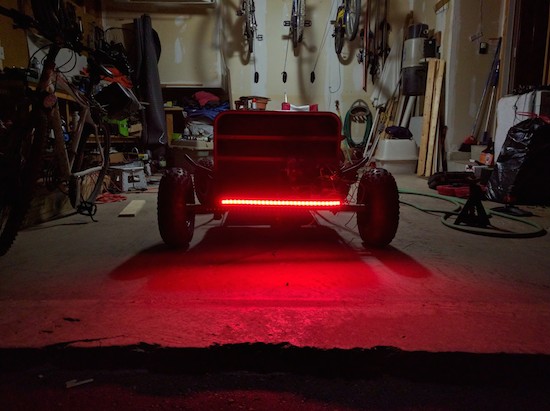
To finish off the build, the students reupholstered the seat, painted the chassis red and black, and threw on 60 LEDs. You can see the end result in action below, as the e-kart reaches a top speed of roughly 33mph (53km/h).
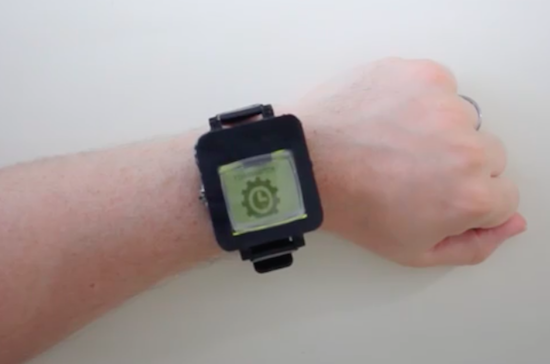
Do you have an old cellphone lying around somewhere? Don’t know what to do with it? Time to blow off that dust and convert the ‘dumb’ device into a smartwatch? This is exactly what Tinkernut has done. His DIY wearable not only tells time, but connects wirelessly to his smartphone over Bluetooth and notifies him of incoming calls and text messages via light and vibration.
The build itself uses an LCD screen and vibrating motor from a Nokia 1100 along with an Arduino Pro Mini to drive the system. A 3.7V 1100mAh rechargeable battery powers the gadget. All the electronics are soldered together to a perfboard, and housed inside a 3D-printed case.
Have an obsolete phone you’d love to repurpose into modern-day tech? Tinkernut has put together a detailed three-video series that explains everything from extracting the display, to connecting it to the Arduino, to creating an app in the MIT App Inventor. Admittedly, this project kept things simple; however, there are plenty of other features you can add, including a pedometer to count steps or a real-time clock module so you can keep time without having the watch tethered to your mobile device.
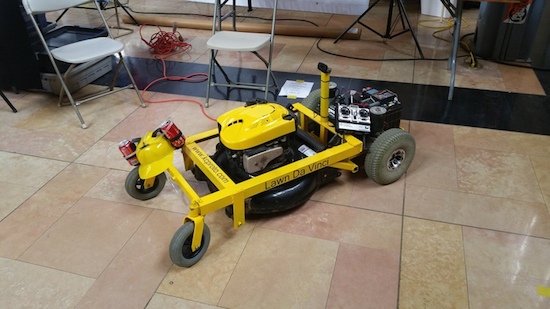
Inspired by the one seen in Honey, I Shrunk The Kids, Blake Hodgson has built a remote-controlled lawn mower of his own dubbed ”Lawn Da Vinci.”
The robotic machine’s frame is made from angle iron and steel, while its wheels and motors were taken from a mobility scooter. Power is supplied by a pair of 12V car batteries wired in series, and it’s driven across the yard with an RC airplane remote.
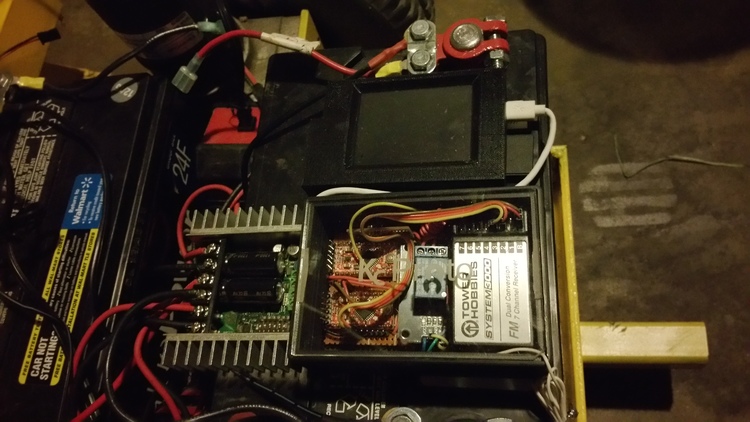
The Lawn Da Vinci has two Arduino Pro Minis and a Raspberry Pi for a brain–one Arduino is used for the motors and RC signal, the other for the kill switches. Meanwhile, the Raspberry Pi is tasked with streaming video from an attached webcam to his phone.
To improve reliability and reduce complexity, the motor driver now gets its signal directly from the RC receiver once it goes through the two relays controlled by the Arduino, which is always looking for a good signal. The Arduino and Raspberry Pi are powered off of a disassembled car cigarette lighter USB charger which takes the 12v of the batteries down to a clean 5v. I originally had it powered off of the Sabertooth but have better reliability this way. There are many ways to kill the motors. You can turn the remote off, push the trainer button, left with the right joystick, or push a button separate key fob and all of these will kill it.
Rather not to push a mower around all summer long? Check out Hodgson’s entire project–complete with its code–on his blog here, or read more on Hackaday.