There's no doubt that air fryers have been having a moment, but they haven't pushed the humble multicooker completely out of the limelight yet. If you somehow haven't jumped on the Instant Pot bandwagon yet, you can give it a try for much less right now. Amazon has discounted the six-quart Instant Pot Duo by 50 percent, bringing it down to $50. We've seen this model dip slightly cheaper in the past ($48), but this is the best price we've seen in many months.
The benefit of a multicooker like this one is that it can do many things, acting as a jack-of-all-trades in your kitchen. The Duo in particular has seven cooking modes: pressure cook, slow cook, rice cooker, steamer, sauté, yogurt maker and warmer. It also has 13 customizable "smart programs" that take a lot of the guesswork out of preparing common foods like soup, beans, rice, poultry and more.
Both kitchen newbies and seasoned home cooks can make use of an Instant Pot like this. For those just getting into cooking, it'll help you prepare new foods that you may have never tried before, sometimes even more quickly than you could do just with a pot on stove. For those who cook all the time, it'll make it easier to prepare a lot of food during the holidays by giving you another countertop machine to employ when your other appliances are in use. Plus, it's a great tool for meal prepping.
It's also worth noting that the model on sale has a six-quart capacity, which sits in the middle of the Duo's lineup. It's a great size for most families as it's able to make food for up to six people at once. If you decide to take the plunge into the Instant Pot world, be sure to check out our guide for tips and tricks, recipe inspiration and more.
To me, cooking nirvana is when you have a recipe in mind, your mise en place all set, and you can focus on getting that perfect sear or saute. But before you get there, having the right equipment for the job goes a really long way. So for the adventurous cook in your life, here are some of our favorite kitchen gadgets that would make excellent gifts this holiday season.
KitchenAid Cordless Variable Speed Hand Blender
Will Lipman Photography for Engadget
While KitchenAid’s cordless hand blender isn’t as powerful as some of its wired rivals or countertop models, what it lacks in oomph it makes up for with convenience. There are no speed dials to adjust, just squeeze harder on the trigger to make it go faster. Meanwhile, the lack of wires gives you one less thing to worry about when you’re making sauces or smoothies (especially if you’re doing it on the stovetop). And with a battery life that can blend up to 25 bowls of soup on a single charge, your loved one will probably run out of energy before this thing does. — Sam Rutherford, Senior Reporter
Everyone has their preference when it comes to cutting tools, but I think everyone could use a ceramic knife in their arsenal. Starting at under $50, they’re relatively affordable. But more importantly, they are much sharper,hold an edge up to 10 times longer and are lighter than traditional steel blades. That makes them less tiring to use, and you don’t ever have to worry about them rusting either. Just remember, ceramic is more brittle than metal, so tell your giftee to stick to slicing fruits, veggies and boneless meats – leave hacking through bones to other knives. — S.R.
After being disappointed with a bunch of non-stick pans from big names like All-Clad to smaller brands plastered across social media, I went on a quest to find something I could trust. And after trying out Mise En’s options, I found a winner. Not only are Mise En’s pans significantly cheaper than premium legacy brands, but I’ve also found they maintain their non-stick coating (which is also PFOA-free) much better over time. So if you know someone who would appreciate a good, affordable no-nonsense pan for cooking eggs, crepes or anything else that can get a little gummy, look no further. — S.R.
Air fryers might seem like just a fad. After all, they’re just compact convection ovens, right? That’s true, but that doesn’t mean they don’t work. In our experience, pod-shaped air fryers are able to produce crispier foods than their convection oven counterparts and they’re much easier to clean too. If you have someone in your life who loves the idea of “frying” foods without the oily mess, an air fryer could potentially be a fantastic gift.
Our favorite air fryer is the 6-quart Instant Vortex Plus with ClearCook and OdorErase. It has a display window so your giftee can check how the food looks. It also uses odor-eliminating filters that help reduce cooking smells – a feature that many air fryers lack. The six-quart size in particular is what we recommend; it’s large enough to fit four large chicken thighs or a whole pound of wings. The basket internals are nonstick so it’s easy to clean, plus the inner rack is dishwasher safe. — Nicole Lee, Commerce Writer
Any home cook will tell you cooking is a messy affair. No matter how neat and tidy you think you are, you’ll inevitably encounter oil spitting at you as you’re frying potstickers or perhaps an accidental splash of tomato sauce as you mix in meatballs. If you have a loved one who cooks often enough, they’ll certainly appreciate an apron to avoid getting any of that mess on their clothes. Hedley & Bennett makes perhaps the best commercially-available apron on the market. The Essential Apron is made from 100 percent cotton twill fabric that’s durable enough to withstand frequent use, and it comes with pockets – one breast pocket for a perhaps pen or a clip-on timer and two large front pockets big enough for a phone or a small tablet each. These aprons are also sold in a wide variety of colors and patterns, so you’re sure to find at least one that’ll fit your loved ones’ taste. — N.L.
An immersion circulator (aka a sous vide machine) isn’t for everyone. But it can do things that no other gadget can. It can take the guesswork out of nailing the temp on a steak before finishing it off with a quick sear in a cast iron skillet. A sous vide machine can also create the perfect jammy center on a soft-boiled ramen egg or simply add a range of aromatics to various types of meat while they cook. This is the kind of thing that a lot of home cooks dream about but can’t quite justify buying, which is precisely what makes it a perfect gift. — S.R.
A good grater is a must-have in the kitchen, and just like Band-Aid is to adhesive bandages and Kleenex is to tissues, Microplane has become synonymous when it comes to zesting and grating. The classic model comes with a no-slip plastic handle and an included protective cover and it can handle anything from parmesan cheese to garlic to nutmeg. And priced at $16, it’s an ideal kitchen gadget gift even if you don’t have a ton to spend. — S.R.
There’s no shortage of instant-read thermometers out there, but ThermoWorks’ ThermoPop has been a staple in my kitchen for a long time. Yes, it’s cute, but that’s only one reason to buy it over others. I like that it’s quite accurate and provides temperature readings in just a couple of seconds, plus it's splash resistant and pretty easy to clean. It also has a screen that you can rotate to show you the temperature in different orientations, making it easy to use in all kinds of positions. Plus, you can’t beat its $35 price tag, which is a steal for an accurate thermometer like this that also has an attractive, pocketable design. If you want the latest and great, spring for the ThermoPop 2 that just came out, which is even more accurate than the previous generation, faster and can read temperatures up to 572 degrees Fahrenheit. — Valentina Palladino, Senior Commerce Editor
Anyone who has watched even a handful of cooking shows or videos has probably seen this cutting board in the background. And the reason is that they’re just great products that deliver everything you need and nothing more. Boos blocks are available in a huge range of shapes, sizes and woods, from small circular boards to huge maple slabs with juice grooves. That said, if you’re planning on gifting a cutting board this nice, don’t forget to include proper care instructions, which at the very minimum include oiling it once a month. — S.R.
Everyone needs a good pair of scissors, and it doesn’t hurt if they look good too. The Good Shears sport soft silicone handles and sharp micro-serrated blades that should make quick work of anything short of beef bones. And unlike a lot of cheaper competitors, the Good Shears are dishwasher safe and can be taken apart for sharpening or cleaning. — S.R.
Those who eat rice regularly know that rice cookers are a much easier way to prepare the popular grain than using the stovetop alone, especially if you’re cooking for a crowd. Our favorite model is the Zojirushi Neuro Fuzzy thanks to its “fuzzy logic” tech (yes, that’s a technical term), which ensures perfectly cooked rice even if your water and rice measurements aren’t exact. It has settings for different sorts of rice: white, mixed, porridge, sweet, semi-brown, brown, rinse-free and quick-cooking. Other features include a timer and a keep-warm setting. The Zojirushi rice cooker also makes fantastic polenta, not to mention oatmeal from steel-cut oats.
There’s also an updated (and pricier) option called the Zojirushi Induction Heating System Rice Cooker. In addition to the fuzzy logic tech mentioned above, it features an induction heating tech that heats the inner cooking pan. According to the company, this allows the device to make precise temperature adjustments to cook exceptional rice. This also means the food will heat evenly, as the bottom, side and lid will all generate heat. — N.L.
The Vitamix 5200 is often cited as the premium blender of choice among experienced cooks and professional chefs. But the default 64-ounce container is often much too tall to fit under most cabinets. Enter the Vitamix Low-Profile blender, which still has a 64-ounce container but has a much shorter stature so it easily fits in most kitchens. Aside from looks, it’s just as capable and powerful as the original. It can crush ice, make quick work out of frozen fruit and tough vegetables and puree soups with ease. — N.L.
A good kitchen scale is an essential kitchen gadget, especially in times when loose volumetric measurements just don’t cut it (like baking). Not only does OXO’s Precision Scale support both metric and imperial measurements, it also features accurate 0.1-gram measurements that go up to six pounds. There’s also an easy-to-read digital display with a built-in timer, and its minimalist design will look good in practically anyone’s kitchen. — S.R.
Admittedly, this might not strictly be a gift for a cook, but it’s definitely handy to have around the kitchen and great for creating a custom sodas or cocktails. The Soda Stream Terra, is the company’s most affordable sparkling water maker. For just $100, the starter kit includes the device itself, a reusable 1L bottle and a CO2 cylinder. You can also spring for the $130 hydration pack if you’re shopping for an avid cocktail maker or seltzer addict. That tacks on two more 1L bottles, two 0.5 liter dishwasher-safe bottles and 40ml lemon flavor drops. The whole setup is super easy to use too, and doesn’t even need to be plugged in. Just attach the CO2 tank, fill up the bottle with water and then tap to add bubbles. From there your giftee can mix and match flavor packs to suit their taste while also cutting down on waste from packaging and transporting heavy cans or bottles. — S.R.
If you have a meat lover in your life, ButcherBox’s Favorites is quite possibly the best gift they’ll ever get. Each shipment will have all of the company’s bestsellers lovingly vacuum-packed and frozen for their enjoyment. The contents include two pounds of ground beef, four eight-ounce boneless pork chops, three one-pound packs of boneless chicken breasts, two six-ounce filet mignons, one pound of sirloin tips, a 12-ounce pack of apple gouda sausage and a 10-ounce pack of bacon. That’s more than enough to keep them satisfied for at least a month, perhaps even longer. At least, if they don’t gorge it all in one go. — N.L.
For many people, the first cup of tea is often the highlight of their day. And while you don’t need much to make a great brew, there are a number of tools and gadgets that can make the whole experience a lot more enjoyable. So this holiday season, whether you’re looking for a present for you or someone you love, check out this list of our favorite gifts for tea lovers.
Hiware Borosilicate glass pitcher
Hiware
After the handle on my previous pitcher developed a crack, I went on a search for a simple but durable container that could support my iced tea addiction and after a year and a half, this thing has not disappointed. Its heat-resistant borosilicate glass means you can pour boiling water directly into the pitcher without worrying about it shattering and its huge 68-ounce capacity holds enough to keep an entire family hydrated. Meanwhile, the stainless steel lid prevents leaves or stuff like fruit pulp from escaping. And at $20, this pitcher is just great value.
If you know someone who always brings their “famous” iced tea to parties or picnics check out Hario’s Cold Brew bottle. It holds up to 750ml of liquid and comes with a removable strainer to keep tea leaves from spilling out. There’s even a grippy silicone top for easy handling and a removable stopper that acts like a cork. And if you’re worried it’s a little pedestrian looking to make a lasting impact, Hario makes a champagne bottle version too.
When it comes to boiling water in style, Fellow’s Stagg EKG Kettle can’t be beat. It’s available with a huge range of finishes and accents including walnut, cherry and maple woods. There’s an LCD panel built into the base for choosing a specific temperature (down to the degree) while the hold feature keeps water hot for up to an hour. The gooseneck spout is also great for friends or family that like making mudwater (aka coffee) with a V60 or similar brewer. And if that’s not enough, just this fall, Fellow introduced a new pro model that supports customizable brew settings, WiFi connectivity and more.
For those on your list that prefer function over form, you really ought to consider Breville’s IQ Electric Kettle. In addition to having nearly double the capacity (57 ounces vs 30 ounces) of the Stagg, it has dedicated temperature settings for a lot of major types of tea (green, white, oolong and black). It’s also a bit more powerful with an output of up to 1,500 watts, so there’s less waiting around for the water to heat up.
One of the easiest ways to brew better tea is by moving away from single-serving bags and switching to loose-leaf teas. That’s because typically tea bags feature lower quality leaves that often sit on shelves for months (or years) with the whole process favoring convenience over flavor. On top of that, the cloth or (more often) paper used to make tea bags can also impart unwanted flavors.
If you know someone looking to get into loose-leaf teas, they’re going to need an infuser, and OXO’s is one of the best. Its stainless steel basket won’t mess with the taste and its included lid traps heat in when steeping while also doubling as a saucer to prevent dripping once the tea is ready to drink. The basket is also a perfect size so it fits in practically any mug (and even many iced tea pitchers), and at just $15, it’s cheap enough to buy two or more so there will always be a clean one ready to go.
While Fellow’s Atmos Canister was originally intended to store coffee, it’s equally great at keeping tea tasting fresh and flavorful, even after long periods. That’s because simply twisting its lid removes oxygen from the canister, slowing down potential oxidation which can cause tea to taste dull and lifeless. It’s available in three sizes (0.4, 0.7 and 1.2 liters) and in a range of materials, though you’ll probably want to stay away from the glass version, as light is another source of potential oxidation. (Leave the clear one for cookies or something.) And while it’s a bit on the pricey side, in my opinion there’s no better way of keeping even the fanciest leaves tasting great over time.
For matcha lovers who don’t want to deal with the hassle of a traditional bamboo whisk or anyone seeking a way to quickly froth up some milk, Golde’s Superwhisk is a great pick. It has two different speed settings and a battery that can be recharged via USB. It even comes with an included travel case, so your giftee can take it camping or anywhere they want to enjoy some tea (or a latte).
For people who want to bring their brew on the go, this charming portable tea infuser bottle looks great and makes the whole process super easy. Tea goes in the top section and water goes in the bottom. Right before drinking they flip the whole infuser upside down to brew instead of letting the leaves become oversteeped after sitting in water all day. The portable infuser also features borosilicate glass with a double-walled construction, so it can handle high temperatures without burning hands. Admittedly, there are similar bottles for less, but between its innovative design and premium materials, I can’t think of a better way to drink tea on-the-go.
Getting into matcha can be intimidating for even long-time tea drinkers. Not only can matcha be expensive but, since it’s very finely ground green tea instead leaves steeped in water, it has a very different flavor profile and texture. So instead of buying someone a single type of matcha, give this matcha flight kit a try. It includes four different blends which range from bright grassy varieties to deeper savory mixes. There’s also a handcrafted bamboo scoop, a sieve, tea towel and most importantly, a motorized whisk for properly whipping up the perfect cup.
For complete newbies to tea, Adagio’s loose teas sampler sets offer a huge range of types and flavors to choose from. You can select specific types like green teas from China for the Sinophile on your list, or opt for more general mixes like seasonal blends or even herbal selections. Prices also start as low as $12 a box for four different types, which makes this one of the most flexible and affordable ways of gifting a wide range of teas without doing a ton of research.
The first time I had butterfly pea flower tea was on my honeymoon in Thailand and it was love at first sip. It has a sweet flora aroma with some subtle earthy notes. But its signature highlight is its color. When brewed alone, you get a deep blue hue with hints of green, but when you add acid suddenly the tea becomes bright purple or pink. And because butterfly pea flower doesn’t contain caffeine, between its color and taste, it’s a great way to introduce kids to tea. Steep it, chill it, add the juice from a couple lemons or limes and a splash of sugar (I preferred agave), and in no time you’ll have the perfect summertime iced tea.
Despite Russia being the world's third largest oil producer and exporter (at least until its invasion of Ukraine), its people have traditionally relied on the nation's monumental expanses of loggable forests for their cooking fuel needs. Access to an essentially inexhaustible firewood supply has deeply influenced Russian culture, governing how food is prepared, which impacts the form factor the home's oven and hearth takes, which in turn shapes the both home itself and domestic dynamics around it.
In her latest book, The Kingdom of Rye: A Brief History of Russian Food, prolific author and prominent food scholar Darra Goldstein turns her gaze onto a resourceful people who have overcome their climate, repeated famines, hunger, and political repression to establish a culture and cuisine of their own. If you are what you eat, Goldstein aptly illustrates what it means to be Russian.
Russia is not a quick-cooking culture. The nature of traditional Russian cuisine was in large part determined by the design of the masonry stoves that had come into use by 1600. These massive structures for both cooking and heating could measure up to two hundred cubic feet, occupying a good quarter of the living space in one-room peasant cottages. They were built of bricks or stone rubble covered with a thick layer of whitewashed clay. (For heating, wealthy families also had so-called Dutch stoves faced with beautiful tiles—even utilitarian objects provided an opportunity to display their prosperity and aesthetic taste.) Unfortunately, far too many peasant cottages fell into the category of “black,” meaning their stoves had no chimneys, and much of the smoke lingered in the air, to detrimental effect. More affluent peasants lived in “white” cottages in which the smoke was vented through a chimney.
Unlike other countries where fuel was scarce, resulting in the adoption of quick cooking methods, Russia boasted extensive forests and thus plentiful firewood. The thick walls of the stove retained heat very well, and many of Russia’s most typical dishes result from this property. When the stove was newly fired and very hot, with embers still glowing at the back of the hearth, cooks placed breads, pies, and even blini in the oven to bake. It took two to three hours to bring a cold oven up to temperature. Experienced cooks inserted a piece of paper to determine when the oven was ready for baking, based on how quickly the paper browned and burned. So central was bread to Russian life that oven temperatures were often described in relation to bread baking: “before bread, after bread, and at full blast” (vol’nyi dukh). As the heat began to diminish, other dishes took their turns: grain porridges that baked to a creamy consistency, followed by soups, stews, and vegetables, which were cooked slowly in bulbous earthenware or cast-iron pots. When the oven temperature had fallen to barely warm, it was just right for culturing dairy products and drying mushrooms and berries. During the winter, the stove was fired once or twice a day, and in summertime, only as needed for baking.
At the rear of the masonry surrounding the traditional Russian stove, high above the floor, is a ledge. This lezhanka (from the verb “to lie”) was the warmest spot in the peasant cottage. There, the elderly or infirm could find comfort, and children could laze like the beloved folk figure Emelia the Fool. Most stoves also provide recesses for storing food, kitchen equipment, and wood, as well as niches for drying mittens and herbs. The oven cavity itself is massive, large enough for uses well beyond cooking. The stove could become a makeshift banya when planks were set up along the hot interior walls of the oven, and this cleansing ritual endured well into the twentieth century. It usually took place on a bread baking day, when the oven was already heated, and was considered especially beneficial when steam from the hot water released the aroma of medicinal herbs. Some Russians took a “bread bath,” believed to have healing powers, by using diluted kvass instead of water to create the steam. In some regions of Russia women crawled into the oven to give birth, since it was the most hygienic place in the cottage. Beyond such practical uses, the stove played a highly symbolic role in Russian life, demarcating the traditional female and male spheres, with the cooking area to the left of the hearth and the icon-dominated “beautiful corner” to its right. And not surprisingly, given its importance in providing sustenance, heat, and health, the stove was believed to hold magical powers beyond the alchemy of transforming dough into bread. Mothers would sometimes place sick infants on bread peels and ritually insert them three times into the oven in hopes of curing them.
The masonry stove prevailed in Russian households both rich and poor until the eighteenth century, when Western-style ranges and the new equipment they required gradually came into use. Many Russian stoves were modified to include stovetop burners in addition to the oven, and in some households a cooktop range superseded the stove entirely. Saucepans and griddles largely replaced the customary earthenware and cast-iron pots perfect for slow cooking in the Russian stove. Cooktops also affected the way ingredients were prepared. In kitchens that could afford meat, large joints for roasting or braising gave way to butchered cuts like steaks, filets, and chops that could be prepared à la minute, often in more elaborate, if less natively Russian, recipes.
The Russian stove released deep, mellow flavors through slow cooking even as its low heat enabled culturing and dehydration, which produce intensified flavors that also characterize Russian cuisine.
While we at Engadget are blessed with a passion for cooking, most of us are not blessed with spacious kitchens. But that doesn’t stop us – we use every inch of our tiny apartment kitchens as efficiently as possible. In doing so, we’ve found that some of the most useful cooking tools are the small things – items hiding deep in your drawers or sitting humbly on your countertop that you turn to often and may end up taking for granted. We wanted to highlight some of our favorite small kitchen essentials to remind everyone (including ourselves) that you don’t need to add the latest ultra-convenient unitaster to your kitchen to make great food. Ultimately, it’s the small stuff that matters, both when it comes to recipe ingredients and the tools you keep in your cupboards.
Thermapen One
ThermoWorks
If there was ever an essential kitchen gadget, an instant-read thermometer is certainly it. Not only does it help you cook things correctly, but aso safely. No one wants to serve their guests undercooked chicken. If you’re in the market, Thermapen’s One is the best your money can buy. It’s more expensive than your run-of-the-mill probe, but the One gets its name from its speed: it can provide readings in one second.
What’s more, the One is accurate to within half a degree and the IP67 waterproof housing means it will hold up to any accidents. The display auto rotates so you’re never twisting your neck to read the numbers. It’s also equipped with a motion sensor so that display automatically comes on when you pick up the thermometer. The Thermapen One will serve you well in the kitchen, at the grill and for many other things, making it a go-to for a variety of culinary tasks. – Billy Steele, Senior News Editor
I was late to hop on the Instant Pot train. I picked up the three-quart Instant Pot Ultra on Prime Day in 2020, and even as I waited for it to arrive, I was slightly skeptical about how much I’d really use it. Fast-forward more than a year and the multi-cooker has become one of the most used gadgets in my laughably small kitchen. If I had enough counter space, it would stay out all the time – next to my other cooking MVP, my Vitamix – but sadly it has to sit in a lower cabinet when not in use. But I pull it out often to make soups and stews, to meal-prep large batches of dried beans and even to whip up rice. I grabbed the three-quart model because I mainly cook for myself and my fiancé, but since we always have leftovers, that leads me to believe that the smallest Instant Pot could make a decent-sized meal for up to four people or a big batch of our favorite side dish. While the Ultra model can be difficult to find right now, the newer Instant Pot Pro Plus has many of the same cooking modes along with a fancier display, plus app connectivity. — Valentina Palladino, Commerce Editor
I bought my Microplane after taking an in-store cooking class at Sur La Table where, admittedly, the hosts had an agenda to sell us stuff on our way out. I treated myself to this $15 hand grater, having just been introduced to it in my cooking demo. Today, I use it for everything from mincing garlic, to zesting citrus to grating parmesan over my pasta. The Microplane takes up less cabinet space than my box grater – and it’s never sliced my finger like traditional models either. The only annoying thing about my workflow is that the Microplane is often sitting dirty in the dishwasher when I need it. But at this price, with such a small footprint, it wouldn’t kill me to get a spare. – Dana Wollman, Editor In Chief
I love to cook, but I can’t say I’m terribly precise when it comes to following recipes. If something calls for a tablespoon of oil or a half cup of stock, I’m more likely to just dump it straight in than measure it out. So if you had told me a few years ago that one of my most-used kitchen gadgets would be a cheap kitchen scale, I probably would have laughed.
Then the pandemic hit and I quickly realized my lackadaisical approach would not cut it when it comes to baking. Baking bread, or just about anything else, requires precisely-measured ingredients, and a kitchen scale is far and away the easiest and most reliable way to measure out your ingredients.
I like this one because it’s compact, but can handle up to 11 pounds of weight. And it’s easy to quickly switch between pounds, grams and fluid ounces. And even though my pandemic baking hobby was short lived, I’ve found having a scale handy is actually quite useful. From brewing the perfect cup of pour-over, to weighing out the cat’s food, to managing my own portion sizes, this little scale has earned a permanent place on my counter. – Karissa Bell, Senior Reporter
There are very few items that have earned a permanent spot on my painfully tiny countertop, and my Cosori electric kettle is one of them. I’ve written about it before, about how I finally decided to move on from the dark ages of heating up water for tea in the microwave to something more civilized. But the kettle has proven itself useful in many other ways, like prepping stock by using Better Than Bouillon and boiling water, and making the occasional quick cup of ramen. I like that Cosori’s model has different built-in temperature settings for different types of drinks, and its gooseneck design makes it easy to use for Chemex-made coffee. I’ve thought about upgrading to a new kettle recently, but I always ask myself, why? Cosori’s is still going strong, just the same as the day I bought it. — V.P.
According to my Amazon records, I purchased this small-batch Cuisinart food processor for about $28 on Amazon Prime Day 2017, correctly surmising that I didn’t need anything larger or pricier. For small kitchens and occasional use, the size is right – and so is the price, even if you pay closer to the $40 MSRP. And don’t be fooled by the name “mini” either – the three-cup capacity is enough to whip up pesto, hummus and various other dips and sauces. The only time recently I had to work in batches was when I was grinding up Oreos for the cookie layer of an ice-box cake. No big deal, and certainly not a dealbreaker.
When it comes to cleanup, I like that the plastic cup and lid can go in the dishwasher, though I need to wash the blades and wipe down the base by hand. Fortunately, too, it’s short enough in stature that it can sit even in a cabinet with just 9.5 inches of clearance. And, because it’s so lightweight, pulling it down from above my head never feels like a safety risk. – D.W.
According to my Amazon orders archive (a testament to how much I have, in my own small way, enriched an awful company) I purchased this knife in January of 2016. It had good reviews and was, I believe, less than $40 — my assumption being this would be a cheap, workhorse knife that, were it stolen or destroyed by inconsiderate roommates, would be no great spiritual or financial loss. I have chopped and diced with it; I've hacked into gourds, coconuts and lobsters; I've used it to cleave straight through chicken bones; I regularly run it through the dishwasher.
Over six years later, it remains the best knife in my kitchen — and with the help of a chef's steel, the easiest to cut with too. And no, I have never once given it a proper resharpening either. An 8-incher from trendy upstart Misen which retails for almost twice the price failed to take its place. (Personally I think the weight distribution is off.)
There's no fancy damascus patterning to the steel, and the handle is plastic. I absolutely do not know (or care!) if it features a full tang or what the edge geometry is supposed to be. It's an utterly proletarian knife that, in my many years of use, remains both irreplaceable and indestructible. – Bryan Menegus, Senior News Editor
I’ve accumulated lots of measuring spoons over the years – plastic, metal, some with a key ring attached – but these are the only ones I bother to use anymore. This set, which includes five spoons ranging in size from a quarter-teaspoon to tablespoon, has a magnetic nesting design, ensuring the spoons take up as little space as possible. (I also never find myself ransacking the drawer to find the one missing spoon that I really need at that moment.) Equally important: Each spoon is two-sided, so if I need to use the tablespoon, say, for both wet and dry ingredients, I can keep the two separate and throw just the one spoon in the dishwasher when I’m done. – D.W.
Look, don't ask me exactly which one is hanging off the pegboard I installed in my kitchen — I don't remember and frankly, you're buying bent pieces of wire, so any distinction between different brands is likely trivial. The point is that, while I have the utmost respect for printed media, the best use for a magazine rack is for storing pot lids, a very necessary and otherwise extremely annoying-to-store kitchen object.
What kind you look for depends mostly on what sorts of pot lids you're trying to stash away. Handle-style (is there even nomenclature for this type of thing? I'm talking about these ones) lids work best with a straight rail. For those with knob-type handles, ideally seek out one like this that features a slight concavity in the middle of each rail, as it'll keep the lids from sliding around too much. This is also the best bet if you — like me, and probably most people — have a set of pots and pans cobbled together from a variety of manufacturers and your lid handles are a mix of both varieties.
The only word of caution I'll offer is that, while pot lids might not be as heavy as, say, a cast iron skillet, install your magazine rack securely, either off a pegboard (which I cannot recommend highly enough for its versatility) or make sure it's screwed down into a wall stud. Cleaning up broken glass and buying an entirely new set of lids is no one's idea of a good time. — B.M.
Those puny stick frothers do not cut it. Beyond the fact you have to heat the milk yourself – yeah, I was out already – it doesn’t have the oomph to offer that thick velvety milk needed for your daily flat white. There are several more substantial milk frothers available now, but I swear by Nespresso’s Aeroccino series or its Bluetooth-connected Barista Recipe Maker. I have the latter, because, well, I work at Engadget.
The Barista can whip up hot and cold milk, depending on your selection. It uses induction tech to both heat up the dishwasher-safe milk jug and magnetically spin the whisk inside, which is substantial and also thankfully dishwasher-safe. The results are consistent and ideal for at-home caffeination – which is not a word, apparently.
It turned out to be the final piece of my homemade coffee puzzle, ensuring my brews more closely approximate the espresso-based delights I get in West London’s cafes. While the touch-sensitive buttons and ability to replicate recipes are nice, I could survive without them.
Nespresso has recently introduced its fourth-generation Aeroccino, which is designed to look like a Moka pot, which is cute. It’s also a touch cheaper than my Barista Recipe Maker. – Mat Smith, U.K. Bureau Chief
If you love coffee, you probably already know all the reasons why a pour-over setup will produce a better cup. But even occasional coffee drinkers will benefit from ditching a bulky drip machine for a sleek glass Chemex. In small kitchens, you need all the counterspace you can get, and Chemex’s three or six-cup carafe takes up a lot less space than the typical drip machine. It’s also easier to clean and stash away in a cupboard when not in use (and easier on the eyes if you do leave it out).
Most importantly, it brews a far better cup than any machine. To the uninitiated, pour-over setups can seem intimidating, but a Chemex makes it reasonably foolproof: add grounds to a filter (you can use bonded paper filters or get a reusable one), add hot, but not-quite-boiling, water, wait a few minutes and you’ll have a surprisingly smooth cup of coffee. What’s great about a Chemex is you can put as little or as much effort in as you want. Like other pour-over setups, there’s room for endless experimentation: you can change up the grind size, water temperature and coffee to water ratio to get the “perfect” cup. Or, if you’re less fussy, you can do what I do most mornings and eyeball it — as long as you don’t pour your water too quickly even a hastily made Chemex cup will have a lot more flavor than whatever is coming out of your drip machine. – K.B.
Like many people, my food insecurity got pretty serious in April 2020. Cities and businesses all across America were shutting down, while grocery stores and delivery services started to run out of food. Everywhere I looked — whether it was Amazon, Instacart, Uber Eats or FreshDirect — it seemed impossible to find a reliable source of fruits and vegetables. I looked at my dwindling supply of canned soups and packets of ramen and almost wept.
Now, I know I’m immensely fortunate compared to a lot of people to be able to even consider my access to fresh food during the height of the pandemic. I know that there are people for whom a supply of canned food would have been a godsend, not to mention fruits and vegetables. That said, I think a lot of people can also identify, and felt the need to stock up.
Even as scarcity eased, I wanted to have a reliable source of fresh meals just in case we had to lock down again. I looked at delivery services like Blue Apron, Sunbasket and Purple Carrot. As a single person living on her own, I didn’t want to get too much food that would just spoil in my fridge. I also preferred meals that were ready made, rather than deal with raw meats.
My preference for convenient preparation limited the selections, and I narrowed down my options to Daily Harvest, Revive Superfoods and CookUnity. These companies all offered significant discounts on my first deliveries, and I rotated through them each week.
All three provided delicious, fresh food that was easy to prepare, and I appreciate that they all made an effort to use sustainable packaging. Daily Harvest’s packaging was almost 100 percent paper, with CookUnity a close second. The latter used plastic wrap on top of paper boxes for meals, with plastic containers for sauces, and meals were delivered in insulated bags that you could return with your next delivery. Daily Harvest, meanwhile, mostly used bowls made from molded pulp, as well as recyclable paper cups or pods where possible. Revive Superfoods also does a respectable job, with recyclable paper cups and plastic lids.
As my dietary needs shifted to focus on more protein instead of prioritizing fresh vegetables and fruit, it was critical that I could look up each meal’s nutritional info before my weekly orders. Again, all three websites offered at least basic data on macros and ingredients. The last time I ordered, only CookUnity allowed me to filter my searches by calorie count, which was one of my concerns at the time.
CookUnity also had an advantage in that it offered the greatest variety of meals, while Revive was the most limited in its options. I also loved that CookUnity’s food was chef-prepared and usually had more balanced macros. But they needed to be consumed within two to three days, while Daily Harvest’s and Revive’s could be stored in the freezer.
Ultimately, I quit Revive and CookUnity for the same reason. Both companies started to restrict how long you could skip upcoming deliveries, and trying to stay on top of my schedule got trickier and trickier. The tighter windows meant I had to check in to each service every two weeks to make sure I skipped an order, as opposed to a couple of months.
Daily Harvest
Daily Harvest, on the other hand, lets you skip up to nine weeks of upcoming deliveries, the company also sends you a reminder before it bills your account. It gives you ample time to consider if you need the food that week and cancel if you feel like it. Daily Harvest also provides helpful information about how its vegan meals taste, giving you a comparison to something more familiar.
That’s an important feature, by the way, since Daily Harvest’s meals are often vegetarian versions of other dishes. My favorites are the “Kimchi fried rice” made with riced cauliflower, the lentil-and-tomato bolognese and the spinach and shitake grits with nutritional yeast. Each of these consists of a handful of simple, mostly organic ingredients, and basically everything I’ve tried tastes fantastic. I loved the Broccoli and Cheeze bowl, the vegetable-crust flatbreads, the assortment of dessert bites, the vegan ice creams (especially the salted black sesame swirl) and the lattes, too. The only thing I didn’t really like was the chocolate and hazelnut smoothie, but only in comparison to something similar from Revive Superfoods.
I also generally picked bowls because they’re the easiest to prepare — just add a little water (you can skip this step) and throw it in the microwave. Many of the other options require either a blender or using your oven.
You can tell from everything I’ve mentioned, though, that Daily Harvest has a wide variety of food to offer. I haven’t even mentioned the breakfast-friendly forager bowls, the soups and the newly launched “Crumbles,” which are meant to provide a protein punch. Just looking at the menu again has me itching to send in an order for things I haven’t tried yet, like the Matcha and Murasaki bites.
In the end, though lots of meal delivery services can send you great-tasting food, few actually do so with the thoughtful approach of Daily Harvest. I don’t love that the prices of some of its dishes and lattes have increased in the last year, but at least it’s been very up front about these changes. I’ve received email notifications delineating exactly what was getting more expensive and when, as well as an explanation for the change.
I’ve since canceled my Revive and CookUnity accounts, not without hassle, by the way. After a few rounds of back-and-forth emails with customer service, Revive finally agreed to deactivate my account, rather than delete it and remove my payment and delivery details from their servers like I asked. CookUnity, meanwhile, simply had the typical process of offering you a discount and asking you to answer some questions after you manage to find the Cancel Subscription link. But at least I was able to actually cancel my subscription without having to talk to customer service.
Revive still emails me daily asking me to “Come back for more at 50% off” or “Reactivate with a 50% off offer” even after repeated emails in September and October saying “LAST CHANCE! Come back and save 40% x 2!” Typical marketing bluster, I know, but still annoying given I had asked in writing for them to lose my info. CookUnity’s last email to me was in January 19th, 2022, and when I signed back into my account, it showed me "Your subscription was canceled =("
I haven’t gotten a box from Daily Harvest in months, because these days I’ve been trying out a few more new services like Better Bagel, Farmer’s Fridge and Huel. So far I’ve loved the quality of food for the first two, and Huel is a little less appetizing. Regardless of the new options I add to my roster, I’m more than happy to keep ordering from Daily Harvest. Delicious, fresh food, a well-designed website and thoughtful customer service? Take my money.
If we're honest, we're kind of obsessed with food here at Engadget. Senior news editor Billy Steele is a backyard pitmaster and has the finsta to prove it. Editor-in-chief Dana Wollman treats her NYT Cooking recipe box the way gamers treat their backlog. Commerce writer Nicole Lee has channeled her passions into Instant Pot, sous vide and rice cooker experimentations. And my transition into an Italian grandmother is nearly complete with my preference for laboriously homemade pasta sauce over the stuff in store-bought jars. We turn to foodie YouTube and TikTok late at night; we trade recipes in Slack; and we often use this stellar Guy Fieri emoji when things are, as the kids say, chef's kiss.
We live for food when we're not living for tech, so many of us jumped at the opportunity to cook for work. Enter Cooking Week, our first kitchen-focused series, where we explore the intersection of cooking and tech, while also testing out some of the most popular — and wackiest — kitchen gadgets available right now. We dove into the worlds of grills, immersion blenders and, yes, air fryers, and tried out some high-tech appliances that were intimidating at first, but that we eventually mastered.
Long-time Engadget readers will know that we've written about kitchen gadgets before. We've been able to squeeze in mentions of electric kettles and pizza ovens over the years, but we see Cooking Week as our first official love letter to food on Engadget. We hope that you enjoy reading these stories as much as we enjoyed writing them (or, even better, as much as we enjoyed eating the spoils of our testing).
Check out all of the Cooking Week stories right here.
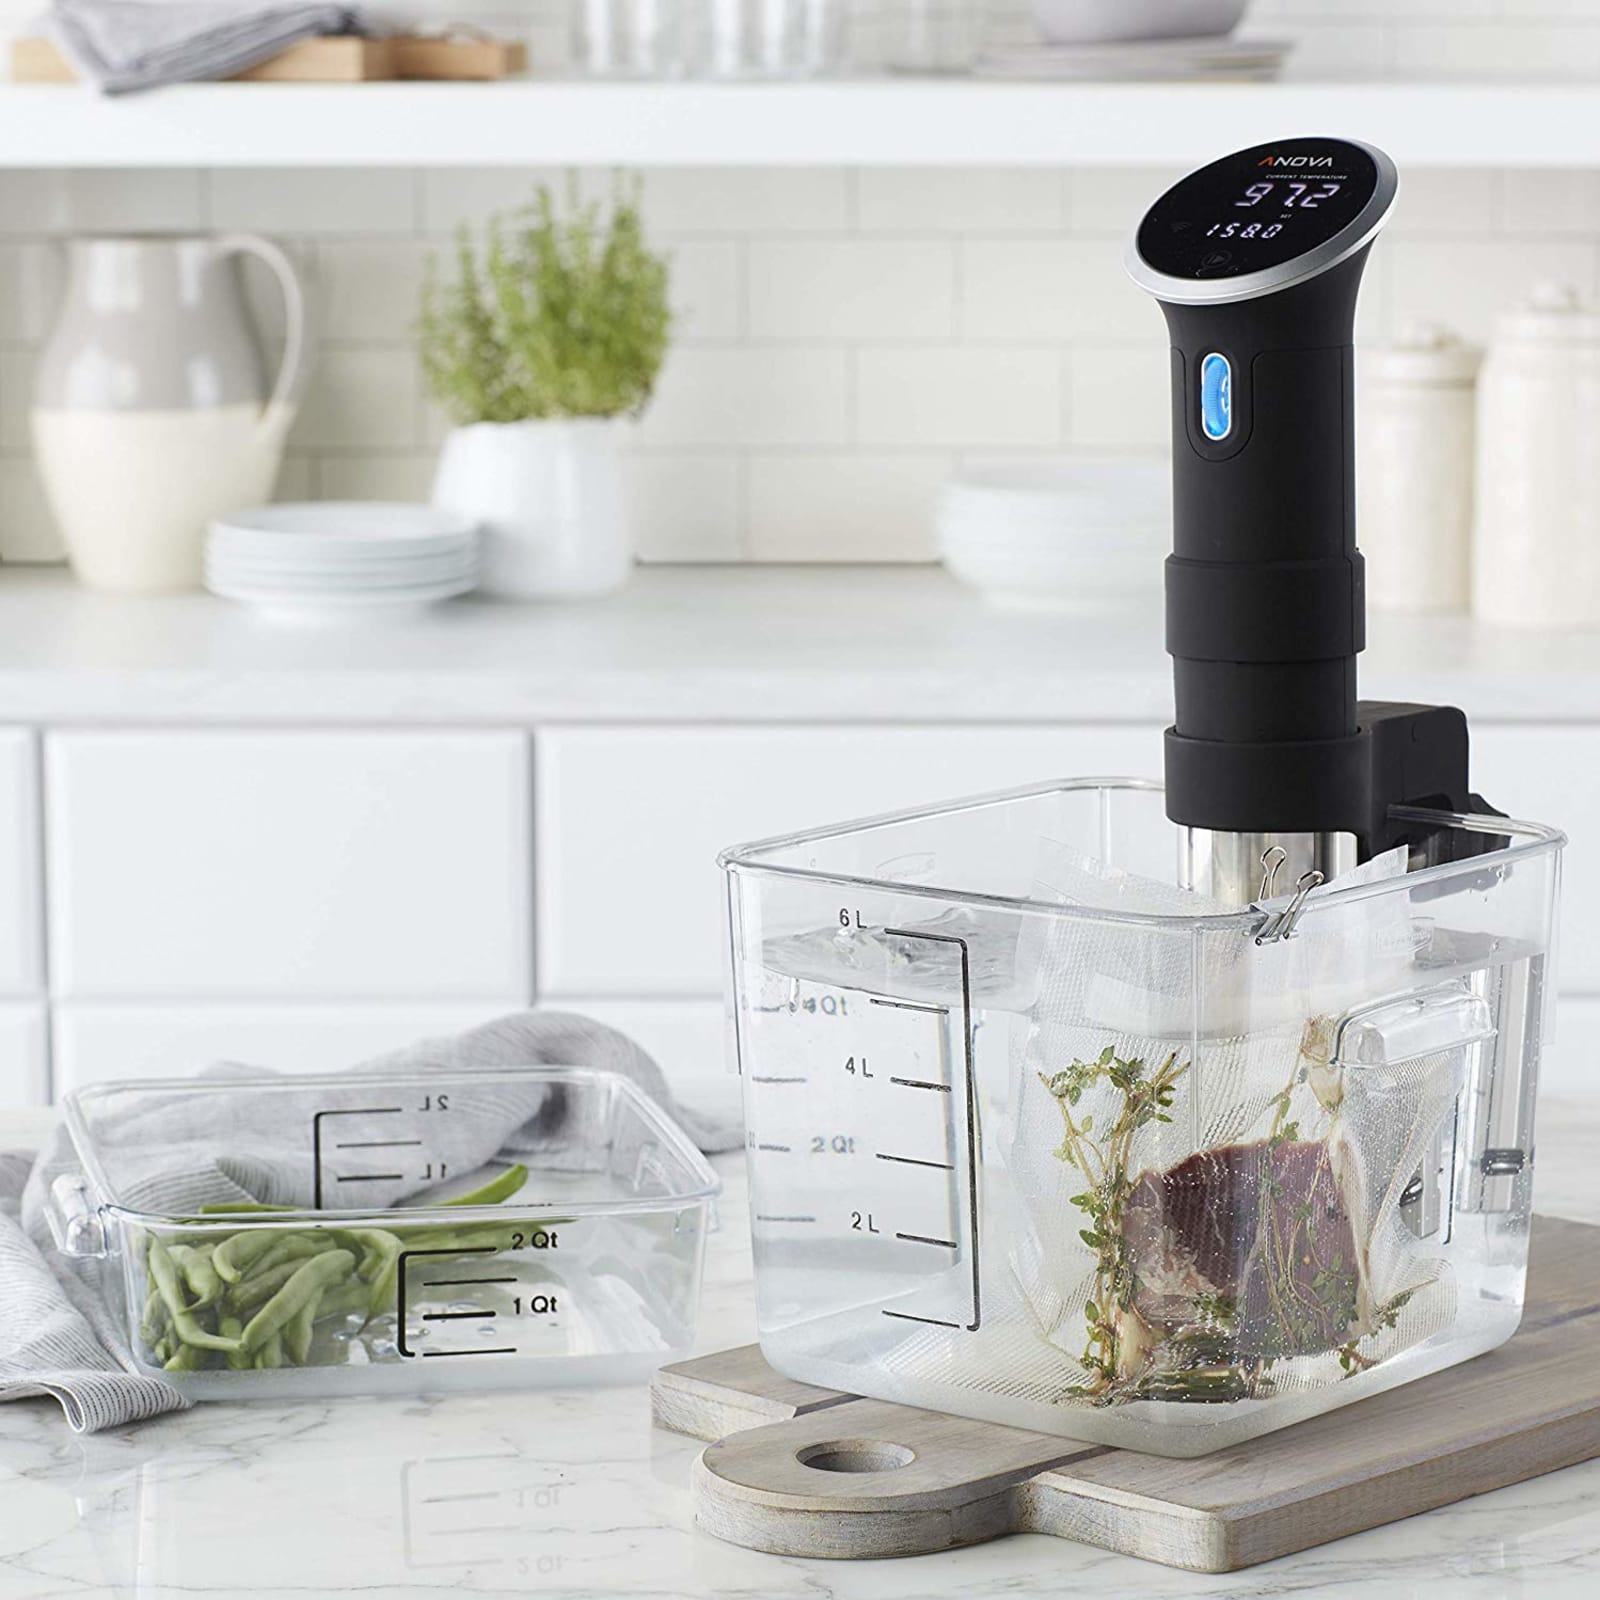
Sous vide cooking has been the province of professional chefs for decades, and for good reason: A temperature-controlled water bath ensures perfectly cooked food. Instead of worrying about whether a steak is medium rare or whether that chicken breast will be dry, simply dial in the desired temperature, dunk in your vacuum-sealed food ("sous vide" is French for "under vacuum"), wait a while and your food will be done to perfection, with little to no guesswork required.
If you haven’t tried this method yet, it’s not as complicated as you might think. Wand-like immersion circulators have been on the market for several years now, making sous vide cooking affordable and accessible to home chefs. Several Instant Pot models even have a sous vide mode that holds the water at a set temperature, though it’s not quite as accurate as dedicated machines. If you’re curious about giving sous vide a go, we’ll walk you through the process of choosing the right machine for you and share some of the tips and tricks we’ve learned through our own experiments.
How to pick a smart sous vide machine
Almost all of the immersion circulators on the market work the same way, so you really can't go wrong whichever you choose. That said, there are a few criteria to keep in mind when comparison shopping. For one, you'll want it to keep an accurate temperature and to maintain that temperature for an extended period of time, especially for foods that take over a day to cook. (This isn't uncommon, especially for tough cuts of meat.) It's better if it's powerful enough to heat up water quickly, though you could always help it along by using hot tap water to start.
Engadget picks
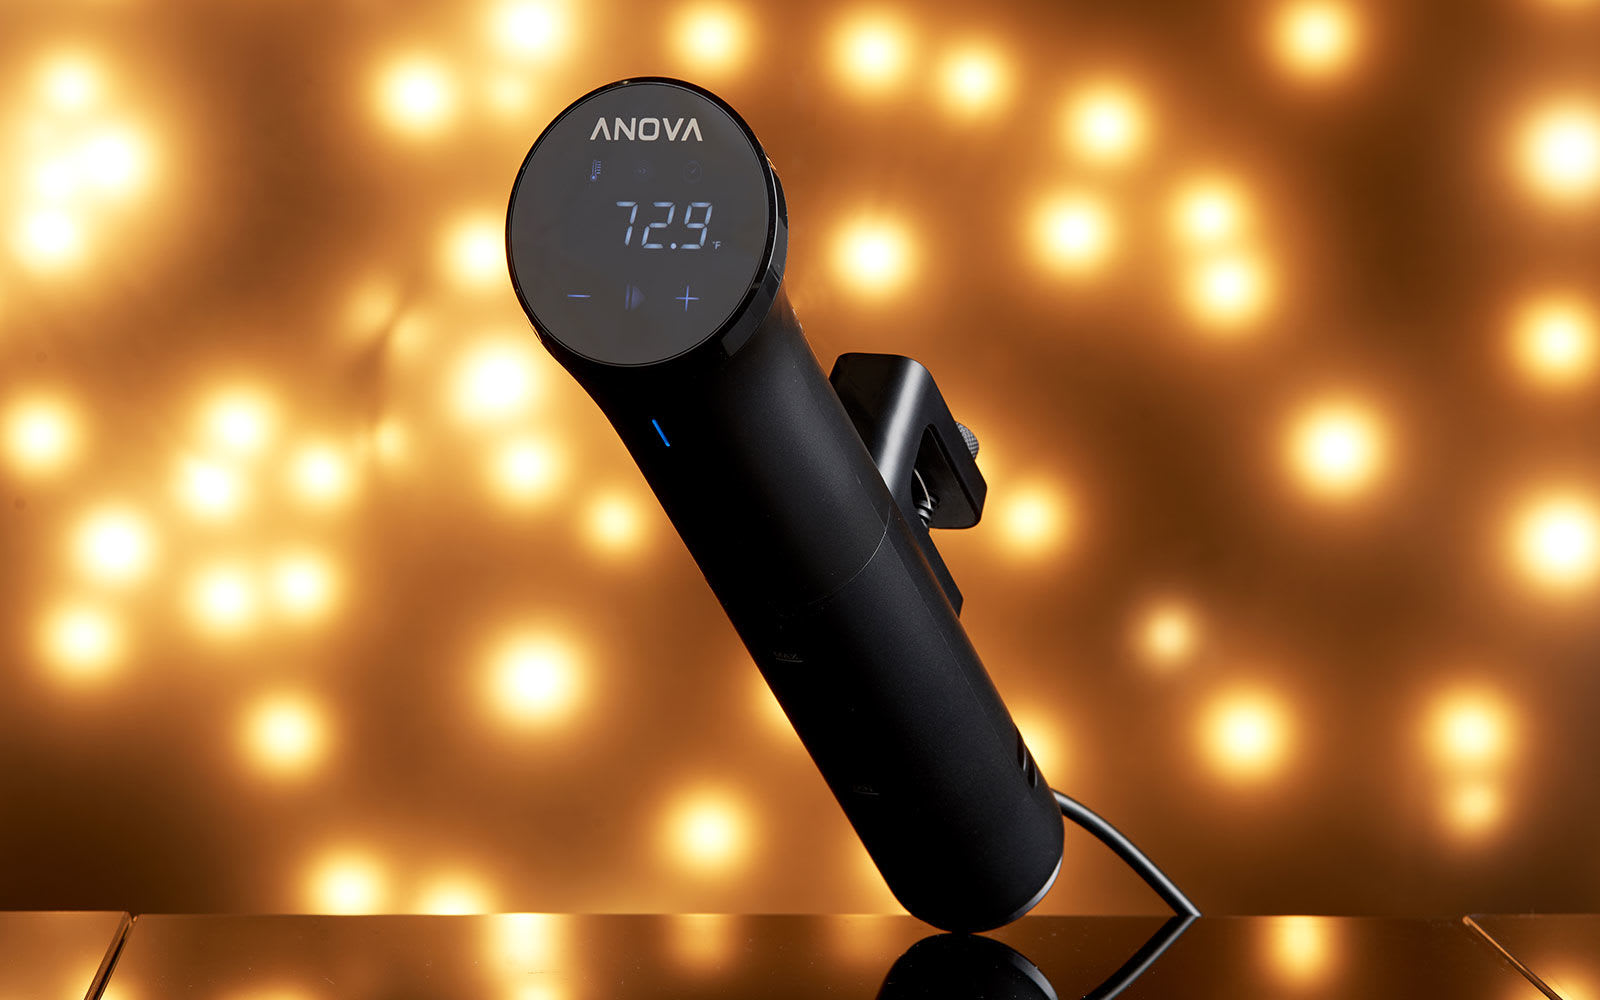
Several Engadget staffers tend to prefer the sous vide devices from Anova, as the company has a strong track record for precision and the interface is intuitive. Anova offers several different models at varying power levels (and price points). The lower-end Nano, for example, won't heat up water as quickly and doesn't have an adjustable clamp, but it's only $129 and will likely suit most home cooks. If you're a little more ambitious or see yourself cooking a lot of things via sous vide , upgrading to the higher-end Precision Cooker or Precision Cooker Pro might make sense.
We’d recommend the Anova Precision Cooker Nano for most people on account of its affordable price, compact size and intuitive controls. The companion app is helpful as well, as it comes with hundreds of recipes that will get you started on your sous vide journey. The Breville Joule is our runner-up because, while it lacks onboard controls, it’s a little more compact than the Anova, while the companion app has a “visual doneness” guide that lets you know what the food should look like when it’s cooked.
Another popular choice is the Breville Joule (formerly known as the Chefsteps Joule, until Breville acquired the brand), which is a personal favorite of mine due to its small size. It's a little more powerful than the aforementioned Nano and can heat up water a few minutes faster. I also like that it has a magnetic base, making it easier to attach to certain pots. The one downside is that it lacks onboard controls; the only way to use it is via the companion app. I personally don't find this to be a problem, but if you simply need to be able to see the temperature at a glance and dial it up or down with ease, this might not be for you.
It's also worth mentioning the Monoprice Strata, which is the cheapest of the lot at only $70. There's no WiFi or Bluetooth connectivity here, but it gets the job done all the same.
What else to consider
At a minimum, the other items you need to cook sous vide are a large metal pot (big enough to fill with water) and zipper-lock freezer bags to put the food in. Alternatively, you can use reusable silicone bags such as these from Stasher. Rather than using a vacuum sealer to get rid of air, you would use the water displacement method: Immerse the bagged food in the water while partially unsealed, and water pressure will push the air through the opening. Once everything is mostly underwater, you can seal the bag and it'll stay submerged.
If it still floats, you can stick one or two spoons in the bag, and that will hopefully weigh things down. (J. Kenji Lopez-Alt from Serious Eats also suggests using a large binder clip attached to the bottom of the bag along with a heavy spoon.) If you're concerned about water getting in the bag, you can attach the bag tops to the pot with binder clips, thus keeping the bag upright.
If you're really serious about sous vide, you might want to invest in some specialty equipment. Instead of pots, for example, you could opt for large restaurant-grade plastic containers by Cambro or Rubbermaid. Not only is plastic a better insulator than metal, but there's generally more space for more food, which is handy when you're cooking for a crowd.
Whether you use a pot or a plastic container, it's best to cover the vessel with plastic wrap when cooking for long periods, to keep evaporation to a minimum. Some companies, like Chefsteps, offer custom silicone pot lids that are made specially to accommodate their sous vide cookers. Alternatively, Lopez-Alt offers a much cheaper and more ingenious solution: cover your water in ping pong balls. They'll slow down evaporation.
Additionally, while zipper-lock bags work well for most tasks, it's still not a bad idea to get a vacuum sealer along with thicker plastic bags designed specifically for sous vide. For one, this lets you sous vide vegetables or braised meats, which typically require a higher temperature. (Zipper-lock bag seams might fail when it's that hot.) This also lets you freeze a bunch of food, vacuum seal them and sous vide packets straight from the freezer, which is convenient for batch cooking.
You likely already have this at your disposal, but another handy tool is a good skillet to sear your meat. That sous vide device might be able to cook your steak to medium rare, but it won't be able to brown it. A cast iron skillet, on the other hand, will. You could also consider a torch like the Bernzomatic TS8000, and we've seen others use a Searzall — but a cast iron skillet is far more affordable than either option. Of course, if you have a grill, you can use that too.
There are other miscellaneous items that could prove useful. Lopez-Alt likes having a pot lid organizer immersed in the container to help separate several submerged bags. If you want to make custard, yogurt or breakfast cups with your sous vide cooker, you should get yourself some mason jars too.
One more indispensable item worth considering: a trivet to rest your water vessel on so you don't destroy your countertop.
Sous vide recipe resources
Since affordable sous vide cookers have been in the market for a few years now, there’s no shortage of recipes and guidelines online to help you figure out what to do with your newfangled kitchen gadget. The links below are some of our favorites, though bear in mind that a lot of this is based on personal taste. Your mileage may vary.
It only makes sense that the maker of one of the most popular sous vide machines also has a deep library of sous vide recipes. If you're ever at a loss as to what to make via sous vide, simply peek at this website, where you can search for recipes from professionals and amateurs alike.
We've mentioned it several times here already in this guide, but Serious Eats truly is a remarkably useful resource for all things sous vide. Its guide to sous vide steak is a favorite among Engadget staffers, as is its take on slow-cooked sous-vide style eggs, which results in some of the best eggs I've ever had.
Years before making the Joule, Chefsteps made a name for itself as a cooking school with a heavy emphasis on food science, tech and molecular gastronomy. That's probably why the sous vide recipes from Chefsteps are some of the more creative ones we've seen. One recipe, for example, teaches you how to make that perfect chicken breast along with the perfect accompaniment for said chicken breast — perhaps a crunchy apple fennel salad and a buttery carrot puree. Other favorite recipes include wonderfully tender salmon filets, juicy pork chops and Chefsteps' own interpretation of the "sous vide egg bites" you sometimes find in certain Starbucks shops.
This is actually a cookbook from the people behind the Nomiku WiFi sous vide machine (which has since been discontinued), but the recipes in it will work with any sous vide device. Not only does it have beautiful photographs, but it also offers fantastic recipes like jerk chicken wings, duck confit and chocolate pots du creme.
Aside from immersion circulators like the ones mentioned here, you could also opt for multi-purpose appliances that offer sous vide-like functions. Several Instant Pots, for example, offer such a feature. They include the Instant Pot Pro, Duo Plus, Pro Plus, Duo Crisp and Max. Unfortunately, however, they do not circulate the water like the aforementioned immersion circulators, and the temperatures aren’t quite as precise (which is a definite downside if you need something cooked to a specific temperature). But if you don’t really care about that, or you just want to dabble occasionally in sous vide, this might be a viable option.
If you’re dead set on a multi-tasking appliance and you have the money to spend, consider the Anova Precision Oven. Thanks to its use of steam, you can indeed use it to cook foods via sous vide but without the need for plastic bags. It also uses a fan to circulate the moist air around the food and a probe thermometer helps keep foods at a precise temperature. And, of course, the Precision Oven can be used as a regular oven as well, and is great for baking breads and bagels. It is, however, quite expensive at $600 and takes up a lot of counter space.
Images: Will Lipman for Engadget (Anova / holiday light background)
At the most basic level, the only kitchen equipment you really need are a knife, cutting board, a heatproof vessel of some kind and perhaps a utensil or two. But if you really want to take your cooking to the next level – and who doesn’t? – you’ll want to invest in a few accoutrements. From pressure cookers to toaster ovens, these are our favorite kitchen must-haves that will make cooking easier, faster and maybe even more enjoyable.
Best multi-cooker: Instant Pot Duo Plus
Instant Pot
If you haven’t yet hopped on the bandwagon, a multi-cooker like the Instant Pot could become part of your regular rotation. This cult favorite can perform multiple tasks, including pressure cooking, slow cooking, sautéing, rice cooking, yogurt making, steaming and warming. The combination of all these features make it easy to prepare stews, soups, braises and more. You can make cheesecake in it too! Our favorite model for most people is the Instant Pot Duo Plus because it’s simple to use, with several quick-cooking modes for soup, eggs, porridge and grains. It has sterilizing and sous vide cooking functions too.
Want a smarter Instant Pot instead? Consider the Instant Pot Pro Plus. It not only has updated features like a canning function and an oven-safe inner pot, but you also get WiFi connectivity and a companion app, which offers step-by-step guided instructions for over 800 recipes. Plus, you can use it to release the Instant Pot’s steam remotely. You can also use the app to set a timer to release the steam automatically.
Nobody wants to eat undercooked meat, but it’s pretty inedible when it’s overcooked as well. One way to avoid either extreme is to use a thermometer to monitor the temperature. Our favorite is the Thermapen One from ThermoWorks. It gives readings instantaneously, and the screen rotates automatically depending on how you’re holding it. The auto-wake and sleep feature is useful for quick temp checks, and its IP67 waterproofing rating means you don’t have to worry about accidentally dropping it in the sink.
The ThermoPop is a more affordable option in ThermoWorks’ lineup. It’s not quite as fast as the Thermapen One, and it doesn’t have the rotating display or backlight. But it still measures temperatures accurately and while it’s not waterproof, it is splash resistant.
Bakers everywhere know that the most precise way to measure ingredients is with a scale. A “cup of flour” can be wildly different depending on how you scoop it, while a scale can tell you exactly if you have 120 grams. A digital scale is best for the most accurate measurements, and we especially like the Escali Primo. You can switch between grams and ounces with a single press, and importantly, there’s also a tare button that zeros out the weight so you can keep measuring in the same container. One reason we like the Escali Primo over other models is that it has a very long auto-off timer, allowing it to stay on for four minutes before shutting off. That’s important for when you need the extra time to chop up vegetables or gather other ingredients without having to worry about the scale resetting to zero.
The hottest kitchen gadget right now seems to be the air fryer, presumably because the idea of “frying” foods without the oily mess is an easy sell. Really, though, air fryers are just miniature convection ovens. They’re typically pod-shaped and often come with a removable basket. There are also toaster ovens with an air-frying function – see our recommendations below – if you prefer to have a multi-purpose appliance.
Though both have their own merits, if you think you’re going to be air-frying a lot, we actually recommend a dedicated pod-shaped air fryer. These devices tend to result in crispier food, plus they’re easier to clean. One of our favorites is the Instant Vortex Plus with ClearCook and OdorErase. As the name suggests, it has a window so you can see what you’re cooking, as well as odor-eliminating filters that help reduce cooking smells – not many other air fryers have both. It also doesn’t take up as much space as a large toaster oven and it has easy to use controls.
Sure, you could probably mix together a batch of cookie dough by hand, but it’ll take time and quite a bit of upper body strength. That’s even truer if you want to knead bread dough or whip up a meringue. Save yourself the trouble by getting a stand mixer. The favorite among bakers and amateur cooks for years have been KitchenAid’s Artisan series. It’s durable, powerful and it comes with your choice of paddle, hook and whisk attachments. We also like that the KitchenAid mixers are compatible with a variety of accessories and attachments that can turn the machine into an ice cream maker, a meat grinder and a pasta machine just in case you want to expand your culinary horizons.
It’s hard to beat the Vitamix in this space. The high-performance blender brand makes machines that do more than just prep smoothies, but can also make sauces, batters and soups. It’s especially handy if you have a habit of adding tougher ingredients into your recipes – things like nuts, dried fruit and frozen produce. Whereas other, less powerful blenders may leave chunks once you introduce hardier ingredients, the Vitamix won’t, leaving you with a silky smooth final product.
Depending on the model you get, you can also buy different attachments to make the most of the blender’s powerful base. You can pick up 64-ounce containers for making smoothies for your whole family at once or a “dry grain” container that’s outfitted with a blade specifically for grinding up things like whole grains so you can make your own flour.
Vitamix currently has four series of blenders: the basic Vitamix One, which comes in at $250; the slightly more advanced Explorian series, which starts at $350 and is arguably best for most people; the Legacy series, starting at $400; and the advanced Ascent series, which will set you back at least $500. Yes, these are expensive machines, but it’s worth investing in if you do a lot of blending or like to experiment with making things from scratch.
Best toaster oven: Breville Smart Oven Air Fryer Pro
Breville
A toaster oven is a surprisingly versatile appliance. Yes, you can use it to toast bread, buns, and all manner of baked goods. But it’s also a great alternative when you don’t want to warm up your whole house with your full-size oven. It heats up far faster too, which makes it a more efficient choice for warming up leftovers.
We love the Breville Smart Oven Air Fryer Pro as it’s big enough to roast a chicken and it also has other functions like dehydrate, proof and air fry (thanks to a super convection mode). It also includes presets for baking pizzas and toasting bagels. A step up from that is the Joule Oven Air Fryer Pro, which adds WiFi connectivity so you can control it from your phone. The app has lots of recipes, too, and there’s an “autopilot” feature that automatically adjusts the temperature during cooking.
If you don’t want something quite so large, a smaller and more affordable alternative is the Panasonic Flash Express. It’s roomy enough to handle a slice of pizza but definitely won’t take up as much space as the Breville. It’s definitely a great option if all you want is a toaster oven for heating up frozen snacks or toasting several bread slices at once.
Best sous vide machine: Anova Precision Cooker Nano
Anova
If you want to make sure your expensive steak is perfectly medium rare without having to constantly monitor its temperature, consider getting a sous vide cooker. These machines let you cook anything inside a temperature-controlled water bath so that it’s done to perfection. We’ve successfully made steak, chicken, burgers, eggs and even yogurt in a sous vide cooker, and the results have been perfect every time.
Our favorite model is the Anova Precision Cooker Nano. It’s relatively affordable, it’s compact enough to store in a drawer and the controls are easy to use. The companion app is thoughtfully designed as well, with hundreds of recipes and the option to control the machine remotely. There are other sous vide cookers that might be more advanced, but the Nano is the only one that combines affordability and precision in this compact of a form factor. And even though there’s a companion app, you don’t have to use it; you can easily adjust the temperature with the on-board controls and the large digital display.
Another option we recommend is the Breville Joule. It’s a little more expensive and it lacks the digital readout that the Anova has, but it’s even more compact. Plus, it has a magnetic base that makes it a little easier to attach to certain pots. We’re also a fan of the Joule app, which has a “visual doneness” guide that shows you photos of how the food should look when it’s done.
Best smart displays: Amazon Echo Show 8, Google Nest Hub
Google
Though they’re not made specifically for the kitchen, smart displays from either Amazon or Google make wonderful cooking companions. Searching for recipes is as easy as using your voice (you can say “Look up recipes for tomato soup,” for example). Each recipe features a list of ingredients that you can easily add to your phone, plus step-by-step instructions that you can follow along on screen as you cook. Some recipes even have photo or video guidance, which is especially helpful for beginner cooks. Additionally, you can use smart displays to set timers – a must-have feature for kitchen use.
As for which smart display to choose, we recommend going with either the Amazon Echo Show 8 or the 7-inch Google Nest Hub. They each have a decent screen size for reading through recipes and are fairly affordable as well. We generally prefer the Nest Hub because we like YouTube (there are plenty of great cooking shows on there), but the Echo Show 8 does offer apps for Food Network Kitchen and Allrecipes. Of course, you should pick the smart display that best aligns with your preferred ecosystem regardless. You can read more about picking the best smart display here.
If you prefer a more portable device, tablets are also fantastic options. You can look up recipes from any source you like, including blogs and social media, which aren’t always accessible on smart displays – be sure to check out our guide on online cooking resources for some examples. Sure, you can use your phone as well, but a tablet’s larger screen can make all the difference when you want to read a recipe at a glance. We probably wouldn’t suggest a super high-end tablet for kitchen jobs – you don’t want to cover your $1,000 possession in flour do you? – but a model with 720p resolution is fine for watching recipe videos. For iOS users, we recommend Apple’s 10.2-inch iPad, while we think Android users will be happy with Amazon’s Fire HD 8.
As part of Cooking Week, we set out to test some of the most niche (and, in some cases, ridiculous) kitchen gadgets we could find. We wanted to know if these impressive-looking appliances actually do what they claim and if they’re worth the splurge. These are our findings.
I’ve been drinking non-dairy milk almost exclusively for about eight years, but only recently did I think to make my own. Even since I made the transition from cow to almond milk, many more non-dairy milk options have hit the market. Just go to your local supermarket and you’ll find different varieties and flavors of almond, cashew, soy, oat and coconut milk, and even the occasional pea and flax milk choices, too.
With all that choice, it may seem counterintuitive to make your own non-dairy milk at home, but Almond Cow believes that there are plenty of people who would rather take that route. Almond Cow is a company that makes a milk-maker machine that shares its name that removes a lot of the work involved with making your own non-dairy milk. It’s essentially a big, high-powered blender with just enough moving parts to make alt milks at home, including an attached blade, a filter basket, a big base and a motor inside that makes all of the magic happen.
Before I get into my time with the Almond Cow, it’s worth mentioning that plant milk machines aren’t new, but they aren’t as ubiquitous as standard blenders either. In addition to the Almond Cow, there are a number on the market from companies including Nutr, ChefWave and Tribest – all more niche than a regular ol’ blender, which is exactly why I wanted to give one a go.
Valentina Palladino / Engadget
And I should say: You could easily make plant milk using a blender (the more high-performance, the better), but it requires a few additional steps, namely filtering your blended up ingredients through a nut milk bag. It’s time consuming and messy, and honestly it’s one of the main reasons why I never wanted to try to make my own alt milk at home. In testing the Almond Cow, I was hoping to figure out if making plant milk would actually be worthwhile and if it could help me reduce the amount of store-bought plant milk I buy.
I’ll admit, the Almond Cow is a bit intimidating when you unbox it. It’s basically a big stainless steel jug with a removable top that has the machine’s blade attached to it. A bit larger than your standard pitcher of lemonade, it can make five to six cups of plant milk at a time. It doesn’t take up too much counter space and I found it easy to clean as well. It also comes with a “collector cup,” which is just a plastic vessel with grooves on the bottom that perfectly cradles the machine’s removable top, making clean up easier and way less messy than you’d think.
After washing all the included parts first, I dove into my first endeavor: making cashew milk. The machine comes with a book of recipes, which I followed almost to a tee. Five cups of water went into the base of the Almond Cow, while the following went into the filter basket: one cup of unsoaked cashews, a quarter-teaspoon of salt and two pitted dates (the recipe called for three, but I prefer very lightly or unsweetened plant milk). I twisted the filter basket into place so that the machine’s blade was submerged in the ingredients and then placed the whole top back onto the base.
Valentina Palladino / Engadget
After that, it’s literally a one-button process. With the machine plugged in, you only need to press the top button on the Almond Cow and let it go. The device automatically cycles through three blending modes, which infuse the water with your ingredients while grinding them down into a fine pulp that stays in the filter basket. The blending process takes maybe 90 seconds, tops, so the whole process from ingredients to finished plant milk takes maybe three to five minutes. If you have the necessary ingredients at home, this is much faster than popping out to the grocery store to pick up a new carton of plant milk.
The results were impressive. My first batch of cashew milk was subtly sweet with a creamy, smooth texture. Cashew milk has a pretty neutral flavor and my homemade batch tasted similar to the cashew milk I get at the grocery store. The biggest difference I noticed came a couple days later when the cashew portion of the milk settled to the bottom of the mason jar I was storing it in. Settling will happen with almost any non-dairy milk – that’s why every carton advises you to “shake well” – so I only noticed a hint of graininess when I drank the very last portion of my homemade milk (something I’ve never experienced with industrially made alt milks, even when I neglected to shake the carton). That’s not to say the last cup or so of my cashew milk was bad; rather, it just required more vigorous, continuous stirring into my coffee that morning.
I also made coconut and pistachio milk, with similar results: light and pleasantly creamy milk that required a good shake before pouring after it sat in the fridge overnight. One of the great things about the recipes in the Almond Cow book is that almost all of them call for unsoaked nuts, so you can make batches of non-dairy milk without any prepping ahead of time. You can also control the exact ingredients you put into each batch, so if you’re like me and like to experiment with different recipes, the Almond Cow will be a great machine for you.
There’s also a compelling reduced-waste aspect to the Almond Cow that I’m sure many will appreciate. Making your own plant milk at home means you may not buy as much pre-packaged milk at the store, thereby reducing the amount of packaging you consume regularly. Also, Almond Cow’s website has a bunch of nut pulp recipes, too, so you can further cut down your waste by conserving the nut pulp from each batch and using it to make cookies, muffins, pies and if you’re feeling adventurous, even vegan cheese.
Valentina Palladino / Engadget
Undoubtedly, the Almond Cow is best for tinkerers, home chefs and those who care about reducing waste. I fit into all of those categories, but I can still see the drawbacks to this $245 device. First, as you could probably guess, the Almond Cow isn’t going to save you money on non-dairy milk in the short term. The device itself is expensive, but the real cost comes in when you consider how many ingredients you’ll need to keep on hand to make alt milk regularly. Nuts aren’t cheap and you’ll need a half-pound (eight ounces) to make one batch of milk in the Almond Cow. And you’ll likely need to make at least one, maybe two batches each week, depending on how much you drink, because homemade plant milk lasts for only three to five days in the fridge – a paltry shelf life when compared to the weeks you’ll get from a carton of the store-bought stuff.
Also, it’s worth noting that the Almond Cow is designed to take the guesswork out of making your own plant milk. That means it’s less flexible than, say, your own blender when it comes to customization. The baseline ratio of nuts to water is 1:5 (cups), so what that produces is the creamiest milk you’ll get. The included cookbook does provide a few “creamer” recipes, which uses the limited area of the collector cup to make a small amount of thicker, nut-milk creamer for you to use in your coffee. However, you’ll be able to experiment with more than creamier consistencies of plant milk if you use different nut-to-water ratios in a high-powered blender.
One thing I have grown to love over the past decade or so is make my own common foods from scratch. I’d rather make my own pasta sauce than buy a jar for $5; I have a go-to granola recipe that I prefer over any pre-made types; and I have a signature pesto recipe that I’m now attempting to mess with to make it vegan. That’s all to say that the Almond Cow is a unitasker that’s designed specifically for someone like me. And I do love using it, but will it totally replace the plant milk I love from my grocery store? No – at least not immediately. I’ve tried so many plant milks over the years that I now have my favorites and it’ll take a lot to get me to give those up. But I do relish the opportunity to make my own plant milk at home in the hopes that maybe, someday, I’ll craft a concoction that comes close to my store-bought favorites.