Light up the elements with this periodic table display
If you took chemistry at any point in your life, you were exposed to the periodic table, which organizes different atomic structures by their atomic number. It’s an amazing chart, demonstrating just how much “stuff” our world is made up of!
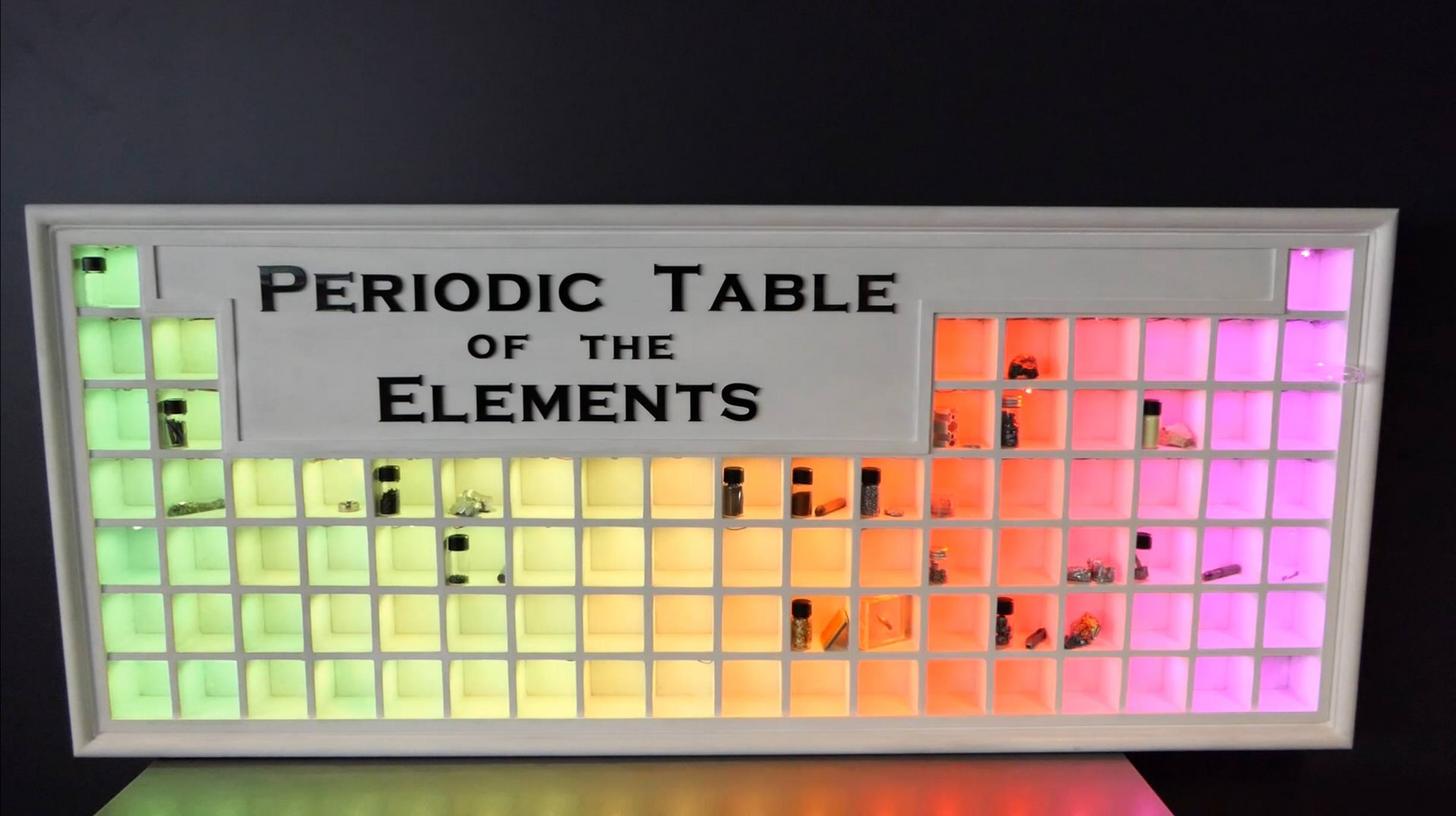
To show off the element collection he shares with his girlfriend, elemental hacker “Maclsk” built a light-up periodic table display with square cubes where each sample could be stored.
What makes this really amazing is that the display uses WS2812B LEDs to light each cube individually. This allows it to produce fun color effects and even categorize the collection by different aspects, like element group, discovery year, or their state at certain temperatures.
Modes are selected via a Bluetooth phone app. Be sure to see it in action in the video below!