Hacking a rotary phone with an Arduino and a GSM shield

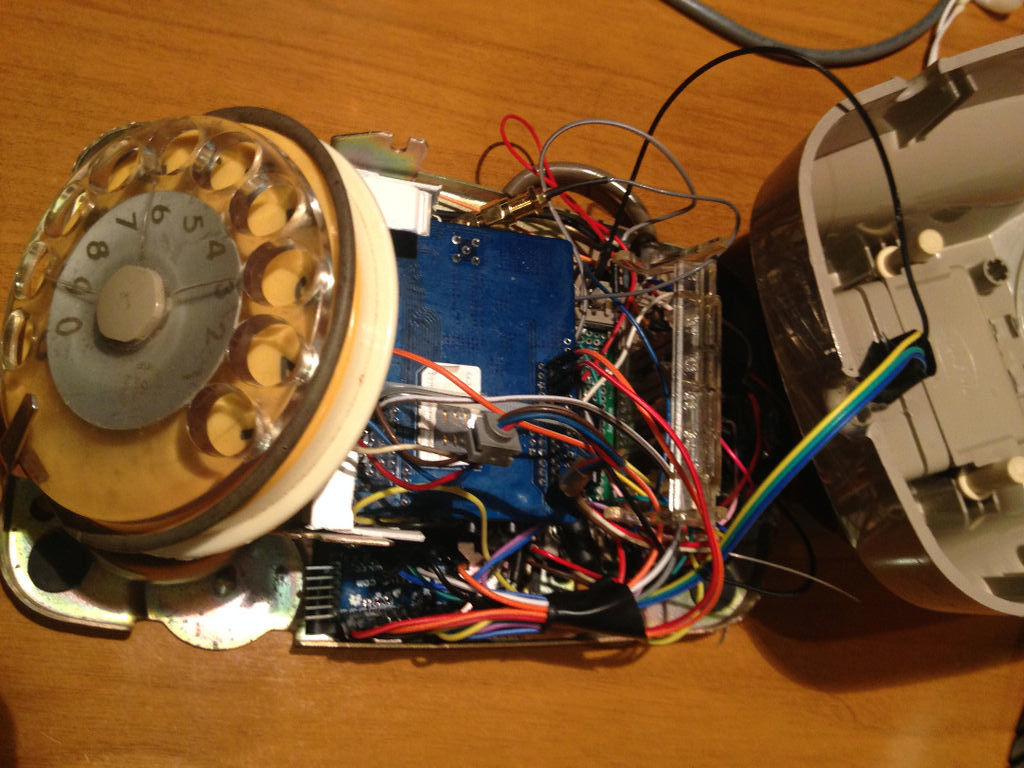
While cleaning out his closet, Instructables user “Acmecorporation” discovered an old rotary telephone. Instead of tossing it away, the Maker decided to give the old-school device some modern-day technology using an Arduino Pro Mini and a SIM900 GSM shield.
Acmecorporation is able to use the aptly named TOWA Phone (There Once Was A Telephone) to make and receive calls, send single DMTF tones, and even program numbers on speed dial. Aside from its classic bell ringer, there’s an RGB LED that indicates GSM status: red for offline, green for online, and blue for an incoming call.
The Maker briefly explains how it works:
To make a phone call you have to pick up the handset and dial the number, that’s all. Terminate call hanging up the handset.
When phone is ringing, pick up the handset to answer. Terminate it hanging up.
If you call to a support center or an office, usually you have to dial numbers to connect a specific department. You can do this because TOWA sends single DMTF tones.
Inside the Arduino script, you can add your favorite telephone numbers and combine it with a specific integer number. For example, I’ve stored my favorites combined with numbers from 1 to 8. So when I pick up the handset and dial 1, it starts a call to my wife. When I dial 2 or 3, it calls one of my sons, and so on.
Although Acmecorporation didn’t design TOWA for everyday use, it has become a permanent fixture on his desk. Do you have a rotary phone lying around? Time to brush off the dust and rig your own!