Posts with «education» label

Arduino goes to college with the new Arduino Engineering Kit!

We’re excited to announce the Arduino Engineering Kit, the first product released as a result of our new partnership with MathWorks, to reinforce the importance of Arduino at the university level in the fields of engineering, Internet of Things, and robotics.

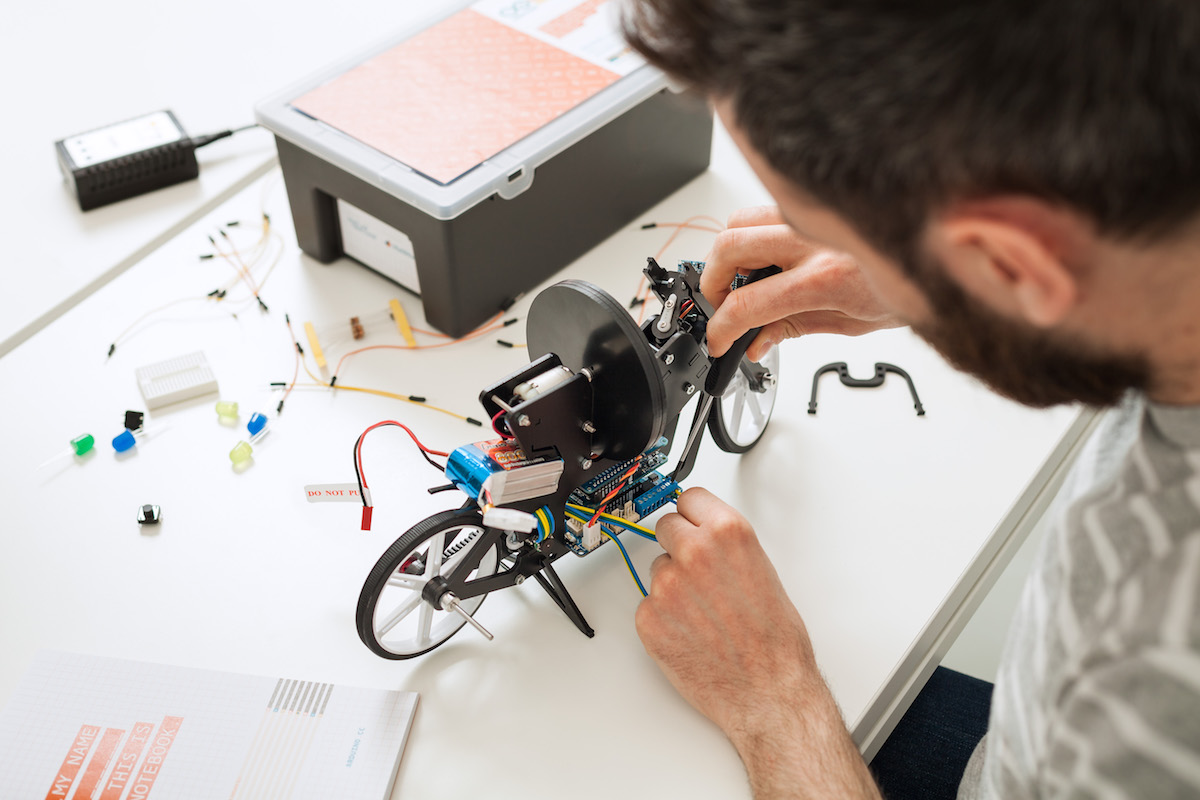
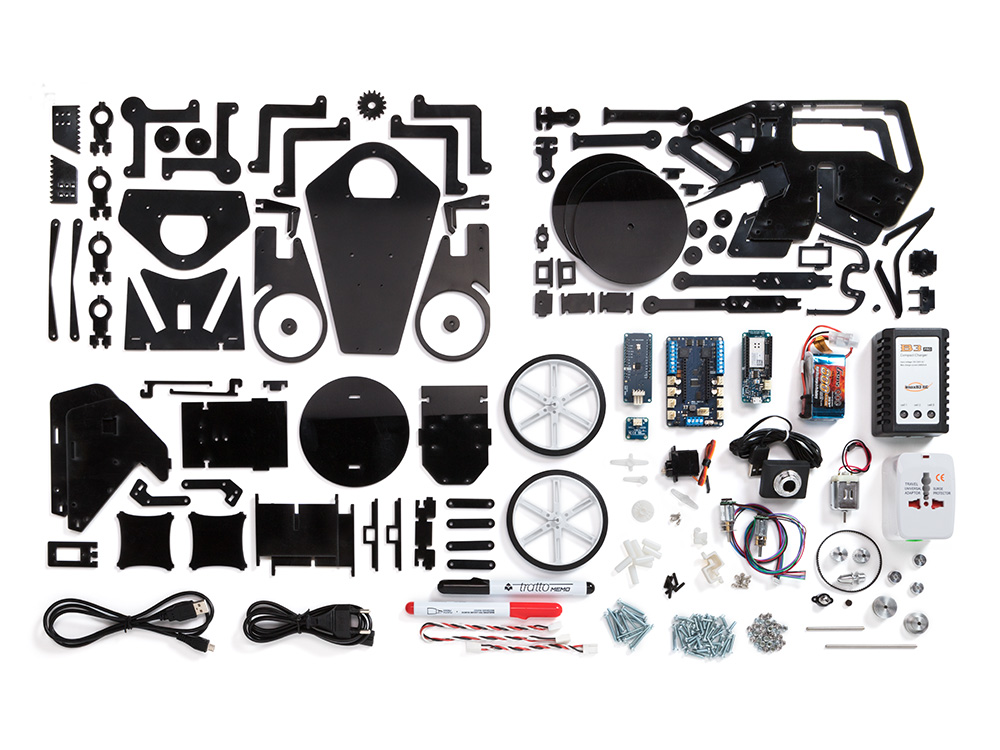
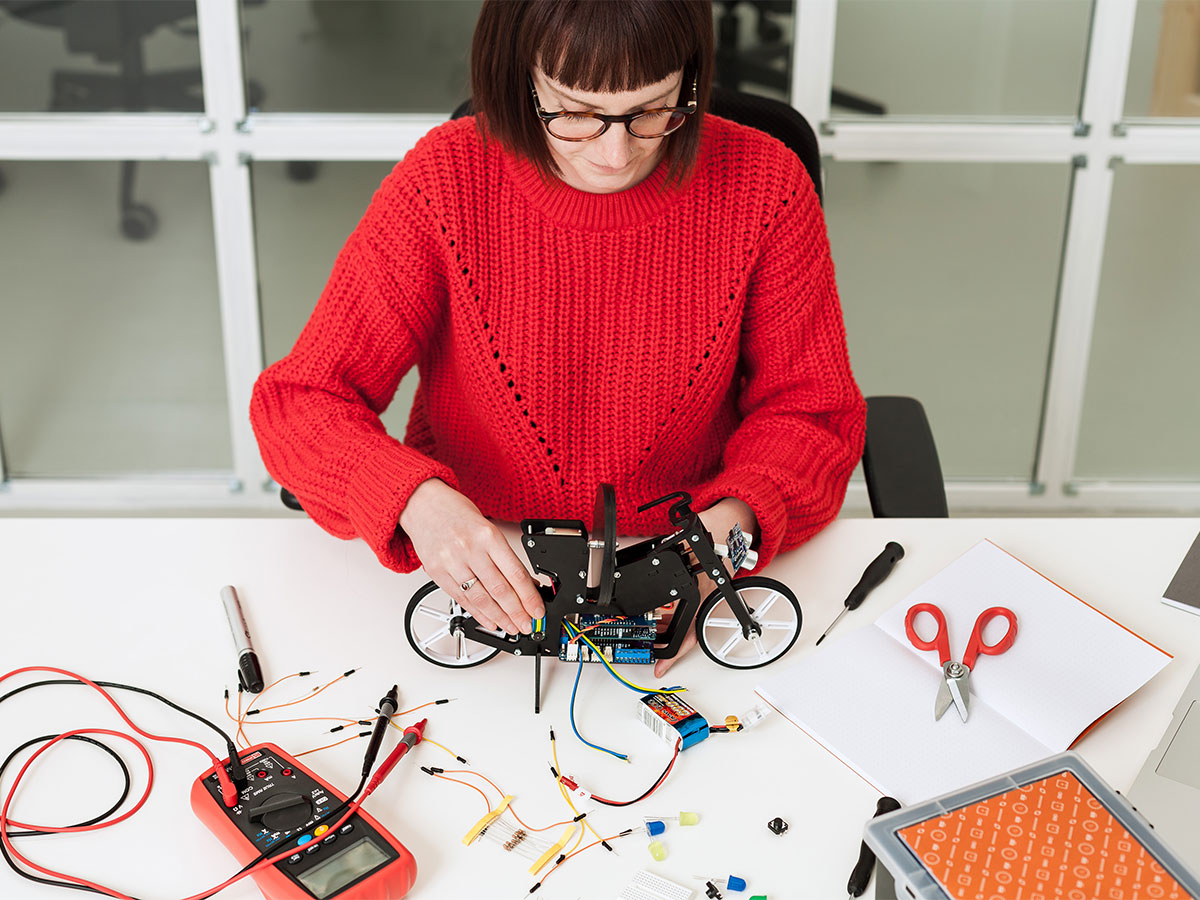
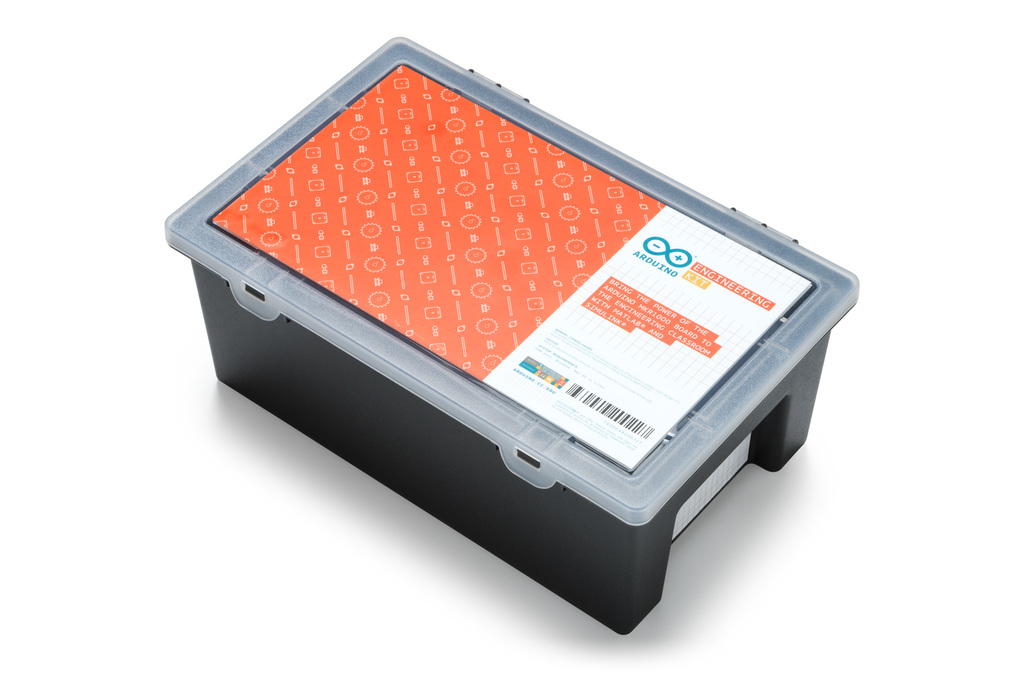
The Arduino Engineering Kit, which will be available for purchase starting today on the Arduino online store, consists of three cutting-edge, Arduino-based projects and will teach students how to build modern electronic devices – challenging them intellectually and helping them develop physical engineering skills that will better prepare them to enter the commercial market following graduation. In addition to the hardware, after registering online, students and educators will have access to a dedicated e-learning platform and other learning materials. The kit also includes a one-year individual license for MATLAB and Simulink, providing the user with hands-on experience in system modeling and embedded algorithm development.

Following the global success of Arduino CTC 101, a program tailored for upper secondary schools, the Arduino Engineering Kit enables college students and educators to incorporate core engineering concepts like control systems, inertial sensing, signal and imaging processing, and robotics with the support of MATLAB and Simulink programming. These software packages are the base of industry-standard tools for algorithm development, system modeling, and simulation, all of which will be required in their future careers.

Each Arduino Engineering Kit comes with a durable and stackable plastic toolbox for easy storage and years of reuse. Inside the box is an Arduino MKR1000 board, several customized parts, and a complete set of electrical and mechanical components needed to assemble all three projects:

  • Self-Balancing Motorcycle: This motorcycle will maneuver on its own on various terrains and remain upright using a flywheel for balance.
  • Mobile Rover: This vehicle can navigate between given reference points, move objects with a forklift, and much more.
  • Whiteboard Drawing Robot: This amazing robot can take a drawing it’s given and replicate it on a whiteboard.

“We designed the Arduino Engineering Kit the way we would have liked to have learned mechatronics, control algorithms, state machines, and complex sensing when we were in our first years of engineering school: in a fun and challenging way,” said David Cuartielles, Arduino co-founder and Arduino Education CTO. “It’s all about hands-on activities built on top of well-grounded theoretical concepts. But more importantly, after finishing the basic materials, there’s plenty of flexibility to experiment, for the students to deviate and test their engineering creativity.”

https://youtu.be/pymRl7FCV0A

A look back at CTC Valencia Fair 2018

On April 18th, a team from Arduino Education made it to the museum Ciudad de las Artes y las Ciencias in Valencia to participate in the CTC Valencia Fair. A total of 1,200 students (out of 1,500 people in attendance) participated in the five-hour-long event where the students exhibited what they had been producing over the last couple of months.

CTC, the Creative Technologies in the Classroom initiative

CTC started as a project in the region of Castilla La Mancha in Spain. I was asked what kind of process could be implemented in order to bring teachers and school up to speed with new educational technologies. Back then, in 2012, I had been teaching students from many different disciplines, mostly at the university level: interaction design, medicine, engineering, product design, mathematics, multimedia, fine arts… I had also been working with upper secondary school teachers from Spain, Argentina, and Sweden in the creation of small curriculums introducing interactive technologies a part of more transversal teaching in subjects like science and design.

When asked by the people in charge at the regional centre for educators in Castilla La Mancha, I suggested a quick iterative design process that began with a collective survey to teachers in 25 schools and followed by a curriculum suggestion on topics that they considered relevant. The most complex aspect in this process was how to design interventions in the way of implementing this programme so that I could incorporate the teachers’ as well as the students’ opinions and debug the content as we went. CTC has over 25 different mid-size experiments designed to help a class get acquainted to work in a project-based learning methodology through an iterative process.

The first CTC fair brought together over 400 students from all over Castilla La Mancha that presented 100-plus projects. Almost five years later, we have witnessed yet another incredible fair with very nice results, only this time in Valencia.

What has changed

CTC now includes experiments with wireless technology, accelerometers, capacitive sensing, motors, lights, and other interesting tricks, thanks to using the Arduino 101 board that comes with BLE, an IMU, and some other goodies. Students are introduced to programming using Processing and the Arduino IDE. But not everything is coding, given our pedagogic approach, they learn how to work in groups, search for technical information, organize time, and present their results…

On the Arduino side, we have jumped from having a good old WordPress site to enable communication between the students, to a full-fledged platform that is being augmented with new materials and courses on a yearly basis. The content works for both the classic IDE and the more modern Create IDE. At the same time, we have implemented a hotline where teachers can ask questions directly to Arduino’s support specialists. Of course, there is a forum just for teachers to talk to one another and the Arduino forum still supporting them; but we have learned that teachers like one-to-one communication because each school is somehow different in terms of equipment, network facilities, classrooms and policies, and social environment–teachers, students, and their families.

We have learned about complex deployments; for example, in Valencia there is a special Linux distribution called Lliurex that we had to hack in order to get the IDE running properly. During a previous project in Andalucia, teachers had no administration password to the computers! Well, we did figure things out and got the project to work. So big kudos to our support team that had to get out the hacker hoodie and code a clever solution!

Also, for the CTC webinars we make on a bi-weekly basis, we have changed our online seminar backend to have a much more efficient one. Now our calls allow full interaction with the participants that can be invited to talk and share screens when needed instead of simply having a chat line back.

Valencia is cool, isn’t it?

We had a CTC fair at the Ciudad de las Artes y las Ciencias, a museum by Santiago Calatrava in the shape of a huge boat put upside-down. There are fountains surrounding the building, the weather was amazing (remember I am coming from Sweden, where we just had the worst winter in 10 years, so anything over 15°C is good at this point), the organizers from CEFIRE (the teacher organization in Valencia’s region) made a great preparation of the location, schools arrived on time, the show went fine-great-FABULOUS… so yes, Valencia is cool, and the so was the CTC fair.

On stage we could see almost 30 projects being presented by the students, while we conducted a two and a half-hour livecast for those interested in seeing the projects from anywhere in the world. We held 15 interviews, but unfortunately we couldn’t show everything happening, considering that there were a more than 150 projects on display!

The following video is a summary of livestream from the museum; for your benefit, we have chosen some highlights of the broadcast I conducted throughout the day.

The interviews were conducted in Spanish, which is another reason for the summary; but if you are interested in the actual interviews, check out the following video.

Some seriously nice projects

I cannot stop being surprised by the amount of creativity students show when making projects. Even if I attend an average of five events of this nature per year, I keep on finding projects that make an impression in me. Students are always challenging any pre-conceptions I might have about what could be done with something as simple as an Arduino board. The one thing teachers keep on saying again and again is that it was them, the students, that pushed the process forward, that once they got started with the course, it was hard not to get carried away by the students initiative. The role of the teachers is playing the realist, trying to make sure the projects come to an end. That said, here some of the things I saw while walking around in the faire.

Probably the most impressive project I came across was a model of the Hogwart’s castle inspired by the Harry Potter movies. It took the students four months to build the entire project. It was a replica of the castle, so heavy that it needed four people to carry it around. It had dragons flying around one tower, the lights could be turned on and off… there was even a fountain with running water! The whole mode could be controlled via Bluetooth from an Android tablet. In total, the model took three months to construct, the students said, while making the electronics and software work took one month.

On the other side of the spectrum, I could play with a small arm wrestling toy made by a single student that took only 5 hours to build. You can check out the interview with the student in the above-posted videos. While the project seems to be simple, it is clear that the student had become quite knowledgeable in the craft of making projects, since he had figured everything for the project on his own without any external help.

One last project I would like to talk about was a small drawing machine comprised of mechanics from DVD drives that could replicate small drawings (less than 10x10cm big) using a pen. The students explained that it barely worked the night before, but that they finally figured out the calibration process minutes before leaving for the faire. The results, as you can see on the video interviews, are quite amazing. They can export drawings using the open source program Inkscape in a format (G-code) their machine can understand, this allows them to trace any kind of vectorized drawing and reproduce it with their machine.

There were a lot more projects, take a look at the videos and pictures in this blog post. We will be presenting some others as part of the Arduino Livecast series in the the future. If you want to know more, just subscribe to Arduino’s YouTube channel and you will get weekly notifications on our videos.

Acknowledgements

The CTC Valencia project has been possible thanks to the generous contribution of EduCaixa, the on-site collaboration of the technical body at CEFIRE, the kind support of the regional government of Valencia – the Generalitat -, and the help of our old friend Ultralab.

From everyone involved in the project, big thanks to Ismael and Oscar, who believed in the project and pushed for it. Personally I want to thank Nerea who coordinated the project, and Roxana who was there making it happen from Arduino on a weekly basis; also Carla and Carlos who covered up when needed. Finally to Laura, who worked long evenings on top of everything else to make all of graphics needed for the fair.

At a more technical level, we have a new revision to the look and feel of the CTC project site coming, and it is looking awesome. Marcus, Gabrielle, Luca and everyone working with the UX in Arduino are creating one of the best-looking educational experiences ever. If not only the content is good, but if it feels good and looks good, then the experience will be excellent!

Do you want CTC in your world?

If you want to be part of the CTC initiative, visit Arduino Education’s website, subscribe to the Arduino Education Newsletter [at the bottom of that site], or send us a request for more information via email: ctc.101@arduino.cc.

[Photos by Pablo Ortuño]
Thursday Night Live(cast) with your host David Cuartielles

Why livecasting from Arduino Education

About a month ago we started livecasting from Arduino’s YouTube channel. This is something I had been willing to do for quite some time, but I never figured out the way to make room in my agenda to fit the planning required to make it happen. Technology has changed a lot over the last couple of years and it is relatively easy to start broadcasting from anywhere given there is an Internet connection. Not only has the tech for transmission evolved, there are also several options on where to send the video so that others can watch it whether live or in its recorded form later.

What we are excited about

We want to reach you when you’re commuting to/from school and have some time to chat about things that matter in the field of tech and education. We want to test LIVE experiments made by others and see whether we get the same results. We want to showcase projects from the Arduino community that are relevant for those involved in education. We want to give a voice to makers from all over the world that we meet when traveling (something I do often). We want to fail on air, and get help from the chat to fix things. We want to have a more inclusive audience. Livecasting is a quick and honest way to approach all of this, minimizing the impact in terms of the amount of resources needed to put it in place.

Our yearly livecasting plan

Even if the livecasts will be super LoFi in nature, it doesn’t mean we will not be thinking carefully about the content to be presented in them. We have prepared a (preliminary) agenda all the way to 2019. While the exact topics of the livecasts are open to change, we will keep a balance between technical casts, interviews, project presentations, and basic introductory sessions for those starting. We will air in English on Thursdays at 7pm CEST (CET) unless there’s a holiday, in which case we’ll try on an earlier day that same week. Some weeks we might transmit more than once, like e.g. if we find ourselves at a conference or event where there might be something meaningful to inform you about.

That said, follows an overview of the livecasts we have planned to make (along with those that have already taken place).

In the program you will see how some of the livecasts are actually sponsored by the eCraft2Learn EU research project. This is a project we have been working with for over a year, where our role is to provide teachers interested in Arduino related topics with introductory tutorials to the technology. We call those livecasts “teacher tutorials.”

List of Livecasts: past and (near) future

Teacher Tutorial 1: Introduction to Arduino and the popular Arduino Uno board. (Please note that the audio was not good in this transmission, we have learned a lot since then.) 

Hacking STEM 1:  A water quality sensor experiment, where we took one of the Microsoft Hacking STEM projects and replicated it. The building process went fine, but the sensor gave us some trouble because of some alligator clips.

Sensors Q&A 1: We are always receiving questions about how different sensors work. Here we devoted one session to test different temperature sensors… ah, and we threw an Arduino Uno into the frozen sea and proved it works (after drying up).

Live from Hackergarage GDL, Mexico: We interviewed a series of people from the Mexican maker scene. People from all over the country came to Guadalajara for an event and we managed to squeeze in a series of live interviews.

Live from Hacedores CDMX, Mexico: We went to Mexico City and interviewed the founder of the Hacedores MakerSpace, Antonio Quirarte, who could also be considered one of the founding parents of the Mexican make scene. We had a great talk and he showed some of the educational projects they have been working with for some time. Are you into weather stations? Then this is your podcast!

Teacher Tutorial 2: Learn about Arduino’s classic IDE and how it differs from the new online Create IDE. We also found out about the Microsoft OneDrive issue with the classic IDE (bug that will be solved in the next release).

April 18th (between 10AM and 12AM CEST) – Live from CTC Valencia Faire: We will be transmitting live from the museum Ciudad de las Artes y las Ciencias, showing projects made by students participating in the CTC initiative.

April 19th – CTC Projects 1: We will dissect a CTC project made by students and try to replicate it, to some extent, with whatever materials we have in our office.

April 26th – Microsoft Hacking STEM Project 2: Yet another project from the Microsoft Hacking STEM collection.

May 3rd -Teacher Tutorial 3: Learn how to extend Arduino’s classic IDE, add libraries, use other cores, etc.

May 10th – CTC Projects 2

May 17th – Real World Applications: Let’s look at a project where Arduino is being used in the wild to see how it could inspire our students to think more about this kind of design cases.

May 24th – Teacher Tutorial 4: Electronics and electricity basis

May 31st – CTC Projects 3

June 7th – Microsoft Hacking STEM Project 3

June 14th – Summer Projects: What can you do with Arduino this summer?

There is a full agenda, although it may be a bit too much to include in this blog post. We will update you with more details in the coming weeks, so stay tuned.

The equipment

As you could imagine, there are different techniques for livecasts. Since we are looking at a consistent experience over the programs, we have settled on using gamer computers (because of the graphics card), together with a couple of webcams, an external mixer board, and a good ambient mic. We have an extra HDD to record the programs should the bandwidth be so bad that we need to lower the quality beyond our own standards and a Zoom recorder because sound is sometimes troublesome. The software of choice is OBS that can push the stream directly into YouTube and uses the graphics card for real-time compression of the video, which is very helpful. This is the reason why we had to fall for MS Windows (those that know me know I’m a Linux guy), as OBS doesn’t support some of the extra features of the graphics card in the Linux operating system.

In the studio, we have a stationary gaming PC with two screens; when on the road, I have a gamer laptop of similar characteristics. The other difference is that the stationary has a control panel made with an Arduino Leonardo operating as MIDI device, which sends keystrokes to OBS via an interfacing program. These are used to change between scenes, switch cameras, add overlays, etc. For the portable station, I got a control panel from El Gato that takes a lot less space.

What has (and hasn’t) worked so far
At the time of writing I’ve made six livecasts with different degrees of success. I have no problem admitting that we (I) are still learning how to prepare the system, switch scenes, and even select the content and write scripts. During our first transmission, the audio ended up having a terrible echo that we couldn’t figure out how to filter. For the second one, the sensors didn’t work even after a full day of preparations. In the third, there were times when I was talking about something but the screen was showing something unrelated. That day I came in the studio and someone had taken one of the monitors to use it in a lab experiment so I had to improvise and had no monitor to check whether I was doing it right or wrong.

So far we have learned a lot, yet we still consider the livecasts to be in beta. We are having fun making them and will continue to do so. Also, we are nurturing a new chat community using Discord where people interact live during the programs making suggestions, adding links, and competenting the show. If you want to join the conversation, use the following link and join us on your computer or smartphone via the Discord app.

Finally, do not forget subscribing to the Arduino YouTube channel. If we see a good response from the community, we will start making a lot more video content. Don’t discard seeing some other relevant members from the crew coming online, I will do my best to convince them!

Other livecasts you can follow

We didn’t invent livecasting, obviously, and there are other streams you can subscribe to if you want to learn more about the maker culture. Personally, I have to recommend two Spanish channels. First, La Hora Maker, run by Cesar, with whom I collaborate on making live Q&A sessions. Cesar is probably the most knowledgeable person in the maker culture in Spanish language. The other relevant channel is Programar Facil from Luis, where you will find a lot of sessions about projects made with Arduino and various programming techniques.

CTC Classics: Finding books with frickin’ laser beams!

CTC, a project from the 2015 edition

CTC stands for Creative Technologies in the Classroom, an initiative from Arduino Education aimed at helping teachers get up to speed with 21st century skills in the context of STEAM. We have been working with CTC since 2013, with our first experience in Castilla La Mancha, Spain. During a varying period of time, teachers are introduced to project-based learning as they run a full course with their students. At the end, teachers and students meet with their partners at a technology faire to show the result of an open-ended innovation process.

In this article series, I present projects made by students and exhibited at CTC faires. At those events, students come and pitch their experiments in front of hundreds of thousands of their peers from schools spanning all across their region. I select some of these projects and reinterpret them as a way to inspire other groups of students and their teachers in making new, interesting, user-centric, and thrilling projects.

What is CTC Catalunya and what makes it different?

CTC Catalunya is the longest of Arduino’s CTC projects, having had faires since 2015. Thanks to the generosity of the EduCaixa Foundation and the help from Cesire, Catalunya’s government department, we have reached out to as many as 200 public schools at the time of writing.

In order to achieve this, we designed a plan where the educators of different regions of Catalunya were trained in becoming trainers themselves, so that they could constitute their own regional support teams as a way to make the project sustainable over time. You can imagine that, after four years, there are many familiar faces. People have grown to like this project, and the CTC faire has become part of the educational landscape to the point that many teachers plan for it within their annual agendas.

What about the project I chose for this blog post 

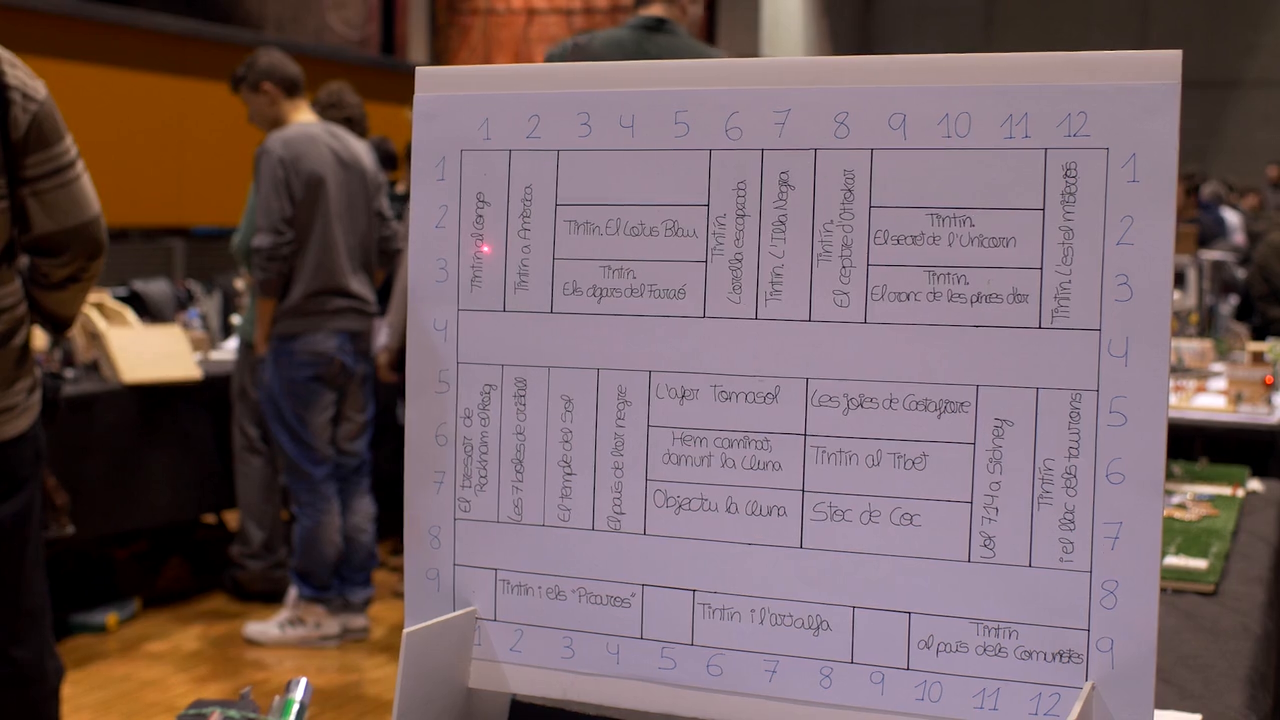
One of my favorite projects of all-time is a system that enables you to look for books on the shelf by means of a laser pointer. Imagine you want to find that one novel; how many times have you had to browse through hundreds of your books and were unable to locate it for a while? Even if you have a database of all of your books, you would still have to make sure you place them in a certain location and need to go looking for it.

Two students at the CTC Catalunya Faire 2015 conceived the idea of a database of books that connected to an Arduino-controlled laser, which would point to a particular book on the shelf.

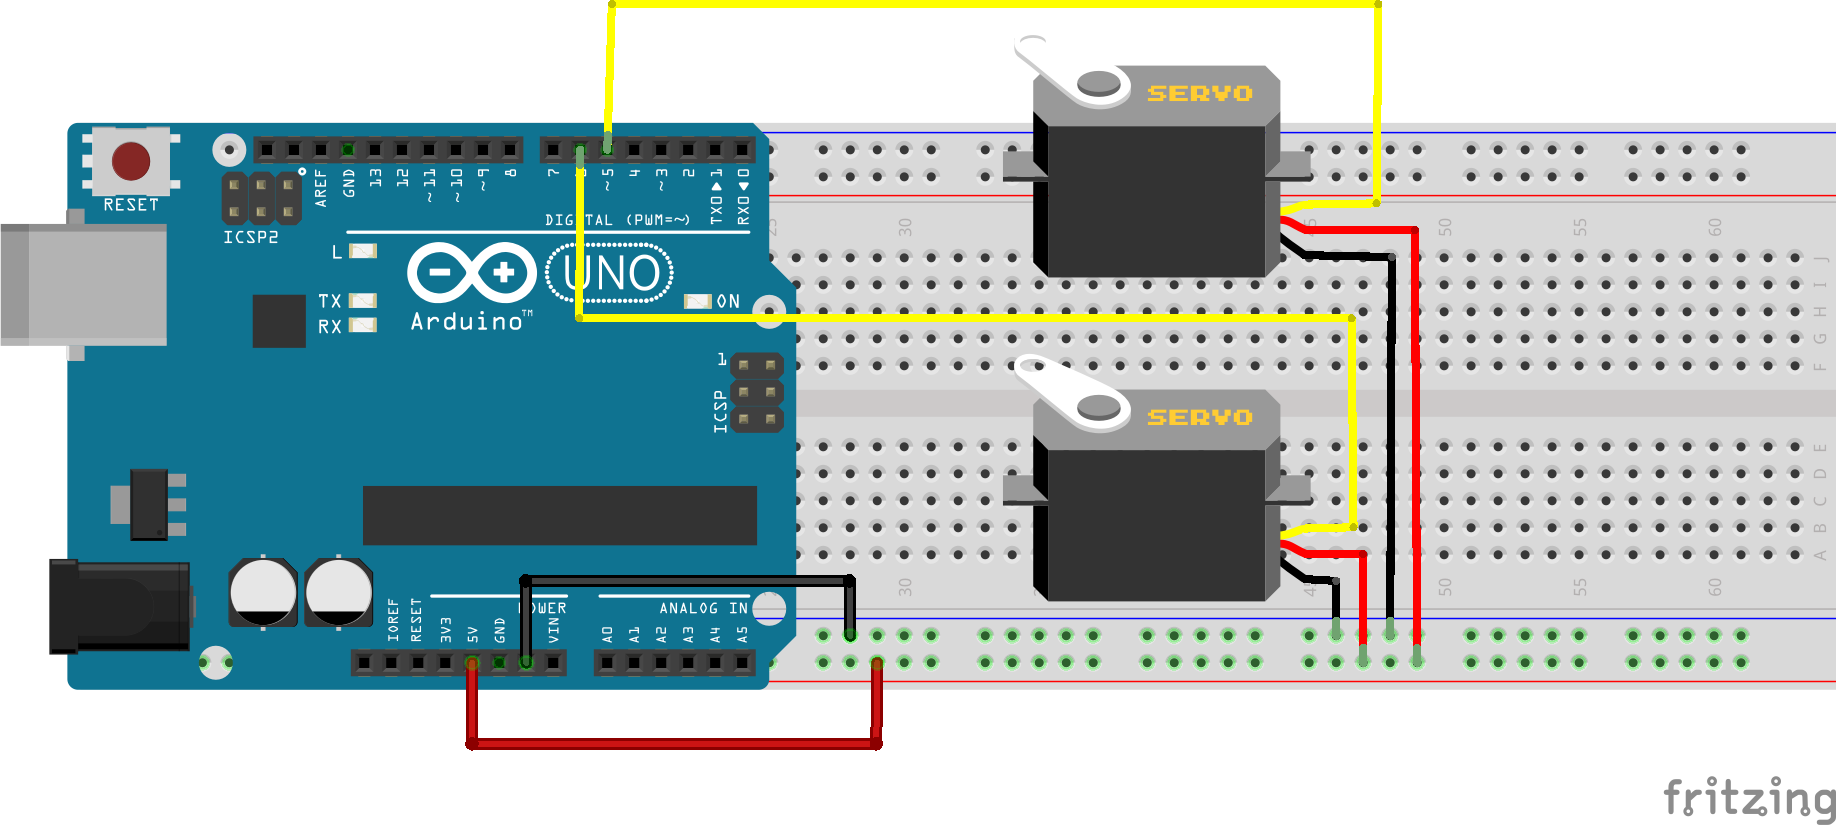
Schematic diagram: lasers, servo motors, and some code

As many years have passed since the project was presented, I don’t have documentation on how it was built. This is going to be a bit of the topic in this series. I am not looking at being super precise in replicating these projects; rather, my aim is provide some guidelines on how this could be made and inspire others to get the idea and improve it. If you want to see how I make things for real, I invite you to follow my livecast sessions every Thursday at 7pm CET. I’ll be implementing one project from scratch each month.

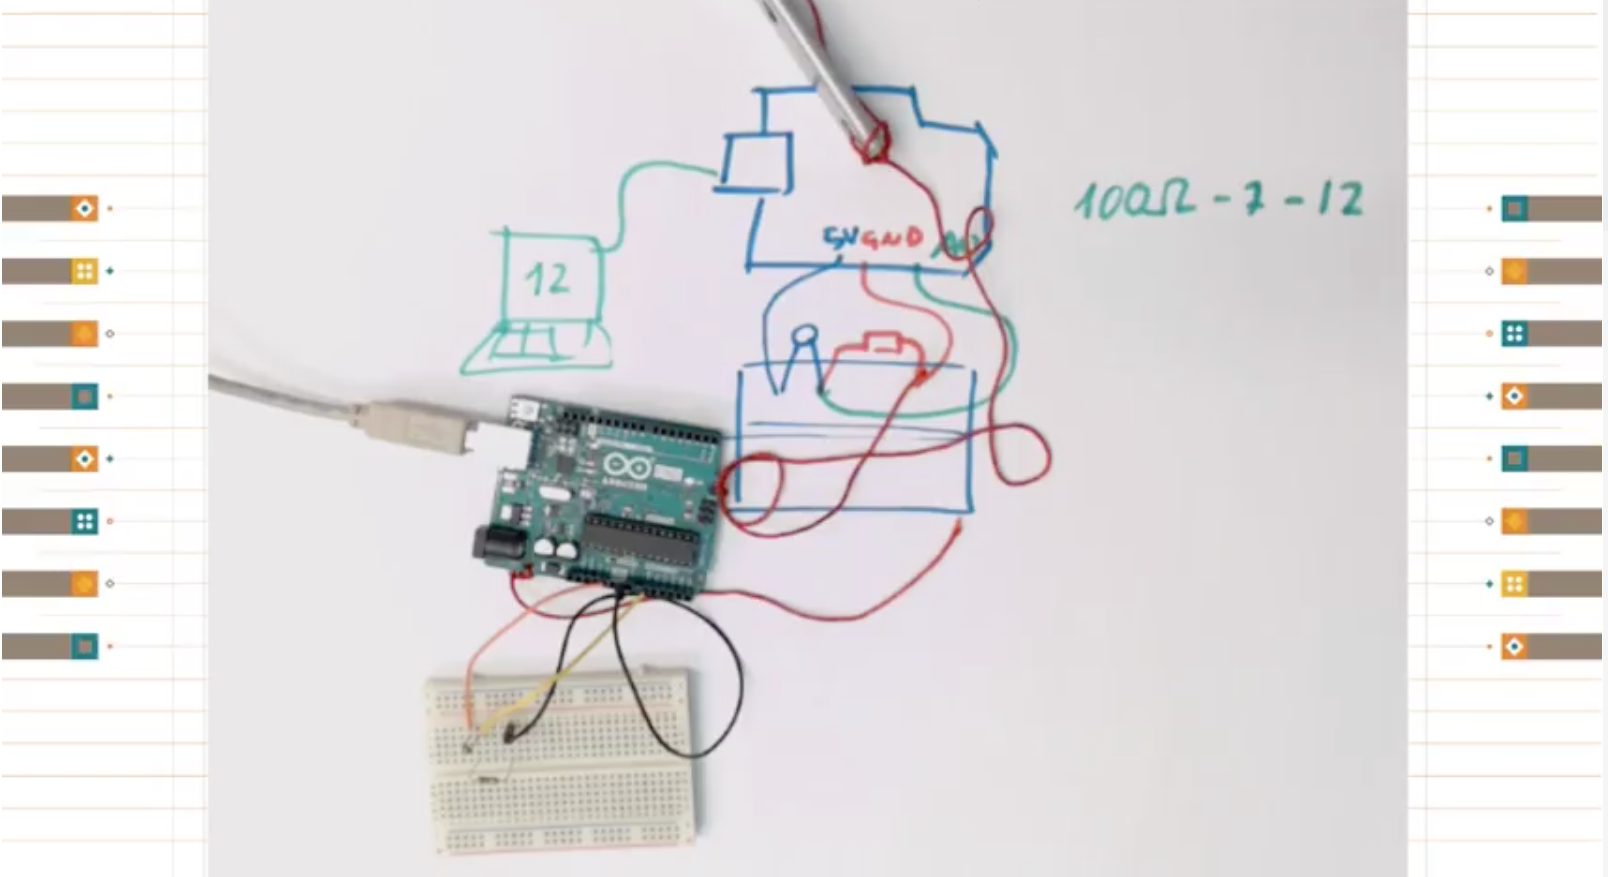
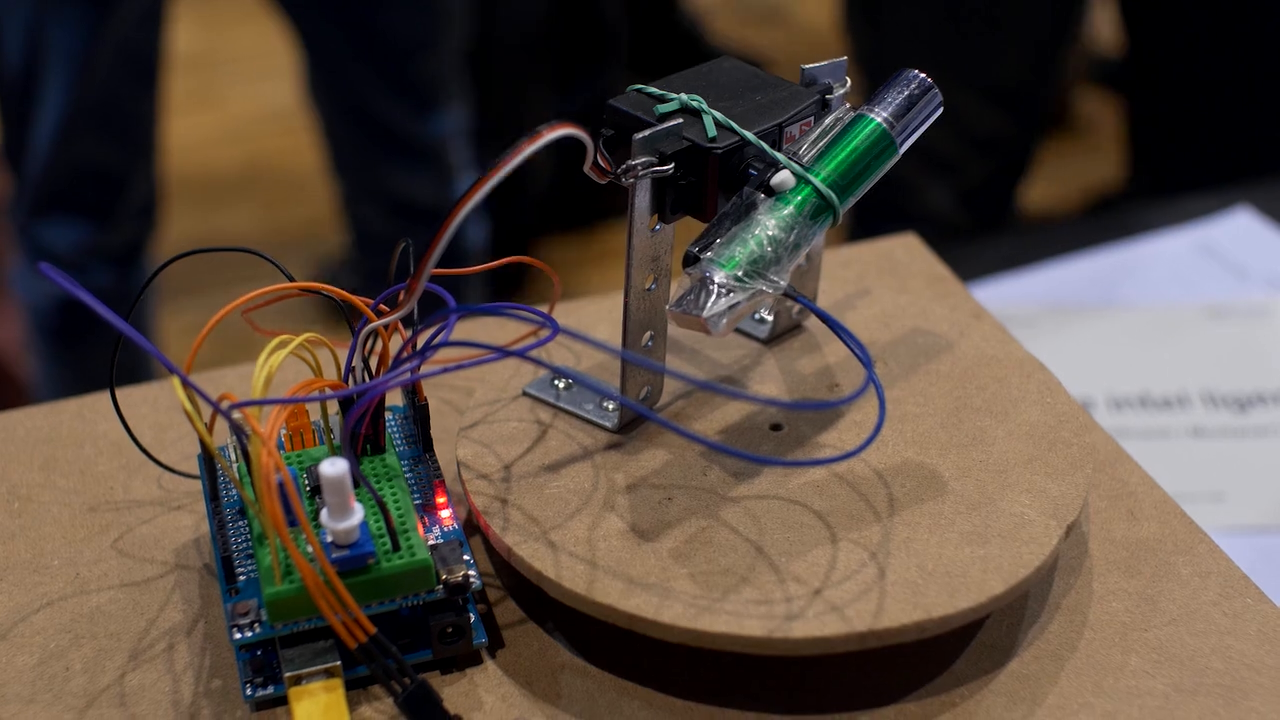
When it comes to my understanding on how this project was built, it is clear that the students used an Arduino Uno board, a Processing sketch, two standard servo motors, and a laser pointer. I have prepared a schematic for you to see how it could work, as well as a diagram that explains the basic interactions between the Processing code and the Arduino one.

(Here is where I have to apologize because of the diagram. I didn’t have a lot of time to enhance its appearance, but CC0 clipart images are your friend and let me make things quickly.)

An idea of how it works

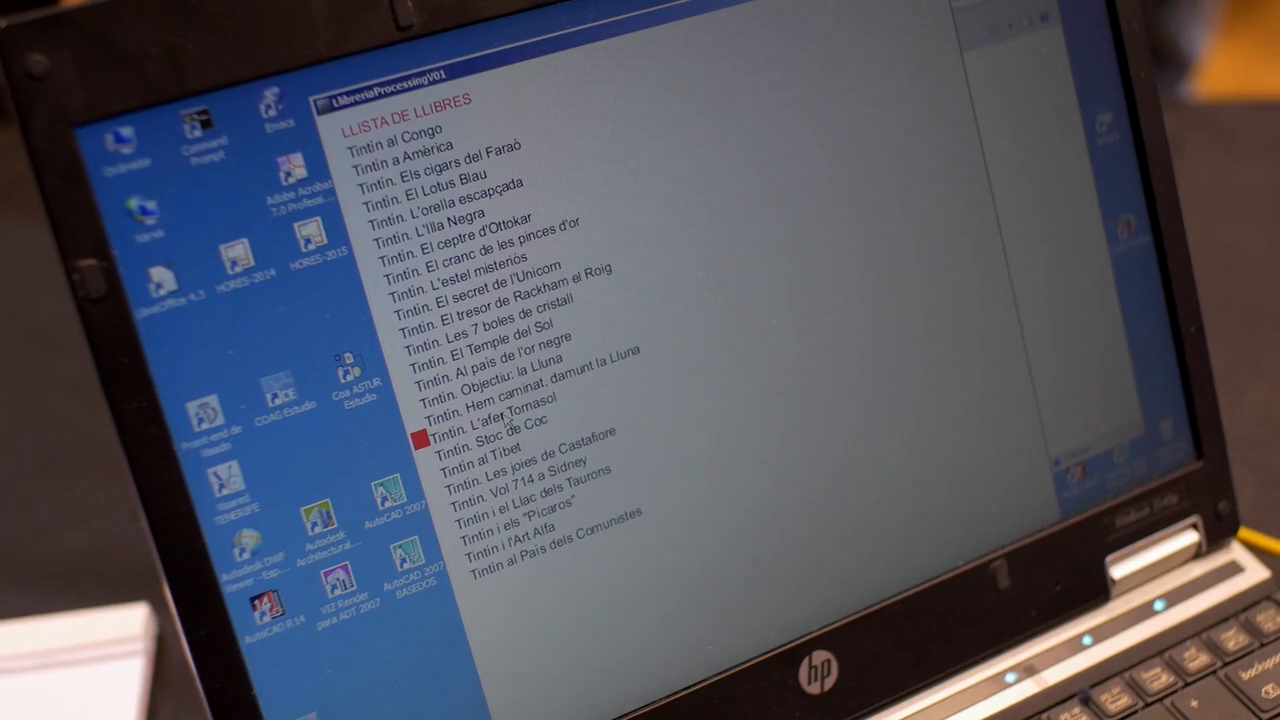
Take a look at the flow chart above, which explains more about the project. The user will interact with the Processing sketch whenever he or she wants to search for a book. It is very likely the project that the students made had everything hardcoded in the program. In other words, the system was not letting you easily add new books to the database, but were stored in a text file that the Processing sketch would load upon boot.

The books were presented in the form of a dropdown list for you to choose from. Once you selected one of the items in the list, the Processing sketch would send the coordinates to the servo motors. Those coordinates also had to be stored in the same text file as the names of the books. With the coordinates, that had to be the angles for each one of the servos, the pointer would be directed towards the shelves, highlighting the location of the book.

Since this had to be shown at a faire where thousands of people would come by over a four-hour period, the students couldn’t prepare a much more complex presentation. This is why I have to make some assumptions about how far they went in their building. I also assume that they had to think through the ways to calibrate everything, since they didn’t have a lot of time to set up. The project worked flawlessly for the entire faire.

This is why I like it so much

At home we like books, we always have. When I was a kid, my parents had books in the living room, the dining room, mine and my brother’s room. As an adult, I have bought thousands of books and read every week. We own a 7m long bookshelf where books are sorted by color. When we discuss a project or think about possible ideas for what to build next, we look through our books. After a while, finding books is a time-consuming activity. I need one of these book-finding robots in my home!

Other projects with lasers?

You’ve likely seen at least one of the servo-controlled laser pointer projects for entertaining your cats here, here, or even here. Those are just one example of the fun things you can do with Arduino and lasers. In the context of CTC, there is actually a whole series of projects using laser diodes for creating music instruments. But that is an entirely different story, If you want to read about it, stay tuned for more adventures in CTC at the Arduino blog!

The CTC Caire was supported by Cesire at the Generalitat de Catalunya and the EduCaixa foundation.

Desafío STEM 2017/18 in Spain

Telefónica Educación Digital, the education branch of Spanish telecommunications company Telefónica, arranged a contest for students in the fields of Science, Technology, Engineering and Math (STEM) for the second year. While the 2016/17 edition of the contest was launched only in Spain, 2017/18’s took place in Latin America as well. Just a week ago, the jury came to the final result for the current Spanish edition.

In the first edition, we in Arduino Education created an educational kit and content to assist a team of mentors that would in turn work with teachers all across Spain in helping them building projects within the limits of the contest. In the 2017/18 edition, we collaborated on a series of webinars for teachers hosted last fall. In both editions, I have acted as one of the jury members. The level of projects is pretty high in average. Considering that many of the participants come from secondary schools, it is quite impressive to see how they embrace the latest technological developments like IoT or VR and make meaningful projects out of those.

The winners of the Spanish version of the contest are invited to a trip to CERN to visit the place where things happen in science: the particle accelerator. Over 1,500 innovations were presented by seven-member teams within the categories established by TED: IoT, Industry 4.0, e-health, digital education, cybersecurity, and other technological projects. From those 1,500, the jury had to work really hard to come up with the final results. If you are among the non-chosen ones, you should know that the gap between the top 50-or-so projects was incredibly tight.

The following list highlights the four teams that were awarded by the jury. I have translated the information about the teams, but the videos from the students are only in Spanish. I hope you will find them as thrilling as I do!

Project 1

  • Title: AGROTECH
  • Topic: Livestock automation system
  • Level: Advance (junior high and vocational education)
  • Theme: Industry 4.0
  • School: Instituto de Educación Secundaria LOS OLMOS
  • City: Albacete
  • Description: AGROTECH implements a prototype to automate the systems to manage livestock. Using Arduino and a series of sensors, it is possible to monitor and refill the livestock’s food and water, control the light and ventilation of the stables, report alarms like fire or intrusions and eliminate leftovers. All information is captured in real-time and displayed on a website.

Project 2

  • Title: Virtual Detective (Detective Virtual)
  • Topic: Virtual reality spaces
  • Level: High (upper secondary)
  • Theme: Digital education
  • School: Colegio María Virgen
  • City: Madrid
  • Description: Virtual Detective is a virtual, guided tour to the school. The students have hidden a series of challenges along the way that are related to different school subjects. The virtual space is a gamified version of the class that helps the kids learn in an alternative way.

Project 3

  • Title: Recycling Is for Everyone (REPT, Reciclar Es Para Todos)
  • Topic: Other technological projects
  • Level: Junior (lower secondary)
  • Theme: Digital education
  • School: Colegio Santo Domingo
  • City: Santa Cruz de Tenerife
  • Description: REPT is a trash bin prototype that can classify the leftovers and will run a lottery among those recycling once the bin has been sent to the recycling station.

Project 4

  • Title: ALPHAPSI
  • Topic: VR platform for the diagnosis and treatment of students with special educational needs
  • Level: Advance
  • Theme: Digital education
  • School: Colegio Calasancio Hispalense
  • City: Sevilla
  • Description: ALPHAPSI consists of an application made in Processing that connects to a VR head-mounted display capable of detecting the wearer’s head movements. Thanks to a series of tests consisting of tracking an object moving in the VR space, the system can follow the movements and will help generating a diagnosis and treating students with attention disorders.

The Desafío STEM project is an initiative of Telefonica Educacion Digital and their project STEMbyme

CTC 101: Giro d’Italia + CTC Faire in Barcelona

The last couple of weeks have kept the Arduino Education team extremely busy. While some of us were presenting CTC 101 to teachers all across Italy, others were in Barcelona for the CTC 101 Faire with more than 4,000 upper secondary students showcasing the projects they created as a result of the CTC 101 2017-18 academic year.

The one thing that really amazes us at Arduino EDU is how the CTC program has scaled since its inception five years ago. Back then, we prototyped our first full-year academic program and conducted a test with 25 schools. Our first faire garnered 400 participants, about 10% the size of one of our latest events. The earliest edition of CTC ran on Arduino Uno, consisted of 20 projects, was made in black and white, and included a mascot that we commissioned to the well-known Mexican artist “Grand Chamaco.” From that experiment on, almost 18,000 students have gone through the program. CTC has been implemented by 800 schools, mainly in Spain, Sweden, Ecuador, and Mexico, while more than 1,600 teachers have had the opportunity to learn under the guidance of the Arduino EDU team both on and offline.

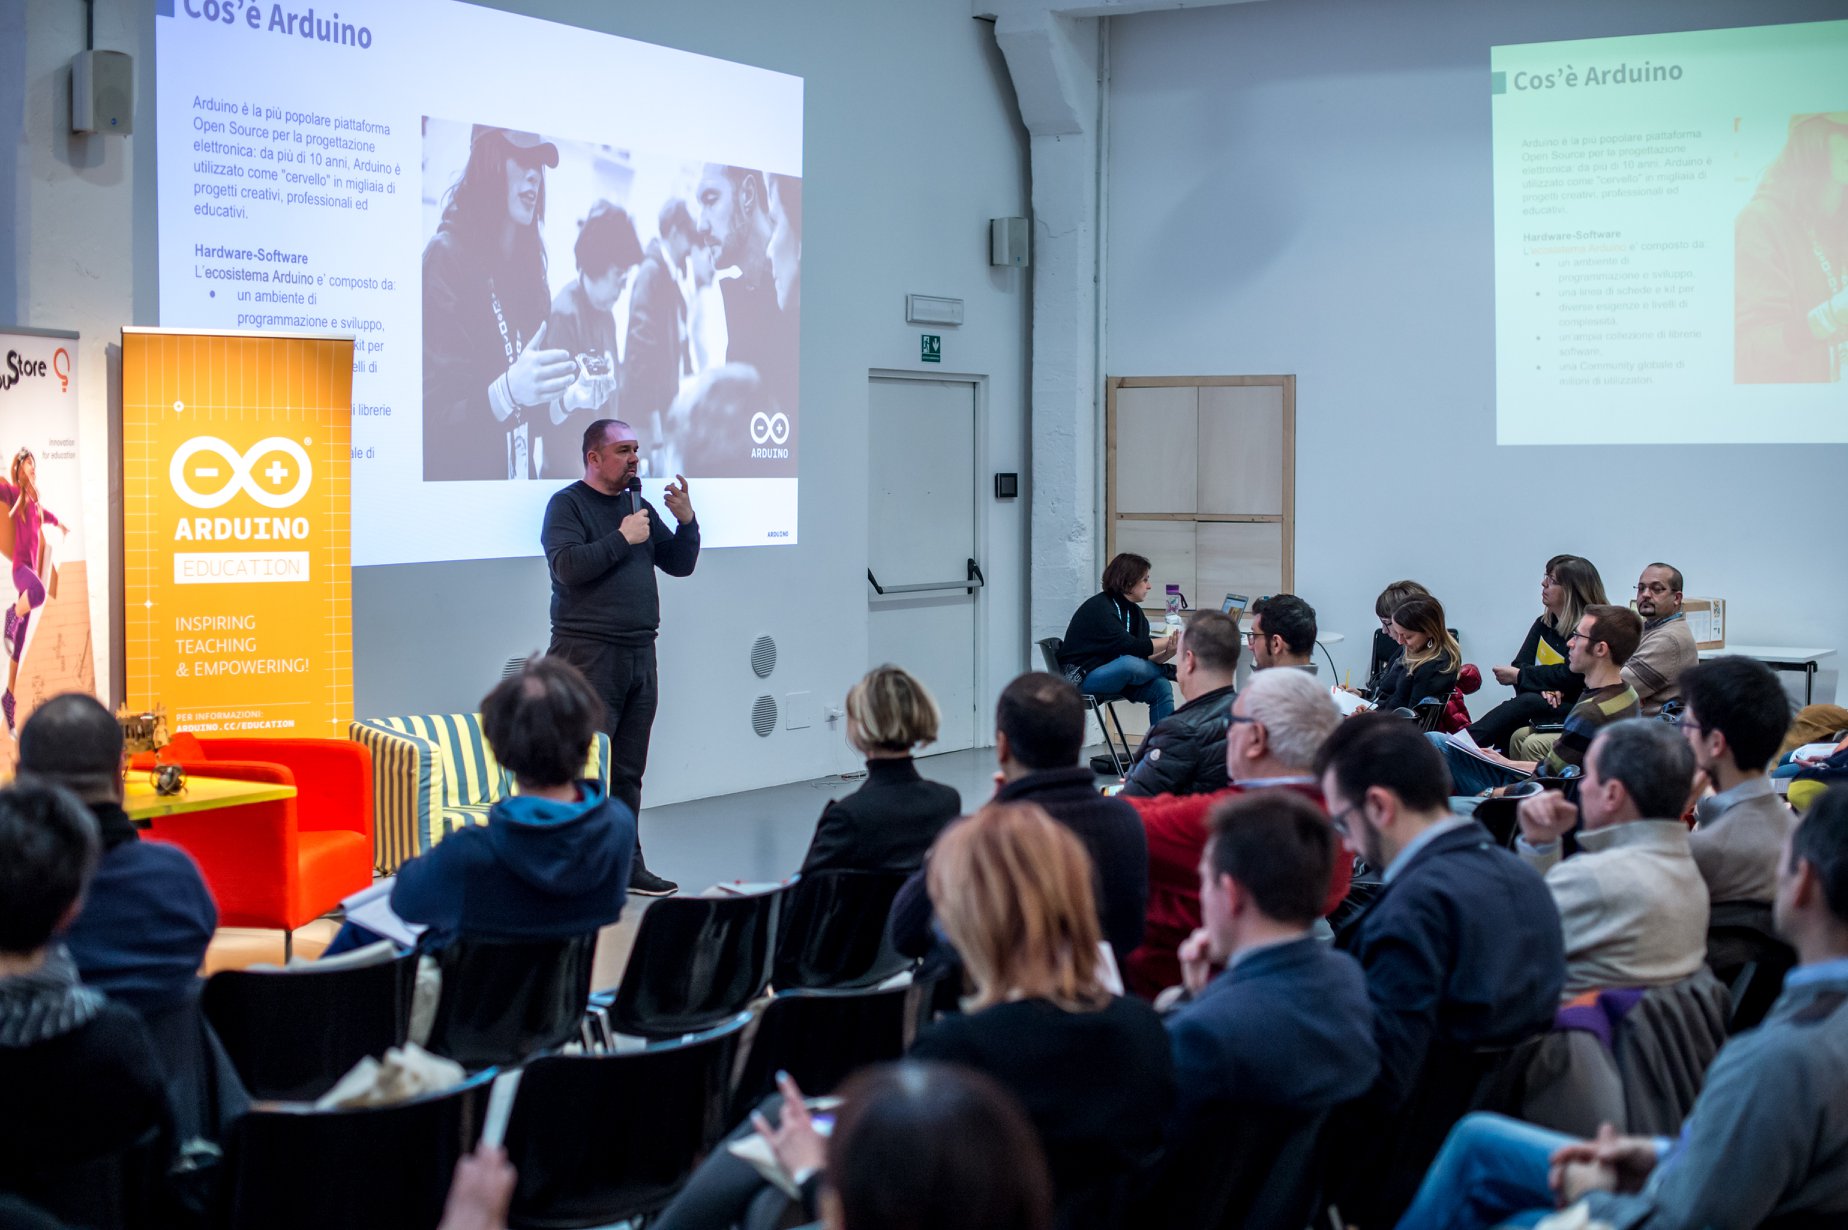
In 2018, CTC 101 will expand to several countries including Italy, where my partner and Arduino co-founder Massimo Banzi together with Valentina Chinnici (Arduino EDU Product Marketing) led the EDU team through a custom-made “Giro d’Italia” visiting Turin, Bologna, Roma, Bari, and Naples to hold special events and workshops to Italian high school teachers, together with CampuStore, one of our Italian partners.

In the words of Massimo, “The Arduino Education tour was created to confirm and strengthen Arduino’s efforts and attention towards Italian school. The hundreds of teachers who signed in to all the dates are a great encouragement for Arduino to continue the path towards research, innovation, and dissemination of the values of open source.”

Not only did Massimo present CTC 101 to 400 teachers in person, he also hosted a webinar for over 900 educators. In case you missed it, we have posted the webinar video to the Arduino YouTube channel. (Please note that it is in Italian.)

While Massimo was touring Italy, I travelled to Barcelona with Nerea Iriepa, CTC’s project manager, to participate in the 2018’s edition of the CTC Catalunya Faire at the renowned CosmoCaixa science museum.

The EduCaixa Foundation has been sponsoring this project for the last four years in the regions of Catalunya, Andalucía, and Valencia, with a great degree of satisfaction from both teachers and students alike. In particular, a total of 200 schools in Catalunya (one-third of all of the public schools in the region) have been sponsored by EduCaixa, providing access to the program that has helped teachers enter the world of STEAM via Arduino Education.

This year’s faire brought together nearly 500 projects from 100 schools. It is worth mentioning how much effort all of the participants put in building their projects. It has been a tremendous journey for students and teachers that kicked off in September 2017 and culminated at this exhibition.

We are truly grateful for CESIRE (big hugs to Rossana and Jordi for their work), the regional ministry of education, as well as Ultralab, our local partner, in organizing this faire.

Arduino Create plans for education now available!

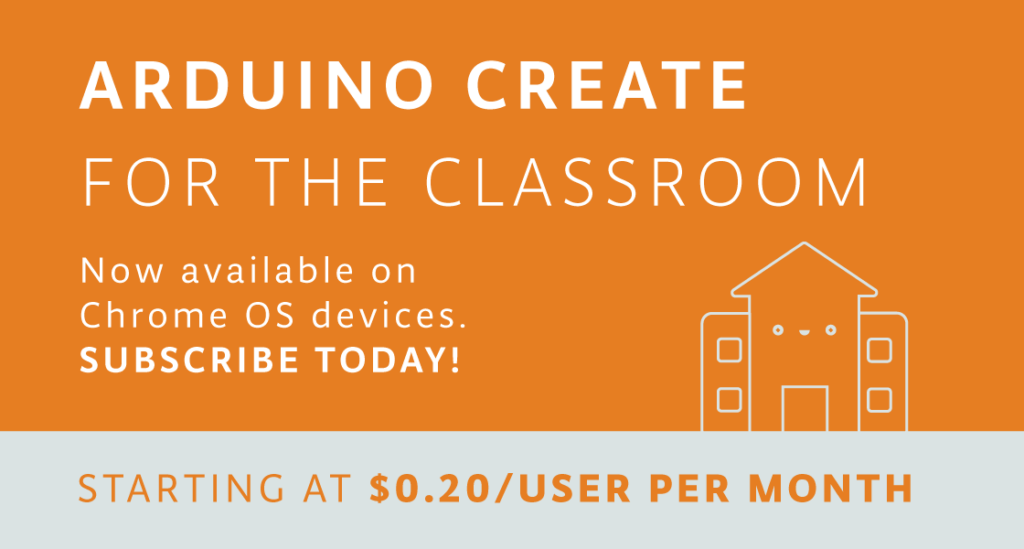
Today, we’re excited to announce that Arduino Create is now available for schools with Chrome OS devices in their classrooms.

With Arduino Create, students and teachers will be able to tinker with Arduino hardware and programming in a collaborative, always up-to-date environment. You can learn how to subscribe using this tutorial.

Last June, we launched Arduino Create for Chrome OS; however due to limitations with Google Apps for Education (GAFE), educational institutions were unable to purchase subscriptions on the Chrome Web Store.

The new Arduino Create subscription site allows schools to purchase and manage subscription plans for their students, starting at $0.20/student per month. All you need is a credit card and the email addresses of the students you would like to enroll. We also have a solution for students under the age of 14 who might not have full access to emails.

The Google Admin console can be used by IT administrators to bulk install the app on a fleet of Chrome OS devices.

Arduino Create will continue to be available for regular Chrome OS users at $0.99 per month on the Chrome Web Store. Both versions support the following boards: Uno, 101, Mega, Mega ADK, Esplora, Nano (ATmega328), Micro, Zero, MKR1000, MKR Zero, MKR Fox 1200, MKR GSM 1400, MKR WAN 1300, Pro, and Pro Mini (ATmega328).

Visit the new Arduino Create subscription site to get started. If you have any questions or comments, write to us on this Forum page. We look forward to hearing your feedback!

Desafío STEM + Arduino Podcast [Español]

Con el fin de apoyar a los nuevos participantes del Desafío STEM 2017, Arduino y Telefónica se han unido para crear una serie de tres podcast, abiertos al público en general, conducidos por David Cuartielles.

Desafío STEM es un concurso interescolar que fomenta el desarrollo de competencias tecnológicas, creado por Telefónica Educación Digital para impulsar la implantación de nuevas formas de aprender a través de dinámicas motivadoras y fomentar las vocaciones STEM.

Durante los podcast se abordarán los siguientes temas:

  • Primer podcast: 15 de Noviembre
    Cómo crear proyectos creativos usando tecnología digital.
  • Segundo podcast: 22 de Noviembre
    Identificación de problemas técnicos en la creación de proyectos.
  • Tercer podcast: 5 de Diciembre
    Nuevos usos de tecnología en el aula.

La duración de los podcast será de una hora comenzando a las 19: 00 GMT+1. Podrán seguir la transmisión del podcast en: http://verkstad.cc/urler/desafiostem

David responderá durante el podcast preguntas de la audiencia que se envíen antes de los podcast. Para enviar las preguntas, seguir el link que se presenta a continuación y llenar el formulario: http://verkstad.cc/urler/desafio-preguntas. También se podrá participar en twitter con el hashtag #desafiostempreguntas.


To support the new participants of Desafío STEM 2017, Arduino and Telefónica have come together to create a series of three open podcasts, conducted by David Cuartielles.

Desafío STEM is an interscholastic competition that promotes the development of technological competences, created by Telefónica Educación Digital to promote the implementation of new ways of learning to motivate and inspire students to pursue STEM vocations.

The following topics will be addressed:

  • First podcast: November 15
    How to build creative projects using digital technology.
  • Second podcast: November 22
    Identification and resolution of technical challenges in the creation of projects.
  • Third podcast: December 5th
    New uses of technology in the classroom.

The duration of each podcast will be one hour starting at 19:00 GMT + 1. To follow along, please click on the following link: http://verkstad.cc/urler/desafiostem

David will answer questions from the audience during the podcast, which need to be sent beforehand via this link: http://verkstad.cc/urler/desafio-preguntas. Twitter users can also participate using the hashtag #desafiostempreguntas.

Educational Robot for Under $100

While schools have been using robots to educate students in the art of science and engineering for decades now, not every school or teacher can afford to put one of these robots in the hands of their students. For that reason, it’s important to not only improve the robots themselves, but to help drive the costs down to make them more accessible. The CodiBot does this well, and comes in with a price tag well under $100.

The robot itself comes pre-assembled, and while it might seem like students would miss out on actually building the robot, the goal of the robot is to teach coding skills primarily. Some things do need to be connected though, such as the Arduino and other wires, but from there its easy to program the robot to do any number of tasks such as obstacle avoidance and maze navigation. The robot can be programmed using drag-and-drop block programming (similar to Scratch) but can also be programmed the same way any other Arduino can be.

With such a high feature count and low price tag, this might be the key to getting more students exposed to programming in a more exciting and accessible way than is currently available. Of course, if you have a little bit more cash lying around your school, there are some other options available to you as well.


Filed under: robots hacks

Creating Interactive Art: The Museum of Funny Ladies

The Museum of Funny Ladies is an interactive way for people to experience the story of Sybil Adelman, a pioneer comedy writer from the 1970s.

Read more on MAKE

The post Creating Interactive Art: The Museum of Funny Ladies appeared first on Make: DIY Projects and Ideas for Makers.