Posts with «debounce» label

Mouse Mis-Clicking? We Got You.

A mouse with malfunctioning buttons can be a frustrating to deal with — and usually a short leap to percussive maintenance. Standard fixes may not always last due to inferior build quality of the components, or when the microswitch won’t close at all. But, for mice that double/triple-click, will release when dragging, or mis-click on release, this Arduino-based hack may be the good medicine you’re after.

Instructables user [themoreyouknow]’s method cancels click malfunctions by latching the mouse’s controller switch trace to ‘on’ when pressed, keeping it there until the button normally closed contact closes again completely. Due to the confined spaces, you’ll want to use the smallest Arduino you can find, some insulating tape to prevent any shorts, and care to prevent damaging the wires this process adds to the mouse when you cram it all back together.

Before you take [themoreyouknow]’s guide as dogma, the are a few caveats to this hack; they are quick to point out that this won’t work on mice that share two pins between three buttons — without doing it the extra hard way, and that this might be trickier on gaming or other high-end mice, so attempt at your own peril.

Speaking of gaming mice, we recently featured a way to add some extra functionality to your mouse — cheating optional — as well as how to stash a PC inside an old Logitech model.


Filed under: hardware, how-to
Hack a Day 30 Aug 09:00
arduino  click  debounce  hardware  how-to  mouse  nano  repair  

Mouse Mis-Clicking? We Got You.

A mouse with malfunctioning buttons can be a frustrating to deal with — and usually a short leap to percussive maintenance. Standard fixes may not always last due to inferior build quality of the components, or when the microswitch won’t close at all. But, for mice that double/triple-click, will release when dragging, or mis-click on release, this Arduino-based hack may be the good medicine you’re after.

Instructables user [themoreyouknow]’s method cancels click malfunctions by latching the mouse’s controller switch trace to ‘on’ when pressed, keeping it there until the button normally closed contact closes again completely. Due to the confined spaces, you’ll want to use the smallest Arduino you can find, some insulating tape to prevent any shorts, and care to prevent damaging the wires this process adds to the mouse when you cram it all back together.

Before you take [themoreyouknow]’s guide as dogma, the are a few caveats to this hack; they are quick to point out that this won’t work on mice that share two pins between three buttons — without doing it the extra hard way, and that this might be trickier on gaming or other high-end mice, so attempt at your own peril.

Speaking of gaming mice, we recently featured a way to add some extra functionality to your mouse — cheating optional — as well as how to stash a PC inside an old Logitech model.


Filed under: hardware, how-to
Hack a Day 30 Aug 09:00
arduino  click  debounce  hardware  how-to  mouse  nano  repair  

Wireless pinball controller for tablet gaming

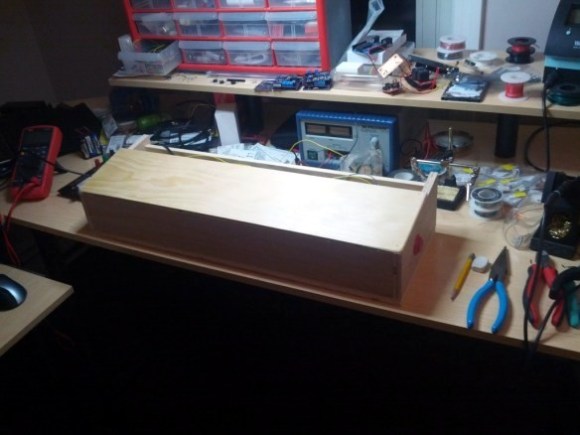
This wooden box is a wireless pinball controller and tablet stand. The idea is to set it on a workbench to give you some of the thrill of standing and playing the real thing. [Jeff] has been rather addicted to playing a pinball app on Android lately, and started the journey because he needed a way to give his thumbs some relief.

An Arduino monitors buttons on either side of this wooden controller. [Jeff] is new to working with hardware (he’s a Linux Kernel developer by trade) and was immediately struck with button debouncing issues. Rather than handle this in software (we’ve got a super-messy thread on that issue with our favorite at the bottom) he chose a hardware solution by building an SR latch out of two NAND gates.

With the inputs sorted out he added a BlueSMiRF board to the project which allowed him to connect a Nexus 7 tablet via Bluetooth. At this point he ran into some problems getting the device to respond to his control as if it were an external keyboard. His stop-gap solution was to switch to a Galaxy Tab 10.1 which wasn’t throwing cryptic errors. Hopefully he’ll fix this in the next iteration which will also include adding a plunger to launch the pinball, a part which just arrived in the mail as he was writing up this success.

We’ve embedded his quick demo video after the break.


Filed under: android hacks, arduino hacks