

Air Hockey Table is a Breeze to Build
Many of us have considered buying an air hockey table, but are put off by the price. And even if the money is there, those things take up a lot of space. How often are you really going to use it?
This DIY air hockey table is the answer. It’s big enough to be fun, but small and light enough to easily stow away in the off-season. At ~$50, it’s a cheap build, provided you have a vacuum cleaner that can switch to blower mode. The strikers, goals, corner guards, and scoreboard enclosure are all 3D-printed, while the pucks and playfield are laser-cut acrylic. [Technovation] glued acrylic feet to the strikers to help them last longer.
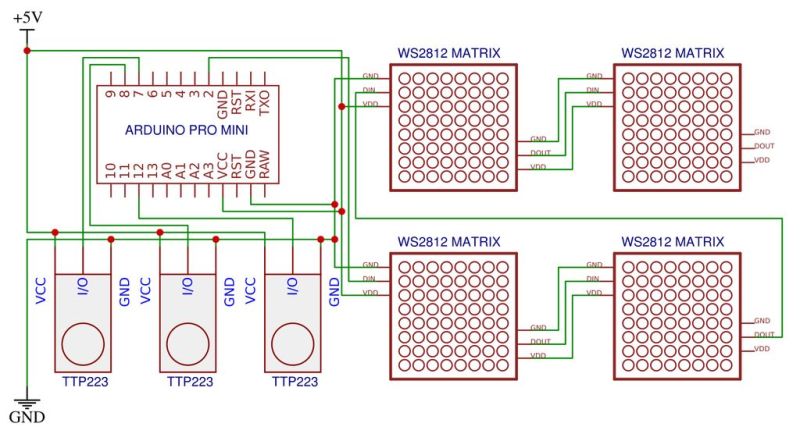
The scoreboard is an Arduino Uno plus an LCD that changes color to match the current winner. Scoring must be entered manually with button presses, but we think it would be fairly easy to detect a puck in the goal with a force or weight sensor or something. For now, the RGB LEDs around the edge are controlled separately with a remote. The ultimate goal is to make the Arduino do it. Shoot past the break and cross-check it out.
Already have a table? Had it so long, no one will play you anymore? Build yourself a robotic opponent.