Posts with «3d printer» label

3D Printing Pen and CNC Machine Yields Cheap 3D Printer

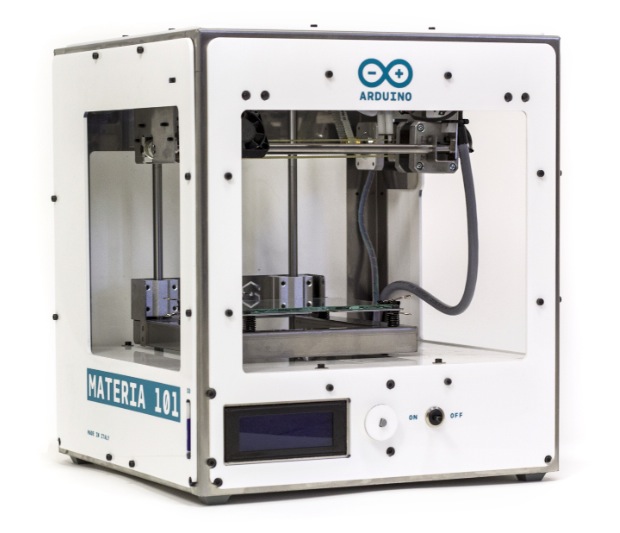
3D printers are ubiquitous now, but they’re still prohibitively expensive for some people. Some printers cost thousands, but even more inexpensive options aren’t exactly cheap. [Daniel] decided that this was unacceptable, and set out to make a basic 3D printer for under $100 by including only the bare essentials needed for creating anything out of melted plastic.

3D printers are essentially four parts: a bed, filament, and a hot end and extruder. In a previous project, [Daniel] used parts from old CD drives to create a three-axis CNC machine which he uses for the bed. To take care of the hot end and extruder, he is using a 3D printing pen which he mounts to the CNC machine and voila: a 3D printer!

It’s not quite as simple as just strapping a 3D printing pen to a CNC machine, though. The pen and the CNC machine have to communicate with each other so that the pen knows when to place filament and the CNC machine knows when to move. For that, [Daniel] went with a trusty Arduino in order to switch the pen on and off. Once it’s working, it’s time to start printing!

[Daniel] does note that this is a design that’s relatively limited in terms of print size and resolution, but for the price it can’t be beat. If you’re interested in getting started with 3D printing, a setup like this would be perfect. 3D pens are a pretty new idea too, and it’s interesting to see them used in different ways like this.


Filed under: 3d Printer hacks

Hackaday Links: October 11, 2015

[Kratz] just turned into a rock hound and has a bunch of rocks from Montana that need tumbling. This requires a rock tumbler, and why build a rock tumbler when you can just rip apart an old inkjet printer? It’s one of those builds that document themselves, with the only other necessary parts being a Pizza Hut thermos from the 80s and a bunch of grit.

Boot a Raspberry Pi from a USB stick. You can’t actually do that. On every Raspberry Pi, there needs to be a boot partition on the SD card. However, there’s no limitation on where the OS resides,  and [Jonathan] has all the steps to replicate this build spelled out.

Some guys in Norway built a 3D printer controller based on the BeagleBone. The Replicape is now in its second hardware revision, and they’re doing some interesting things this time around. The stepper drivers are the ‘quiet’ Trinamic chips, and there’s support for inductive sensors, more fans, and servo control.

Looking for one of those ‘router chipsets on a single board’? Here you go. It’s the NixCoreX1, and it’s pretty much a small WiFi router on a single board.

[Mowry] designed a synthesizer. This synth has four-voice polyphony, 12 waveforms, ADSR envelopes, a rudimentary sequencer, and fits inside an Altoids tin. The software is based on The Synth, but [Mowry] did come up with a pretty cool project here.


Filed under: Hackaday Columns, Hackaday links

Prevent Failed Prints With A Filament Speed Sensor

If you have used a 3D printer for any length of time, you’ve probably experienced a failed print caused by a clogged nozzle. If you’re not around to stop the print and the nozzle stays hot and full of filament for hours, the clog gets even worse. [Florian] set out to solve this issue with an encoder that measures filament speed, which acts as an early warning system for nozzle clogs.

[Florian] designed a small assembly with a wheel and encoder that measures filament movement. The filament passes under the encoder wheel before it’s fed into the 3D printer. The encoder is hooked up to an Arduino which measures the Gray code pulses as the encoder rotates, and the encoder count is streamed over the serial port to a computer.

When the filament slows down or stops due to a nozzle clog, the Python script plays a notification sound to let you know that you should check your nozzle and that your print might fail. Once [Florian] works out some of the kinks in his setup, it would be awesome if the script could stop the print when the nozzle fails. Have any other ideas on how to detect print failures? Let us know in the comments.


Filed under: 3d Printer hacks

Vacuum Gauge Display; Arduino Replaces Industrial

Arduinos! They’re a great tool that make the world of microcontrollers pretty easy, and in [cptlolalot]’s case, they also give us an alternative to buying expensive, proprietary parts. [cptlolalot] needed a gauge for an expensive vacuum pump, and rather than buying an expensive part, built a circuit around an Arduino to monitor the vacuum.

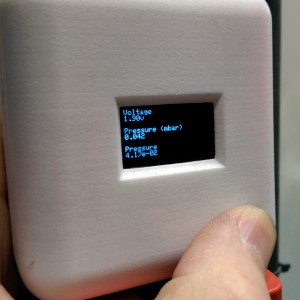
This project goes a little beyond simple Arduino programming though. A 12V to 5V power supply drives the device, which is laid out on a blank PCB. The display fits snugly over the circuit which reduces the footprint of the project, and the entire thing is housed in a custom-printed case with a custom-printed pushbutton. The device gets power and data over the RJ45 connection so no external power is needed. If you want to take a look at the code, it’s linked on [cptlolalot]’s reddit thread.

This project shows how much easier it can be to grab an Arduino off the shelf to solve a problem that would otherwise be very expensive. We’ve been seeing Arduinos in industrial applications at an increasing rate as well, which is promising not just because it’s cheap but because it’s a familiar platform that will make repairs and hacks in the future much easier for everyone.


Filed under: Arduino Hacks

3D Printed Fish Feeder

[Helios Labs] recently published version two of their 3D printed fish feeder. The system is designed to feed their fish twice a day. The design consists of nine separate STL files and can be mounted to a planter hanging above a fish tank in an aquaponics system. It probably wouldn’t take much to modify the design to work with a regular fish tank, though.

The system is very simple. The unit is primarily a box, or hopper, that holds the fish food. Towards the bottom is a 3D printed auger. The auger is super glued to the gear of a servo. The 9g servo is small and comes with internal limiters that only allow it to rotate about 180 degrees. The servo must be opened up and the limiters must be removed in order to enable a full 360 degree rotation. The servo is controlled by an Arduino, which can be mounted directly to the 3D printed case. The auger is designed in such a way as to prevent the fish food from accidentally entering the electronics compartment.

You might think that this project would use a real-time clock chip, or possibly interface with a computer to keep the time. Instead, the code simply feeds the fish one time as soon as it’s plugged in. Then it uses the “delay” function in order to wait a set period of time before feeding the fish a second time. In the example code this is set to 28,800,000 milliseconds, or eight hours. After feeding the fish a second time, the delay function is called again in order to wait until the original starting time.


Filed under: 3d Printer hacks, Arduino Hacks

Arduino Gets Physical With The Materia 101 3D Printer

We take an early look at the Materia 101, Arduino’s first foray into 3D printers

Read more on MAKE

Arduino Gets Physical With The Materia 101 3D Printer

We take an early look at the Materia 101, Arduino’s first foray into 3D printers

Read more on MAKE

Arduino Materia 101 is available for pre-order

During Maker Faire Rome we announced and gave a preview of our new project called Arduino Materia 101, the 3d printer developed in collaboration with Sharebot.

We are happy to announce that starting today the 3d printer is available for pre-order (30 days delivery time) from Arduino Store :

We can also share with you a list of documentation to learn all the details about it:

  • Product page with downloadable PDFs of
    • Use Manual in English and Italian
    • Assembly Manual (soon online in Italian and  in English)

In the next weeks we are going to post on the blog some cool hacks and user profiles to make it even easier to enjoy with the 3d printer.


Printing and programming a self-balancer

The Hackaday staff isn’t in agreement on 3d printers. Some of us are very enthusiastic, some are indifferent, and some wonder what if they’re as widely useful as the hype makes them sound. But we think [Jason Dorweiler's] self balancing robot is as strong a case as any that 3d printing should be for everyone!

Don’t get us wrong. We love the robot project just for being a cool self-balancer. Seeing the thing stand on its own (video after the break) using an Arduino with accelerometer and gyroscope sensors is pure win. But whenever we see these we always think of all the mechanical fabrication that goes into it. But look at the thing. It’s just printed parts and some wooden dowels! How easy is that?

Sure, sure, you’ve got to have access to the printer, it needs to be well calibrated, and then you’ve got to make the designs to be printed out. But these hurdles are getting easier to overcome every day. After all, there’s no shortage of people to befriend who want nothing more than to show off their Makerbot/RepRap/etc.


Filed under: robots hacks