

Oscilloscope Christmas Tree
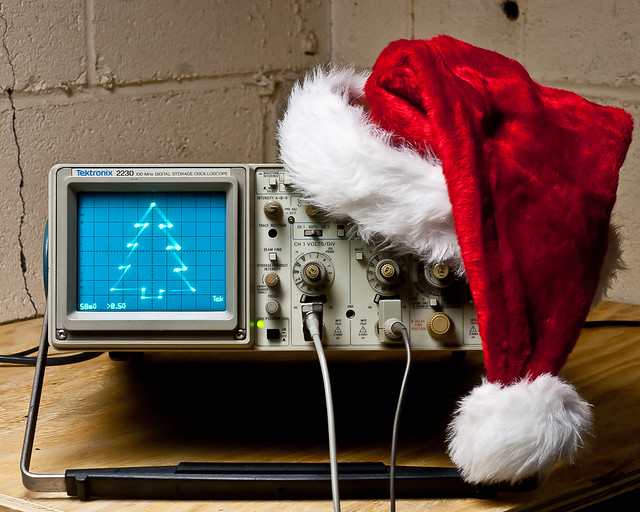

When I was a little kid, my dad worked at Bell Labs. Every year around Christmas, we’d go visit him at work. One memory which has always stuck with me from my holiday visits was seeing a Christmas tree on an oscilloscope. I was pretty amazed by it. Engineers are a funny bunch — they tend to celebrate holidays in the most uniquely nerdy and wonderful ways, just like kids. When I recently acquired a new ‘scope and wanted to familiarize myself with it, I knew exactly what my test circuit was going to be.
In honor of the nameless BTL engineer whose scope scribbling captivated me as a child, here we are. Maybe the same thing will happen for some other kid. There are a lot of holiday parties coming up. You could put this on one of your scopes at work or at your hackerspace, and some other kid will see it, and it’ll fire their imagination too. It looks pretty neat at any rate, and it’s downright fascinating after a few fortified egg nogs.
While I suspect the original was built with 74xx logic circuits, or maybe a couple 555′s (you could easily make a Christmas tree shape by combining triangle (x) and sawtooth (y) waveforms), this one uses an AVR ATTiny2313. (I used my handy BB313 board). You could do this with an Arduino too (that is covered below) — pretty much anything that has an 8-bit timer with dual PWM outputs will do the job. The discussion will apply regardless of the implementation (though the numbers might change).
Before you continue, bear in mind that I assume you already know how to use an oscilloscope: how to attach the probes, adjust the voltage ranges, put it in XY mode, etc.
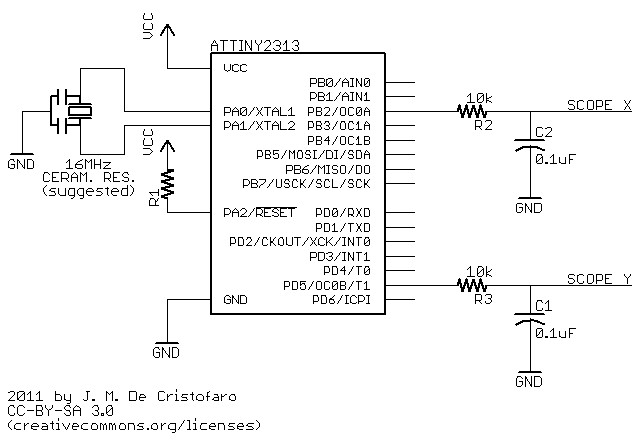
The ATTiny code is here, and this is the schematic for the circuit:
How it works:
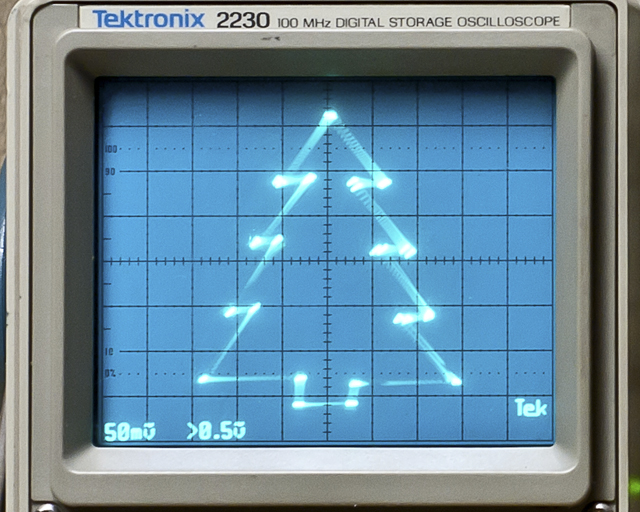
The PWM outputs feed two RC low-pass filter circuits, with a time constant chosen to effectively suppress the jitter from the rectangular waveforms. The PWM outputs (and hence the DC components of the signals) jump from one point in the drawing to the next; in order to actually draw lines to make the tree shape, you have to interpolate between those points. The delay between one ‘drawing’ point and the next has to be chosen to allow the charge/discharge curve of the RC circuit to do the interpolation. You’ll notice in the photo above that the ‘straight’ lines are slightly curved. This is the because the jumps in x don’t quite equal the jumps in y. You’ll also notice that the tree appears a bit crooked. This is the result of the RC curve not settling out completely before the next transition — the voltages never quite get to where they’re supposed to go before they switch to a new value. Personally, I rather like these imperfections — the tree has a hand-drawn quality to it, like a homemade ornament. You could make the lines straighter and the drawing more uniform by using a longer delay, but it will lower the overall refresh rate, resulting in noticeable flicker. How you draw your oscilloscope Christmas tree says a lot about your personality.
The ATTiny’s clock is running off of a ceramic resonator at 16MHz. The PWM frequency is 16MHz/256 or 62.5kHz. The corner frequency of the filter is 160Hz, which is about 8.5 octaves (2.5 decades) below that. I used 10k resistors and 0.1uF caps here — you could also use any other “equivalent” RC combo (100k/0.01uF or 1k/1uF, etc.) If you choose to use a chip with a different clock frequency, then you’ll have to adjust the RC circuit accordingly.
Reducing the capacitor values (or increasing the resistor values) will shift the corner frequency of the filter up, and you’ll start to see the lines get crooked, like resistors in a schematic. These are triangle waves resulting from filtering the rectangular PWM signal. This can look pretty cool too, actually, as below where I switched to 0.022uF capacitors.
Now the tree has needles, and all it took was changing the coefficients of a partial differential equation — easy! (this might be a great way to introduce a kid to the concept of filtering — just sayin’).
Arduino Implementation:
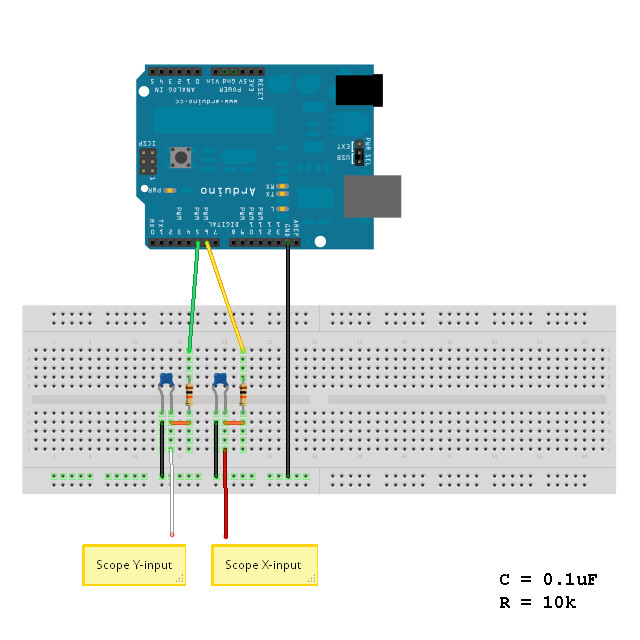
Doing this on an Arduino isn’t much different than using the ATTiny, except that it’s more expensive and instead of a real schematic, you have to read this ridiculous handy cartoon (above).*
The Arduino code is here. It uses no libraries, so all you have to do is extract the folder into your Arduino directory, set up your oscilloscope and load the sketch.
Possible alternative methods:
- If you really, really want a perfect, orthogonal tree, you can use an R2R ladder or dedicated DAC/soundcard to generate the control voltages.
- You can get straighter lines if you use a current mirror to feed the RC circuit, thus making it a “true” integrator with a straight-line slope.
- If you want to increase the refresh rate, you could set an upper limit on the 8-bit timer to a lower value, say 64, and set all your points therein. Note on the ATTiny you’ll probably have to do this using an interrupt from the other timer, but it would give you faster PWM output, which means you can use a smaller filter time constant and thus a higher refresh rate.
- …or, you could overclock the AVR (you know you’ve always wanted to).
- As I mentioned in the beginning, you might be able to do something like this with a couple of 555′s generating triangle and sawtooth waveforms. If you get their phases matched correctly and with the right frequency ratio, you could have a pretty nice looking tree!
Be as creative as you like with it — I hope you enjoy making it work for you.
Merry Christmas!
*just kidding — I love Arduino! Buon Natale!
UPDATE – Several folks have done this themselves and written in:
EmbeddedEric did an awesome Frosty the Snowman with his daughters.
aussie_nick did one using a DSO.
Goran did one for the Calgary On-Air Engineers.
Gordon Pearce took it to the next level with animation using sine functions:
Nice!
[original story: johnginneer]