Posts with «food & cooking» label

How to make the most of that Instant Pot you just bought

Few kitchen appliances have reached the same cult status as the Instant Pot. With 1.9 million members on the official Instant Pot Facebook group, more than 100 fan-created online groups, around 30,000 reviews on Amazon and accolades from the likes of TheNew York Times, it's no question that this kitchen marvel is a hit.

It's a winner with the Engadget staff, too; not only have a few of us bought it for ourselves, we've recommended it in past gift guides. Sure, it's not a tech gadget per se (although there is a "smart" edition with an app and Google Assistant), but it does have a lot of crossover appeal thanks to its promise of all-in-one efficiency.

But what do you do when you get one? With so many recipes on the internet and so many different things you can do with it, where do you even start? In this guide, I'll attempt to give you a primer on the first steps you should take when you get one, some tips and tricks on how to use it and a few favorite recipes and source links. A lot of this comes from personal experience; I've been an Instant Pot owner for a few years. I'll also note that the listed recipes lean toward my own taste, but hopefully this guide will provide a good start for your own culinary adventures.

How Instant Pots work

If you're reading this, you probably already know what an Instant Pot is, but just in case you don't, here's a brief introduction. The Instant Pot is an "all-in-one" kitchen gadget that promises to replace a rice cooker, a yogurt maker and a slow cooker; it also lets you sauté and steam foods. But the real reason the Instant Pot has risen to fame is that it's also a very good electric pressure cooker. This lets you cook food at an accelerated rate; imagine pulled pork in an hour instead of five or a chicken curry done in 10 minutes. And because it's electric, you just press a few buttons and walk away. Unlike a stovetop pressure cooker, there's no need to keep a constant eye on it.

There are a bunch of Instant Pot models to choose from. Some of the lower-end ones lack the yogurt-maker, and a couple of the higher-end models have extra features like sous-vide cooking and canning, but all have the electric pressure cooker function, so much of this guide will focus on that. The Instant Pot comes in 3-, 6- and 8-quart sizes. Unless you're only cooking for yourself or you have a large family, I think the 6-quart model should work for most people.

Buy Instant Pot Duo at Amazon - $89

A brief word on other Instant Pot models: 

  • The Duo Plus (starting at $100) is an upgraded version of the Duo Series. It has two additional functions: sous vide (for temperature-controlled cooking) and sterilizer (a steam shortcut for sterilizing items like baby bottles). There’s also a cooking progress status bar plus an anti-spin design that keeps the inner pot in place when you’re sauteing.

  • The Pro (starting at $115) is designed for the serious cooking enthusiast, with plenty of upgrades over existing Instant Pots. The inner pot has an extra thick bottom that can go on the stove, plus it has handles so it’s easier to lift. It comes with 28 customizable programs for different foods, and there are five favorites buttons that you can assign to frequently cooked meals. The steam release switch has been upgraded to reduce noise and splatter, and there are even steam release reminder alerts with 5- and 10-minute pre-sets. The Pro is also one of a few Instant Pots compatible with an optional QuickCool lid that helps you release pressure faster.

  • The Duo Crisp + Air Fryer ($180) is basically an Instant Pot that comes with an additional Air Fryer Lid, which adds dry-heat cooking methods like baking, broiling, dehydrating and of course air-frying. There’s also a Pro version of this Instant Pot ($200) that pairs the air fryer lid with the Pro model mentioned above.

  • The Star Wars Instant Pots ($100) are a great choice for the Star Wars enthusiast or just anyone who wants a fun and unique kitchen appliance. They’re really just rebranded versions of the Duo, with the same exact functionalities and features. They come in five iterations: Little Bounty, Darth Vader, Stormtrooper, BB-8, and R2-D2.

Which Instant Pot model is right for you?

  • The 6-quart Instant Pot is ideal for most people, but if you’re a singleton or a student, then the 3-quart model is best. For large families, or simply those who like to make a lot of food, then the 8-quart model is a good choice.

  • If you’re interested in diving into sous vide but don’t want to make an investment in a separate machine just for that, then the Instant Pot Smart WiFi, Ultra, Duo Crisp or the Duo Plus are good choices.

  • If you’re really into pressure-canning and preserving foods, then the Instant Pot Max is the one for you. It’s the only one that’s capable of reaching 15 PSI, which is needed for pressure-canning.

  • Making yogurt with the Instant Pot is really easy because it can maintain the same temperature for hours. Models that have this feature include the Duo, Duo Nova, Smart WiFi, Ultra and Duo Plus.


Getting started

With any appliance, I would suggest reading the instructions to get a full idea of how to use it, but here's a brief primer.

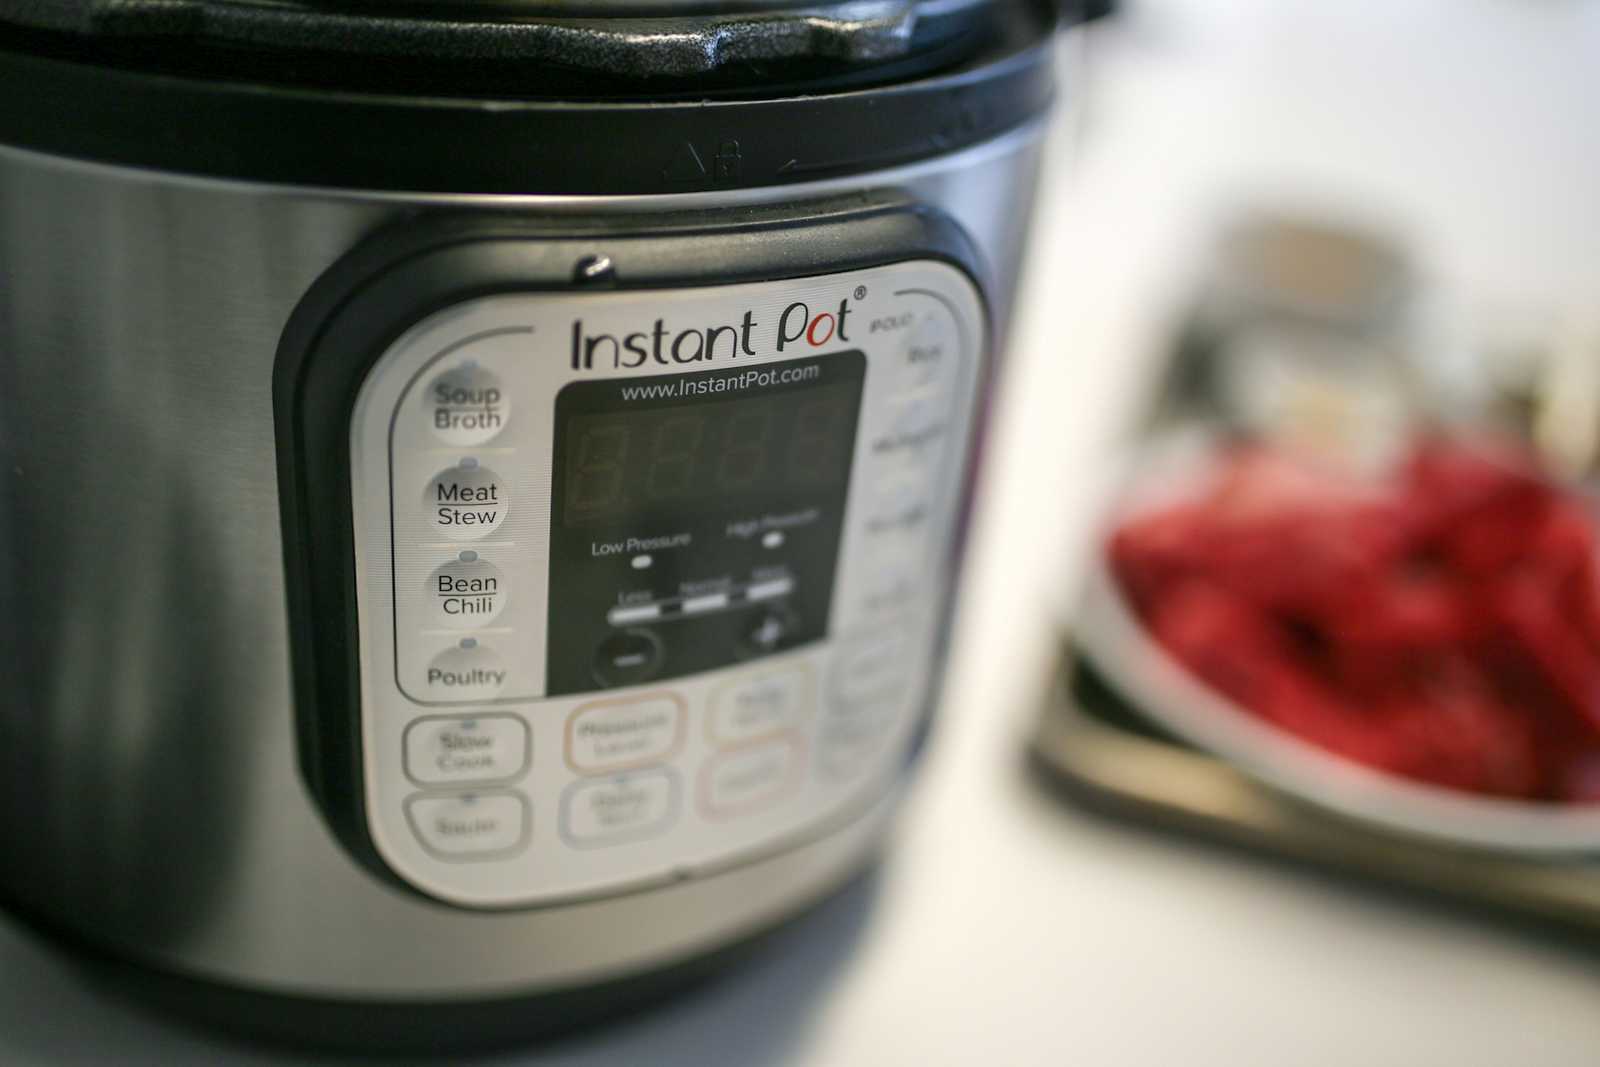
The Instant Pot has three parts: the housing with the cooking element at the bottom; the stainless steel inner pot; and the lid, which comes with a sealing ring plus a steam-release valve. Setup is as easy as putting the inner pot inside the housing and plugging it in. You'll also want to attach a tiny condensation collector on the back if the instructions call for it.

The first thing to do is a "water test," which not only helps familiarize you with the basic pressure-cooker features but will confirm your appliance is in proper working order.

To do a water test, put three cups of water in the pot, twist the lid on — it'll make a sound when it's locked in place — and set the pressure cooker on high for two minutes. The way to do this varies from model to model; on the Duo machines, you'll have to press Manual, select High, then dial down the time to two minutes. On something like the Ultra, you just need to go to the Pressure Cooker menu, dial it to two minutes and select High.

Then make sure your valve is set to "Sealing" so that the Instant Pot can build pressure. On the Duo machines, this means rotating it so the arrow points up, while on the Ultra, the valve will automatically be set to Sealing.

Then press "Start." From there, the Instant Pot will build up that pressure to High, maintain it for the set two minutes, and then stop. In some cases, you'll hear hissing and see steam coming out of the Instant Pot. This is totally normal. You'll know the Instant Pot is under pressure when the float valve pops up and the hissing quiets down.

The lid cannot be opened when the Instant Pot is under pressure. You must depressurize it first. Once the cooking is done, you can let the pot naturally depressurize (also known as "Natural Release"), which simply means leaving it alone for 20 or so minutes until the float valve comes down.

Or you can do a manual release (also known as "Quick Release") by switching that aforementioned valve to "Venting." To do that on the Duo models, you rotate the valve, while on the Ultra, you'll press a steam release button on the top. This method will release a lot of steam, so I suggest doing this under a range hood if you have one. Again, once the float valve comes back down, you'll know the Instant Pot has been depressurized.

Doing the water test teaches you the basics of sealing the Instant Pot, setting it and depressurizing it. Plus, if anything goes wrong along the way — especially if it doesn't seal the pressure — you can call the retailer or manufacturer to troubleshoot or ask about a return or exchange. It's a step that many people skip, but I recommend it, especially if you're a beginner.

Instant Pot accessories

The Instant Pot is ready to use right out of the box, but if you want to get even more functionality out of it, then you might want to consider some accessories. The following are just a few suggestions that we think will elevate your Instant Pot experience.

Tempered glass lid

The main reason to get an Instant Pot is to use it as a pressure cooker, but it has other functions too. If you want to use it as a slow cooker or you simply want to keep your food warm, then you’ll want to invest in a tempered glass lid. This lid will also keep your food covered if you want to transfer the inner pot to the table or the fridge. 

Buy glass lid at Amazon - $15

Steamers/PIP

Steaming food in the Instant Pot is quick and easy, but you’ll want specific equipment to get the job done right. Instant Pot makes two styles of silicone steamers; one is a stacking model that you can use for dumplings or fish, and another is a collapsible one that is ideal for batch-cooking vegetables. If you need even more capacity, we recommend this Hatrigo mesh steamer basket

Along your Instant Pot discovery journey, you might come across a phrase called “PIP cooking.” This stands for Pot-in-Pot and involves putting another vessel inside the Instant Pot. This method is great if you’re cooking foods that don’t contain liquid (such as cheesecake) or you simply want to cook in smaller quantities. One of our favorite accessories for this is the Aozita Stackable Steamer, which not only acts as a steamer, but also contains tiered containers so that you could cook multiple foods at once. 

Buy stackable steamer basket at Amazon - $10Buy steamer basket at Amazon - $15Buy Hatrigo steamer basket at Amazon - $18Buy Aozita stackable steamers at Amazon - $30

Sealing ring

If you use your Instant Pot for both savory and sweet applications, then we suggest getting extra sealing rings so that the odor of one doesn’t affect the other. You don’t really want your cheesecake to smell like pulled pork or vice versa. 

Buy sealing rings at Amazon - $12

Air fryer lid

As the name suggests, the Instant Pot Air Fryer Lid essentially turns your Instant Pot into an air fryer. It’s a good option if you don’t want two appliances taking up space on your kitchen counter, and this add-on does a decent job of “air frying” foods

Yet, after using it for a few months, I don’t quite recommend it if you plan on cooking a lot of meals this way. The non-stick coating on the fry basket can flake off if placed in the dishwasher, and as I’ve discovered, it accumulates a sticky film that is almost impossible to wash off. Plus, as I said in an earlier hands-on, the Lid really only works for small batches as well as smaller pieces of food. Even a hot dog is too large to fit inside the air fryer basket. 

If you’re going to use the air-fryer lid to add roasting and broiling capabilities to the Instant Pot — so you can brown a roast chicken or melt the cheese on a lasagna, for example — then it’s not a bad option. But as far as air-frying goes, I’d probably save up and invest in an actual convection toaster oven rather than settle for the lid.

Tips and tricks

Let's go over a few tips and tricks on how to best use the Instant Pot. This is not an exhaustive list, as different people might have different takeaways from their usage of the Instant Pot, but these insights are what I found works best for me.

Don't worry about all the buttons

When you first get the Instant Pot, you might be overwhelmed by all of the different buttons on the front of it. There are ones that say "Meat/Stew," "Chili/Beans," "Multigrain," "Egg" and even "Cake." With the exception of a few, most of these are simply shortcuts that Instant Pot programmed ahead of time. You might never need to use them.

The most important buttons to know are "Sauté," which (as you might expect) lets you sauté things in the pot, and the aforementioned "Manual" or "Pressure Cooker" function. The rest are pretty superfluous, with the exception of "Keep Warm," "Cancel" and non-pressure cooker functions like the "Slow Cooker" or "Yogurt" (which helps maintain the cultured milk at a specific temperature).

Add at least half a cup of liquid, and don't go over the maximum

One of the things you'll learn about pressure cooking is that you don't need to add as much liquid like you would in regular recipes. But you'll still need to add some liquid because the pressure cooker requires some moisture to build that pressure. Otherwise, the Instant Pot could overheat and show an "OvHT" error on the display. On the other hand, you shouldn't fill it up beyond two-thirds capacity, which is handily marked on the inside of the inner pot. The Instant Pot probably won't explode on you — it has a lot of safety features to prevent that — but you probably shouldn't test its boundaries.

Cooking times aren't always accurate

Setting the pressure cooker timer for two minutes doesn't mean the entire cooking time is two minutes. You have to take into account the amount of time the Instant Pot needs to come to pressure and the time it'll need to depressurize. The more stuff you have in the pot (and the colder it is), the longer it'll take. Because of that, a "five-minute" chicken curry could really be more like 10 or 15 minutes from start to finish.

Clean it carefully and frequently

The inner pot is dishwasher safe, which is great, but the rest has to be cleaned by hand. Also, don't make the same mistake I did and accidentally spill something hot directly on the cooking element. The outer shell is hard to clean because you can't put it in the sink — electricity and water don't mix, after all — and you risk damaging the appliance. As for the lid, hand wash it after every use. You'll also notice after a while that the sealing ring — the rubber/silicone gasket on the inside of the lid — might develop an odd smell as it absorbs the scent of the food you're cooking. I recommend soaking it in a vinegar solution, or you could also put it on the top rack of your dishwasher for a couple of cycles.

Consider a separate sealing ring

If you find yourself cooking desserts in addition to savory meals — it's great for making cheesecakes and puddings — I recommend a separate sealing ring just for that. You probably don't want your cheesecake to smell like pulled pork, unless you're into that sort of thing.

You can't cook everything with it

Sure, you can cook everything from dog food to jam in the Instant Pot, but it's not a miracle worker. You can't deep fry in it. You can't bake a pie in it. Don't be ridiculous.

Recipes and guides

Now you're all ready to cook, and you're probably dying to know what to make in your newfangled machine. Due to the popularity of the Instant Pot, you'll find no shortage of cookbooks and recipe tutorials online. That aforementioned Facebook group is a good place to start, and there are numerous YouTube videos that are helpful as well. Here are just a few of my favorites:

Pressure Cook Recipes

Amy and Jacky are part of the OG Instant Pot community, and their site is great for beginners. Not only will you get the low-down on the aforementioned water test, but you'll also get great recipes for bone broth, "fail-proof" rice, yogurt, cheesecake and more.

Nom Nom Paleo

Whether or not you're into the "paleo" lifestyle, you'll like Michelle Tam's list of Instant Pot recipes. Pressure cookers are great for shortening the amount of time for cooking braised meats, and she has a lot of recipes that cater to your inner carnivore. Her Instant Pot pulled pork recipe is still my go-to, and the short ribs are great as well.

Serious Eats

My personal favorite site for pressure-cooker recipes is probably Serious Eats. All of these recipes are fantastic. I've tried the chicken stock, the mushroom risotto, the chicken pho, the chicken and chickpea masala, and they've all been outstanding.

The New York Times

Another personal favorite is The New York Times cooking section, which has a list of wonderful pressure-cooker-friendly recipes. My favorites are from Melissa Clark, who has written two Instant Pot cookbooks: Dinner In an Instant and Comfort in an Instant. There's a recipe in Comfort in an Instant for spaghetti and meatballs that I was hugely skeptical of but turned out to be one of the most amazing things I've ever made. I also love the recipes for chicken korma and shrimp biryani.

Tiller & Hatch

If you’re at a complete loss with what to do with your Instant Pot, then we recommend trying out products from Tiller & Hatch, a company that specializes in pressure cooker-ready frozen meals. Simply unload the contents of a bag into your Instant Pot, follow the instructions and you’ll have dinner in minutes. Some of the meals are better than others — I prefer the minestrone soup over the gnocchi — but on the whole I think they’re a pretty good value. Each bag costs around $16 and has four servings each. You can sign up for a subscription plan on the website, or pick up individual meals from select Wal-Mart and Target locations.

Other sources

Here are a few other guides that I found very useful in my own Instant Pot journey, and they contain links to many more recipes and sites than I have space for here:

With all of this information in your arsenal, you should have no fear in picking up an Instant Pot. Thankfully, not only is the base model pretty affordable at less than $100, Amazon frequently puts it on sale either on Prime Day or on Black Friday. So if you haven't bought one just yet, it's not a bad idea to wait until one of those times of year to get one at a deep discount. And when you do, come on back here, read through the guide once more and venture off on your own pressure-filled culinary adventures.

Images: Detroit Free Press via Getty Images (First Instapot); Portland Press Herald via Getty Images (Instapot / chopping board); Boogich via Getty Images (cooking)

Impossible's plant-based nuggets are now available in select restaurants

Though it was teased earlier this year, Impossible Foods officially launched its plant-based “chicken” nuggets today. Mostly made out of soy protein and sunflower oil, the “Impossible Chicken Nuggets” will initially be available in select restaurants across the country, and then sold in grocery stores in the frozen aisle later this month.

Some of the restaurants that will be serving the Impossible Nuggets include David Chang’s Fuku in New York City, Marcus Samuelsson’s Red Rooster in Harlem and Miami, Sean Brock’s Joyland in Nashville, Tal Ronnen’s Crossroads Kitchen in Los Angeles and Traci Des Jardins’ El Alto Jr., a new pop-up at State Street Market in Los Altos, California. Regional chains such as LA-based Fatburger and Bay Area-based Gott’s Roadside will also add the nuggets to their menus this week.

I tried out the nuggets a few days ago at the Gott’s Roadside located in the Ferry Building in San Francisco. They were absolutely delicious, with a crispy well-seasoned breading and a juicy, moist interior. Fresh out of the fryer, they definitely tasted better than the “chik’n” nuggets from the likes of Gardein or Boca Burgers. They didn’t taste exactly like chicken either, but they were close enough that I didn’t mind. In fact, when dipped in various sauces (Gott’s serves them with ranch, ketchup and honey mustard), they were indistinguishable from the real deal.

Engadget

According to Impossible, the nuggets have 40 percent less saturated fat and 25 percent less sodium than animal-based chicken nuggets. “Our technology platform allows us to recreate animal products across protein categories that outperform the animal versions in every way,” said President of Impossible Foods Dennis Woodside in a statement.

An Impossible spokesperson said that the nuggets are made from a combination of protein, fats and nutrients: “We use soy protein as our base to give the nuggets the right bite and to provide high quality protein that is important for our diet. After that, we use sunflower oil to create the fatty and juicy mouthfeel, simple nutrients such as amino acids and sugars that react during cooking to create our savory chicken flavor, and vitamins for nutrition. We also use common culinary ingredients such as starch and methylcellulose to hold the product together and retain moisture, which have the added benefit of more fiber compared to animal meat.”

Impossible certainly isn’t the first company to come out with faux chicken nuggets. Its main rival, Beyond, debuted a line of “chicken” tenders a few months ago, and of course, companies like the aforementioned Gardein and Boca have been making faux nuggets for years. But seeing as chicken is a hugely popular protein source, having more companies produce plant-based alternatives for it is not a bad idea.

According to Impossible, the nuggets you get in the restaurant aren’t very different from the ones you’ll get in the grocery store. The primary difference is in the breading; the foodservice version is designed to be prepared in a commercial deep fryer, while the grocery store ones can be made in the oven, microwave or air fryer. The nuggets are already pre-cooked.

Speaking of the grocery store, the nuggets will be available in the frozen aisle of retailers such as Walmart, Albertsons, Kroger, Gelsons, Safeway, Shoprite and Giant locations across the country later this month. They’re priced at $7.99 (MSRP) for around 20 pieces (13.5 ounces), and come in a resealable freezer bag.

Turns out, I like cooking food from scratch... in a microwave

I’m a sucker for newfangled kitchen appliances. I bought into the Instant Pot hype a few years ago and tried out an air fryer as well. (I ended up getting the Breville Smart Oven Air, a toaster oven with an air-frying setting.) I also own a host of other contraptions cluttering up my kitchen cabinets: a juicer, food processor, ice cream maker and two sous vide machines.

Yet, the appliance I use the most is the humble microwave. Like many of you, I use it mainly for reheating leftovers or warming up frozen dinners. I’ve never really considered using it for actual cooking, except for the occasional “microwave mug cake” recipe I’ve seen go viral on social media. Oh, I’ve heard of cookbooks from the ‘70s and ‘80s that tried to sell the public on the wonders of microwave cooking — I’m sure my mom even bought a few back in my youth — but those have largely turned out to be full of culinary deception. (A roast beef dinner via microwave? I don’t think so.)

But a few months ago I saw an Instagram ad for a new line of cookware that was designed to be used specifically with the microwave. It’s called Anyday, and it was co-founded by renowned chef David Chang of Momofuku and Ugly Delicious fame. The ad showed luscious photos of mashed potatoes, mapo tofu, mac and cheese, and a chicken and pea dish that all looked really delicious. Could all of this really be made with just the microwave? Perhaps the best kitchen appliance was under my nose all along? Needless to say, I was intrigued.

Engadget

According to Anyday, the main thing differentiating its cookware from regular microwave-safe containers is its glass lid. It has a silicone gasket that blocks splatters and keeps moisture in, as well as a knob at the top that can be pulled out for steam to escape through air vents. The knob can also be pushed down to create an airtight leakproof seal, at which point the containers are also stackable. In contrast, my existing set of Pyrex containers just have regular plastic lids, which even the manufacturer recommends shouldn’t be used in the microwave since they can warp.

I should note here that the Anyday lids do have stainless steel rims, which you might think is a little dangerous to put in the microwave. But they’re actually safe on account of their smooth, curved shape, which prevents arcing. The company does warn against heating up two dishes at once, however, as the combination of two stainless steel lids might result in sparks flying.

Also, the Anyday dishes themselves are made of a frosted borosilicate glass which can withstand large temperature fluctuations without cracking. This last part is important, as certain ceramics and glass aren’t completely microwave safe. For example, I tried heating up a potato once on a plate I bought from IKEA, and it ended up splitting in two. The plate, that is, not the potato.

Engadget

Still, I was a little skeptical. So I went ahead and purchased a full set of Anyday cookware just to try everything out. That’s four dishes total — shallow and deep in medium and large sizes — which is admittedly quite expensive at $120. Alternatively, you can get the medium set of two dishes for $55 or the large set for $75. You can also opt to buy each dish separately; the two medium ones go for $30 a piece while the large options are $40 a piece. That definitely makes this pretty pricey compared to an average set of microwave-safe containers — a full 18-piece Snapware Pyrex set, for example, is just $30.

The Anyday set comes with several recipe cards, which are very handy to start out with, but the best place to find recipes is on the Anyday website. You’ll find everything from one-ingredient recipes (e.g., you just want to steam some rice) to full recipes such as black bean soup and squash curry. On each recipe page, you can select your desired serving size as well as the wattage of your specific microwave oven, which will determine variables such as dish size, cook time and what power level you should use.

I’ve used the Anyday cookware for several weeks now, and I’ve actually been mostly impressed with the results. The first recipe I tried was a chicken and rice meal with peas and marinara sauce. I was nervous about whether it would work, but it turned out to be delicious, with the chicken cooked through to the bone and the rice tender and fluffy. The Thai pineapple chicken recipe also worked out well. I think I would’ve preferred it if the onions were browned and caramelized like they would be on the stove, but for microwave cooking, it was completely satisfactory.

Engadget

One dish in particular was a revelation for me: Silky Chinese steamed egg. This is a recipe that can be quite tricky to master on the stove, as you need to steam it slowly over a gentle heat. But in the microwave, it’s a matter of heating the custard solution at a lower power level for just four to five minutes, depending on your microwave wattage. (The company's site recommends Power Level 4.) I’ve never really fiddled around with my microwave’s power settings before, but now that I see it can result in a smooth custard, I will definitely be using it more often.

Another killer application, at least for me, is poached eggs. I usually find poaching eggs to be a bit of a chore; you have to heat up a pot of water, carefully drop in the egg and hope you’re able to rescue it when it’s done just right. It’s especially challenging when it’s six in the morning and I haven’t had my coffee just yet. But with the Anyday and the microwave, all I have to do is fill up a shallow dish with cold water straight from the tap, crack an egg into it, cover it, nuke it for two minutes and it’s done. The yolk is cooked just enough so that it’s a little runny, which is how I like it. I almost couldn’t believe it.

The experience wasn’t perfect, however. For example, I tried using the Anyday to cook white rice, and even though I followed the recipe exactly, the water in the dish boiled over, pushing the lid up and spilling out into the microwave. As a result, the rice wasn’t cooked correctly, and I had to add the water back in and cook it further. I tried cooking the rice in a much larger dish later on and it worked out better, but I wish the site had suggested that instead of me finding out on my own.

Engadget

Speaking of the recipes, I should note that not all microwave ovens are the same, even among those with the same wattage. My microwave, for example, is apparently more powerful than normal, and it took way less time for me to steam broccoli than the site recommended. I also found that not all microwave ovens' power levels are the same either. My Power Level 4 could be your Power Level 3. I definitely had to play around with different variables in order to get certain foods to cook properly.

Plus, there are certain kinds of cooking that the microwave just cannot do. You’re just not going to get the same kind of browning that you can get on the stove or in the oven. You can’t use it to deep fry or roast or bake. What you’re basically doing is steaming food, albeit in a more controlled way. The microwave won’t replace your stove or your oven or your Instant Pot completely.

But, for all its flaws, I still think the Anyday cookware is great. It’s made me realize that the microwave has a lot more uses than just reheating leftovers. It’s opened up a whole new world of culinary possibilities that I had not realized existed before. Sure, the mac and cheese I made in the microwave won’t be as amazing as the one baked in the oven, but the former can be done in under 10 minutes, and it still tastes creamy and cheesy. I’ve also made instant ramen in the Anyday and the microwave to great success.

It might not make the best food you’ve ever tasted, but for college students and time-pressed parents and professionals, the microwave might just be the most versatile appliance in the kitchen. As long as you have the right cookware for it anyway.

Hitting the Books: The correct way to make coffee, according to science

The best part of waking up is, of course, hot bean juice in your cup. But, as Dr. Kate "The Chemist" Biberdorf explains in her new book It's Elemental, if you want to consistently enjoy the best cuppa joe you can craft — perfectly caffeinated and not too bitter — a bit math is necessary. And it's not just coffee. Biberdorf takes readers on a journey through mundane moments of everyday life, illustrating how incredible they actually are — if you stop to examine about the chemistry behind them.  

Harper Collins

Excerpted from It’s Elemental by Kate Biberdorf, Copyright © 2021 by Kate Biberdorf. Published by Park Row Books.


Coffee and tea are much more potent sources of caffeine than soda. In one cup of coffee, you are likely to ingest around 100 mg of caffeine, but it can be up to 175 mg with the right coffee beans and technique. The whole process of making coffee beans (and coffee itself) is pretty fascinating if you’ve never given it much thought. For example, espresso makers and percolators get the most caffeine out of lighter roasted beans, but the drip method is the best way to get the most trimethylxanthine from darker beans. However, in general, light and dark roast coffees typically have the same relative number of caffeine molecules in each cup of coffee (excluding espressos).

Let’s look at the roasting processes to determine why that is. When the beans are initially heated, they absorb energy in what we call an endothermic process. However, at around 175°C (347°F), the process suddenly becomes exothermic. This means that the beans have absorbed so much heat that they now radiate the heat back into the atmosphere of the roasting machine. When this happens, the settings have to be adjusted on the equipment, in order to avoid over-roasting the beans (which sometimes results in burnt-tasting coffee). Some roasters will even toggle the beans between the endothermic and exothermic reaction a couple of times, to achieve different flavors.

Over time, roasting coffee beans slowly change from green to yellow, and then to a number of different shades of brown. We refer to the darkness of the bean as its “roast,” where the darker roasted coffee beans are much darker in color than the lighter roasted beans (surprise, surprise). Their color comes from the temperature at which they are roasted. Lighter beans are heated to about 200°C (392°F) and darker roasted beans to about 225–245°C (437–473°F).

But just before the beans start to, for lack of better words, lightly roast, the coffee beans go through their first “crack.” This is an audible process that occurs at 196°C (385°F). During this process, the beans absorb heat and double in size. But since the water molecules evaporate out of the bean when under high temperatures, they actually decrease in mass by about 15%.

After the first crack, the coffee beans are so dry that they stop readily absorbing heat. Instead, all of the thermal energy is now used to caramelize the sugars on the outside of the coffee bean. This means that the heat is used to break the bonds in the sucrose (sugar) into much smaller (and more fragrant) molecules. The lightest roasts—like cinnamon roast and New England roast—are heated just past the first crack before being removed from the coffee roaster.

There is a second crack that occurs during the roast, but at a much higher temperature. At 224°C (435°F), the coffee beans lose their structural integrity, and the bean itself starts to collapse. When this happens, you can usually hear it by a second “pop.” Dark roasts are typically categorized by any beans that have been heated past the second crack—like French and Italian roasts. In general, due to the hotter temperatures, darker beans tend to have more of their sugars caramelized, while lighter beans have less. The variation in flavor due to these methods is wild, but it doesn’t really affect how they react in the body— only the taste.

Once you purchase your perfectly roasted coffee beans, you can do the rest of the chemistry at home. With an inexpensive coffee grinder, you can grind up your coffee beans to a number of different sizes, which will definitely affect the taste of your morning coffee. Small, fine grinds have a lot of surface area, which means the caffeine (and other flavors) can be extracted from the miniaturized coffee beans with ease. However, this can often result in too much caffeine being extracted, which gives the coffee a bitter taste.

On the other hand, coffee beans can be coarsely ground. In this instance, the insides of the coffee beans are not exposed to nearly the same degree as finely ground coffee beans. The resulting coffee can often taste sour—and sometimes even a little salty. But if you partner up the correct size of coffee grounds with the appropriate brewing method, you can make yourself the world’s best cup of coffee.

The simplest (and easiest way) to brew coffee is to add extremely hot water to coarse coffee grounds. After they have soaked in the water for a few minutes, the liquid can be decanted from the container. This process, called decoction, uses hot water to dissolve the molecules within the coffee beans. Most current methods of coffee brewing utilize some version of decoction, which is what allows us to drink a cup of warm coffee instead of chomping on some roasted beans. However, since this method does not contain a filtration process, this version of coffee—affectionately referred to as cowboy coffee—is prone to having coffee bean floaters. For that reason, it’s usually not the preferred brewing method.

By the way, did you notice that I was avoiding the term boiling? If you’re trying to make halfway decent cup of coffee, the hot water should never actually be boiled. Instead, the ideal temperature of the water is around 96°C (205°F), which is just below boiling (100°C, 212°F). At 96°C, the molecules that provide the aroma of coffee begin to dissolve. Unfortunately, when the water is just four degrees hotter, the molecules that give coffee a bitter taste dissolve as well. That’s why coffee nerds and baristas are so obsessed with their water temperature. In my house, we even use an electric kettle that allows us to select whatever temperature we want our water to be.

Depending on how strong you like your coffee to taste, you may be partial to the French press or another steeping method. Like cowboy coffee, this technique also soaks the coffee grounds in hot water, but these grounds are a little smaller (coarse versus extra coarse). After a few minutes, a plunger is used to push all of the grounds to the bottom of the device. The remaining liquid above the grounds is now perfectly clear and deliciously tasty. Since the coarse coffee grounds are used in this method, more molecules can dissolve in the coffee solution, providing us with a more intense flavor (compared to cowboy coffee).

Another technique: when hot water is dripped over coffee grounds, the water absorbs the aromatic molecules before dripping into the coffee mug. This process, appropriately called the drip method, can be done manually or with a high-tech machine, like a coffee percolator. But sometimes this technique is used with cold water, which means that the fragrant, aromatic molecules (the ones that give your coffee its distinctive smell) cannot dissolve in the water. The result is called Dutch iced coffee, a drink that is ironically favored in Japan, and takes about two hours to prepare.

Impossible Foods chicken nuggets are coming this fall

Impossible Foods will debut plant-based chicken nuggets this fall, the company told Bloomberg on Friday. As with its past releases, the startup plans to first sell the food to restaurants, with supermarket availability to follow later. But before all that, it will debut them at a trade show next week.

One thing that will distinguish the nuggets from Impossible’s past products is the absence of heme, a molecule the company says is what makes “meat taste like meat.” But the problem with Impossible’s heme is that the company makes it with genetically engineered yeast. That’s something that has prevented Impossible from selling its burgers and sausages in China and throughout Europe. But when it comes to real chicken, there isn’t a lot of heme in the white meat of the animal. “We found in a nugget format, which is breaded and has some seasoning, it really wasn’t that necessary.” Laura Kilman, a flavor scientist with Impossible, told Bloomberg. The formula the company eventually settled on mostly makes use of soy protein and sunflower oil.

Compared to Beyond Meat, Impossible Foods is late to offer a chicken alternative. “We’ve been busy with other things,” Dennis Woodside, the company’s president, told Bloomberg. To that point, Impossible introduced a pork substitute at CES 2020

All the same, that might not matter much. Earlier in the week, Popeyes announced it was adding chicken nuggets to its menu in hopes of replicating the success of its chicken sandwich. The latter sparked a “war” between fast food chains as demand for chicken increased in the US and throughout the world. That's something that could help Impossible when its plant-based chicken starts making its way to consumers.