Posts with «due» label

A HID For Robots

Whether with projects featured here or out in the real world, we have a tendency to focus most upon the end product. The car, solar panel, or even robot. But there’s a lot more going on behind the scenes that needs to be taken care of as well, whether it’s fuel infrastructure to keep the car running, a semiconductor manufacturer to create silicon wafers, or a control system for the robot. This project is one of the latter: a human interface device for a robot arm that is completely DIY.

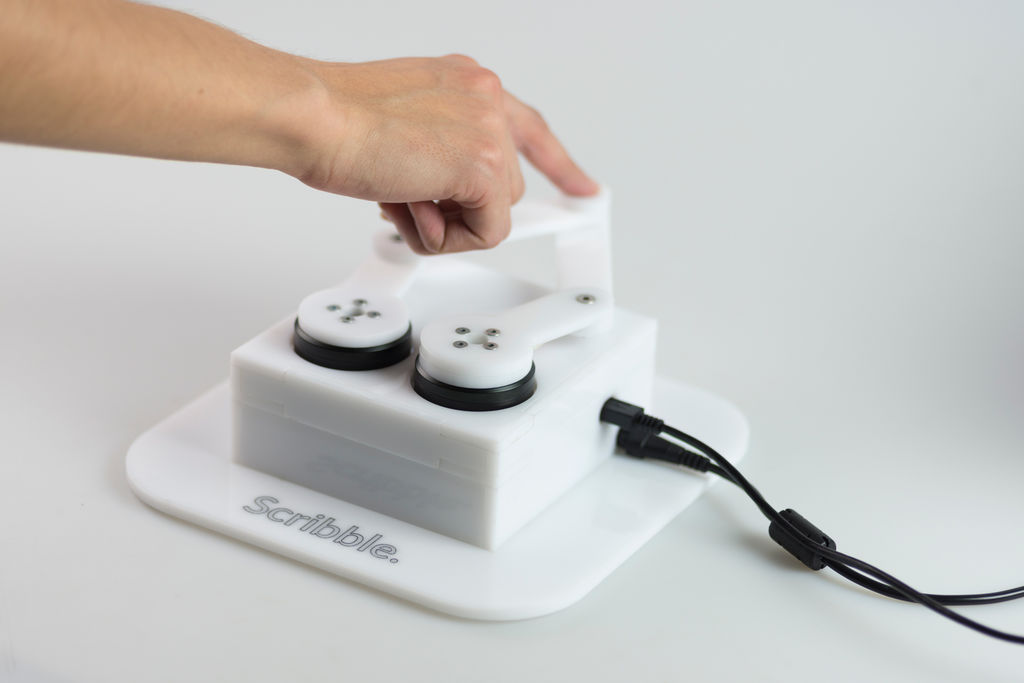
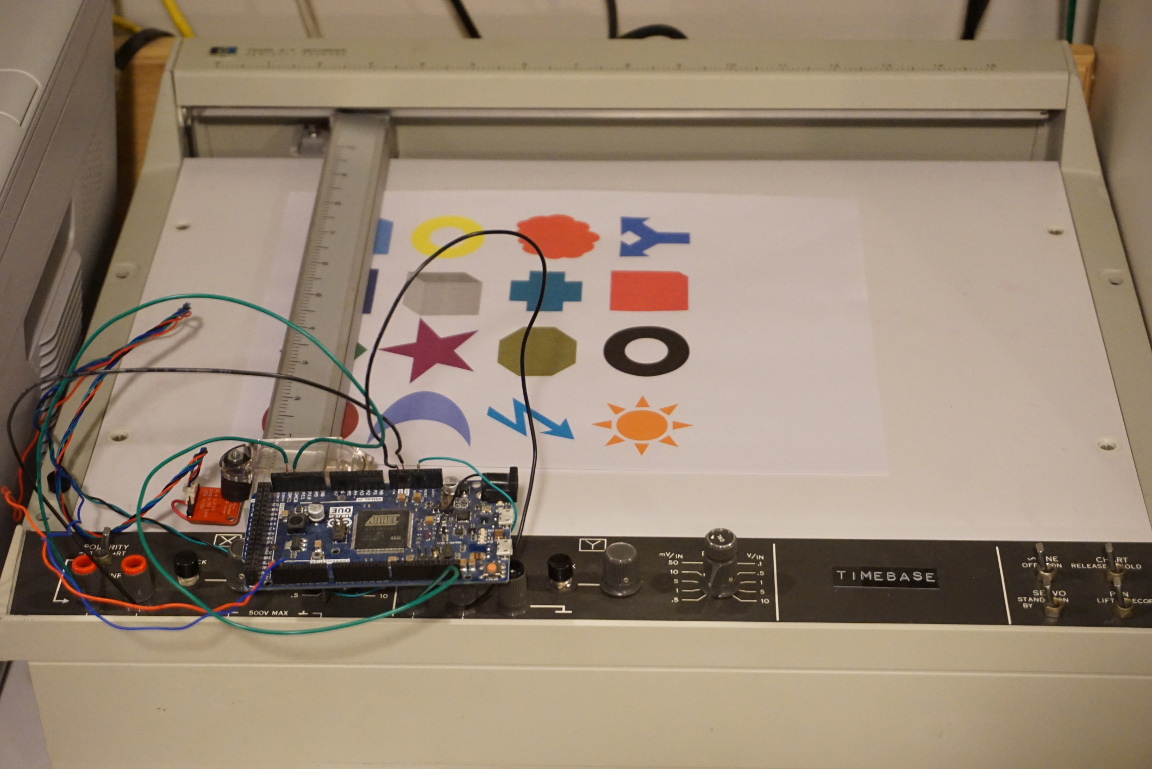
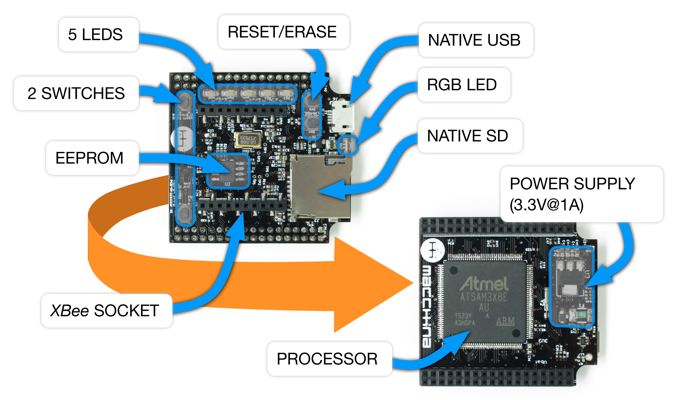
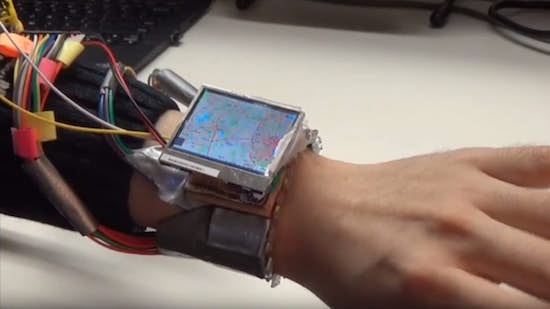
While robots are often automated, some still need human input. The human input can be required all the time, or can be used to teach the robot initially how to perform a task which will then be automated. This “keyboard” of sorts built by [Ahmed] comes with a joystick, potentiometer, and four switch inputs that are all fully programmable via an Arduino Due. With that, you can perform virtually any action with whatever type of robot you need, and since it’s based on an Arduino it would also be easy to expand.

The video below and project page have all the instructions and bill of materials if you want to roll out your own. It’s a pretty straightforward project but one that might be worth checking out since we don’t often feature controllers for other things, although we do see them sometimes for controlling telescopes rather than robots.


Hack a Day 02 Jun 06:00

Scribble is an Arduino-controlled haptic drawing robot

As part of his master’s studies at Eindhoven University, Felix Ros created a haptic drawing interface that uses a five-bar linkage system to not only take input from one’s finger, but also act as a feedback device via a pair of rotary outputs.

“Scribble” uses an Arduino Due to communicate with a computer, running software written in OpenFrameworks.

For over a century we have been driving cars, enabling us to roam our surroundings with little effort. Now with the introduction of automated driving, machines will become our chauffeurs. But how about getting us around a road construction, or finding a friend in a crowded area? Or what if you just want to explore and find new places, will these cars be able to handle such situations and how can you show your intentions?

Currently there is no middle ground between the car taking the wheel or its driver, this is where Scribble comes in: a haptic interface that lets you draw your way through traffic. You draw a path and the car will follow, not letting you drive but pilot the car. Scribble lets you help your car when in need, and wander your surroundings once again.

You can learn more about Ros’ design in his write-up here, including the code needed to calculate and output forward kinematics to set the X/Y position, and inverse kinematics to sense user input.

Be sure to check it out in the video below piloting a virtual car through traffic with ease!

Integrating a Nintendo Power Glove with today’s VR technology

When the Power Glove was released in the early 1990s, the idea that you could control games with hand motions was incredible, but like the Virtual Boy that followed years later, the hardware of the day just couldn’t keep up. Today, hardware has finally gotten to the point where this type of interface could be very useful, so Teague Labs decided to integrate a Power Glove with an HTC Vive VR headset.

While still under development, the glove’s finger sensors have shown great promise for interactions with virtual touchscreen devices, and they’ve even come up with a game where you have to counter rocks, paper, and scissors with the correct gesture.

Making this all possible is the Arduino Due, which supports the library for communicating with the Vive tracker.

We took a Power Glove apart, 3D scanned the interfacing plastic parts and built modified parts that hold the Vive Tracker and an Arduino Due on the glove. After some prototyping on a breadboard, we designed a shield for the Due and etched it using the laser-cutter transfer technique. We then soldered all components and spray-painted the whole shield to protect the bare copper. After mounting the tracker and tweaking the code by matzmann666, we had the glove work.

If you’d like to see the details of what has been accomplished so far, check out the Teague Labs team’s design files and code on GitHub.

Project Aslan is a 3D-printed robotic sign language translator

With the lack of people capable of turning written or spoken words into sign language in Belgium, University of Antwerp masters students Guy Fierens, Stijn Huys, and Jasper Slaets have decided to do something about it. They built a robot known as Aslan, or Antwerp’s Sign Language Actuating Node, that can translate text into finger-spelled letters and numbers.

Project Aslan–now in the form of a single robotic arm and hand–is made from 25 3D-printed parts and uses an Arduino Due, 16 servos, and three motor controllers. Because of its 3D-printed nature and the availability of other components used, the low-cost design will be able to be produced locally.

The robot works by receiving information from a local network, and checking for updated sign languages from all over the world. Users connected to the network can send messages, which then activate the hand, elbow, and finger joints to process the messages.

Although it is one arm now, work will continue with future masters students, focusing on expanding to a two-arm design, implementing a face, and even integrating a webcam into the system. For more info, you can visit the project’s website here as well as its write-up on 3D Hubs.

Ball-on-plate machine uses touchscreen position sensing

Redditor “xmajor9x” has spent several weeks building a three-legged machine to balance a metal ball on top of a plate. The device uses three servos attached to a rectangular surface with linkages that translate servo position into linear displacement of the table. This allows it to keep the ball centered, or rotate around the perimeter in a circle or square pattern.

An Arduino Due controls the ball using a PID loop, and the ball’s position is sensed not by an external camera, but by the top “plate,” which is actually made out of a resistive touchscreen. Although this adds a very unique element, it means that the ball on top must be quite heavy to be reliably tracked, and its creator is considering switching to a computer vision system in the future.

Be sure to check out the project’s GitHub page for code and more info on the build! <!–more–>

Arduino Blog 14 Jul 19:48

Building an Arduino-controlled single-pixel scanner

If you’ve seen color sensors such as the TCS34725,  you may have considered them for projects that can pick out one colored object over another. On the other hand, if you were to take one of these sensors, mount them to an Arduino-driven plotter, and then take readings in an X/Y plane, you’d have all the elements needed for a simple single-pixel scanner.

In the video seen below, Kerry D. Wong does just this using his hacked HP 7044A plotter to scan a picture, recording RGB color values in a 128 x 128 grid. As the device scans, the Arduino Due used for control passes these values to a computer, which assembles them together into a low-resolution image.

You can find more details on the project, including its code, in Wong’s blog post here.

Smartwatch convenience ‘moves’ to the next level

To address the limitations of today’s fixed-face watches, researchers have come up with an actuated smartphone concept that physically moves itself using an Arduino Due, Bluetooth and several motors.

Receiving Internet notifications has gone from using a computer, to checking them on your smartphone, to now simply seeing them come in on your wearable device. On the other hand, you still have to rotate your wrist into the right position to see the screen. Worse yet, if you want to show others what is on your wrist, you may even have to twist your arm awkwardly.

Fortunately, there is a possible solution to this scourge in the form of Cito, which bills itself as “An Actuated Smartwatch for Extended Interactions.” This design can move in five different directions–rotates, hinges, translates, orbits and rises–potentially making viewing more convenient, or even providing haptic feedback. Prototype electronics are housed inside a control box on the upper arm, but presumably would become much smaller in a production version.

You can see the team’s entire paper here, or read this write-up for a more involved summary.

Photo: Jun Gong

M2 by Macchina joins At Heart!

We’re excited to announce the latest member of Arduino’s AtHeart program. M2 by Macchinanow live on Kickstarter–is an open-source, versatile development platform for hacking and customizing cars.

M2’s design is compact, modular, wirelessly connectable, and built on the popular Arduino Due. The device can be wired under the hood for a more permanent installation or plugged into the OBD2 port, enabling you to do virtually anything with your vehicle’s software. 

Macchina, a Minnesota-based company, has partnered with Arduino, Digi and Digi-Key to develop M2, and believes that its highly-adaptable hardware will most benefit hot rodders, mechanics, students, security researchers, and entrepreneurs by providing them access to the inner workings of their rides.

M2 accommodates a wide variety of wireless options thanks to its Digi XBee form-factor socket, allowing you to easily connect your car to the Internet, smartphone, satellites, or the cloud using BLE, WiFi, GSM, LTE, and other modules.

The platform can be programmed using the latest Arduino IDE, and is compatible with a number of software packages. Moreover, given its open-source nature, potential applications are bounded only by the collective imagination of the coding community.

Interested? Check out Macchina’s Kickstarter page to learn more or pre-order your M2 today!

Roast coffee to perfection with an Arduino and Android app

After winning the South African National Barista Championship in 2009, Neil Maree decided to actually start a company to make coffee roasting equipment. Genio was the result, and after some work, his machines can now roast coffee to perfection using recipe input via an Android app.

Once instructions are transferred, a heavily modified Arduino Due controls the roaster depending on user preferences. Maree first tried an analog solution, then used a PLC before deciding that the Arduino was what he needed.

All of Genio’s roasters have a control panel with a variety of traditional switches and knobs, and then a not-so-traditional tablet mount. The app sends a “roast profile” to the roaster over a Bluetooth connection.

Perk your interest? You can take an inside look at the roasting machine factory on htxt.africa here.

Arduino Blog 14 Nov 18:24

Smartwatch prototype turns your wrist into a joystick

Although smartwatches were designed to be an easy-to-use alternative for your smartphone, interacting with their touchscreens still requires your opposite hand to be free. So what do you do when you’re carrying a bag of groceries or holding onto a bus handle?

This is the problem a Dartmouth-led team set out to solve with WristWhirl, a smartwatch prototype that uses the wrist wearing the device as a joystick to perform common touchscreen gestures with one-handed continuous input, while freeing up the other hand for other tasks.

WristWhirl was built using a two-inch TFT display and a plastic watch strap equipped with a dozen infrared proximity sensors and a piezo vibration sensor, which is connected to an Arduino Due board. Commands are then made by moving the hand as if it were operating a joystick, while a finger pinch turns the sensors on/off to indicate the start or end of a gesture.

For starters, the team implemented four sample applications with off-the-shelf games and Google Maps to illustrate potential use cases.

Four usage scenarios for WristWhirl were tested: 1) a gesture shortcuts app was created, which allowed users to access shortcuts by drawing gestures; 2) a music player app was created, which allowed users to scroll through songs through wrist-swipes and play a selected song by double tapping the thumb and index fingers; 3) a map app was implemented for which 2D maps could be panned and zoomed depending on where the watch was held in relation to one’s body; and 4) game input, which often requires continuous input was tested, for which Tetris was played using a combination of wrist swipes, wrist extension and wrist flexion.

You can read more about the project on its page here, as well as see a demonstration of it below!