

How to burn Arduino bootloader to atmega 328
In this post we will learn, how to burn hex file in avr microcontroller using programmer and burner software.
List of components/software:
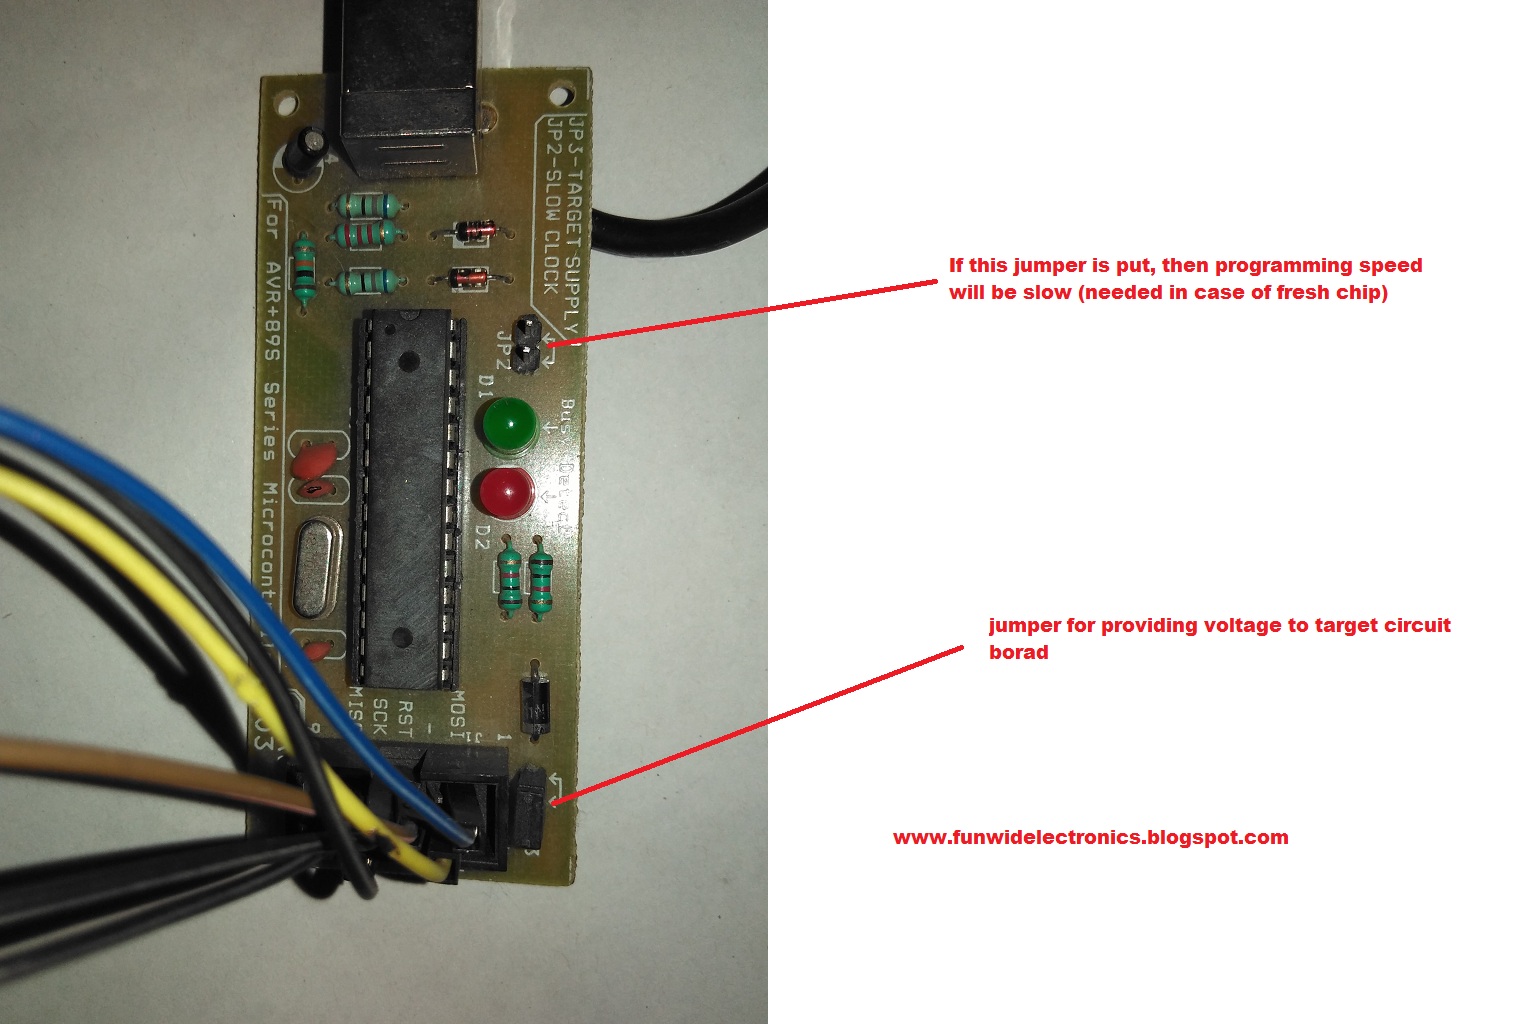
1. USBasp programmer
2. Target circuit board having microcontroller (mine have atmega328)
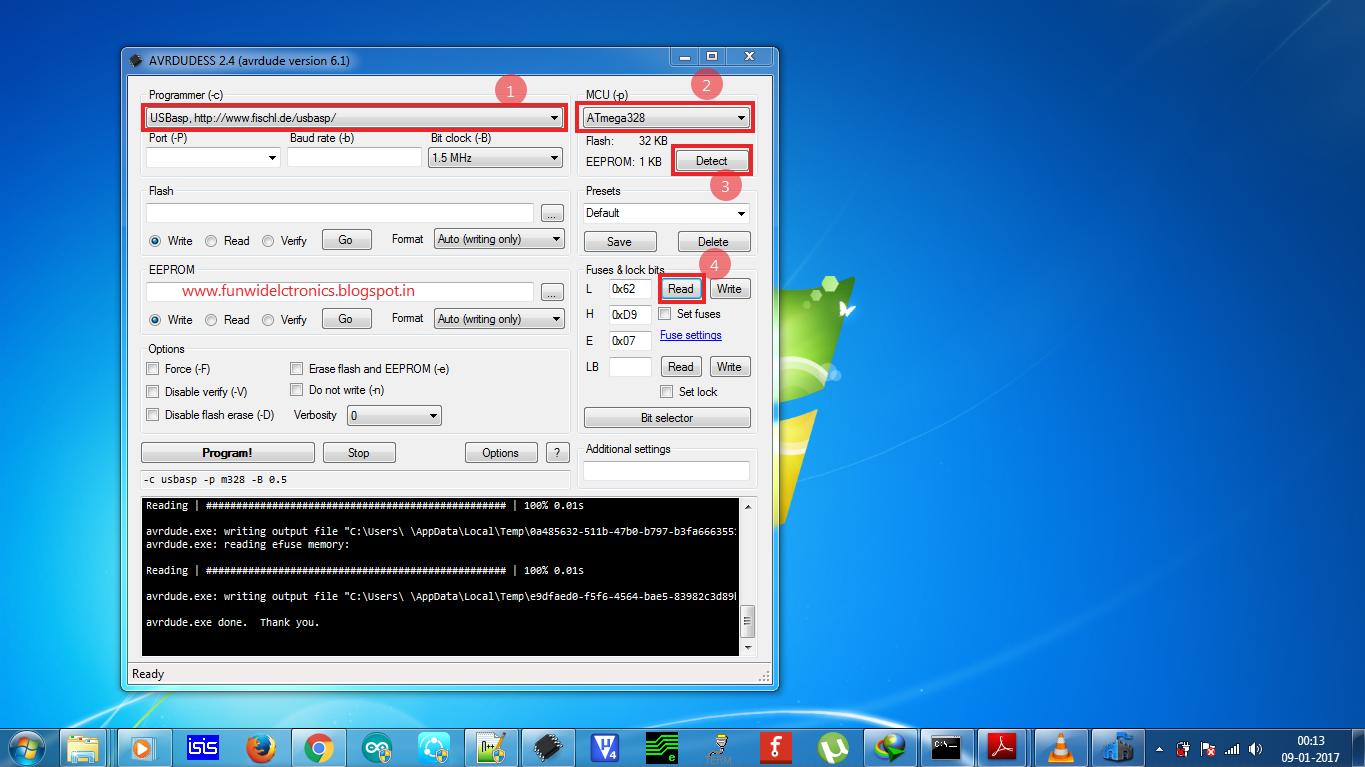
3. Avrdudes (Burner software)
Prerequisites:
USBasp driver installed in your system.
If it is not installed, then read instructions about installation from my previous post.
USBasp driver installation
Default fuse byte for atmega328 is: LFUSE = 0X62 and HFUSE = 0XD9. It might vary
This corresponds to internal rc oscillator
LFUSE = 0XFF and HFUSE = 0XDE
Change the fuse bytes:

Check out the video:
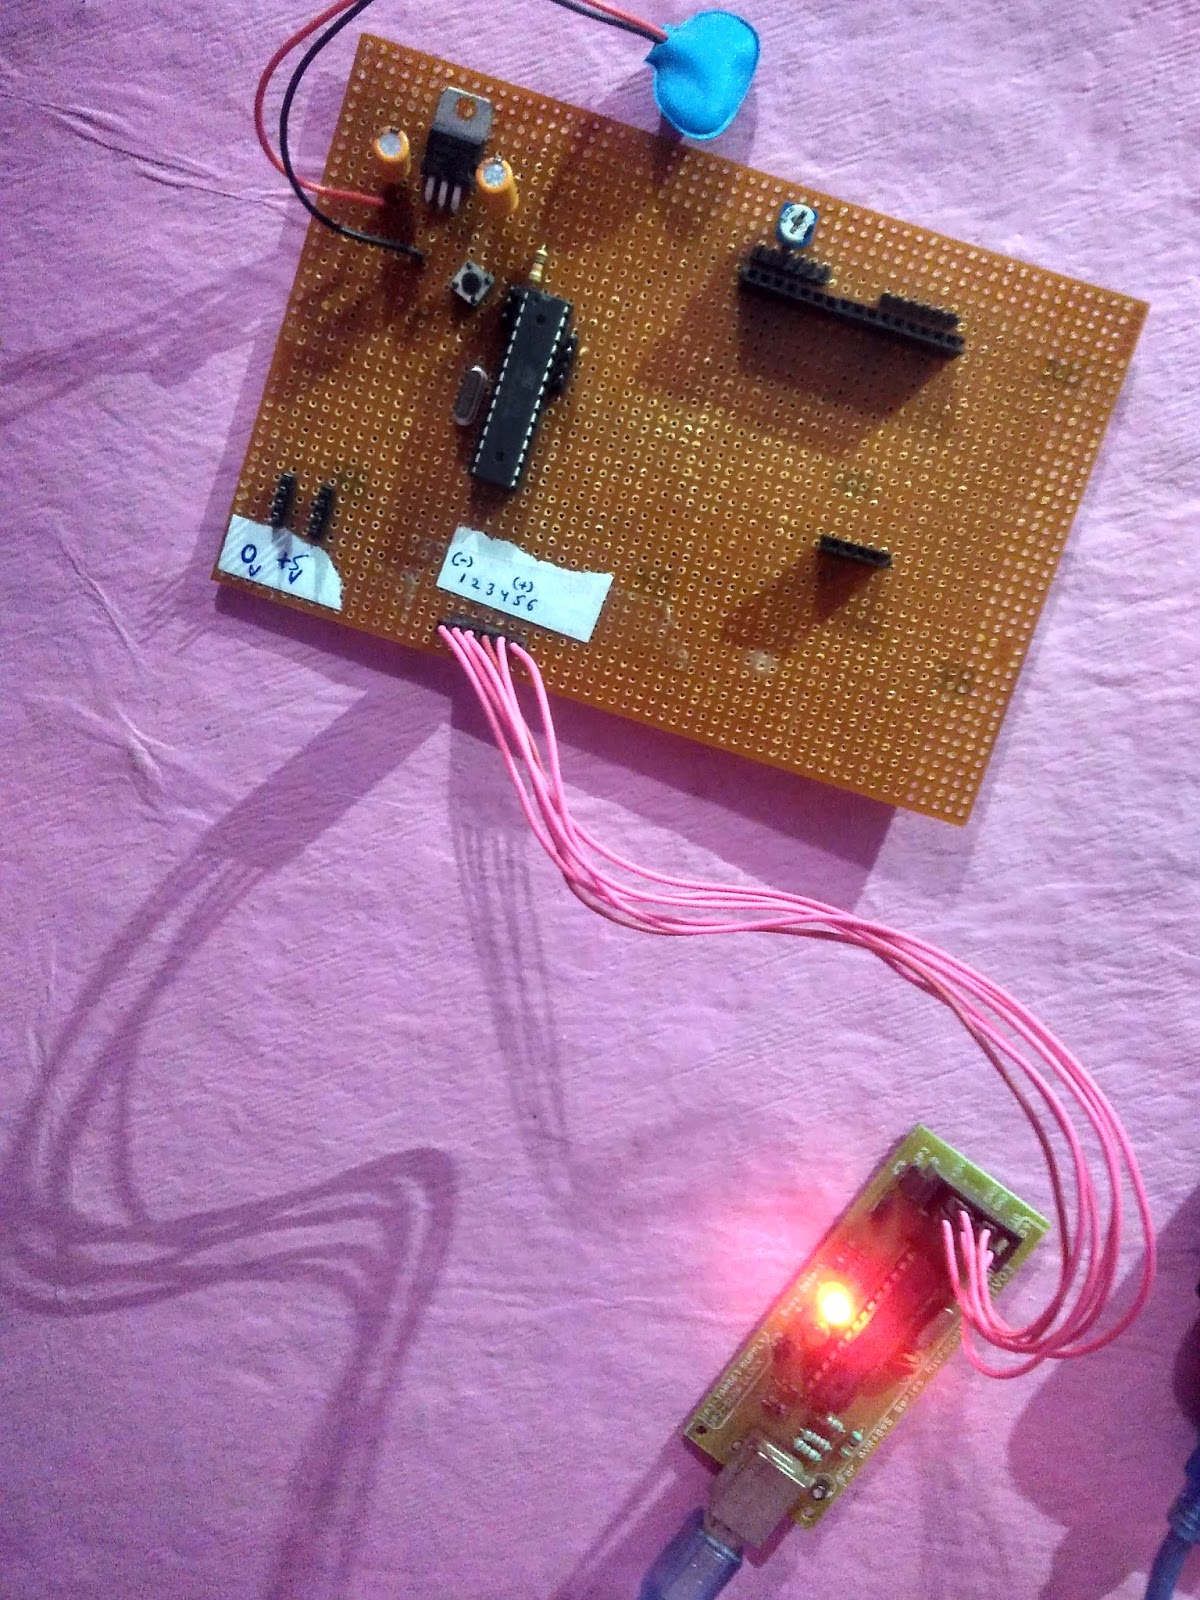
The connections from USBasp programmer to target circuit board (atmega 8a is as follows):
List of components/software:
1. USBasp programmer
2. Target circuit board having microcontroller (mine have atmega328)
3. Avrdudes (Burner software)
Prerequisites:
USBasp driver installed in your system.
If it is not installed, then read instructions about installation from my previous post.
USBasp driver installation
Default fuse byte for atmega328 is: LFUSE = 0X62 and HFUSE = 0XD9. It might vary
This corresponds to internal rc oscillator
LFUSE = 0XFF and HFUSE = 0XDE
We can use internal as well as external oscillator. For the time being, we are using external crystal having 16 MHz frequency.
 |
| Connecting atmega328 to usbasp |
 |
| USBasp programmer |
 |
| Using Usbasp programmer |

Check out the video:
The connections from USBasp programmer to target circuit board (atmega 8a is as follows):
USBASP ATMEGA328
VCC PIN NO. 7, 20, 21 (VCC, AREF, AVCC)
GND PIN NO. 8, 22 (GND)
RST PIN NO. 1 (RESET)
MOSI PIN NO. 17 (MOSI)
MISO PIN NO. 18 (MISO)
SCK PIN NO. 19 (SCK)
The connection is same for any other microcontroller e.g. atmega 328, atmega 328P, atmega 168, etc.
The connection is same for any other microcontroller e.g. atmega 328, atmega 328P, atmega 168, etc.
Download avrdudes from the below link:
Thanks for visiting this blog.
Stay tuned for more tutorials
[original story: FunWithElectronics]