

Arduino Hole Dimensions Drawing
Arduinos are great, but if you’ve ever tried to mount one on a baseplate or inside an enclosure, you know it can be a pain. While there are some great enclosures specifically designed for an Arduino, if you just have a regular box that you want to use, you have to measure and mark out the holes yourself. If all you have is a ruler and a pencil, this isn’t the easiest thing to do.
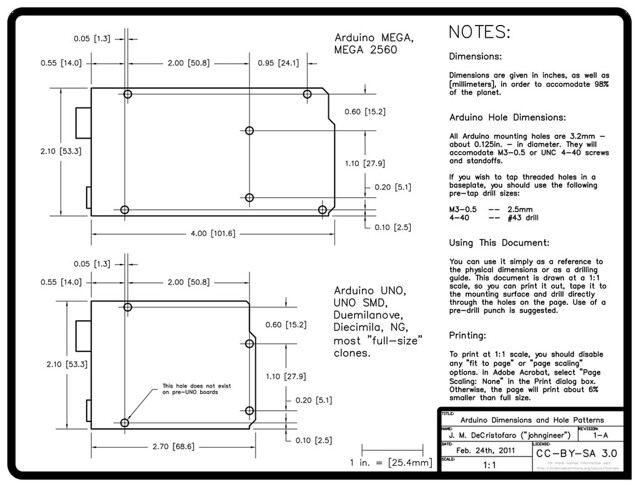
In the process of working on a robot project, I needed to draw up an Arduino hole pattern and outline in CAD as part of the design. I figured others could use a similar drawing — after some polishing up, I had this Arduino hole dimension drawing (PDF).
You can use it as a reference to the dimensions or as a drilling guide. It is drawn at a scale of 1:1, so you can print it out, lay the drawing down on your mounting surface, and use a pre-drill punch directly on the paper. I’d recommend you use the punch rather than just drilling through the paper, to avoid a “walking” drill bit. If you don’t have a proper punch, you can just use a sharpened nail (we’re not fancy here).
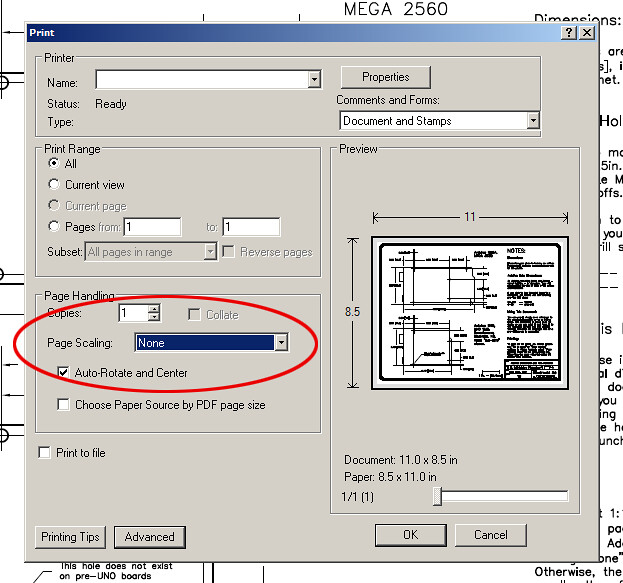
In order to get it to print 1:1, you have to turn off print scaling in Adobe Acrobat. Somewhere in the Acrobat print dialog there’s going to be a “Page Scaling” option. Set it to “None”. There’s a 1-inch scale mark next to the title block in case you want to verify that it worked.
The drawing has dimensions for both the regular Arduino and the Arduino MEGA, and the hole pattern is good for all Arduinos going back to the NG (though the diameter of the holes might be different). The new UNO boards added a fourth mounting hole, which is indicated. It should also work with most “full-size” Arduino clones, such as the EMSL Diavolino and the Seeed Studios Seeeduino, as well as the Netduino boards.
This post is cross-posted from the Adafruit Blog. Big thanks to Adafruit for hosting the PDF.
[original story: johnginneer]