

Another Nixie clock
For "unknown" reasons, these days things don't move as fast as they used to. I have a dozen or so unfinished projects on my desk, most of them waiting for parts to arrive. And usually and unfortunately, when I get the long awaited part, something else is missing... or not fitting,... or not working.
Today I was finally able to finish the "Open Source Nixie Tube Shield", for which I pledged $15 on kickstarter in return for the PCB.
Without paying attention to the schematic (was it even published before the campaign ended?), I thought it was just another variation of the same Nixie theme, which it really was. I expected to have all parts on hand already, including the Nixie K155ID1 driver Russian IC. Surprise! Instead, the circuit uses CD4028 decoder plus HV transistors. And that's where the 4 week wait is coming from.
I liked the compactness of the board even before I soldered the almost 100 components. But I was a bit disappointed when I realized the shield had a (minor) flaw: the area above Arduino's USB A connector is as highly populated as the rest, if not more. Not only the metal encasing of the USB connector will short the high voltage components on the shield above, but the shield cannot be even pushed all the way in.
A workaround (which I ended up using) is to have an intermediary shield between Arduino and the Nixie tube shield. Another solution is to use an Arduino variant with the mini B USB, like Seeeduino or Leonardo.
But all's well that ends well. To cut the story short, the sample sketch provided worked just fine without interventions. Hardware-wise, I added a DS1307 RTC (since I was going to build a clock), a buzzer (for alarm and chime) and a Bluetooth module (to set up the time without buttons). The only kludge required was a change in the core file Tone.cpp, where I replaced Timer2 with Timer1.
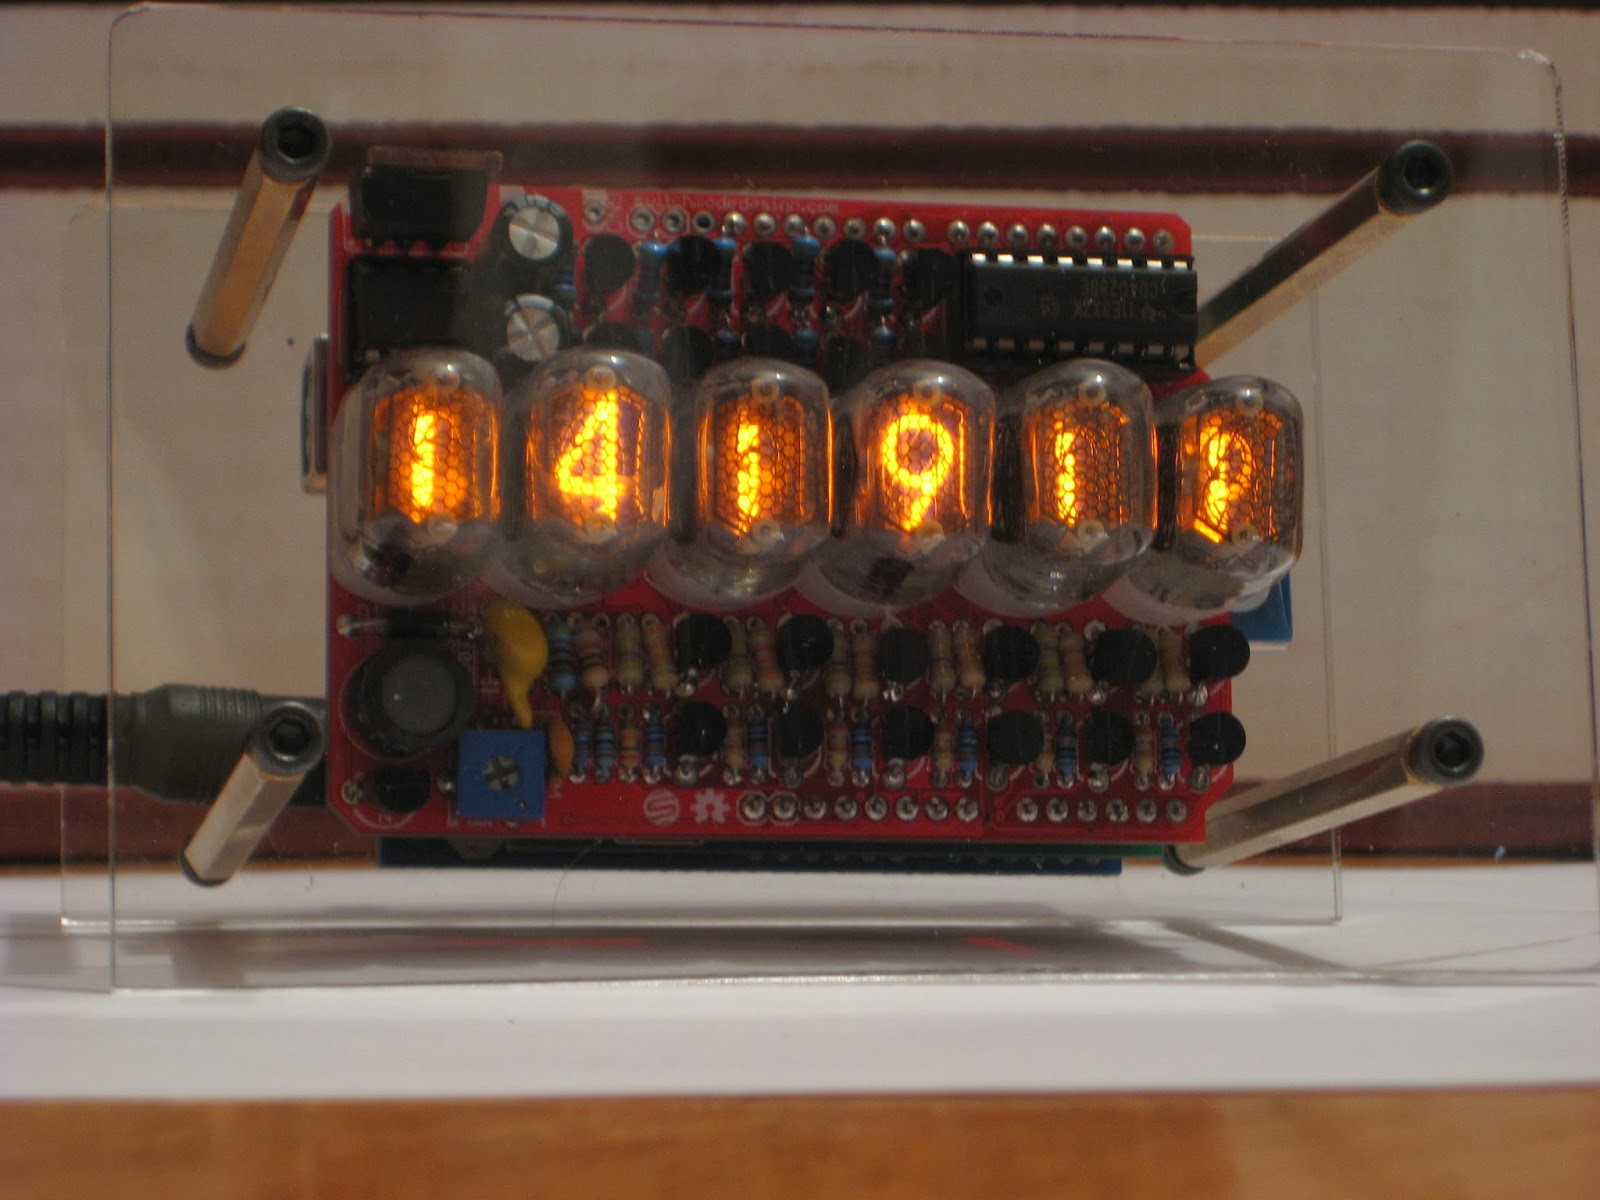
Below are a few photos. For enclosure, I (again) went for the the poor-man's solution, this time hand-cut (as opposed to laser-cut) transparent acrylic plates. (The long standoffs are 60mm, in case one wants to reproduce the experiment.)


I also borrowed an idea from akafugu, with the bigger front plate creating a nice slope.

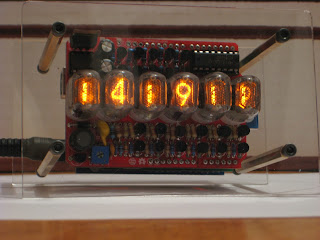
One thing I skipped (because I don't like the combination) is the blue (or any other color, for that matter) LEDs under the tubes.
A working version of the code is available here. It is based on Tyler's code (timer-based multiplexing of the digits, anti-cathode poisoning etc), with added support for RTC (DS1307) and functionality for setting up the time, alarm time, enabling/disabling alarm etc through Bluetooth (using an Android phone or tablet, for example).
The clock can execute the following commands, sent from BlueTerm (after pairing with the device):
Note that all commands must be upper case.
The "Stop alarm" feature is reminiscent of Rami's "Deep Sleep iPhone app" and also of Ramos alarm clock (coincidentally, another Nixie clock, close source though), where both of them are asking for user interaction to stop the sounding alarm. Well, in order to stop this Nixie clock from beeping, one needs to open BlueTerm, pair the devices, then type in "STOP ALARM", a sequence of actions that requires anyone to be pretty much awake.

Today I was finally able to finish the "Open Source Nixie Tube Shield", for which I pledged $15 on kickstarter in return for the PCB.
Without paying attention to the schematic (was it even published before the campaign ended?), I thought it was just another variation of the same Nixie theme, which it really was. I expected to have all parts on hand already, including the Nixie K155ID1 driver Russian IC. Surprise! Instead, the circuit uses CD4028 decoder plus HV transistors. And that's where the 4 week wait is coming from.
I liked the compactness of the board even before I soldered the almost 100 components. But I was a bit disappointed when I realized the shield had a (minor) flaw: the area above Arduino's USB A connector is as highly populated as the rest, if not more. Not only the metal encasing of the USB connector will short the high voltage components on the shield above, but the shield cannot be even pushed all the way in.
A workaround (which I ended up using) is to have an intermediary shield between Arduino and the Nixie tube shield. Another solution is to use an Arduino variant with the mini B USB, like Seeeduino or Leonardo.
But all's well that ends well. To cut the story short, the sample sketch provided worked just fine without interventions. Hardware-wise, I added a DS1307 RTC (since I was going to build a clock), a buzzer (for alarm and chime) and a Bluetooth module (to set up the time without buttons). The only kludge required was a change in the core file Tone.cpp, where I replaced Timer2 with Timer1.
Below are a few photos. For enclosure, I (again) went for the the poor-man's solution, this time hand-cut (as opposed to laser-cut) transparent acrylic plates. (The long standoffs are 60mm, in case one wants to reproduce the experiment.)

I was happy to "upcycle" my Arduino Duemilanove, with the nice bottom exposed and visible :)
The prototype shield was something that I thought I will never use again, but it came in handy.


A working version of the code is available here. It is based on Tyler's code (timer-based multiplexing of the digits, anti-cathode poisoning etc), with added support for RTC (DS1307) and functionality for setting up the time, alarm time, enabling/disabling alarm etc through Bluetooth (using an Android phone or tablet, for example).
The clock can execute the following commands, sent from BlueTerm (after pairing with the device):
- TIME=hh:mm - sets the current time (second is set to 0);
- ALARM TIME=hh:mm - sets the alarm time; the alarm hour and minute are also saved to eeprom (and retrieved from there whenever the clock is powered back on);
- SHOW ALARM - sends back to BlueTerm the alarm hour and minute
- ALARM ON - enables the alarm; this is also saved to eeprom; the Alarm On/Off status can be shown with a LED connected to A0;
- ALARM OFF - disables the alarm;
- STOP ALARM - turn off the sound after the alarm starts beeping;
Note that all commands must be upper case.
The "Stop alarm" feature is reminiscent of Rami's "Deep Sleep iPhone app" and also of Ramos alarm clock (coincidentally, another Nixie clock, close source though), where both of them are asking for user interaction to stop the sounding alarm. Well, in order to stop this Nixie clock from beeping, one needs to open BlueTerm, pair the devices, then type in "STOP ALARM", a sequence of actions that requires anyone to be pretty much awake.
[original story: Wise time with Arduino]