Posts with «stem» label

Qualcomm and Arduino partner with Walt Disney Imagineering and REV Robotics to take the FIRST K-8 experience into the future

The new program will be powered by the Arduino® platform with Walt Disney Imagineers helping bring annual game themes to life.

FIRST is developing its next generation of K-8 robotics programs for the 2027–2028 season, welcoming Qualcomm Technologies as lead technology partner and the Arduino development ecosystem to power the new platform.

It marks a major new chapter for FIRST as its nearly three-decade FIRST® LEGO® League collaboration concludes and evolves into a new era of hands-on STEM, giving students an early look at how real-world engineers work.

Arduino’s role is to help make first builds approachable and give students room to take on more advanced coding, sensing, and prototyping as their skills grow. 

FIRST has a presence in more than 100 countries and reached over 850,000 young people in the 2025–2026 season. Its influence extends well beyond robotics competitions, though. In FIRST’s 10-year study, 83% of alumni pursued STEM majors by their fourth year of college, and 63% were employed in STEM fields. The new K-8 program builds on that track record by giving students an early opportunity to see what engineering looks like when they’re the ones designing, building, and testing a solution.

How FIRST and Arduino are bringing hands-on engineering to a new generation of robotics teams

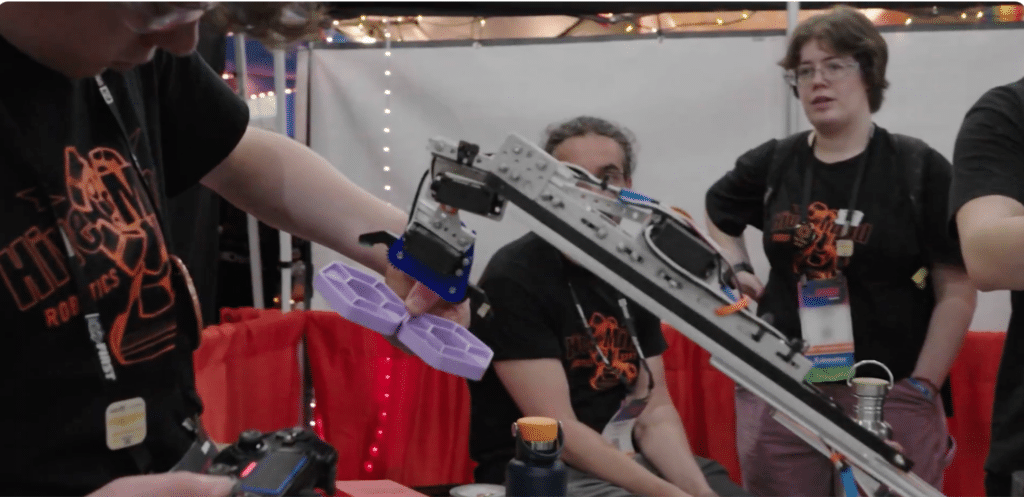
In the new FIRST K-8 robotics program, students will work in teams to turn ideas into working prototypes. They’ll decide how to tackle a challenge, build a robot, test their approach, and use what they observe to improve the design. If the robot doesn’t behave as intended, the team has a decision to make. Do they change the code, adjust the build, or run another test to see if the problem will happen again? They’ll have to explain what they saw, weigh each other’s ideas, and agree on what to try next. The new hardware options for grades 3-8 are built on the Arduino® UNO Q board.
“Every great innovation starts with curiosity. When students are given the right tools, supportive mentors, and the freedom to explore, incredible things happen. Through this collaboration with FIRST and Qualcomm Technologies, we are helping students move from imagination to creation, building the technical skills, creativity, and resilience they will need to shape the future,” said Fabio Violante, Vice President and General Manager of Arduino at Qualcomm Europe.

What it takes to build a new robotics program

A robotics challenge starts with a problem worth solving. What should the robot do? What will make that task interesting enough for a team to try again when its first design falls short? Walt Disney Imagineering is working with FIRST to help develop the games, challenges, and annual themes that give teams a reason to build in the first place.

REV Robotics will design and manufacture the physical build system students will use to turn ideas into working robots.
Helping educators get a team off the ground

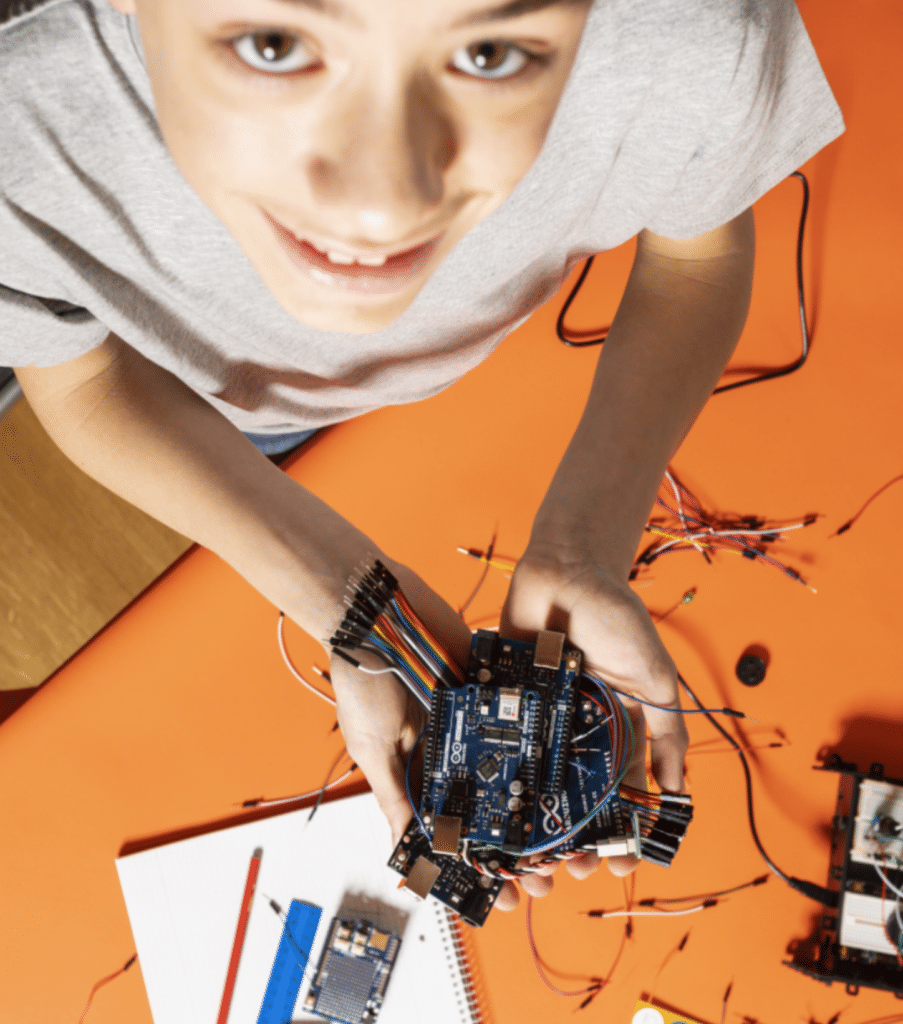
For a teacher or coach starting a robotics team, the first question may be as simple as, “What do we do at our first meeting?” FIRST is designing the program for educators and coaches with a range of robotics experience. Planned professional development and resources such as team meeting guides will help get students building with support as they work through their first challenges.

What’s next for FIRST K-8 robotics

The new programs are set to launch in spring 2027. FIRST will share more information ahead of the 2027–2028 season, including the program names, details about the games and technology platform, educator resources, and how to participate. 

Sign up for the FIRST K-8 updates to hear when those details are announced and to find answers to frequently asked questions.

Arduino and UNO are trademarks or registered trademarks of Arduino S.r.l.

The post Qualcomm and Arduino partner with Walt Disney Imagineering and REV Robotics to take the FIRST K-8 experience into the future  appeared first on Arduino Blog.

Daisy is a tiny $29 computer for building custom musical instruments

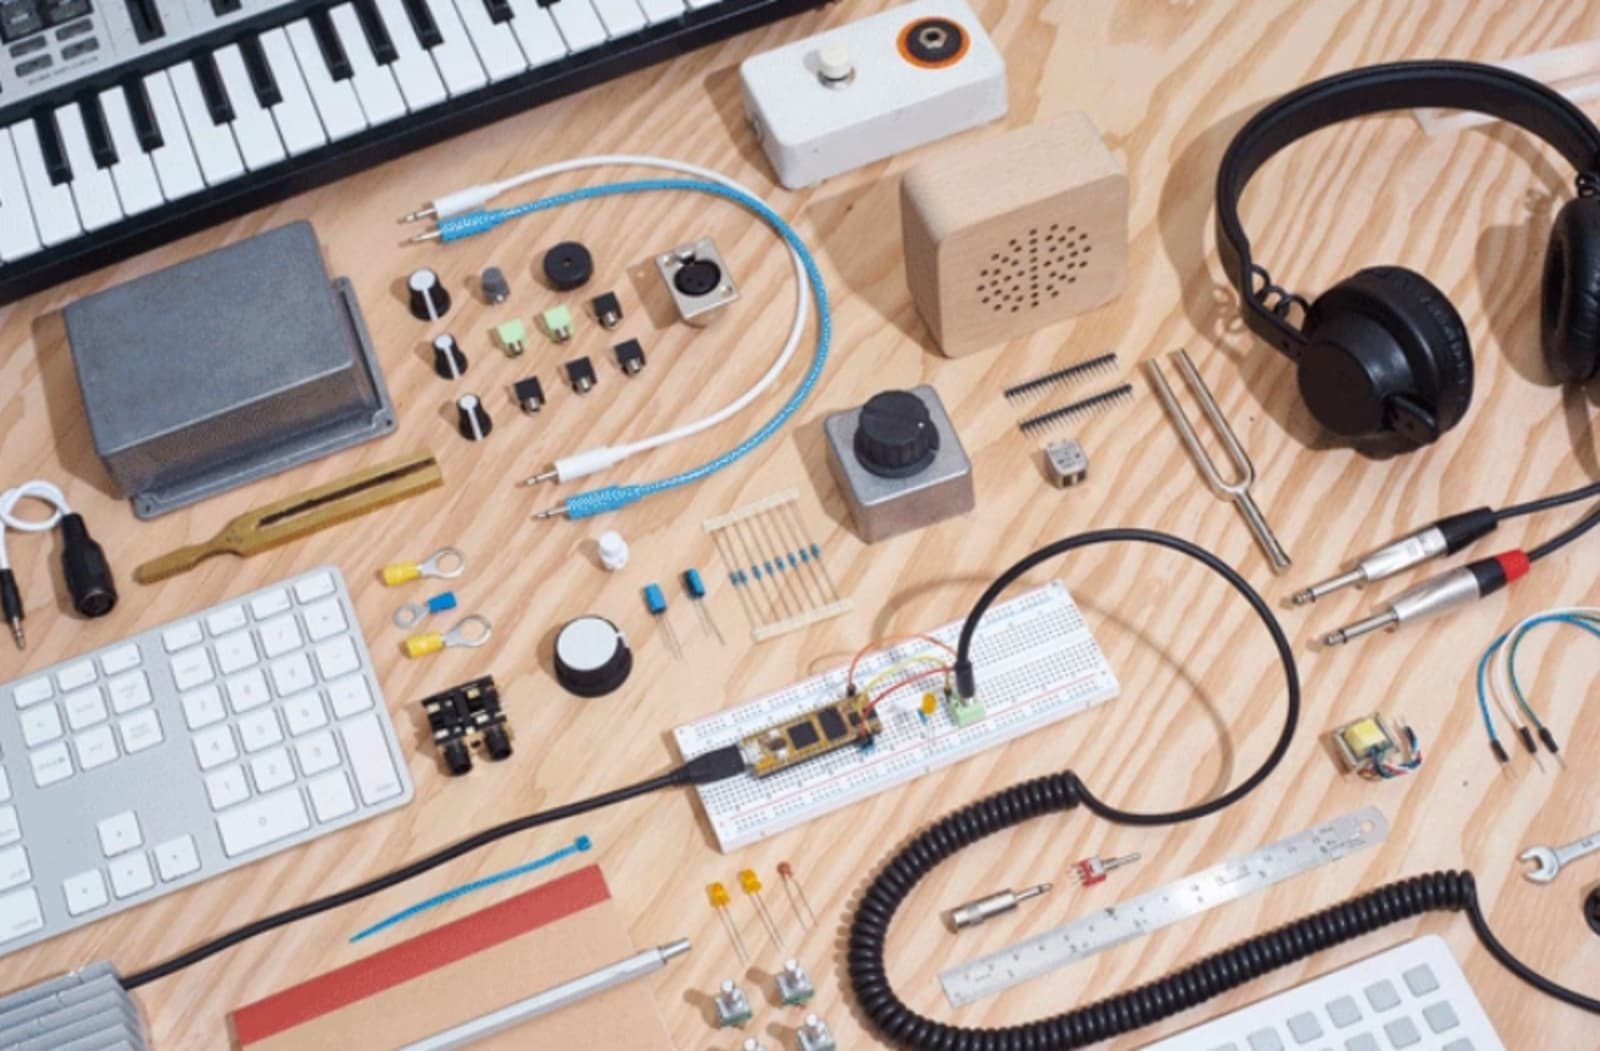
Coding your own musical instruments just got a lot more convenient. Music tech company Electrosmith has launched the Daisy, an open source microcomputer packed with everything you need to code your own pedals, synth, modules and instruments -- and it's the size of a stick of gum.

Daisy is a tiny $29 computer for building custom musical instruments

Coding your own musical instruments just got a lot more convenient. Music tech company Electrosmith has launched the Daisy, an open source microcomputer packed with everything you need to code your own pedals, synth, modules and instruments -- and it's the size of a stick of gum.

Source: Kickstarter

Review: OSEPP STEM Kit 1, a Beginner’s All-in-One Board Found in the Discount Aisle

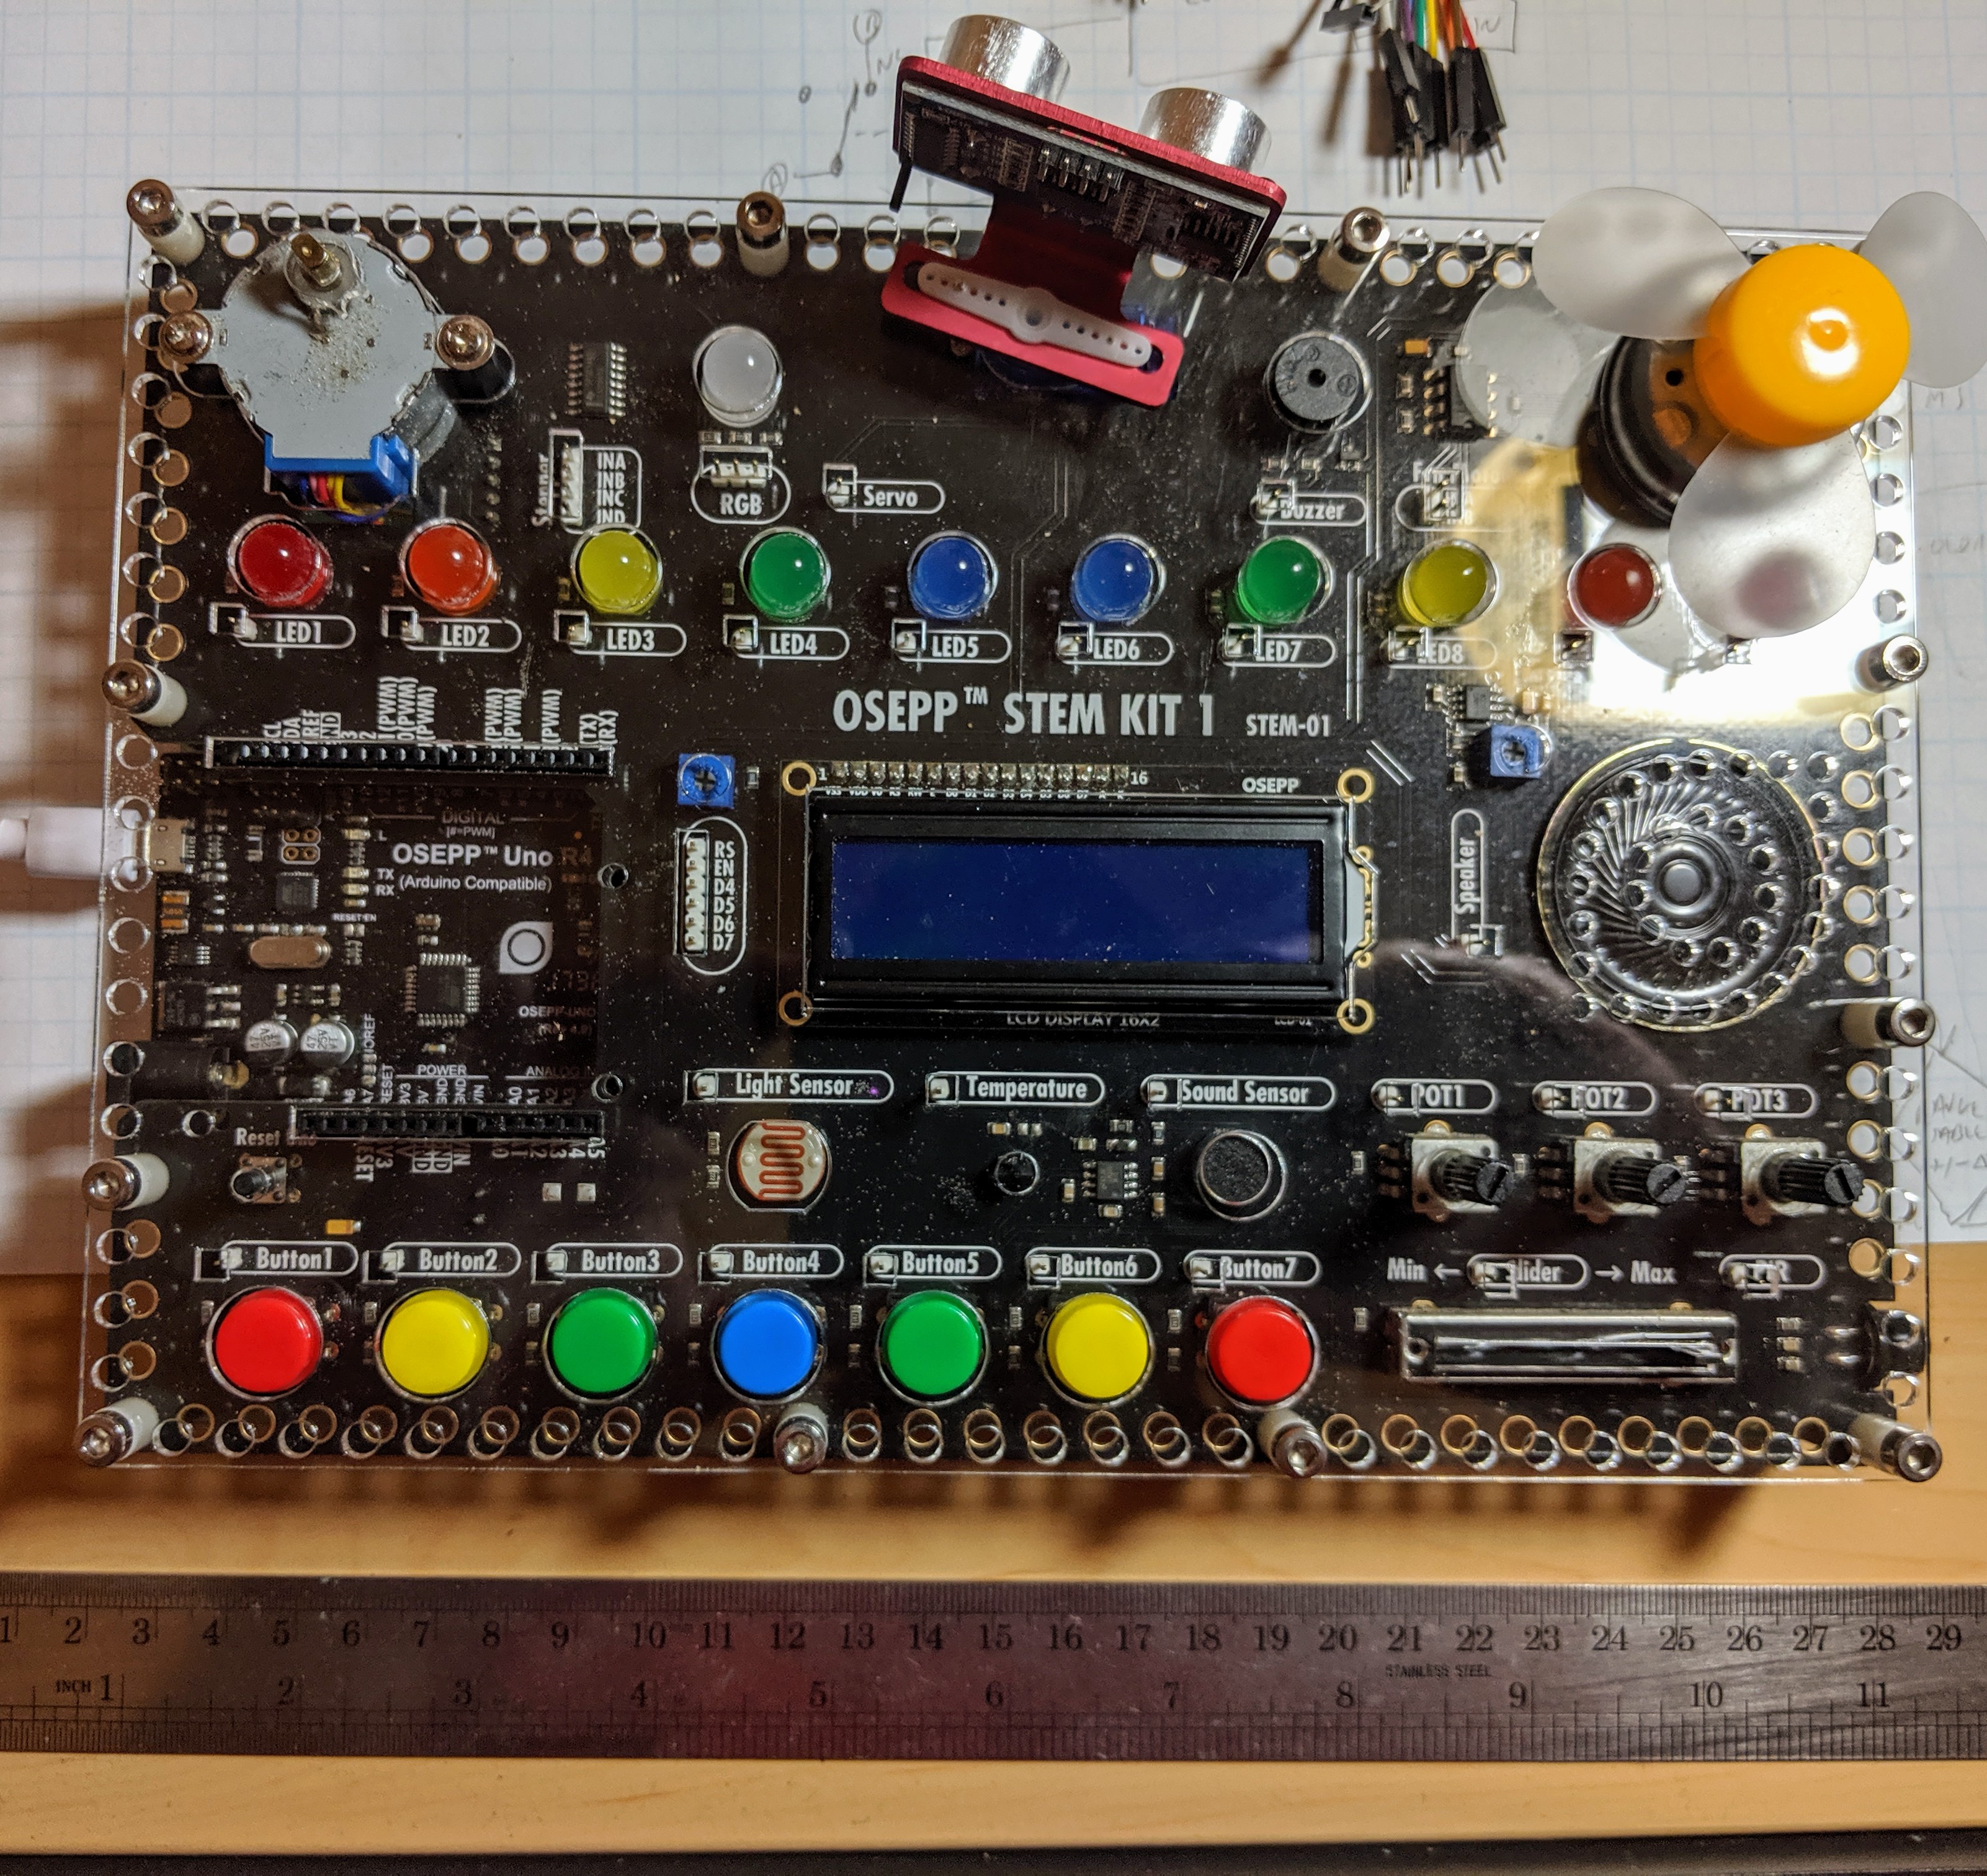
As the name implies, the OSEP STEM board is an embedded project board primarily aimed at education. You use jumper wires to connect components and a visual block coding language to make it go.

I have fond memories of kits from companies like Radio Shack that had dozens of parts on a board, with spring terminals to connect them with jumper wires. Advertised with clickbait titles like “200 in 1”, you’d get a book showing how to wire the parts to make a radio, or an alarm, or a light blinker, or whatever.

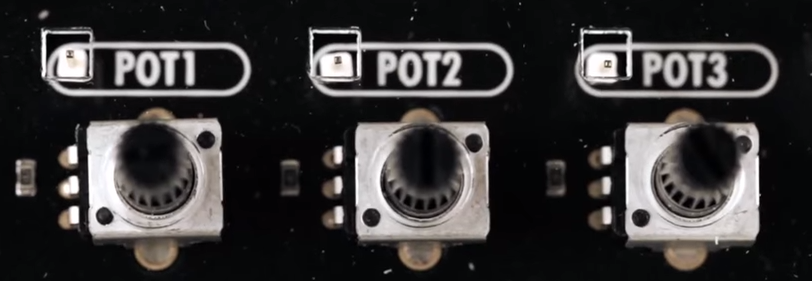
The STEM Kit 1 is sort of a modern arduino-powered version of these kits. The board hosts a stand-alone Arduino UNO clone (included with the kit) and also has a host of things you might want to hook to it. Things like the speakers and stepper motors have drivers on board so you can easily drive them from the arduino. You get a bunch of jumper wires to make the connections, too. Most things that need to be connected to something permanently (like ground) are prewired on the PCB. The other connections use a single pin. You can see this arrangement with the three rotary pots which have a single pin next to the label (“POT1”, etc.).

I’m a sucker for a sale, so when I saw a local store had OSEPP’s STEM board for about $30, I had to pick one up. The suggested price for these boards is $150, but most of the time I see them listed for about $100. At the deeply discounted price I couldn’t resist checking it out.

So does an embedded many-in-one project kit like this one live up to that legacy? I spent some time with the board. Bottom line, if you can find a deal on the price I think it’s worth it. At full price, perhaps not. Join me after the break as I walk through what the OSEPP has to offer.

What’s Onboard?

There are plenty of input and output devices:

  • 7 Push Buttons
  • Potentiometers (3 rotary and 1 slide)
  • Passive Infrared Sensor (PIR)
  • Light Sensor
  • Sound Sensor
  • LM35 Temperature Sensor
  • 10 LEDs (various colors)
  • Servo Motor
  • Stepper Motor
  • DC Motor
  • LCD Display
  • Buzzer
  • Speaker
  • RGB LED

In addition, the kit comes with an ultrasonic distance sensor in a little bracket that can connect to the stepper motor. That’s the only part that needs power and ground that isn’t already wired up.

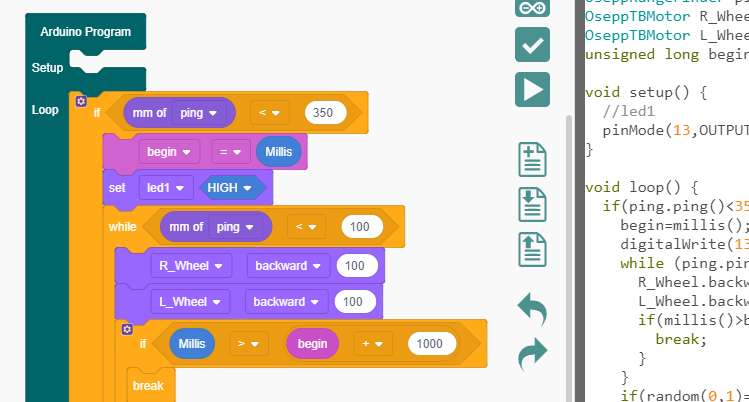
Because the heart of the board is an Arduino UNO clone, you can do anything you like to program it. However, OSEPP touts their visual block diagram language that is basically Scratch. You can use it for free on most platforms and there is even a Web-based version although it can’t download code. It looks like Scratch or other block-oriented systems you’ve seen before.

I’m not usually fond of the visual block languages, but this one at least shows you the actual Arduino code it generates, so that isn’t bad. But you can still use any other method you like such as the standard IDE or PlatformIO.

You can see a video about the board, below.

The Good and the Bad

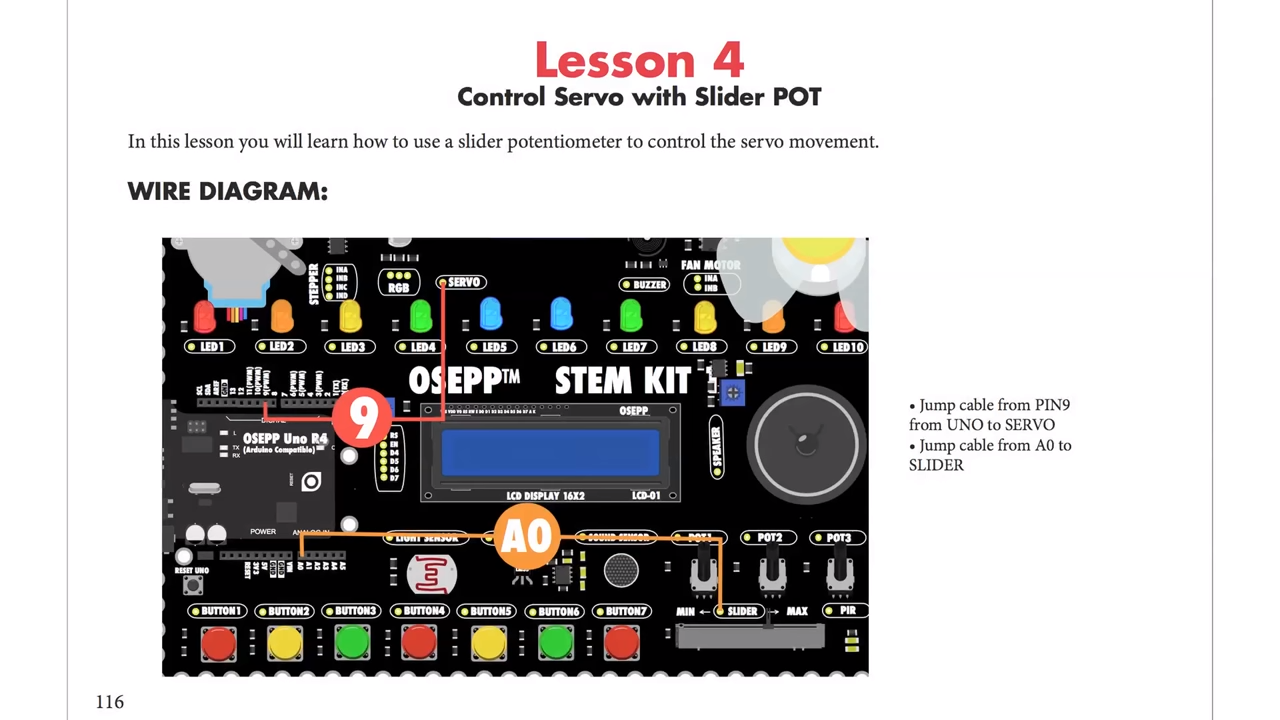
The board feels substantial and able to withstand a good bit of abuse. There’s a good range of components, and I like that the arduino is a real daughter board and not just built onto the PCB. Despite using the block language, I do like the tutorial booklet. It is very slick and has projects ranging from an IR doorbell to a mini piano. You can see a page below — very colorful and clear.

Of course, the suggested retail price of $150 is a bit offputting. You might think a breadboard with a handful of LEDs and other parts would be a much lower-cost option but just look around for arduino kits for beginners and you’ll find prices are all over the place. On the other hand, with a parts kit you would have to know how to wire up things like stepper motors or DC motors, so there is some value to having it already done for you. There’s also value in not having a bag of parts to misplace.

The jumper wires in the kit have pins on one side and sockets on the other. The pins go into the Arduino’s connector and the sockets go over pins on the components. These aren’t quite as reliable as a spring clip and not as versatile either.

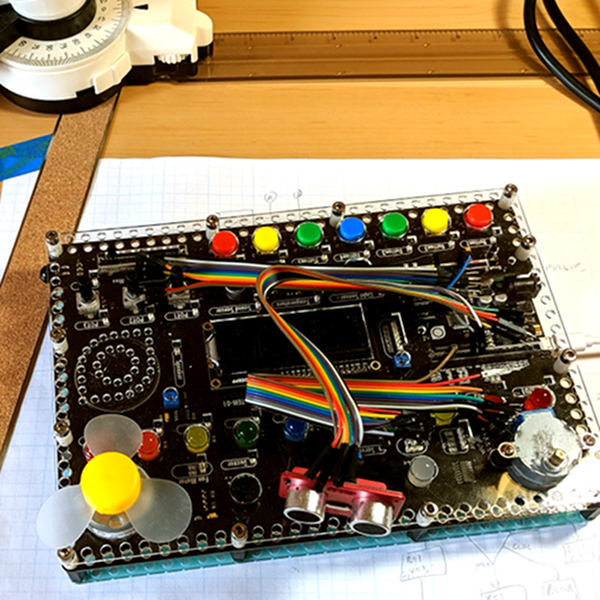
In my mind the worst part of the kit design is that the pins are right next to each of the components. That’s good for understanding, but it makes a mess of wiring. For instance, there are ten LEDs, and connecting them all means stretching jumper wires to both edges of the board The jumpers aren’t very long either, so any complex project is going to have wires crisscrossing the sensors and LCD.

Granted, in this image I could have removed some of the wires from the bundles but that wouldn’t help that much, either. If you need to hook up more than a few of the available components you will have a mess. I would have put some sort of spring clip or even screw terminals and put them all on the top and bottom of the board with clear color-coded marking about where they connect. Then the wiring would all be out of the way. There are probably a few other ways they could have gone, and at this price, they could afford the few extra inches on the PCB.

There are a few other things that would have been nice touches to finish off this kit. I would have enjoyed a short chapter in the booklet about using the Arduino IDE directly so that people know it exists. And having even a small breadboard attached for your own exploration would make sense, but would then call for a different type of jumper wire.

Short Example Using the Distance Sensor

I wanted to do something with the board so I decided to play with the distance sensor and the servo. The distance sensor is a bit annoying both because you have to wire it all up and it has a tendency to fall off when you transport the board.

The demo (you can find it online) won’t win any originality prizes. The program moves the servo to scan from 0 to 180 degrees in 5 degree increments. It measures the distance of what’s in front of it. When it completes a scan, if it saw something close (you could adjust the sensitivity), it moves the sensor back to that position and waits 30 seconds. Otherwise, it keeps scanning.

Really, this is no different from any other Arduino program. That’s kind of the point. Despite the emphasis in the book on the point-and-click language, this is really just an Arduino.

In Summary

For the deep sale price I found, the board will work well for its intended audience of students or anyone starting out with Arduino or microcontrollers. Even a more advanced audience who just wants a way to hammer out a quick prototype might find it worth the $30 or $40 you can sometimes pay. But at full price, it is hard to imagine this makes sense because of the mess of wire routing and limited expansion options.

Desafío STEM + Arduino Podcast [Español]

Con el fin de apoyar a los nuevos participantes del Desafío STEM 2017, Arduino y Telefónica se han unido para crear una serie de tres podcast, abiertos al público en general, conducidos por David Cuartielles.

Desafío STEM es un concurso interescolar que fomenta el desarrollo de competencias tecnológicas, creado por Telefónica Educación Digital para impulsar la implantación de nuevas formas de aprender a través de dinámicas motivadoras y fomentar las vocaciones STEM.

Durante los podcast se abordarán los siguientes temas:

  • Primer podcast: 15 de Noviembre
    Cómo crear proyectos creativos usando tecnología digital.
  • Segundo podcast: 22 de Noviembre
    Identificación de problemas técnicos en la creación de proyectos.
  • Tercer podcast: 5 de Diciembre
    Nuevos usos de tecnología en el aula.

La duración de los podcast será de una hora comenzando a las 19: 00 GMT+1. Podrán seguir la transmisión del podcast en: http://verkstad.cc/urler/desafiostem

David responderá durante el podcast preguntas de la audiencia que se envíen antes de los podcast. Para enviar las preguntas, seguir el link que se presenta a continuación y llenar el formulario: http://verkstad.cc/urler/desafio-preguntas. También se podrá participar en twitter con el hashtag #desafiostempreguntas.


To support the new participants of Desafío STEM 2017, Arduino and Telefónica have come together to create a series of three open podcasts, conducted by David Cuartielles.

Desafío STEM is an interscholastic competition that promotes the development of technological competences, created by Telefónica Educación Digital to promote the implementation of new ways of learning to motivate and inspire students to pursue STEM vocations.

The following topics will be addressed:

  • First podcast: November 15
    How to build creative projects using digital technology.
  • Second podcast: November 22
    Identification and resolution of technical challenges in the creation of projects.
  • Third podcast: December 5th
    New uses of technology in the classroom.

The duration of each podcast will be one hour starting at 19:00 GMT + 1. To follow along, please click on the following link: http://verkstad.cc/urler/desafiostem

David will answer questions from the audience during the podcast, which need to be sent beforehand via this link: http://verkstad.cc/urler/desafio-preguntas. Twitter users can also participate using the hashtag #desafiostempreguntas.

EMoRo now part of AtHeart!

We’re excited to welcome Croatian startup Inovatic ICT and its EMoRo Kit to our AtHeart program!

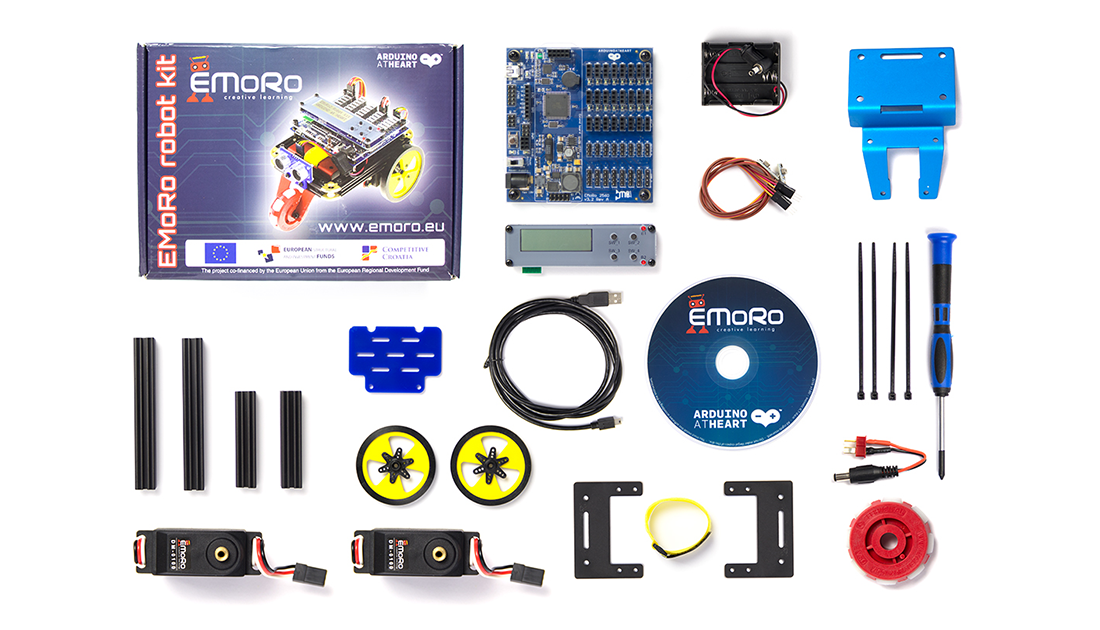
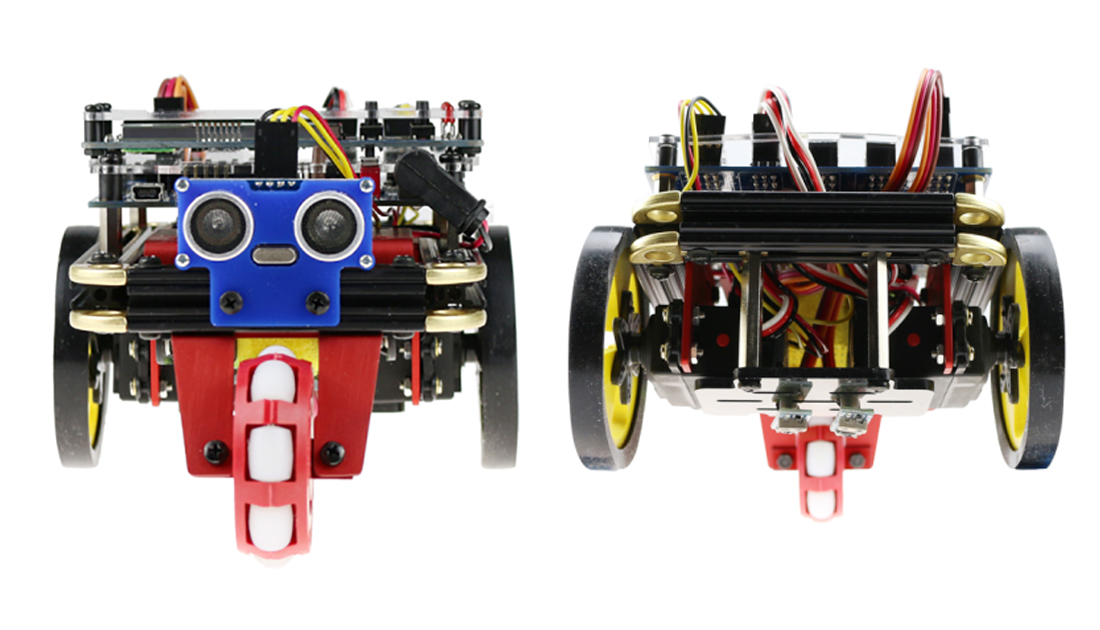
EMoRo (Educational Mobile Robot) is an Arduino-compatible robot designed to encourage logical thinking and technical curiosity in a fun, engaging way. The solder-free DIY kit consists of a robust aluminum chassis along with easy-to-connect components like servos, sensors, and relays. It also supports other construction sets like LEGO Technic, Eitech, and Fischertechnik.

Based an ATmega250 board, EMoRo can be programmed using the Arduino IDE and upgraded with the addition of interchangeable modules, such as Bluetooth for Android device control, an LCD display, push buttons, and an accelerometer, gyroscope and compass for navigation. Built-in safety features include step-down regulators, thermal shutdowns, under-voltage lockouts, and cycle-by-cycle over-current protections–all of which make the EMoRo rugged enough for beginners, yet versatile enough for advanced Makers.

According to Boris Jakov Anic-Kurko, Inovatic ICT Managing Director: 

EMoRo originated as a result of our vision to create a tool that would introduce the world of robotics to children and spark their interest in technology and programming. With that vision in mind, we have decided to use the programming platform Arduino, as the world’s most used and popular programming platform when it comes to programming small educational robots.

Interested in EMoRo for your next robotics competitions or as a tool in your STEAM class? You can now buy a kit here! 

Kick the habit with a cigarette smoke-detecting shirt

You’ve heard it before, smoking is bad for your health. However, despite the countless warnings, millions of people continue to use cigarettes–including 7th grade student Petter’s dad. Mindful of this, the young Maker came up with a new way to shame smokers into quitting.

The aptly named “Cigarette Smoke Detecting Shirt” consists of an Arduino LilyPad, a smoke sensor, and three LED sequins, all sewn into the t-shirt using conductive thread. When cigarette smoke is sensed, one of three different lights illuminate alongside a message to embarrass the wearer such as “stinky breath,” “yellow teeth,” or “lung cancer.”

In the future, Petter hopes to finish the prototype and start making more shirts to sell on Etsy. Whether or not this idea takes off, it’s pretty cool nonetheless. As Adafruit puts it, “This is such a fine example of a project that works on an issue and gets students excited about STEM.”

“Electronics for the Humanities” keynote at Arduino Day

Lately I’ve been struggling with the STEM/STEAM approach to teaching computational technology. It assumes you’re either an artist, scientist, or engineer. What about the rest of us? I meet plenty of people who don’t fit any of these categories, yet who use programming and electronic devices in their work. I’m looking to understand their perceptions of how these technologies work, and how they fit into their practices. In this talk, I tried to explain some of what I’ve noticed by observing and working with people from different backgrounds, and to review some of the current tools for teaching a general audience.

Ultimately, I want us to get to a point where we use programming tools in the same way as we use language. We all use language, but we’re not all language-using professionals. We use it casually, expressively, sometimes professionally, in a thousand different ways. We don’t follow all the rules, yet we work together to share a common understanding through language. We’re starting to do the same with media like video, audio, and images as well. Maybe we can get there with programming and computational thought, too.

Watch the video:

Arduino Blog 05 May 15:12

Engadget giveaway: Win an mCookie Family Kit courtesy of Microduino!

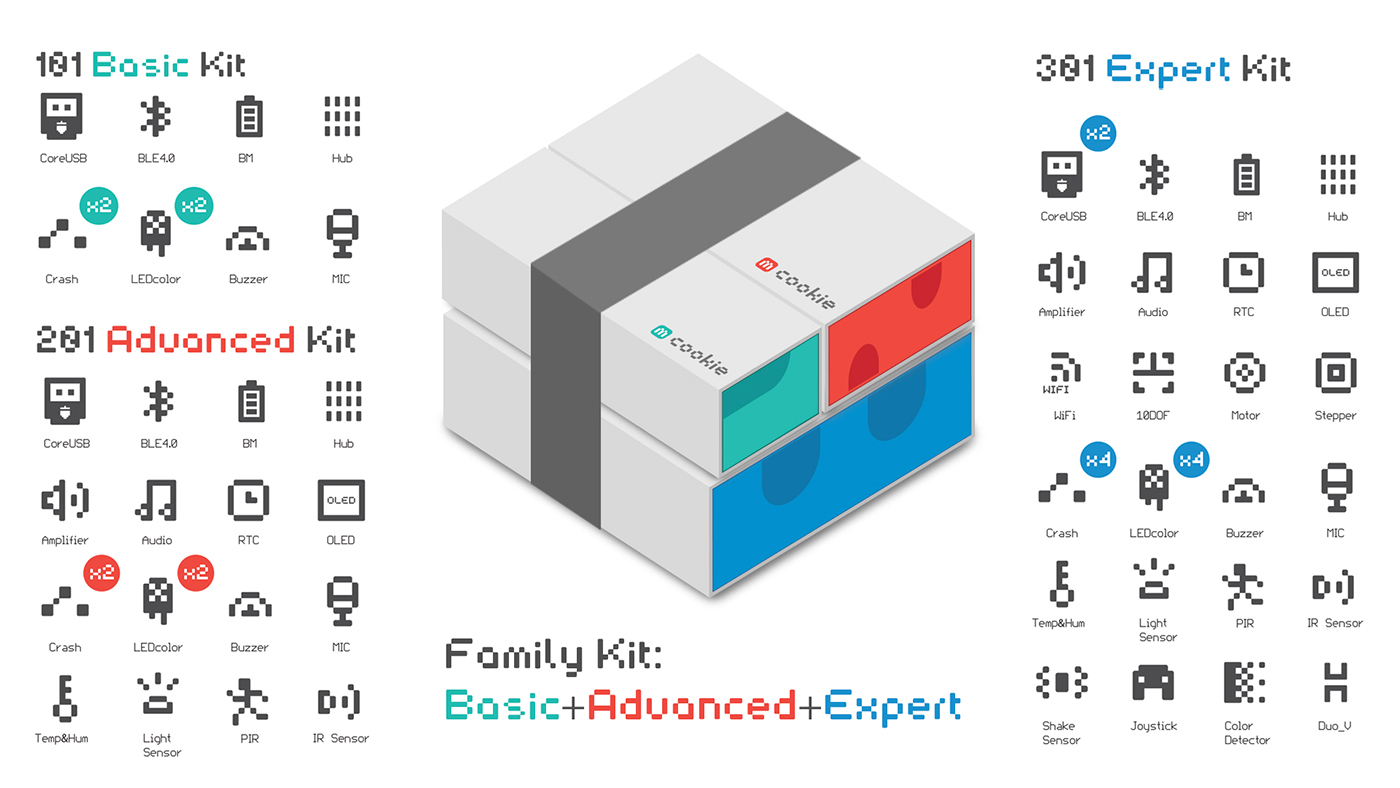
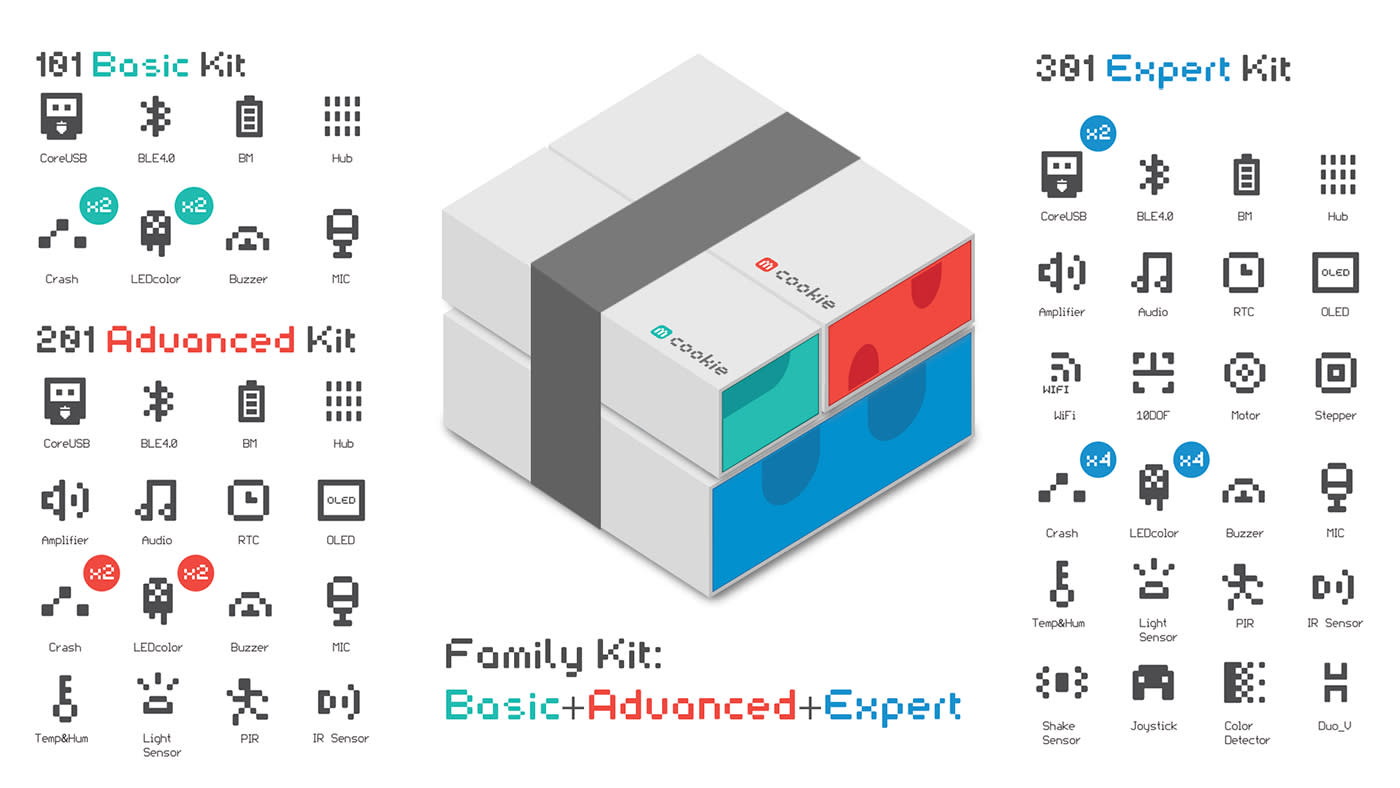
Getting your STEM skills up to speed is now easier than ever with Microduino's mCookie. These Arduino-compatible electronics kits make building mini machines a snap -- literally -- with magnetic connectors and interlocking pins that match up with LEGO blocks. The mCookie family of DIY modules, sensors and accessories was Kickstarted back in 2015 and began shipping to consumers at the end of the year. Now anyone can pick up one of the various kits (Basic, Advanced or Expert) and assemble projects like a music box, voice-activated camera, paw-waving fortune cat and more. Microduino also offers additional components to expand the possibilities to keep pace with your imagination. This week, one lucky reader will win a Family Kit (including all three mCookie sets) to launch your smart-machine-making career. Just head down to the Rafflecopter widget below for up to three chances at winning.
Engadget giveaway: Win an mCookie Family Kit courtesy of Microduino!

Getting your STEM skills up to speed is now easier than ever with Microduino's mCookie. These Arduino-compatible electronics kits make building mini machines a snap -- literally -- with magnetic connectors and interlocking pins that match up with LEGO blocks. The mCookie family of DIY modules, sensors and accessories was Kickstarted back in 2015 and began shipping to consumers at the end of the year. Now anyone can pick up one of the various kits (Basic, Advanced or Expert) and assemble projects like a music box, voice-activated camera, paw-waving fortune cat and more. Microduino also offers additional components to expand the possibilities to keep pace with your imagination. This week, one lucky reader will win a Family Kit (including all three mCookie sets) to launch their smart-machine-making career. Just head down to the Rafflecopter widget below for up to three chances at winning.

Winner: Congratulations to Robin B. of Chico, CA!