Today when you get a text, you can respond with message via an on-screen keyboard. Looking into the future, however, how would you interact unobtrusively with a device that’s integrated into eyeglasses, contacts, or perhaps even something else?
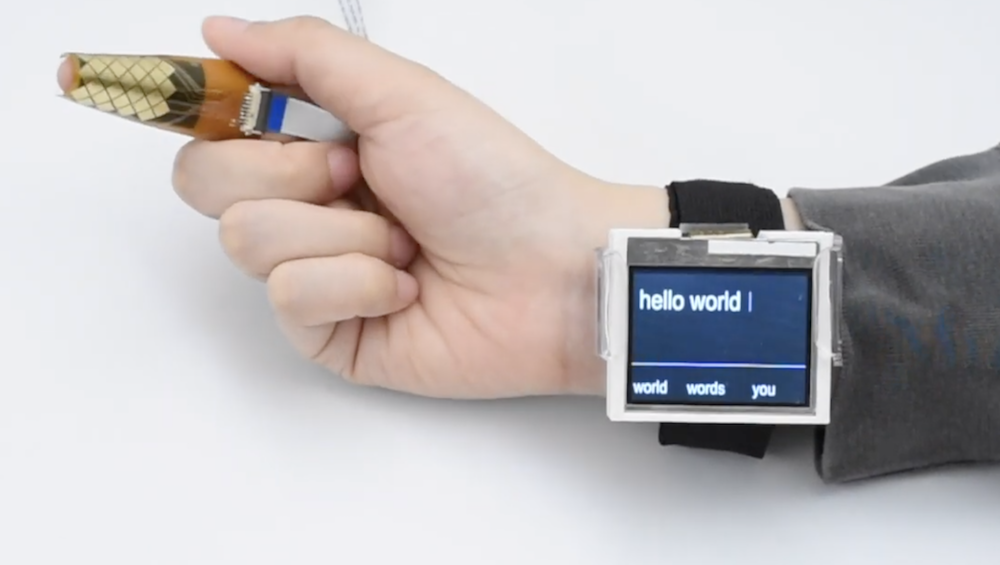
TipText is one solution envisioned by researchers at Dartmouth College, which uses a MPR121 capacitive touch sensor wrapped around one’s index finger as a tiny 2×3 grid QWERTY keyboard.
The setup incorporates an Arduino to process inputs on the grid and propose a number of possible words on a wrist-mounted display that the user can select by swiping right with the thumb. A new word is automatically started when the next text entry tap is received, allowing for a typing speed of around 12-13 words per minute.
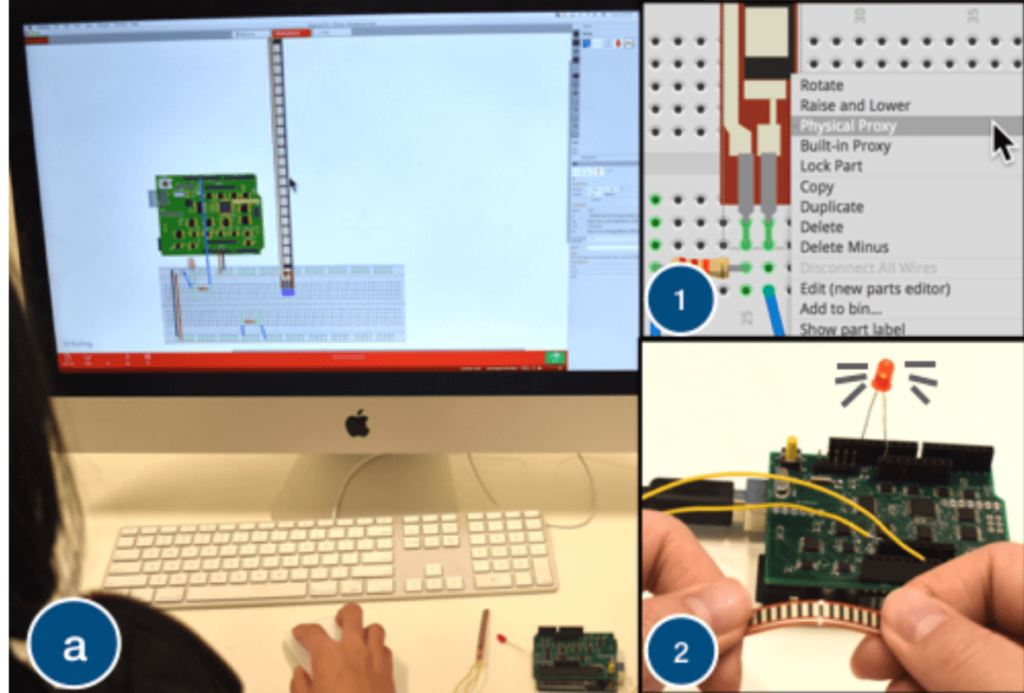
While circuit simulation tools become more accessible all the time, at some point it’s necessary to actual build your device and test it. Proxino, developed by researchers at Dartmouth College, takes a different approach, and enables you to virtually create a circuit, then test parts of it as needed with electronic components via physical proxies.
To accomplish this, Proxino hardware sits on an Arduino Uno as a shield, and generates the virtual circuit’s responses to inputs. This setup allows for the implementation of physical elements like buzzers, lights, and sensors to complement the simulated environment, which can even be shared by remote collaborators in different locations.
Proxino certainly looks like it could be an excellent instructional tool, or perhaps more!
Smartphones have become a part of our day-to-day lives, but for those with visual impairments, accessing one can be a challenge. This can be especially difficult if one is using a cane that must be put aside in order to interact with a phone.
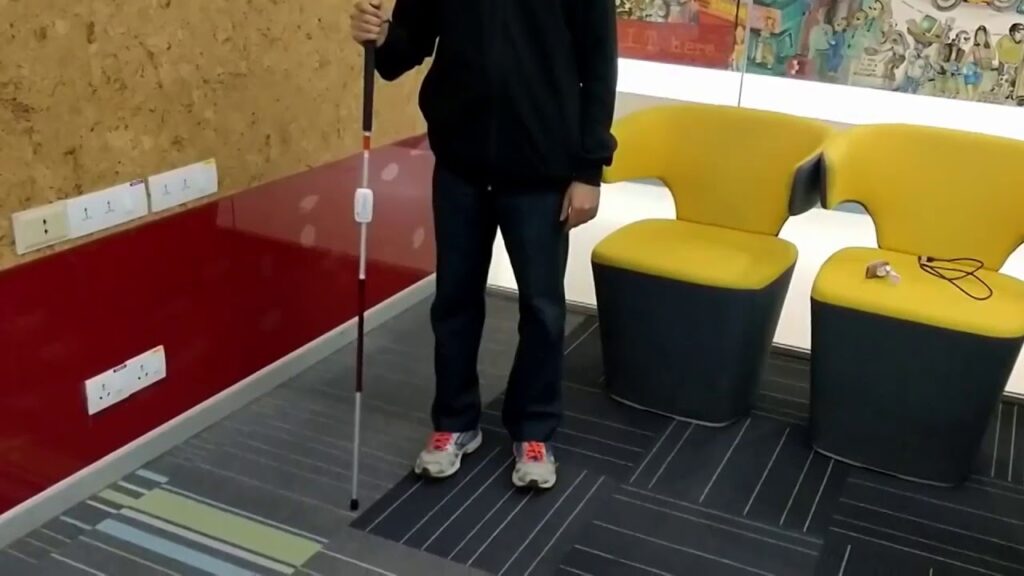
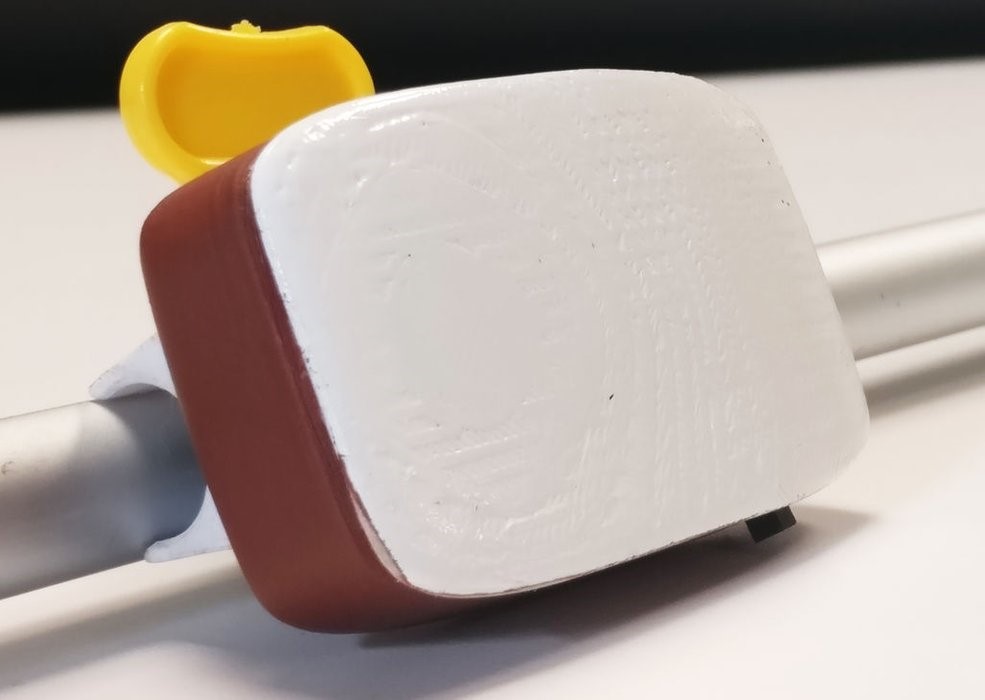
The GesturePod offers another interface alternative that actually attaches to the cane itself. This small unit is controlled by a MKR1000 and uses an IMU to sense hand gestures applied to the cane.
If a user, for instance, taps twice on the ground, a corresponding request is sent to the phone over Bluetooth, causing it to output the time audibly. Five gestures are currently proposed, which could expanded upon or modified for different functionality as needed.
People using white canes for navigation find it challenging to concurrently access devices such as smartphones. Build ing on prior research on abandonment of specialized devices, we explore a new touch free mode of interaction wherein a person with visual impairment can perform gestures on their existing white cane to trigger tasks on their smartphone. We present GesturePod, an easy-to-integrate device that clips on to any white cane, and detects gestures performed with the cane. With GesturePod, a user can perform common tasks on their smartphone without touch or even removing the phone from their pocket or bag. We discuss the challenges in build ing the device and our design choices. We propose a novel, efficient machine learning pipeline to train and deploy the gesture recognition model. Our in-lab study shows that Ges turePod achieves 92% gesture recognition accuracy and can help perform common smartphone tasks faster. Our in-wild study suggests that GesturePod is a promising tool to im prove smartphone access for people with VI, especially in constrained outdoor scenarios.
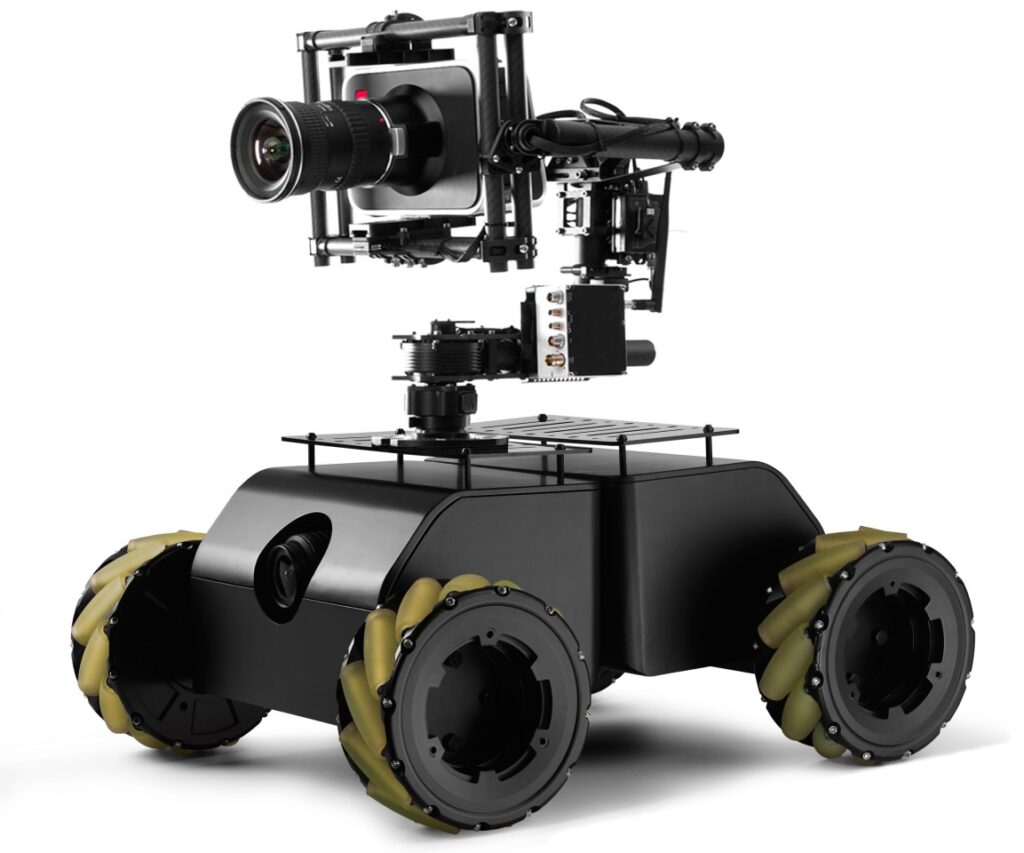
Taking photos or recording videos by hand is great, but in many situations you’d prefer to have your camera mounted on a movable or even programmable platform. Steve — now funding on Kickstarter — aims to fill that role as a remote-controlled vehicle that can maneuver your camera into places where you couldn’t reach before, all while capturing cinematic shots.
The device is able to carry a payload of 20kg, and features a suspension system that allows it to traverse rough terrain, along with Mecanum wheels that let it slide in any direction.
Best of all, it’s powered by an Arduino, meaning that when you’re ready to move on from manual RC operation, it can be customized for a wide variety of uses!
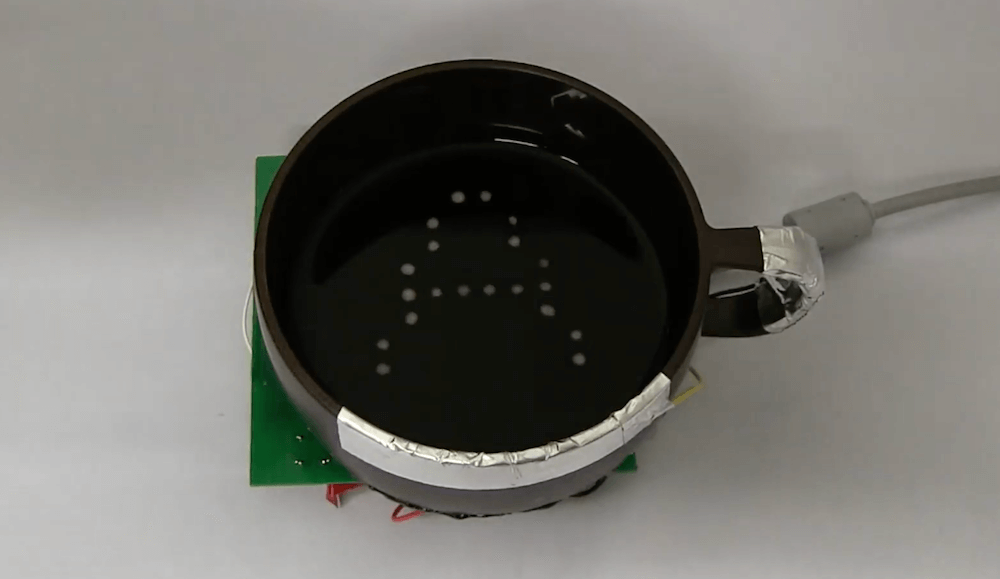
Ads, notifications, and other messages surround us today, and if you were overwhelmed before, researchers at Ochanomizu University in Tokyo, Japan have figured out how to print text and images in your cup of coffee! This system, dubbed “BubBowl,” uses electrolysis to dynamically generate a dot-matrix pattern of 10 x 10 pixels on the surface of beverages.
The Arduino-based device utilizes a series of shift registers to control matrix outputs, along with MOSFETs to handle current through the liquid as it produces tiny amounts of (non-toxic) gas.
Resolution is good enough to display four characters at once — meaning it can show the time, or even very short messages. The drinks are still consumable after messaging, though touch-sensitive electrodes are implemented to cut off power when imbibing!
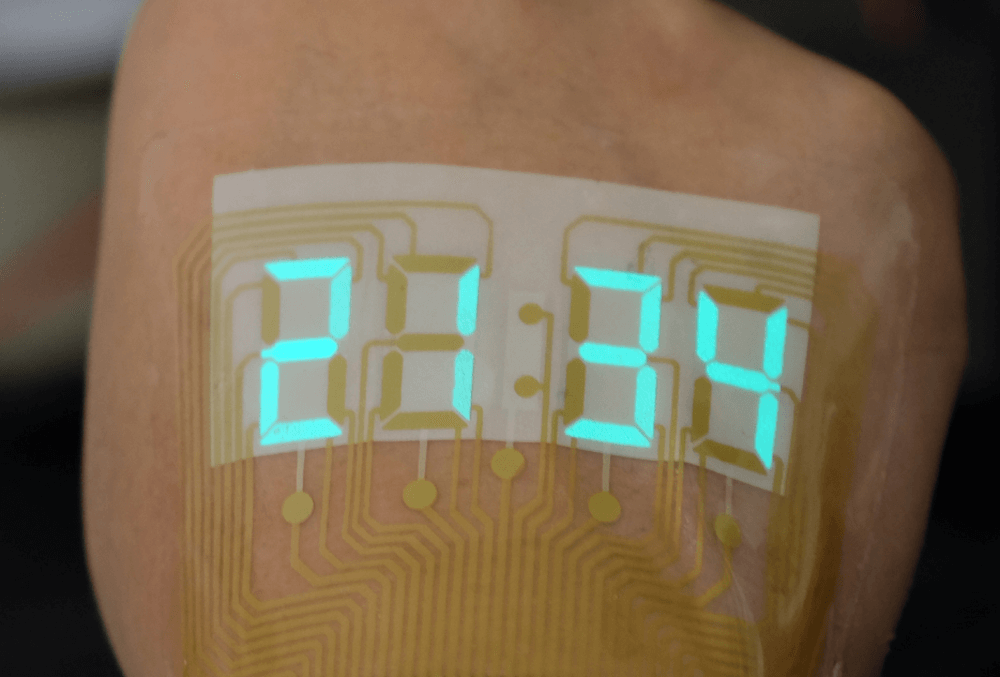
A stretchable light-emitting device becomes an epidermal stopwatch. Image: Adapted from ACS Materials Letters 2019
Imagine if your watch wasn’t mounted on your wrist, but was instead integrated into a sort of temporary tattoo on the back of your hand? Such an idea is now one step closer to reality, thanks to new research into alternating-current electroluminescent (ACEL) display technology.
While normally such displays require well over 100VAC to produce sufficient brightness, scientists have worked to get this number down into the 10-35V range, allowing them to be used in much closer proximity to human skin.
To demonstrate this technology, the team constructed a 4-digit 7-segment display that can be applied to one’s hand, using an Arduino Mega and driver circuitry to turn it into a digital timepiece.
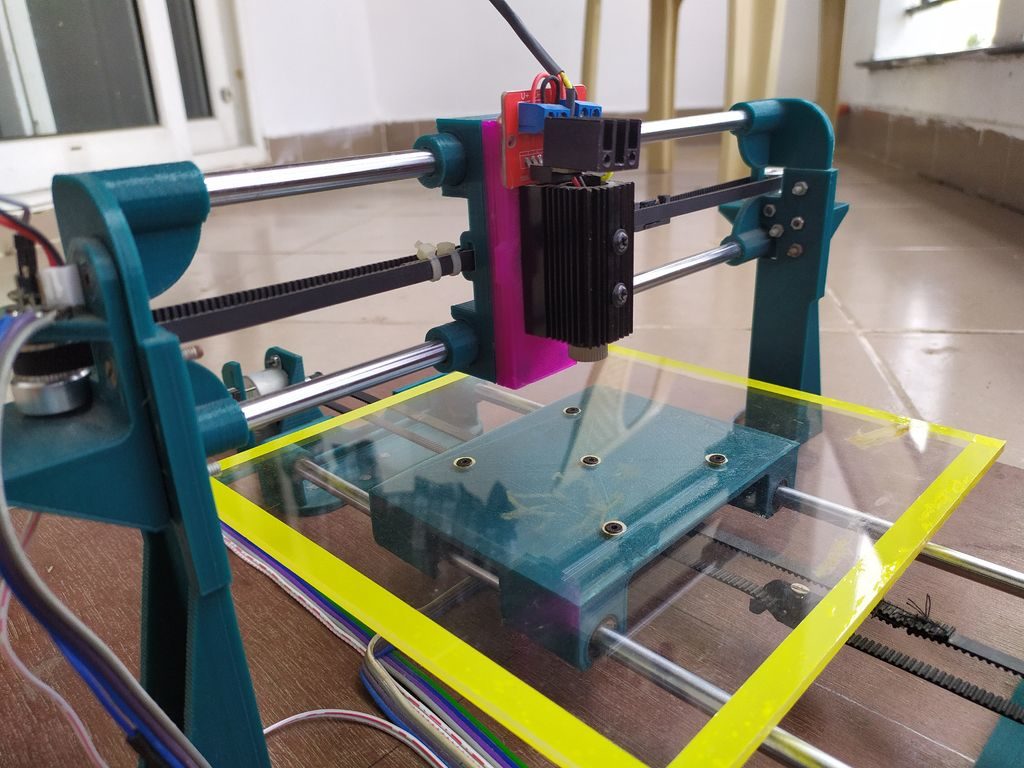
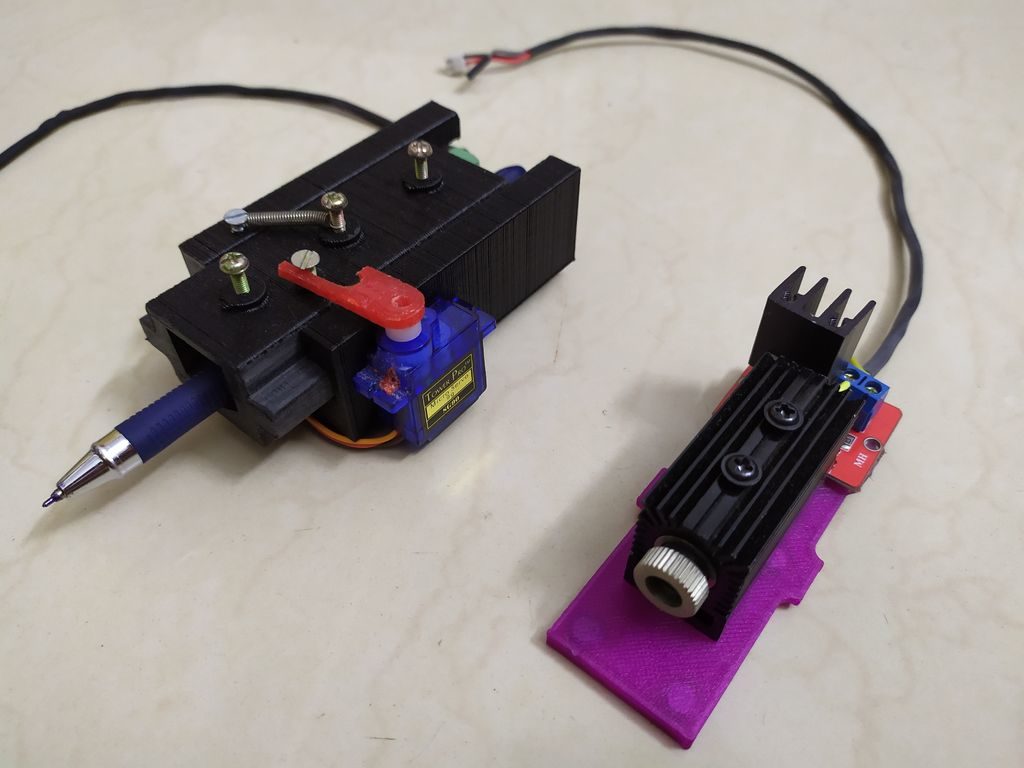
If you find yourself debating between a pen plotter or laser engraver, this project by Patrick Panikulam lets you have the best of both worlds in style. The DIY device pulls a writing instrument in the X-axis using a belt-driven overhead system, while the base itself moves in the Y direction.
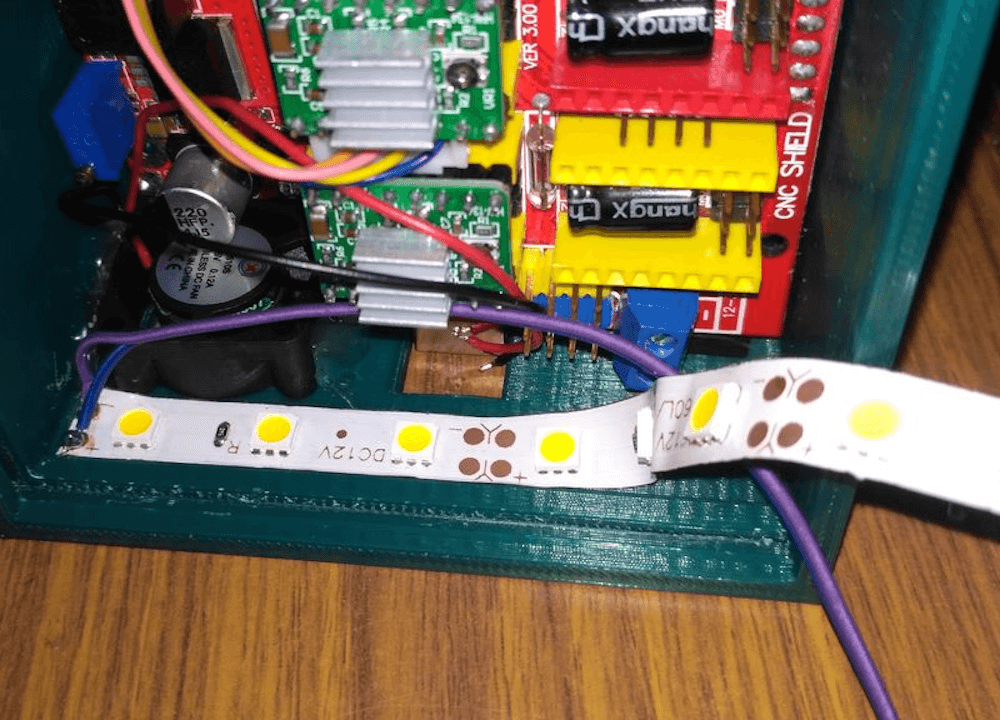
Motion is handled by an Arduino Uno, along with a CNC shield and two A4988 drivers that actuate modified 28BYJ-48 steppers. The shield also outputs laser control signals, which are converted into PWM signals for the lifting servo when in pen mode.
It’s an extremely clean build, and even features a Bluetooth module for wireless communication with your computer. Panikulam provides more details here if you’d like to create your own!
A couple of months back while checking out a few laser engravers on aliexpress, I came across some USB powered laser engravers. It was awesome that these could engrave on a variety of materials and also cut out shapes and designs from sticker sheets and paper and doing all this powered by a 5V USB supply. But the downside of these engravers was that they had a small work area, in most cases just 40mm X 40mm which is definitely way too small for my needs.
So I thought why not design and 3D print my own laser engraver from scratch. I started the designing process in Fusion 360 while keeping in mind all the 3D printing tolerances. And finally came up with something really cool. Along the way, I decided to make the laser holder modular so that I can easily replace the laser with a pen or marker for pen plotting. I also added a Bluetooth connectivity feature so that wired connection between your PC and the engraver can be eliminated while transmitting G-codes.
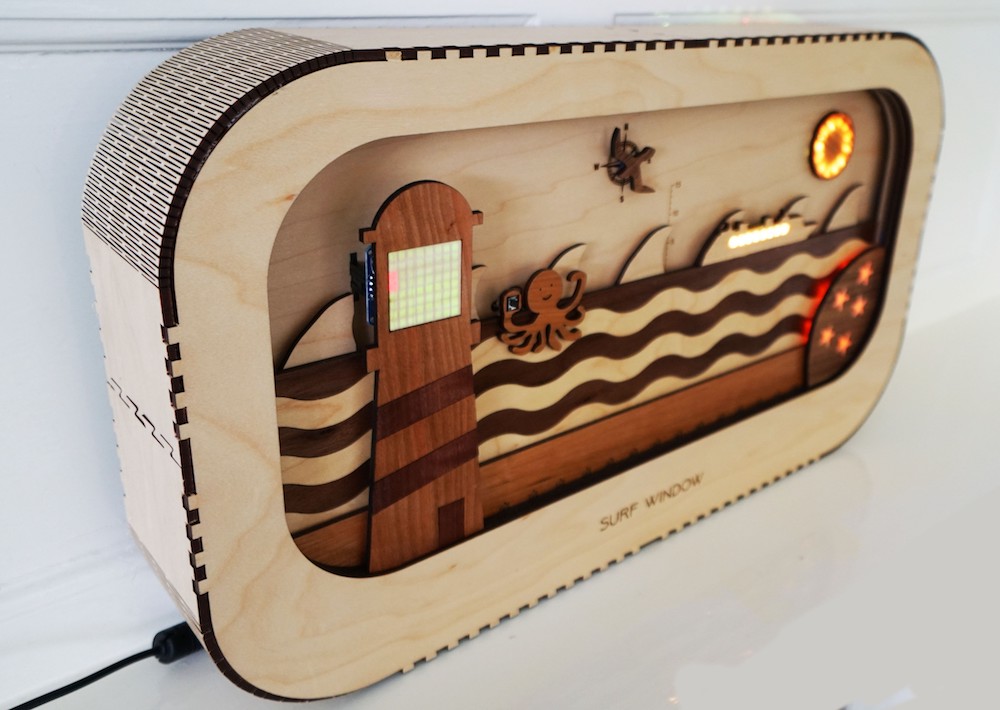
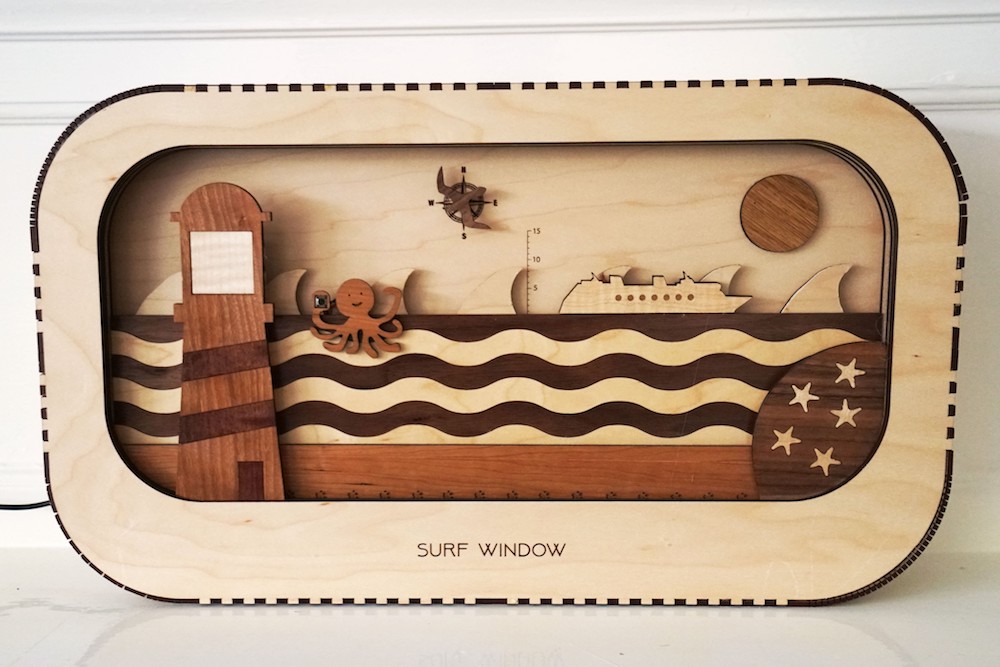
While some of us live directly beside the beach, others—the vast majority, in fact—reside inland where we can’t see the waves on a day-to-day basis. As a solution to this issue, surfer-maker Luke Clifford came up with his own “Surf Window,”an interactive diorama that shows real-time surf conditions at a glance.
The Arduino Mega-controlled device pulls beach info from the Magicseaweed API, then adjusts the laser-cut wooden stage to match. Indicators include starfish that light up depending on how good the surf conditions are overall, a physical wave model that moves up and down to represent height, a rotating seagull to reveal wind direction, and more.
Whether you’re a landlocked surfer, or just someone who wants to know more about the environment, this looks like a really interesting gadget. The build is currently wrapping up a Kickstarter campaign if you’d like to have your own!
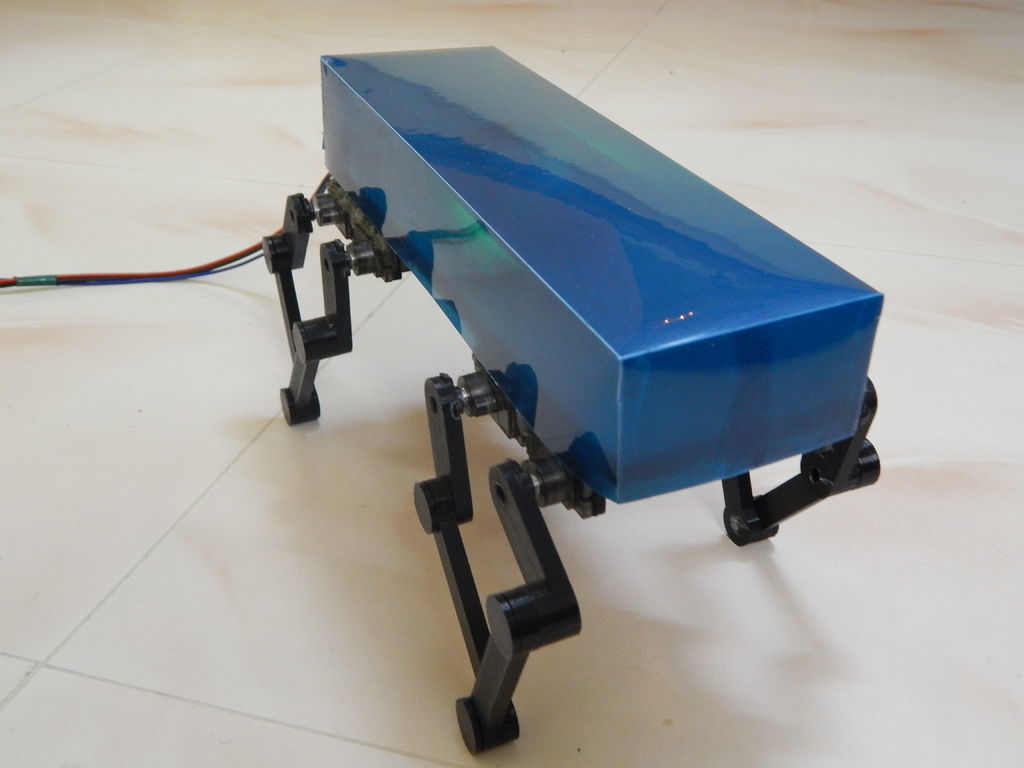
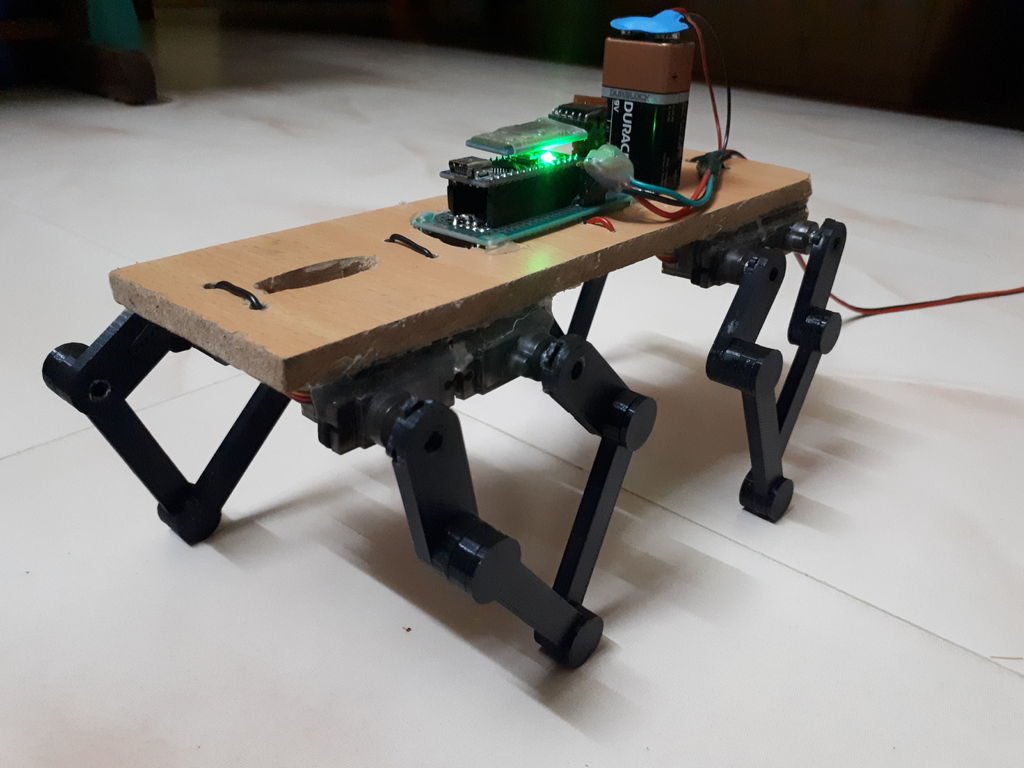
Although we can’t all have the MIT Mini Cheetah at home, Jegatheesan Soundarapandian decided to make his own version — measuring just 23 cm x 9 cm x 9 cm.
As shown in the video below, the aptly named “Baby Cheetah” does an amazing job of getting around on four legs, and is not only able to walk upright, but can even move at a crouch, turn, and tilt forwards or backwards.
The robot is equipped with eight SG90 servos to actuate each 3D-printed leg linage assembly, giving the limbs excellent mobility in a vertical plane. An Arduino Nano is used for control, while an HC-05 Bluetooth module links to a smartphone running a custom app for user interface.
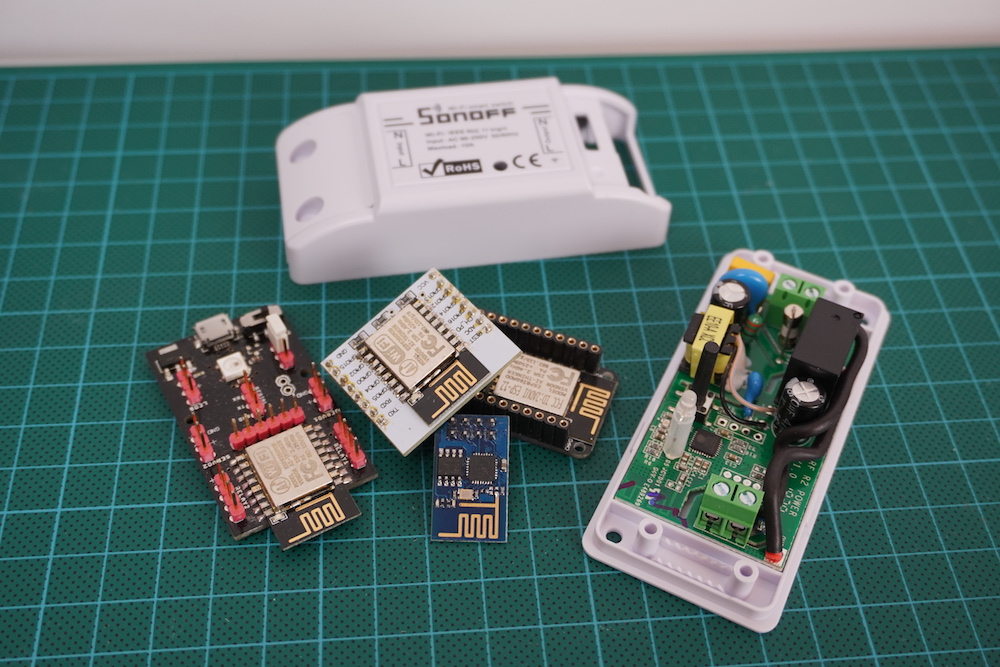
With the latest release of Arduino IoT Cloud (version 0.8.0) we did a lot of work behind the scenes, and while it might be transparent to most users, it introduced some big changes. But the one we’re most excited about is that the Arduino IoT Cloud has begun supporting a number of third party devices.
Starting with the uber-popular ESP8266 by Espressif — NodeMCU, Sparkfun’s ESP Thing, ESPDuino, and Wemos (to name a few) — along with other inexpensive commercially available plugs and switches based on this module. You can now add one to your Cloud Thing and control it using our intuitive web-based Dashboard.
Like every new release, there were plenty of obstacles to get around, especially providing security between the third party boards and the Arduino IoT Cloud, where there’s no possibility to go through our secure certificate provisioning process because the hardware is lacking an essential component: the cryptographic element.
The Arduino IoT Cloud was born with security in mind and developed around the Arduino MKR series of boards featuring Microchip’s ATTECx08, an encryption chip capable of elliptic-curve cryptography. These boards store the bits necessary to authenticate with a server in a very secure way, guaranteeing your board is connecting to the real server and exchanging data over TLS.
When it comes to boards that don’t have enough RAM and do not feature such cryptographic elements, we had to enable a secondary way to get in. Data transfer will still be encrypted over SSL, but the server authentication part will be a little less strict, allowing the Arduino IoT Cloud to be available to a wider user base. Nevertheless, we do inform users that if they want the highest levels of security they’ll have to use a board which embeds a cryptographic chip. As more and more IoT device users become concerned with security, manufacturers are starting to implement such technologies. We have just recently seen standalone ECC modules which can be paired with your microcontroller of choice. It’s looking bright, and we’re proud to have been amongst the first to bring about this change.
For third party boards without a crypto chip, we had to extend our API and allow the creation of a device-exclusive unique identifier (which will be used as a username) and the generation of a Device Key, providing the final user to access the platform using a username: password pair.
Internally we already used those tools and APIs; we’re just opening them up for use by a broader audience.
One small requirement for this to work is that you’ll need to upgrade your Arduino Create plan to the ‘Maker plan.’ This will give you access to ESP8266 compilation and IoT Cloud pairing of the device. The Maker plan will also extend the amount of original Arduino boards and Things you can create and manage.
This is just the first step in opening up to more and more hardware, and we have a lot of things lined up for our users. We really hope you’ll enjoy the ease of development and the tools to bring your application to the Cloud in the shortest possible time.