Posts with «featured» label

Make an “analog” bike speedometer with Arduino
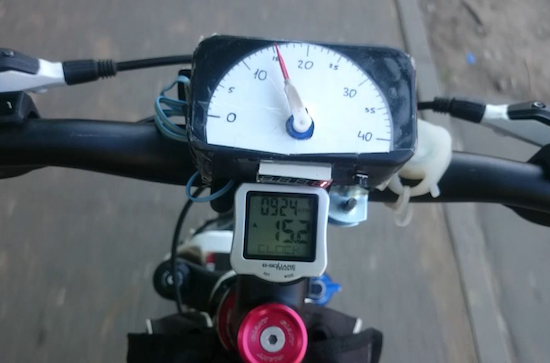
As Maker Alex Gyver points out in his video, Chinese bike computers are quite cheap, but “why not?” It’s a great question, and one that motivates many of the hacks seen here, including his mountain bike speedometer.

Although he could have simply used a numerical display to show how fast his bike was going, he instead employed a small servo to point to the speed like an analog gauge. The custom speedometer is based on an Arduino Nano, and wheel revolutions are measured by a magnetic and Hall effect sensor.

This may seem like a silly project, but if you need to take a very short glance at something, analog gauges tend to be much easier to read than digital. Perhaps this concept could be quite useful! You can see exactly how to make this hack on Instructables and in his video here with a few action shots. Code can be found on GitHub if you’d like to check that out as well!
A cool infinity mirror-style bottle opener

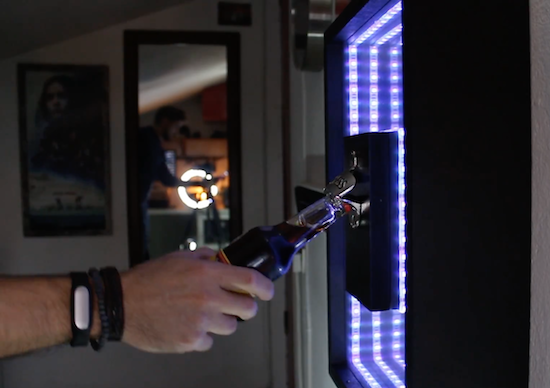
In his quest to create “the coolest wall-mounted bottle opener in the entire world,” it would appear that YouTuber “Never Stop Seeking” has succeeded.

As seen below, the infinity mirror-style unit is made of plexiglass and two-way mirror film, and equipped with Arduino Uno-controlled RGB LED strips that are activated by a proximity sensor as you open a beer or soda. He even included a magnetic catch for his bottle caps!

Want to build one of your own? Good news, Never Stop Seeking plans on sharing more details along with a how-to video in the coming days.

Display time on a 1950s multimeter

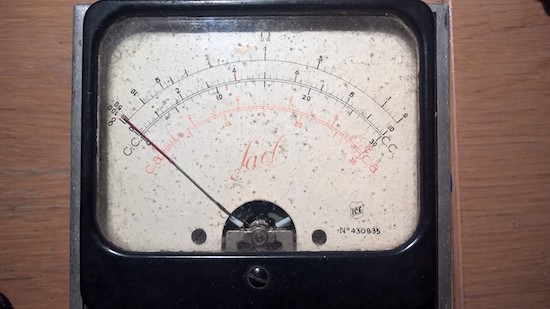
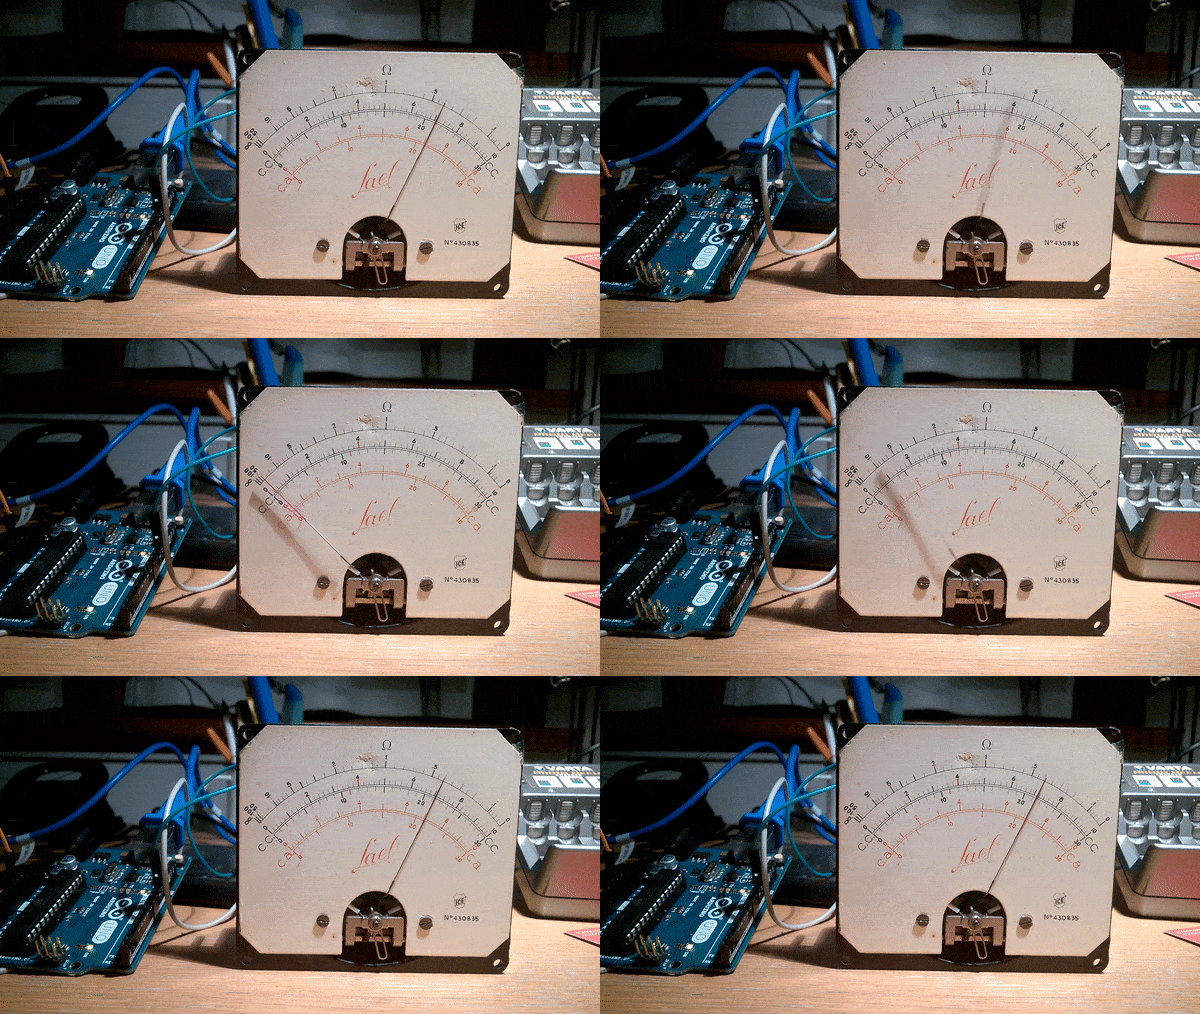
Given an input and some sort of indicator, is there any device that can’t be hacked into a timepiece? With the help of an Arduino Nano and an ESP8266 module, Guilio Pons has created a unique clock out of a 1950s-era multimeter.

Pons’ project not only displays time with an indicator originally meant to reveal electrical values, but is also able to output sounds as needed using a speaker recovered from an old toy. He integrated three LEDs as well as a PIR sensor, so the unit can light up at night.

PWM control from the Arduino takes care of moving the gauge, while the ESP8266 allows the time to be synchronized via the Internet and the alarm adjusted over WiFi.

Want to retrofit a vintage tester of your own? Be sure to check out the Pons’ entire log on Hackaday.io. You can find the software library that he used to play sounds here.

Motorize any camera slider with Arduino!

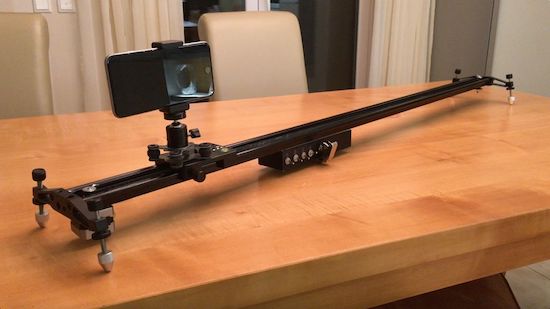
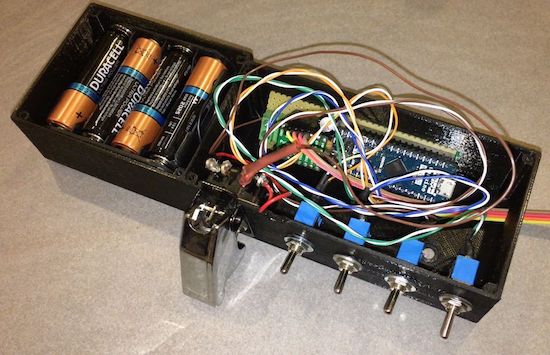
Using a stepper motor, an Arduino Micro, and various mechanical bits, “Max Maker” shows us how to motorize a camera slider.

According to his video below, “There are many cheap sliders available, but none that are motorized.” On the other hand, in this project he demonstrates that with a little bit of work, and an excellent attention to detail, you can make the conversion yourself.

Even if you’re not interested in this kind of application, the video reveals some interesting tricks, such as transferring a hole pattern using tape at 0:30, and using nail polish/recessed lettering to label switches at 3:55. The slider can be set to slide down the rail between 10 seconds and 8 hours depending on your video or photography needs. Video results, seen around 5:00 in, are really amazing!

You can find more details on how to create a slider like this on the project’s Instructables page.

This animatronic device turns speech into sign language

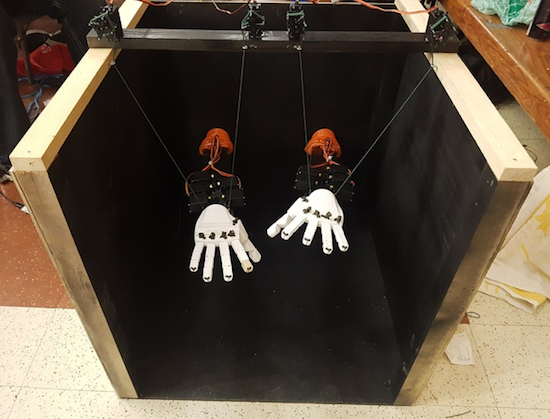
Using a couple Arduinos, a team of Makers at a recent McHacks 24-hour hackathon developed a speech-to-sign language automaton.

Alex Foley, along with Clive Chan, Colin Daly, and Wilson Wu, wanted to make a tool to help with translation between oral and sign languages. What they came up with was an amazing animatronic setup that can listen to speech via a computer interface, and then translate it into sign language.

This device takes the form of two 3D-printed hands, which are controlled by servos and a pair Arduino Unos. In addition to speech translation, the setup can sense hand motions using Leap Motion’s API, allowing it to mirror a person’s gestures.

You can read about the development process in Foley’s Medium write-up, including their first attempt at control using a single Mega board.

Need desk lighting? How about 1,200+ LEDs?

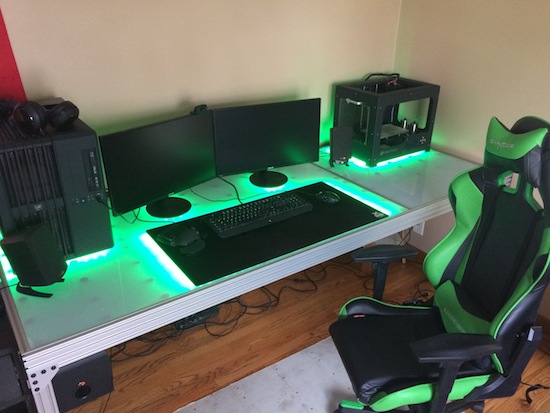
After he’d just finished a project using RGB LEDs, Imgur user nolobot’s brother mentioned he needed a new computer desk. Most people would probably just let their brother buy one, others would make something out of wood, but nolobot instead decided to create something truly amazing using more than 1,200 WS2812 RGB LED modules, an Arduino Mega, aluminum extrusion, and translucent polycarbonate.

The Mega controls these LEDs with the FastLED library, which are sandwiched between a base piece of plywood and a strip of polycarbonate using custom spacers. This diffuses the light nicely, allowing for beautiful light animations directly on the desk’s surface.

You can find more on this awesome build on the project’s Imgur page!

Laptop control box provides speedy access to apps

If you need to quickly launch certain apps on your MacBook Pro, Carl Gordon has your solution using an Arduino Nano.

Although the TV ads for your notebook computer would perhaps have you believe that everyone who uses it is a DJ, artist, or rock climber, chances are you just use it for a handful of programs and folders over and over. If this sounds like you, you can at least speed up access to them using Gordon’s “Laptop Control Box.”

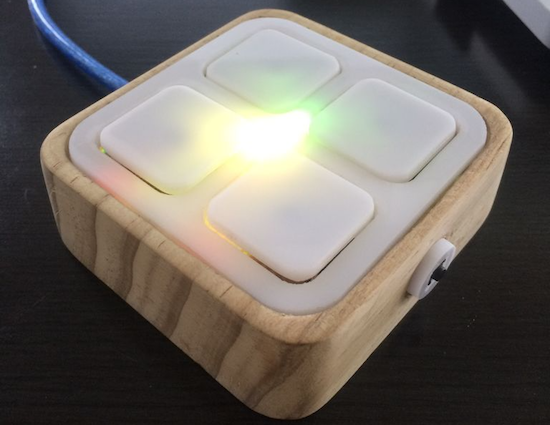
As seen below, the box acts as a grid of shortcuts to your favorite applications, with a button to select sets of programs and an embedded RGB LED module to show you which set is active without having to look at the screen. Control on the computer side is accomplished with Processing, and though it might look like its window needs to be active in the video, it can work in the background as well.

This version currently gives me to access 24 different functions which are divided into six categories of four functions for ease of use, these categories include: tools, media, browser, utilities, social and lifestyle. Categories can be navigated through using the small button on the side and each category is visualized with a unique color by an RGB LED within the device, illuminating the plastic buttons from underneath.

Check out how to make this handy little gadget in Gordon’s Instructables write-up here.

Remotely control a sumo bot with a gaming wheel

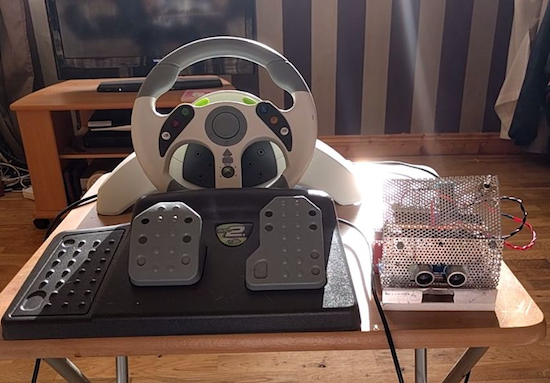
Using an Arduino Uno, Nano, and two Bluetooth modules, engineering student “Roboro” can now remotely control his sumo robot.

Like many hackers, Roboro had an old gaming controller that he wasn’t using, in this case an Xbox steering wheel and pedals. Naturally, he converted it into a controller for his sumo robot, which can now be driven manually. This involved wiring the wheel controls into an Uno; the smaller Nano was used onboard the bot.

Rewiring a controller is nothing new, but what is also quite interesting from a hack point of view is that the Arduinos communicate over Bluetooth. When initiated, the controller connects itself to the robot, which can then be driven around (as long as it doesn’t get stuck in the hardwood).

You can see more details of this build on Roboro’s project page.

Log high-altitude balloon data with this Arduino device

Wanting to see data from their high school’s HAB launch, 9th grader “Spaceshark” and a few of his classmates decided to build their own data tracker.

According to the project’s write-up, Spaceshark’s school has an astronomy club which sends HABs to the edge of space. Although the 360-degree video embedded here would be enough to satisfy most people’s curiosity, this team wanted more data!

Spaceshark’s group proceeded to create a data logger using an Arduino Uno, along with sensors to collect data on the satellite’s latitude and longitude coordinates. Altitude, wind speeds, time, and the satellites in view can also be recorded, saving readings on a microSD card for later analysis.

Since these type of balloons can reach heights of 100,000 feet, the fact that the boards used could get quite cold, as well as the question of whether or not the GPS used would work at that altitude, had to be considered. You can find more details of this build on its Instructables page here.

Arduino Day Turin: Call for projects and volunteers!

As recently announced, Arduino Day 2017 will be celebrated on April 1st. (If you want to organize an event of your own, please submit your proposal by March 11th.) Though festivities will be taking place worldwide, the Arduino team will be holding this year’s official event at Toolbox Coworking in Turin–which happens to be in the same building as Arduino’s new Italian headquarters.

The Arduino Day Turin program (11am – 6pm), organized in collaboration with Fablab Torino, will include an exhibition area with boards and projects, a talk area with speeches by Massimo Banzi and other Arduino co-founders, a workshop/demo area with free activities for kids–with the Fablab for Kids team–and adults, as well as an Arduino store with special prices and offers.

We are currently seeking projects for Arduino Day Turin’s exhibition space: if you are an individual or team of Makers and would like to show off  your creations, feel free to fill out this form by March 18th. If you are an Arduino enthusiast and want to help out, we are also looking for volunteers (application here) to welcome guests, document the event, and assist the Arduino crew.

Over the next few weeks, we’ll be sharing more news and updates on Arduino Day Turin’s agenda and activities. In the meantime, don’t forget to post and invite your friends via ia social media using the hashtag #ArduinoD17!