Posts with «featured» label

Arduino-controlled 360° camera trap for animal photography

Using an Arduino, wildlife observer and hiking hacker Andrew Quitmeyer modified a spherical camera to take pictures when motion is detected.

If you’d like to photograph wildlife without actually being there to scare the animals off (or because you would eventually get bored), a great solution is a camera trap. These devices can trigger a camera when animals move nearby, hopefully capturing interesting images. Generally, you need to point your camera in the right direction, but Quitmeyer got around this by using a 360 camera instead to eliminate this placement bias.

In order to control the device, he rigged up his own system with PIR motion sensors and an Arduino Uno to prompt the camera as well as power it on and off. The hack looks effective, though voiding an expensive camera’s warranty like this will certainly scare a few Makers off!

You can see more about how this project was pulled off on Instructables, and find the Arduino code used on GitHub.
Testing microswitches with a (not quite) Useless Machine

Pete “Raster” Prodoehl shows how to test microswitches with an Arduino Uno.

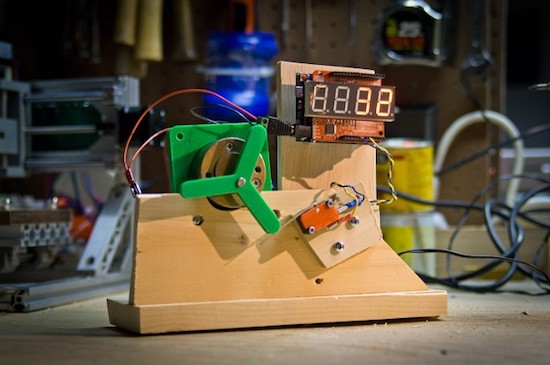
As referenced in his write-up, Prodoehl needed a way to test microswitches that he’d be using for an exhibit. After all, when something is on display, the last thing you want is to have to replace components. Inspired by how Consumer Reports tests things, he decided to build his own setup with a counter and 3D-printed “pusher.”

What he found was that when you’re testing the life span of a component made to work over and over, your testing components have to also be robust enough to handle the very gradual abuse. It’s an interesting exercise, and something that engineers in manufacturing have to deal with constantly. Getting something to work once or even a times is neat, but getting it to function thousands of times for a test or otherwise takes a different way of thinking!

You can see more about this project on Prodoehl’s page here, and check out the video compilation below for a quick overview.

An interactive LED floor to get the dance party started

If you want a light-up dance floor for your next wedding or other special event, you can rent one; however, that can be quite expensive. On the other hand, you and your hacker friends can always build one. How hard can that be?

Turns out, very hard. While it may be simple to get one translucent panel to illuminate with LEDs, this 17-square-foot interactive dance floor used 64 panels with four lighting cells in each, for a total of 256 lighting arrays and 7,680 RGBs arranged as 2,560 addressable pixels.

Even with some advanced tools like a pick-and-place machine for PCB manufacturing, as well as a laser cutter, it still took volunteers many hours over the course of 11 months to get it working. LED control is accomplished via a Teensy 3.1, while 256 pressure switches under the surface are read by an Arduino Mega.

You can see more details of the impressive project in the video below (including a round of multi-player Dance Dance Revolution) and a few more technical details in AvBrand’s write-up here.

Build a motorized gimbal on a budget with Arduino

Tadej Strah, a freshman at Gimnazija Vic in Slovenia, made a motorized gimbal using only $60 worth of parts.

After joining a photo and film club at his university, Strah was inspired by a member with cerebral palsy to build an inexpensive gimbal to keep a small camera level. His project uses an MPU-6050 sensor to detect motion, and an Arduino Mega to process this data and control the device’s two servos. The setup includes a handle from an angle grinder, while the servos are mounted on bent pieces of metal, helping keep the cost down.

Strah believes that with a few upgrades, such as a smaller battery, Bluetooth connectivity, and a 3D-printed frame, it should be able to provide many of the features of those available for $500 or more. Hopefully we’ll see this design become even better in the future!

Until then, you can follow along with Strah’s progress, and perhaps another iteration of his gimbal, on his YouTube channel.


Selectively silence a landline phone with Arduino

Silencing a smartphone at night isn’t difficult, but if you have a landline, Arduino can help!

Before computer hacking/modding became accessible, the next best thing was to creatively explore the phone system via custom electronics. Though this pursuit, known as “phone phreaking,” has largely gone away, some people still have landlines. As “MolecularD” shows in this Instructables writeup, with a few components you can creatively trick your phone into not ringing on your end, while appearing to the caller to simply ring and ring as if no one is home.

In order to make it much more useful, MolecularD hooked up an Arduino Mega with a real-time clock module to turn the device on and off depending on the time of day. Now calls from phone solicitors, or “IRS agents” at 4 in the morning can be eliminated automatically. As noted, this may or may not be legal where you live, so attempt it at your own risk!

Build an Arduino-powered magnetic drawing machine

As touched on in this video by Charlotte Dann (aka “Charbytes”), she has magnets in her fingers.

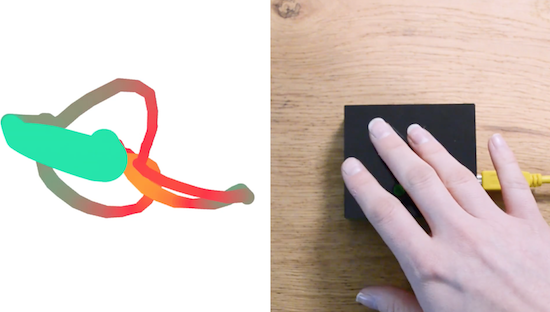
This may or may not seem like a small detail, but either way it allows her to draw interesting shapes by passing them over a magnetometer mounted to an Arduino Uno. Dann’s sensor/Arduino package passes serial data to a computer, which does the “heavy lifting,” turning the input into beautiful colors on a computer screen.

It’s an interesting project, and the build process is nicely narrated in her video. A few highlights include a problem with “plastic weld” at 4:00, and a few electrical issues around 7:30 that she eventually solves. You can see more details on this project on its GitHub page, as well as check out Dann’s Twitter account to see what else she’s up to!

Easy ‘USB-ake’ Oven with Arduino Uno

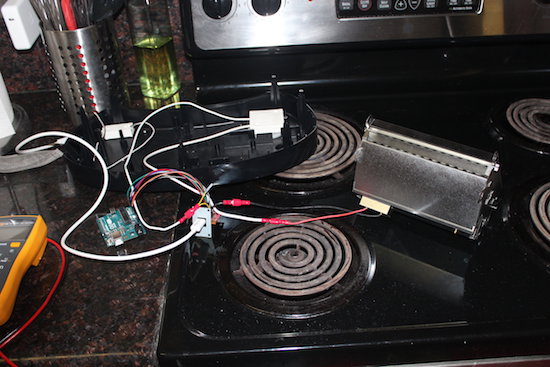
After procuring a new Easy-Bake Oven, engineer Jason Cerundolo decided to convert it to run off of USB. According to his project write-up, “USB-C spec allows for 100 Watts of power to be transferred through the connector, and that is the power rating for the oven, so it should work.”

The biggest modification in this build was dividing the heating element into six segments in order to power it with 20V allowed over USB-C. Finding a suitable charger for this device was also a bit of a challenge, but after 20 minutes, it was able to reach 300° F, producing five strangely-shaped but likely still tasty cookies!

For the electronics, I used my USB-C breakout board with the FUSB302B PHY and an Arduino Uno. I wired I2C plus interrupt between the two. I connected VBUS from the breakout board to VIN on the Arduino to power it. Then, I connected +3V3 from the Arduino to the VDD on the breakout board to power the FUSB302B, as well as +5V to V_pullup on the breakout board. I also connected VBUS to the switch, then to the modified heating element and back to GND. To make the connections easier, I crimped spade connectors onto jumper wires. Finally, I plugged the modified light into pin 13 on the Arduino.

You can check out more about Cerundolo’s project, and find his code on GitHub.

EMoRo now part of AtHeart!

We’re excited to welcome Croatian startup Inovatic ICT and its EMoRo Kit to our AtHeart program!

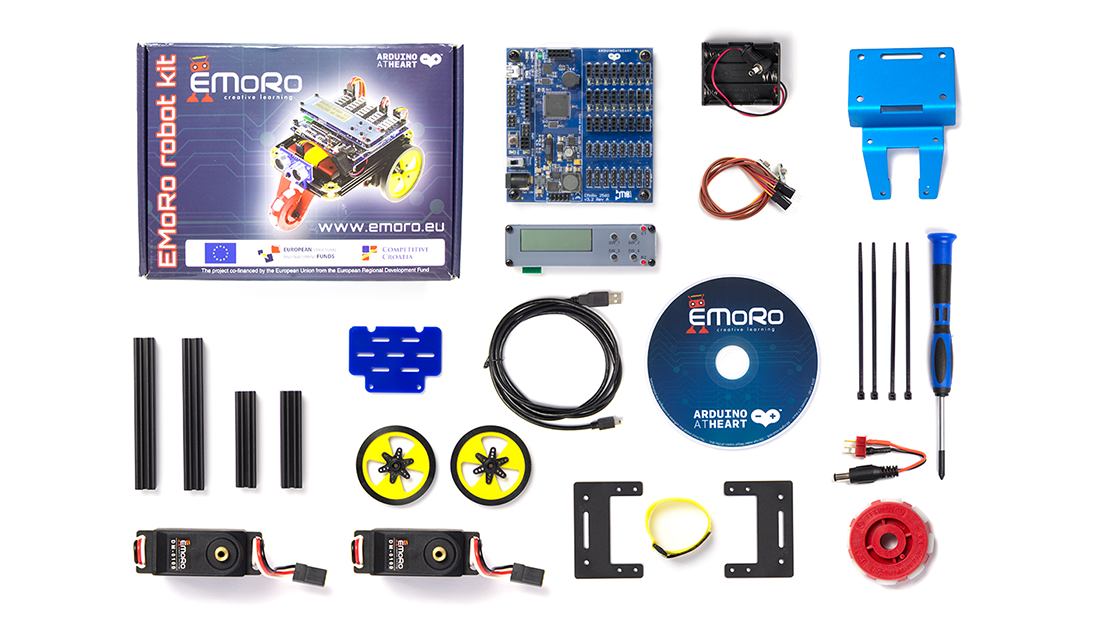
EMoRo (Educational Mobile Robot) is an Arduino-compatible robot designed to encourage logical thinking and technical curiosity in a fun, engaging way. The solder-free DIY kit consists of a robust aluminum chassis along with easy-to-connect components like servos, sensors, and relays. It also supports other construction sets like LEGO Technic, Eitech, and Fischertechnik.

Based an ATmega250 board, EMoRo can be programmed using the Arduino IDE and upgraded with the addition of interchangeable modules, such as Bluetooth for Android device control, an LCD display, push buttons, and an accelerometer, gyroscope and compass for navigation. Built-in safety features include step-down regulators, thermal shutdowns, under-voltage lockouts, and cycle-by-cycle over-current protections–all of which make the EMoRo rugged enough for beginners, yet versatile enough for advanced Makers.

According to Boris Jakov Anic-Kurko, Inovatic ICT Managing Director: 

EMoRo originated as a result of our vision to create a tool that would introduce the world of robotics to children and spark their interest in technology and programming. With that vision in mind, we have decided to use the programming platform Arduino, as the world’s most used and popular programming platform when it comes to programming small educational robots.

Interested in EMoRo for your next robotics competitions or as a tool in your STEAM class? You can now buy a kit here! 

These e-tattoos turn your skin into smartphone controls

Electronic interfaces have advanced from plugging things in, to keyboards, touchscreens, VR environments, and perhaps soon temporary tattoos. Led by Martin Weigel, researchers at Saarland University in Saarbrücken, Germany have come up with a way to turn your skin blemishes and wrinkles into touch-sensitive controls for devices like smartphones and computers.

“SkinMarks” can be transferred onto the skin using water and last a couple of days before rubbing off. As seen in the video below, these e-tattoos can take the form of buttons, sliders and visual displays, and even sense when a joint is bent. For example, knuckles on a hand made into a fist could act as buttons and then become a slider when the fingers are straightened.

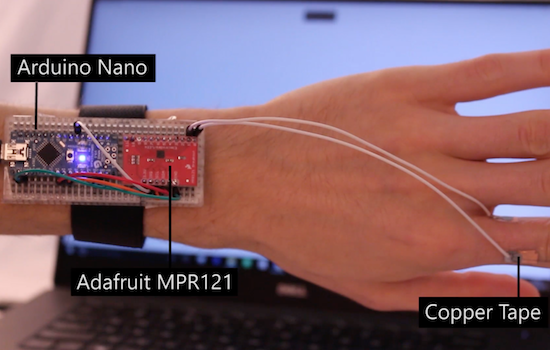
Another type of SkinMark is electroluminescent, meaning that an image printed on your skin could light up to signal a phone call or other important notifications. These tattoos are connected to a wrist-mounted Arduino Nano and an Adafruit MPR121 capacitive touch shield via wires and copper tape; though if the system can be shrunk down even further, this could open up many different possibilities!

You can find more information on this project on New Scientist, or in the team’s published paper here.

Add flair to your turn signals with programmable LEDs

Modding vehicles to do something different and unique has been a pastime of “motorheads” almost since cars began to replace horses. Many modifications involve speed, but some like these fancy turn signals by Shravan Lal, simply supplement the looks of his ride.

An Arduino Nano was used as the brains of this hack in order to control strips of WS2812B LEDs acting as blinkers (similar to those on the new Audi A6) in the video below. In addition to signaling a right or left turn, Lal’s build also has a neat startup animation, and can act as a set of hazard lights if needed.

It’s a neat project, with lots of further potential; on the other hand, be sure to check the legality of this type of modification in your area before attempting something similar! You can find more information on his GitHub page. Speaking of customizing cars, don’t miss AtHeart’s Macchina M2 on Kickstarter now!