Posts with «featured» label

Arduino-powered Infinity Bike virtual training environment
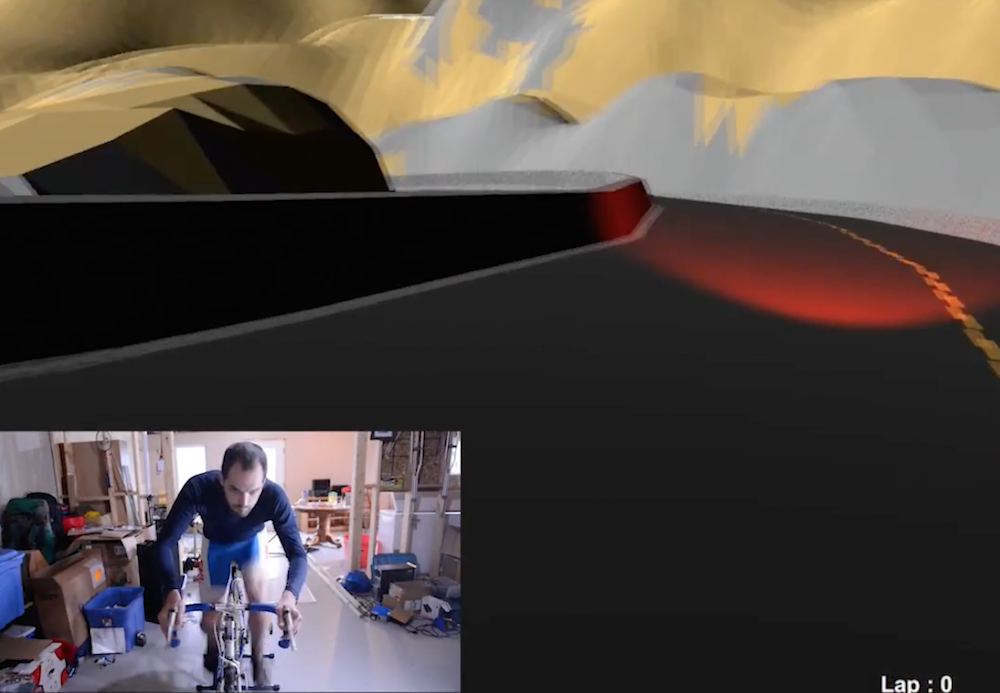
Riding a bike can be great exercise, but unless you have access to a velodrome, when the weather turns bad, training is interrupted. There are of course training wheel setups that you can use to simulate riding indoors, but without the stimulus of actually moving, things can get boring rather quickly.

The Infinity Bike by Alexandre Doucet and Maxime Boudreau, however, aims to change this as a system of 3D-printable parts and sensors that can be applied to an existing bike/trainer.  A Hall effect sensor is used to measure rotations per minute, while a potentiometer mounted to the handlebars detects the steering direction. This information is transmitted to a computer and the Unity 3D environment using an Arduino Nano, allowing participants to ride in a pristine virtual environment rain or shine.
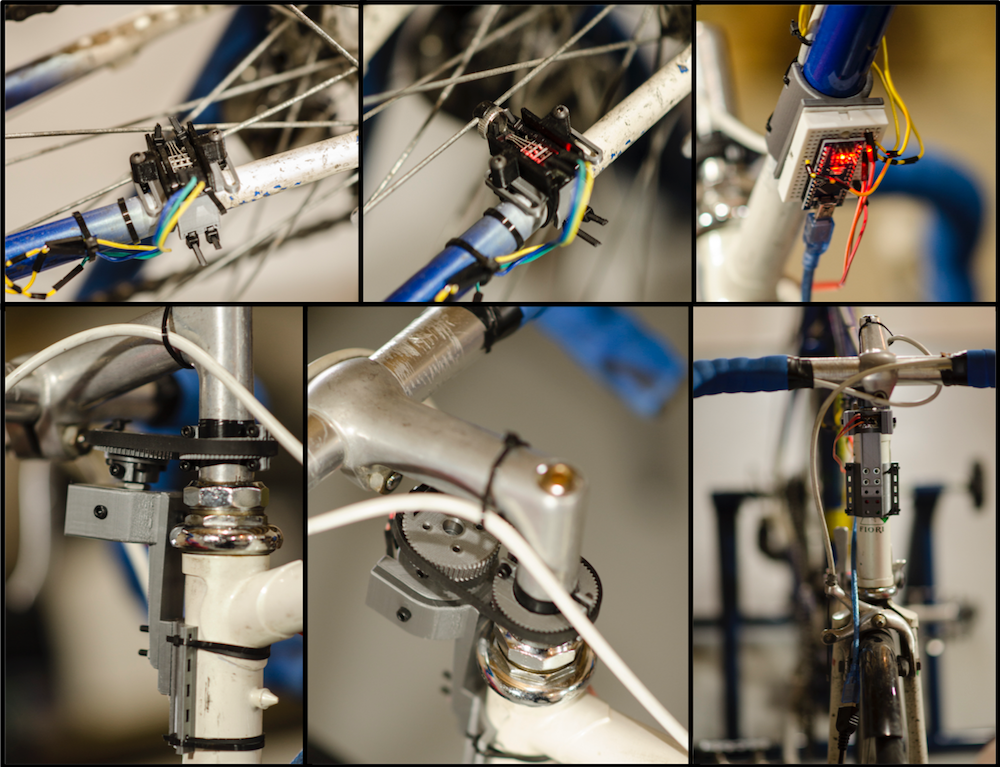
During the winter seasons, cold days and bad weather, cyclist enthusiasts only have a few options to exercise doing their favorite sport. We were looking for a way to make indoor training with a bike/trainer setup a bit more entertaining but most product available are either costly or just plain boring to use. This is why we started to develop Infinity Bike as an Open Source training video game. Infinity bike reads the speed and direction from your bicycle and offer a level of interactivity that cannot be easily found with bike trainers.

We take advantage of the simplicity available from Arduino microcontroller and a few 3D printed parts to secure inexpensive sensors to a bicycle mounted on a trainer. The information is relayed to a video game made with the popular game making engine, Unity.

An overview of the Infinity Bike can be found here, and a preview of the project can be seen in the video below! 
Wake up to an Arduino-based overhead alarm clock

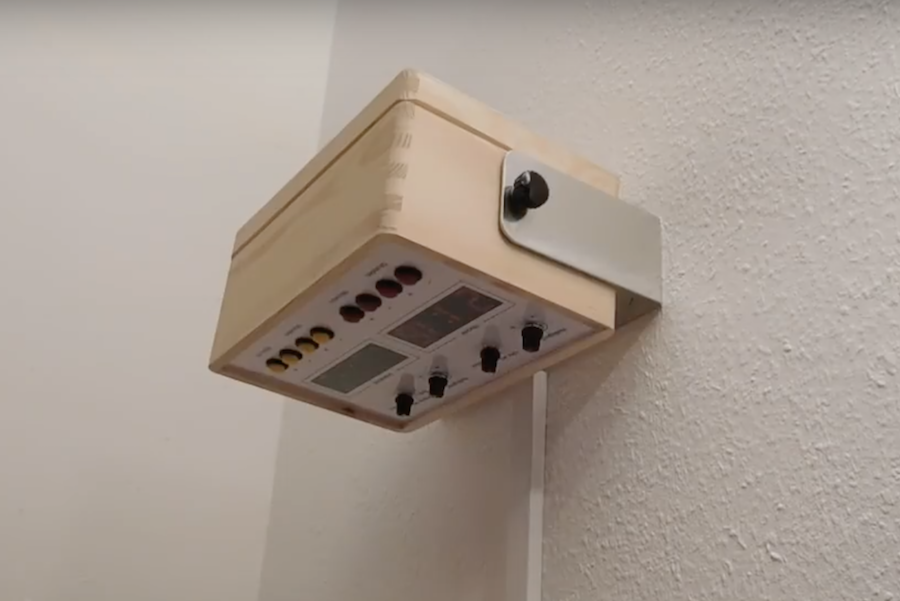
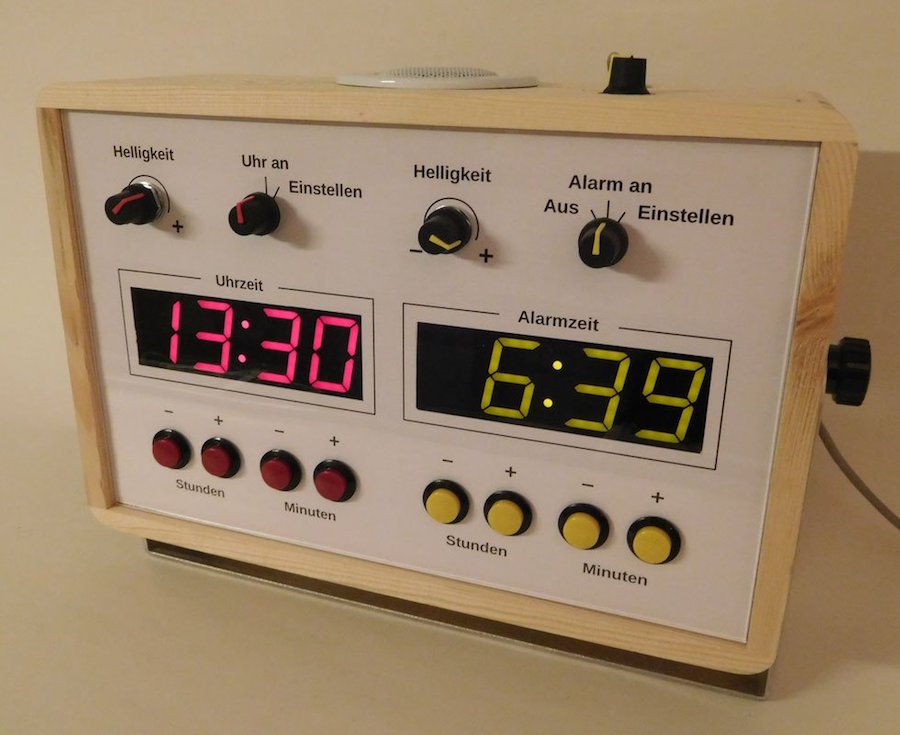
Tired of wondering what time it is at night, only to have to roll over to look at your alarm clock? If you’d like to avoid this nighttime inconvenience, then Kurt Andros has a great solution with his Arduino Mega-based Overhead Alarm Clock. 

The device consists of a nice wooden housing that gets mounted to a wall above where you sleep, and has separate displays for the alarm time and current time.

Instead of a menu system that you must navigate through to tune settings, the clock features buttons to change both current time and alarm time, as well as potentiometer knobs to modify brightness and alarm volume. The result is a simple interface that requires little thought to set up, and no snooze button since you can simply reprogram the wake-up time with a single button.

The overhead alarm clock offers the following features: 

• Time and alarm time can be read effortlessly and glare-free even in the dark; without glasses, without pressing buttons, without having to leave the right or left side position.

• The alarm clock can also be operated in the dark and with only one hand.

• The alarm clock can be used by a first-time user by looking at the control panel. Reading any operating instructions is not necessary.

• It wakes you up with a pleasant, volume adjustable sound (MP3 song).

• It also functions reliably in the event of a power failure.

• It is very accurate and independent of the reception of a radio signal, the power line frequency and the ambient temperature.

• It does not occupy space on the nightstand.

Sound like something you’d like in your bedroom? You can find Andros’ full project write-up here.

Ukulele LEDs light the way!

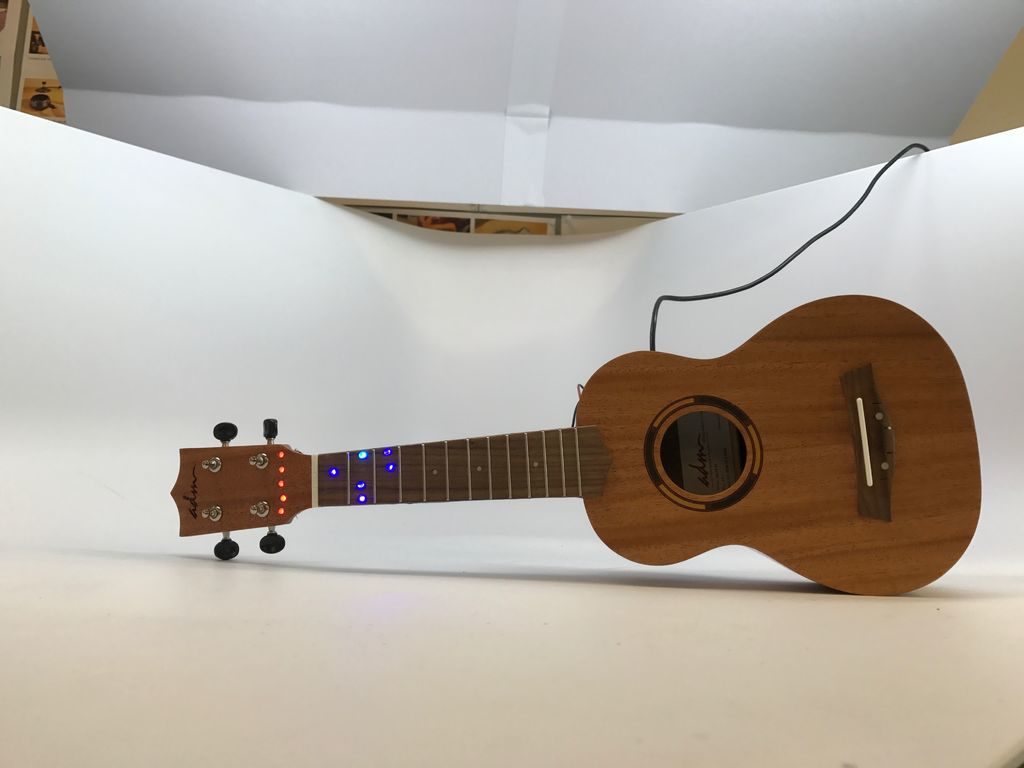
Ukuleles can be a lot of fun to play, and since cheap yet very playable versions can be had for under $50, they make a great target for hacking. And what better way to decorate an instrument by adding LEDs?

Elaine Chow did just that to her uke, adding six LEDs in the fingerboard along with another five embedded in the headstock. Each of these LEDs are controlled with an Arduino Uno, which light up to indicate the four most important chords: C, G, Am, and F. 

This can be set up to sequence through noted in a pre-defined path, and she’s working on a system that will detect when the correct finger positions are pressed, then moving on to the next note.

Combining a spirit level and range measurer in a single device

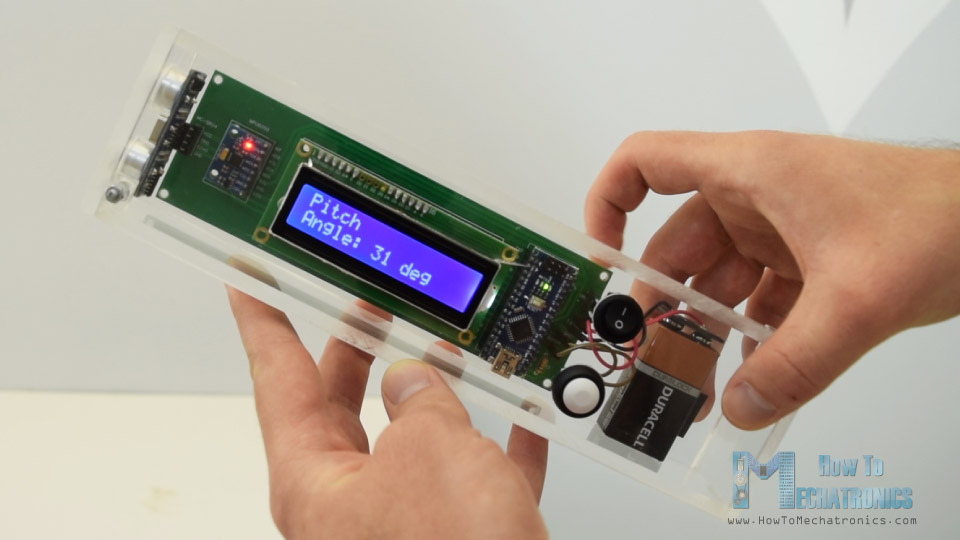
This device by Dejan Nedelkovski of How To Mechatronics implements both an ultrasonic sensor for range measurement and an accelerometer for measuring angles. While you’ve likely seen these implemented separately in other projects, combining them saves space, and allows the Arduino Nano onboard to use the two readings together to calculate a square area automatically.

User interface consists of a power switch, along with a single button for program interaction and to choose between the different measurement routines. Results are displayed on an LCD screen, and the electronics are encased in clear acrylic for visibility. 

Code and PCB files are available on the project’s write-up, and the video below gives a nice overview of its functionality and build process.

Arduino timekeeper displays red for stay in bed

If you have young kids, you’ve probably realized that they don’t exactly like to sleep in. While their energy levels are enviable, if their clock-reading skills haven’t yet caught up, this device by maker “JonathonT” looks like a great and simple solution.

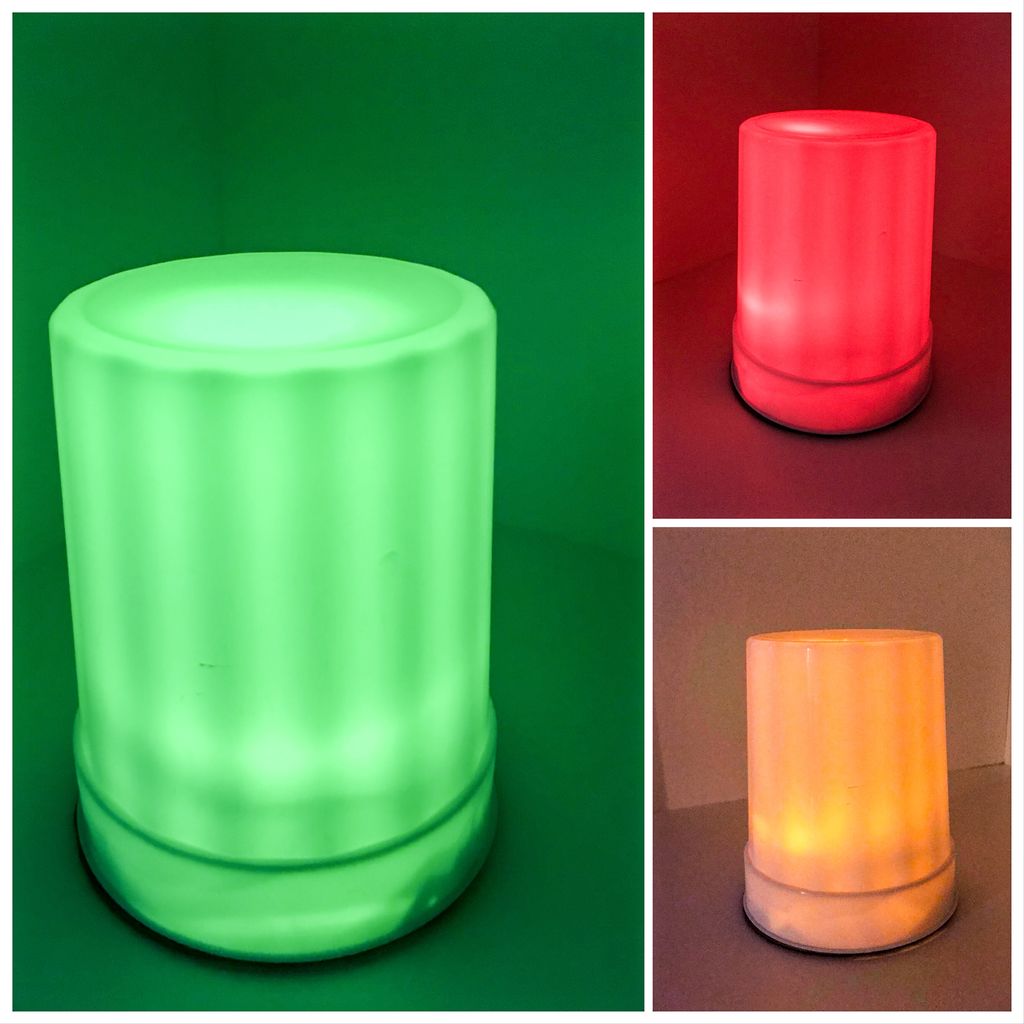
With help from an Arduino and an RTC module, Jonathon uses a trio of LEDs to show red for “stay in bed,” yellow for “almost time,” and green to indicate “you can get up.” While the current 7:00am starting time might still seem early to some, when compared to his son’s previous 5:30-or-so awakening, this is a huge improvement. Cleverly, the LEDs are diffused with a normal white plastic stadium cup with wax paper inside, making it a very accessible project!

GREEN MEANS GO!!! RED, STAY IN BED!!! This simple, inexpensive Arduino real-time clock can be set to light up LEDs at whatever time necessary. For us that means at 6:00am it turns RED, STAY IN BED. Then 10 minutes before 7:00am it turns YELLOW giving the indication it is almost time to come out and to play in your room. Then at 7:00am… “The light is GREEN!!!”, he says, as he bursts into our room each morning no earlier than 7:00am. What a lifesaver!!!

Sound like something you can use in your home? You can find build instructions here.

ZIPY is a homebrew inverted pendulum

Graduate students Ben Wiener and Philip Zucker have been working on a classic controls problem for quite some time called an “inverted pendulum.” This type of device balances a stick on an axis, and in this implementation, a motor pulls the axis assembly that the pendulum—a paint stirrer—is sitting on to keep it stable.

Control is handled by an Arduino Uno, which measures the angle of the stirrer as well as the position of the axis via a pair of encoders.

The inverted pendulum or cart pole is a classic problem in control theory. It’s in OpenAI Gym of course, but we wanted to see it work in real life, not some lame simulation. 

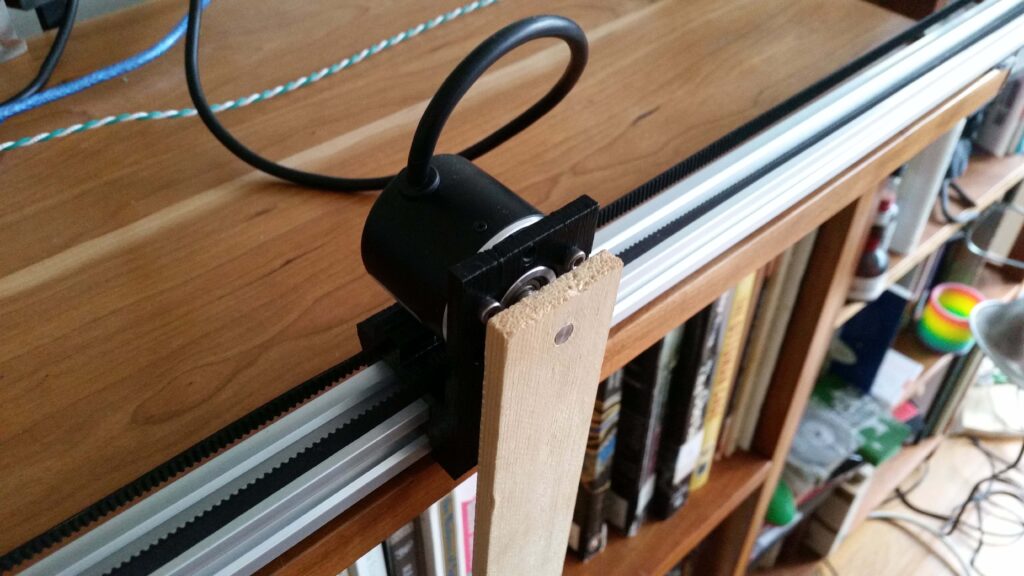
It took a few iterations, but we eventually found a system that works well. Our cart is 3D printed PLA driven by a DC motor via a toothed belt. The pole itself is a paint stirrer. One of the longer type, about 24″. A rotary encoder opposite the motor acts as a pulley for the belt and allows us to track the motion of the cart, while a second rotary encoder on the cart is a pivot for the pole and measures its angle. The motor is controlled by a 32 amp Sabertooth motor controller. It’s overkill, and pretty expensive at about $120, but we already had it for another project. We monitored the encoders with an Arduino. The foundation of the system is a piece of extruded aluminum rail called V-Slot, on which the cart slides and the motor and encoder are mounted. Our rail is 1.5 m long, from a company called  .

Code for the setup can be found on GitHub and be sure to see it in action in the video below, as it swings the wooden stick from rest into a vertical position.

Arduino Blog 23 May 16:31

Automate your chicken coop’s door with Arduino

Farmers have long been known for their ingenuity, able to accomplish urgent repairs with whatever is on hand. Now with the help of an Arduino, maker “rscholten” has even figured out how to automate his chicken coop.

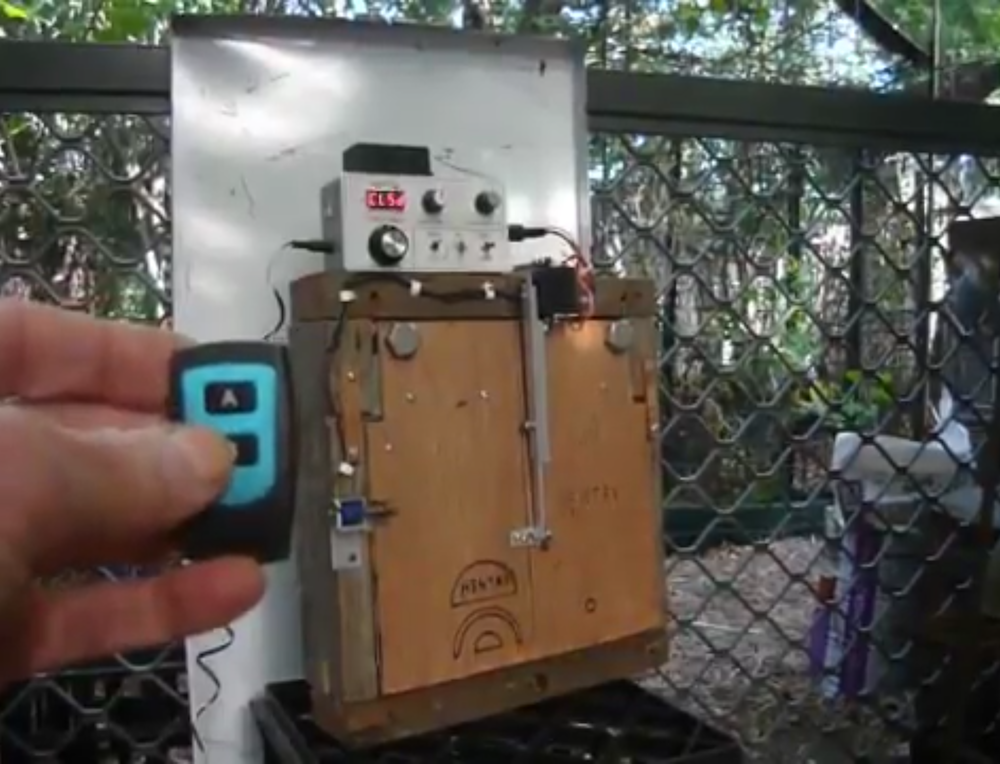
The device uses an Uno and a real-time clock module to schedule his automated coop door’s movement, while a servo and linkage system physically flips the door open and closed. A solenoid then locks the door in place when not in motion so that the servo doesn’t have to constantly maintain a position. 

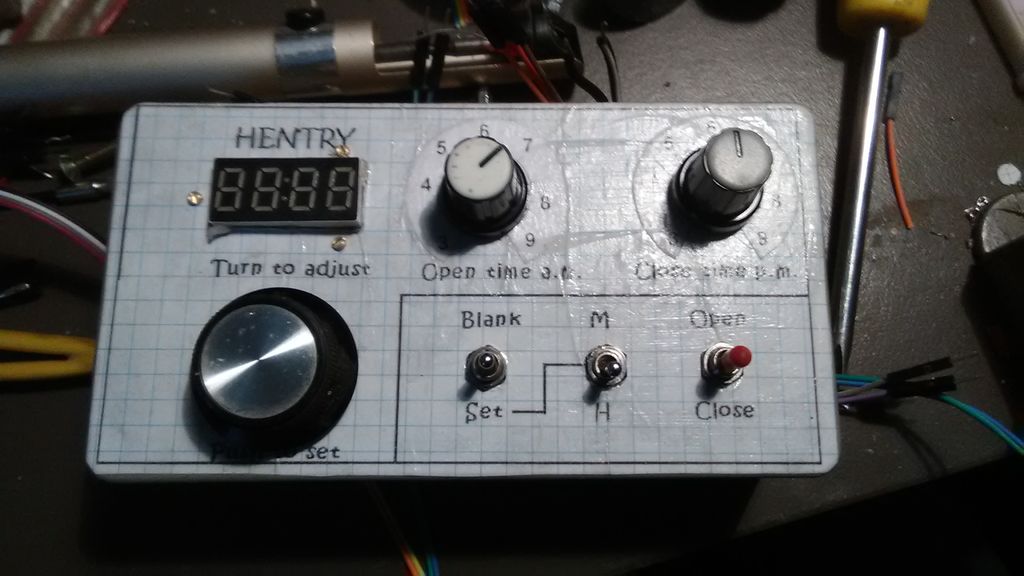
User interface is provided by a 7-segment LED, along with dials to set the current time and when it should be opened and closed. As shown in the video below, the coop can also be activated with a keyfob style remote when needed.

I built this automatic chicken door to save me the twice daily task of opening and closing the door in the morning and evening. Chickens are great providers of eggs, manure and entertainment, but getting up early to let them out the coop – especially in winter – was drudgery. And then making sure I was home in time to close them in really restricted my freedom to come home late.

Chickens follow a daily routine of returning to a coop around sunset and waking up around sunrise. The times they go in and out is not exact and is influenced on the weather of the day and ambient light. Should a chicken be seen to be too late to enter after the door closed, the door can be remotely opened then closed. The door can be closed during the day should the owner need to stop broody chickens from entering.

As sunrise and sunset times vary throughout the year and depend on the latitude, any door controller needs to track the time of day, the day of the year and know the latitude of the location. This requirement can be accomplished with software or a sun tracker, but in this design uses manually adjustable open and close time settings to keep things simpler.

Video of the Arduino FPGA Board Demo at Maker Faire

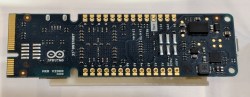
This week, Arduino announced a lot of new hardware including an exceptionally interesting FPGA development board aimed at anyone wanting to dip their toes into the seas of VHDL and developing with programmable logic. We think it’s the most interesting bit of hardware Arduino has released since their original dev board, and everyone is wondering what the hardware actually is, and what it can do.

This weekend at Maker Faire Bay Area, Arduino was out giving demos for all their wares, and yes, the Arduino MKR Vidor 4000 was on hand, being shown off in a working demo. We have a release date and a price. It’ll be out next month (June 2018) for about $60 USD.

But what about the hardware, and what can it do? From the original press releases, we couldn’t even tell how many LUTs this FPGA had. There were a lot of questions about the Mini PCIe connectors, and we didn’t know how this FPGA would be useful for high-performance computation like decoding video streams. Now we have the answers.

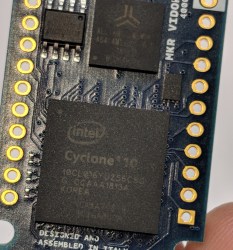
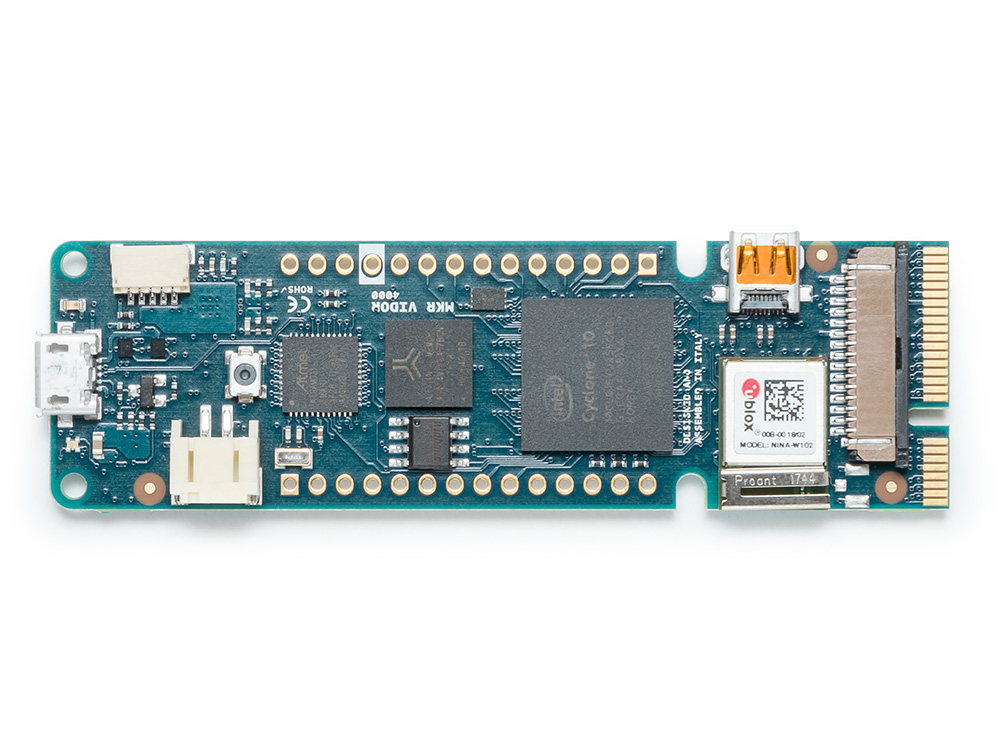
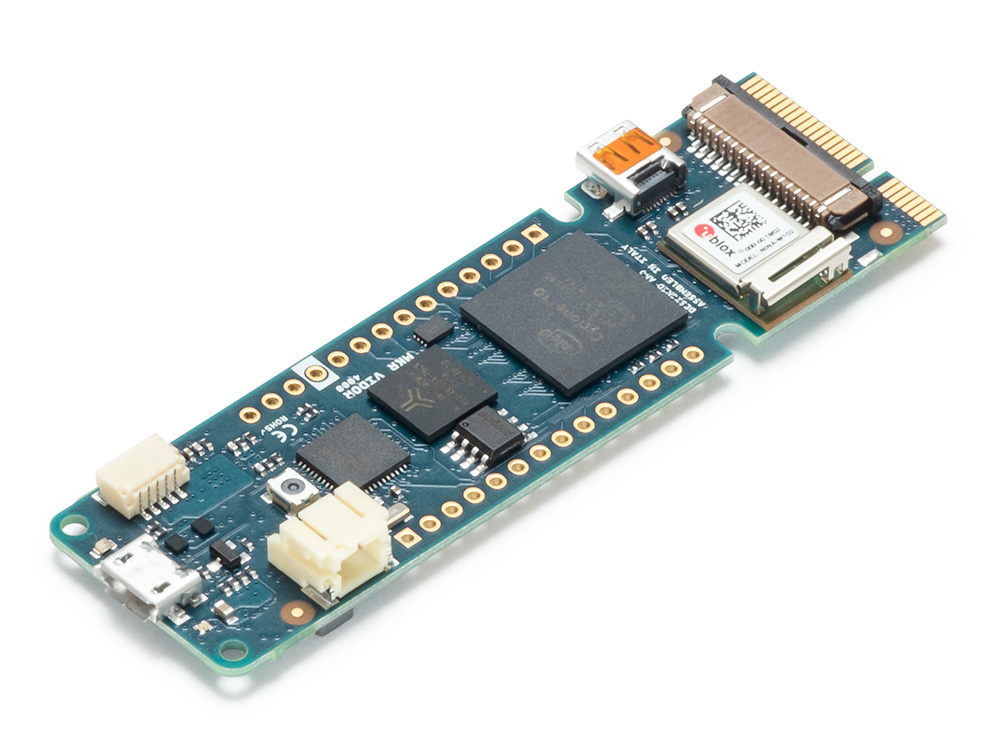
The FPGA on board the Arduino Vidor is an Altera Cyclone 10CL016. This chip has 16k logic elements, and 504 kB memory block. This is on the low end of Altera’s FPGA lineup, but it’s still no slouch. In the demo video below, it’s shown decoding video and identifying QR codes in real time. That’s pretty good for what is effectively a My First FPGA board.

Also on board the Vidor is a SAMD21 Cortex-M0+ microcontroller and a uBlox module housing an ESP-32 WiFi and Bluetooth module. This is a really great set of chips, and if you’re looking to get into FPGA development, this might just be the board for you. We haven’t yet seen the graphic editor that will be used to work with IP for the FPGA (for those who don’t care to write their own VHDL or Verilog), but we’re looking forward to the unveiling of that new software.

Say hello to the next generation of Arduino boards!

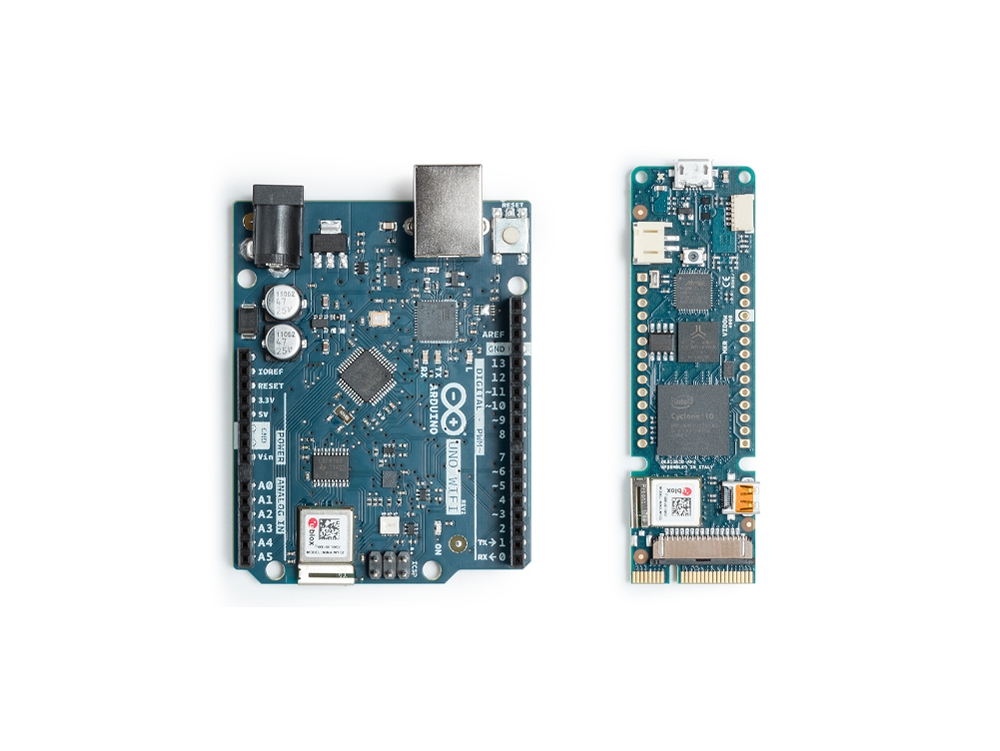
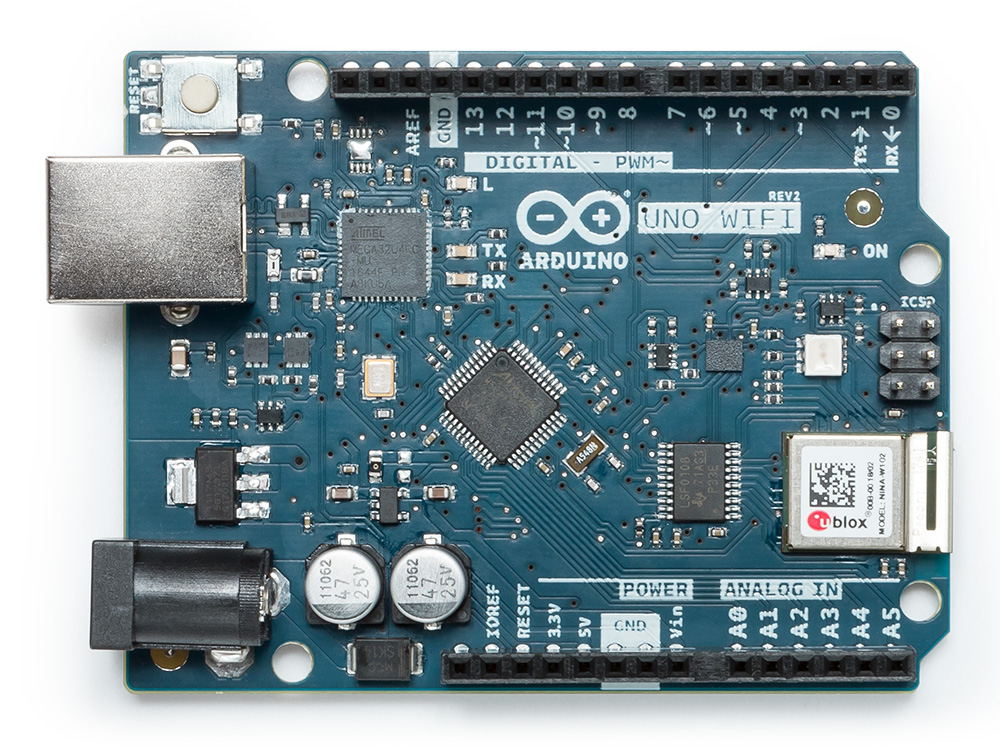
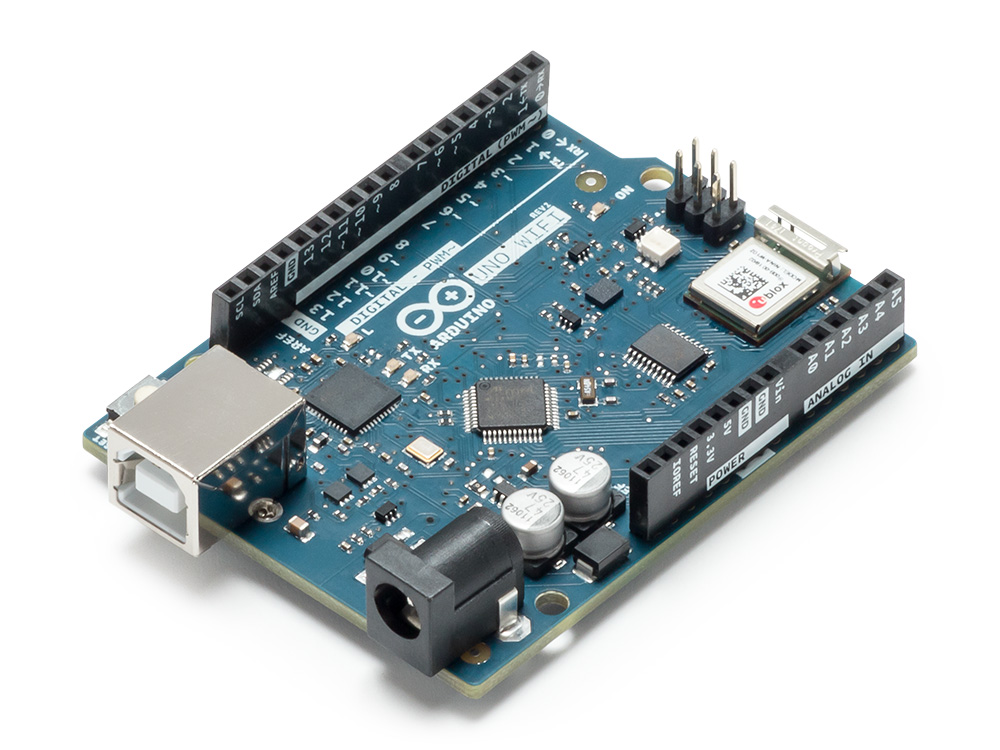
We’re excited to kick off Maker Faire Bay Area by expanding our IoT lineup with two new boards: the MKR Vidor 4000 and the Uno WiFi Rev 2.

The MKR Vidor 4000 is the first-ever Arduino based on an FPGA chip, equipped with a SAM D21 microcontroller, a u-blox Nina W102 WiFi module, and an ECC508 crypto chip for secure connection to local networks and the Internet. MKR Vidor 4000 is the latest addition to the MKR family, designed for a wide range of IoT applications, with its distinctive form factor and substantial computational power for high performance. The board will be coupled with an innovative development environment, which aims to democratize and radically simplify access to the world of FPGAs.

“The new MKR Vidor 4000 will finally make FPGA accessible to makers and innovators,” said Massimo Banzi, Arduino co-founder. “And we are looking forward to changing the game yet again.”

“Maker Faire Bay Area is always an unparalleled opportunity to interact with the Arduino community and makers,” added Fabio Violante, Arduino CEO. “This year I’m extremely excited about the launch of the most flexible Arduino ever, the MKR Vidor 4000 and the development environment vision around it. With this new product we aim at putting in the hands of professionals, makers and educators the electronic equivalent of a resourceful Swiss Knife to bring their creativity to the next level. The applications are countless.”

Co-developed with Microchip, the Uno WiFi Rev 2 is built around the new ATmega4809, u-blox Nina W102 WiFi module, and an integrated IMU. The Uno WiFi will make it even easier to deploy products that need connectivity using the classic Arduino form factor, and is ideal for emerging IoT industries such as automotive, agriculture, consumer electronics, smart home, and wearables. Among its other features, the ATmega4809 provides 6KB of RAM, 48KB of Flash, three UARTS, Core Independent Peripherals (CIPs), and an integrated high-speed ADC. Combined with Microchip’s ECC608 crypto chip on the Uno board, the microcontroller also provides hardware-based security for connecting projects to the cloud including AWS and Google.

“As we grow, partner and invest, we will fuel the vast IoT and software markets across the industry,” said Banzi. “Inspiring the Arduino community with easy to deploy solutions that enable our users to have access to larger both flash and RAM memory for more demanding IoT projects.”

“Arduino aims at supporting professional developers, makers and educators during the entire lifecycle of IoT product development, from the initial learning phases to mass deployment,” noted Violante. “Being based on the popular AVR technology, but on steroids, and with an enhanced WiFi connectivity, the UNO WiFi Rev 2 is a big step forward for all users that want to leverage the vast ecosystem of shields and libraries available for the traditional UNO form factor, in connected use cases.”

Those heading to Maker Faire this weekend are invited to attend Massimo Banzi’s semi-annual ‘State of Arduino’ talk, where you can learn more about our latest developments including the MKR Vidor 4000, Uno WiFi Rev2, and our Arduino Day releases.

Both the MKR Vidor 4000 and Uno WiFi Rev2 will be available on the Arduino online store at the end of June.

Restrict access to tools with this card reader power switch

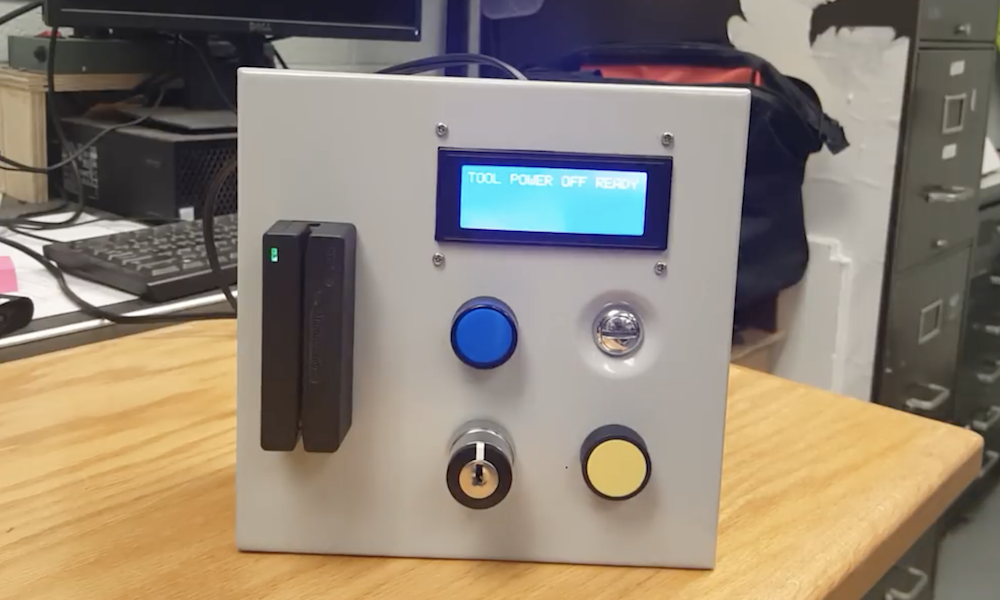
If you need a way to restrict access to power tools to only authorized users, Casey Horton’s magnetic card reader setup, shown in the video below, looks like a great solution. 

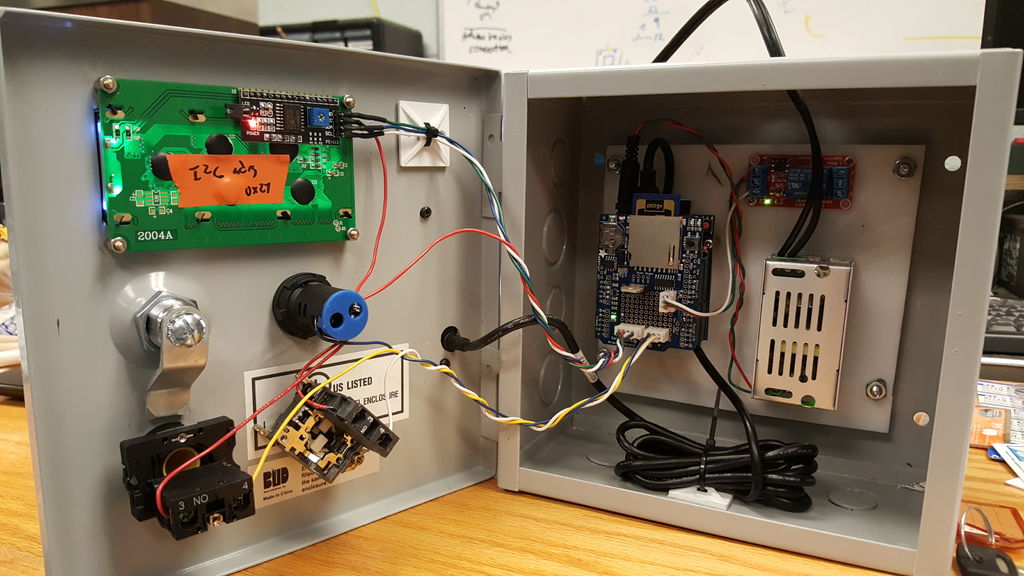
When you swipe the correct card through a reader mounted in an 8”x8”x4” electrical enclosure, the Arduino Uno mounted inside turns on power to the equipment via a relay.

The system uses a USB host shield to interface with the reader, and a datalogger shield to handle file manipulation and record who swipes in at what time. Admin mode is accessed by holding the device’s single button by swiping the correct card, at which time another magnetic card can be swiped and added. 

Full instructions and code is available here.