Posts with «featured» label

Arduino here, there, and at all the EDU faires!
Arduino All Over

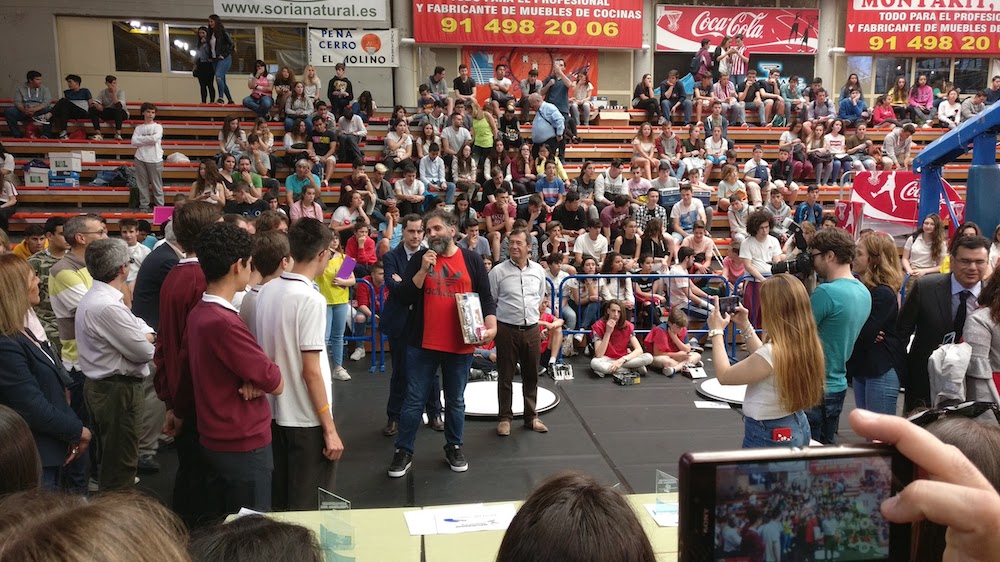
With the arrival of Spring, just prior to the ending of the academic year in Spain, teachers and education initiatives have been celebrating STEAM events all over the country. I personally attended RoboCampeones in Fuenlabrada, a small city outside Madrid, but there were a lot more: Robolot, FanTec, Cantabrobot, Granabot, ROByCAD, and even the technology and education conference PR3D.

Arduino has been present in all of the above-mentioned events, as reported by many of the students, teachers, parents, regional representatives, and distributors, that were on hand. I had the opportunity of interviewing a whole lot of students at RoboCampeones as well as Victor, one of the organizers of many of the 15 editions of the event, and Mati, a teacher from one of the schools participating.

Since the interviews were in Spanish and while I consider putting some work in making the subtitles to the videos, I have already published some of the interviews to the  Arduino EDU LiveCast playlist, which you could find here.

This is the interview made to Victor, the main organizer. In one sentence he said that RoboCampeones is the largest event of its type in Spain (CTC Catalunya 2018 had more students, but not coming from all over the country as in RoboCampeones).

Mati, from the IES Sefarad in Toledo, comments about here experience and about how much students get motivated in making better projects year after year.

Robocampeones in Numbers

2018’s RoboCampeones represents the 15th edition of the event. It has not always been in Fuenlabrada, as it was an itinerating event for a while, and it has not always been having so much Arduino involved. In Victor’s words, it started as a Lego competition, but in 2011 through the intervention of Mati and her college Julio from the IES Sefarad school in Toledo, RoboCampeones added the “open category” to the competition. This category was not only opening up for the participants to use other technologies in the competition (which consisted of the traditional sumo, line following, and rescue challenges), but also brought in a couple of years later the possibility for students to present whatever project they had done in a faire-like environment.

This year’s event had 2,000 participants, plus 1,000 kids that came just to watch. This is, in my opinion, an interesting trend that I have seen at the CTC Faires as well: not only do kids come to showcase their projects or to compete in challenges of different nature, they also come to see what others have done. It is certainly fun to observe some of the projects, see the robots fight on the tatami, and engage in endless conversations about how this or that has been built.

There were over 100 projects in the open category, which took a substantial portion of Fuenlabrada’s Fernando Martin basketball court (where the event took place), 176 Arduino sumo robots, and more than 20 different prizes. You can check out the pictures taken by one of our historical moderators to the Spanish forum and contributor to many open projects in Spain, Juan Manuel Amuedo aka @ColePower.

The Competition

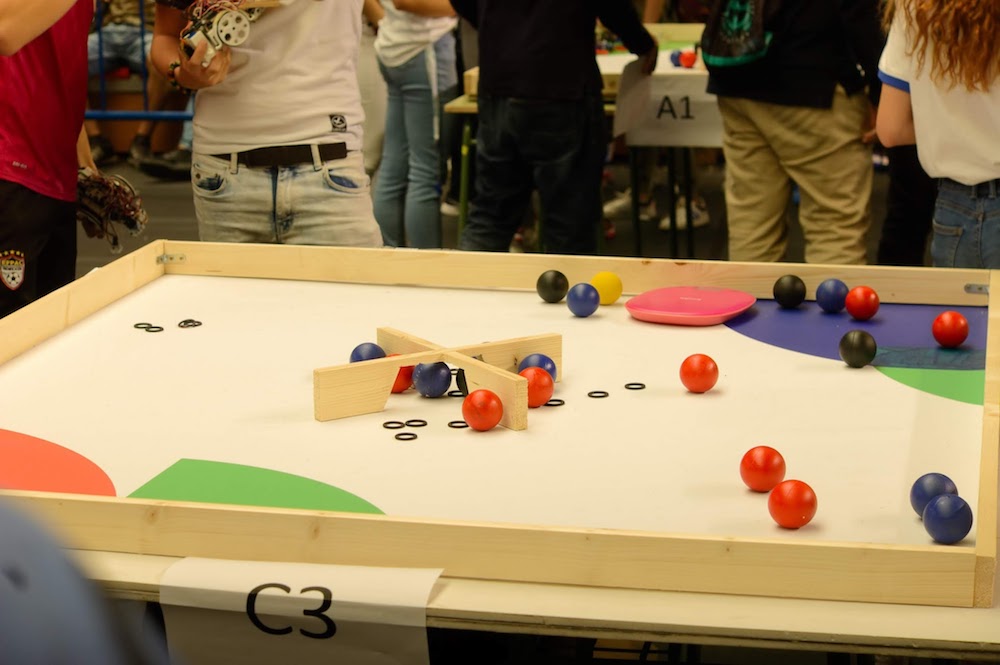
At RoboCampeones, participants compete in getting the most points from the audience, in addition to being the best in the competition. The 2018 edition included a special challenge where teams had to build and command two teleoperated robots (using Bluetooth from cell phones) to compete in moving a certain amount of colored balls from the center to a corner of a squared tatami. Just imagine two teams, two robots per team (thus four players) and 16 balls of different colors rolling on the tatami… messy and fun at the same time!
The other categories were: sumo, rescue, 3D printing, and the open category. I was invited to deliver the prize to the best Arduino project in the open category based on my opinion (yes, I had the chance to judge for a project all by myself!). It was a hard competition, something you can see from the videos. I loved a candy delivering box made by a bunch of 11-year-old kids from Jaen, the eco-friendly shower by three girls from the region, or the funny robot head for dancing at events by yet another couple from Madrid. However, if I have to choose a project that displays excellence in its execution, I voted for the solar airplane-drone designed to fly with a 2kg cargo. It had two different Arduino boards controlling different parts of the operation of the drone: telemetry + flight control, and battery management. They made their own PCBs, installed telemetry equipment, and even implemented a text to speech mechanism so that anyone with a walkie-talkie in the 433Mhz band could connect to the drone and listen to it saying aloud all of the sensor data. See here the interview I made to Julian, one of the boys in the team.

The Trick: Open Your Lab After Lunch

When asking teachers and students how they managed to get so many incredibly relevant projects made during the formal education time, I got a uniform response from them: you (teacher) need to change you class’ methodology and follow PBL centred one. Furthermore, the lab needs extra opening hours. According to the educators, kids demand the technology class (or dedicated lab) to be opened after lunch time, once the class-day has come to an end, for them to continue experimenting and building their projects. Different schools figured out different ways to make it happen: teachers spend some administration hours sitting in the lab and let the kids do, teachers delegate responsibility in older students that want to volunteer and help their schoolmates, the lab management was included in the school’s library management that had to be opened anyway, etc.

This is again something we have experienced with CTC. Technology needs to become much more transversal and become part of different subjects, labs have to be open longer, we need to re-think the management of creative spaces at schools, and the school management has to integrate these activities as part of the overall pedagogic plan of the school. Technology is an important part of our lives, and at school it has to play the same role and have resources at the same level as gymnastics, physics, or other classes in the need for experimental settings.

Other Events

There were other events happening throughout Spain over the last couple of weeks. The following list should give you an idea as to how relevant empirical technology classes are becoming:

  • Robolot: A two-day robotics festival now in its 17th edition, which took place in Olot, and included robotics competition, a STEAM area, had workshops, lectures, and other side events.
  • FanTec: The technology teachers association from Andalucia celebrated the 3rd edition of their faire at the Faculty of Telecommunications and Informatics at the University of Malaga. They have an extensive program with a long selection process, prizes, and visits to museums. 
  • ROByCAD: Cadiz, also in Andalucia, hosted its first robotics day on May 25th. 
  • Granabot: Once more in Andalucia, a couple of enthusiast teachers arranged two days of activities including Arduino Day. 
  • Cantabrobot: In northern Spain, a small robotics festival in Colindres, Cantabria gathered 700 enthusiasts.

To the question of who paid for all of these, typically teachers arrange the events on a volunteer basis, get donated spaces from the regional or local governments, prizes contributed by companies, and sometimes even received grants to help those having to travel long distances to participate in the event.

Credits 

All the images featured in this blog are courtesy of ColePower. 
Arduino Blog 12 Jun 15:59

This Arduino-controlled robot slithers like a snake

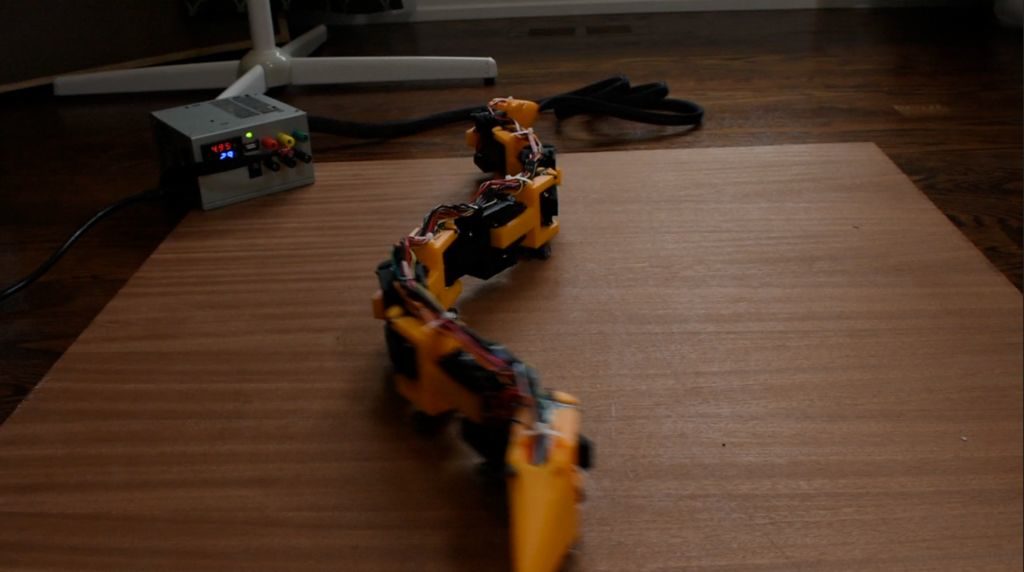
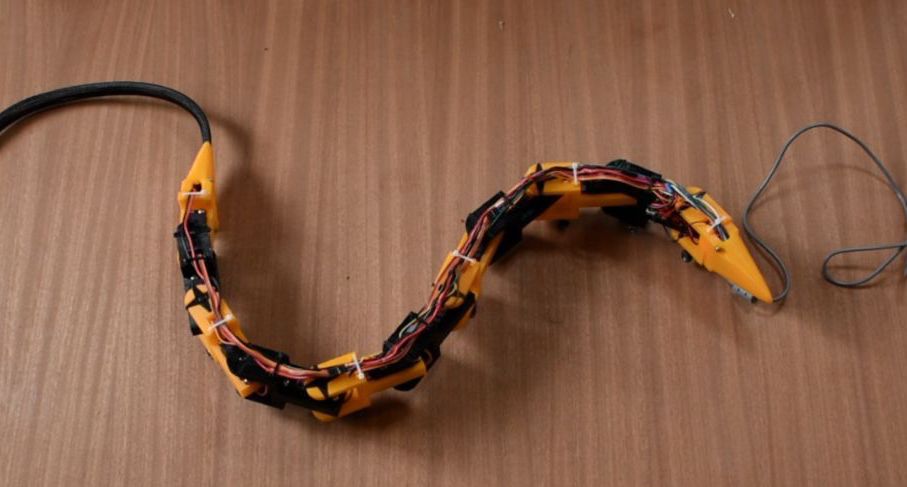
Would you like to create a robot that slithers from place to place like a snake? Well now you can, thanks to this bio-inspired design from Will Donaldson. 

Donaldson’s project uses 10 metal gear servos to allow his robotic snake to curl its body back and forth, sliding along on small wheels that replace a real serpent’s bottom scales. An Arduino Nano controls its 10 segments, and power is provided by an external tether from a recycled desktop power supply. 

As shown in Donaldson’s video, he’s been experimenting with several different snake builds and forms of locomotion. These include an inchworm-style gait where sections are picked up off of the ground, and a sort of hybrid configuration where a snake can move in both the horizontal and vertical planes. 

Instructions and code can be found in Donaldson’s write-up here, and you can check out the video below to see more about his design process.

A DIY Automobile Black Box with Arduino Mega

If you’d like to monitor your driving habits, or perhaps keep them handy in the event of an accident, a “black box,” or more properly a “telematics” device is just what you’re looking for. 

Monitoring driving habits can be interesting, but what if you’d like to make a telematics box yourself, giving you total control over how data is collected and used?

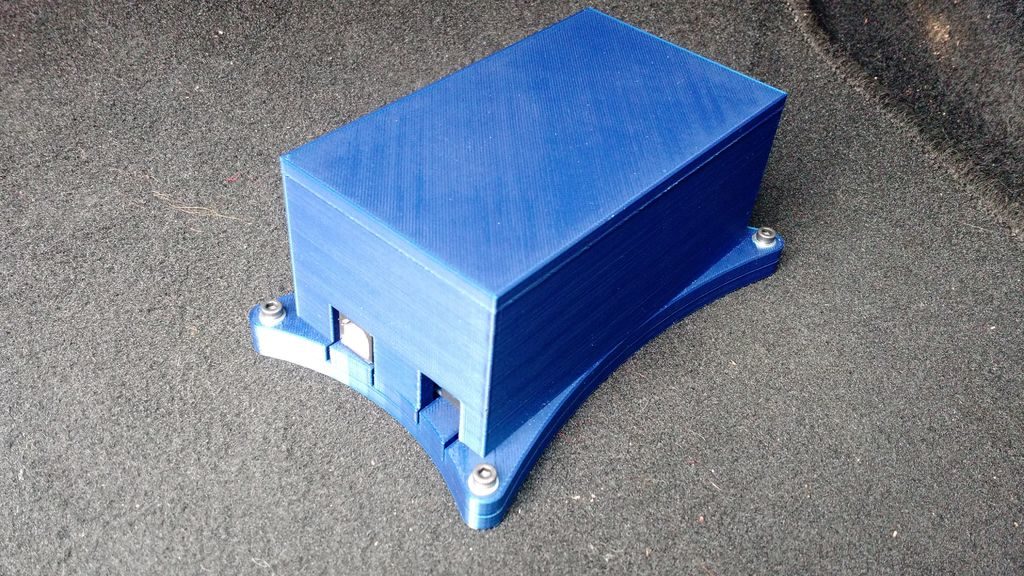
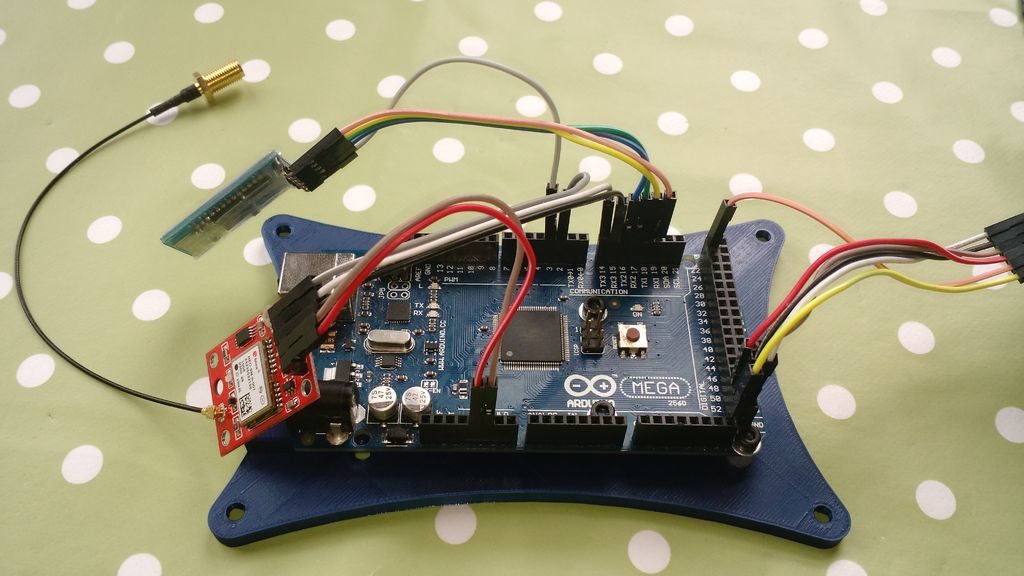
That’s just what maker “TheForeignMan” did, using an Arduino Mega to take in data from his car’s OBD-II port, along with position information from a GPS module. Vehicle speed, engine RPM, and throttle depression are saved on an SD card, which can be removed and graphed on the driver’s computer.

DISCLAIMER: This custom-made black box may not always be valid evidence in a court of law. Some countries/states/local laws may not allow installation of custom monitoring units into moving vehicles unless authorized by an approved installation team. For these reasons, and any other associated to tampering with the OBD port, the author(s) of this article and website hold no responsibility over the outcome of your driving, your car, your car’s electronics (including on board computer), and any other incidents occurred with a custom-made monitoring unit fitted.

Instructions for this build are available here and code can found on GitHub. 

These high school students built their own vending machine

If you’re a high school student and would appreciate a vending machine in class, what’s to be done? Most of the time the answer is “not much,” but Tustin High T-Tech students were able to get one—by building it themselves!

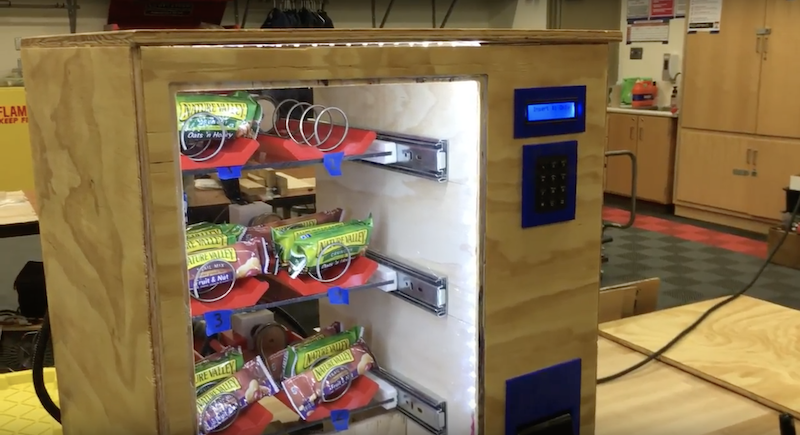
In fact, this excellent device functioned both as a class project and as a fundraiser for their engineering program. It can be seen working in the video below, and uses an Arduino Mega for control, along with motor drivers and steppers to actuate six snack pusher coils. 

Customers simply insert a dollar into the bill acceptor, punch in the correct number in the keypad, and snacks drop out. Arduino code is published here, and Solidworks design files are also available for your DIY vending edification.

A Flexible Arduino Prototype

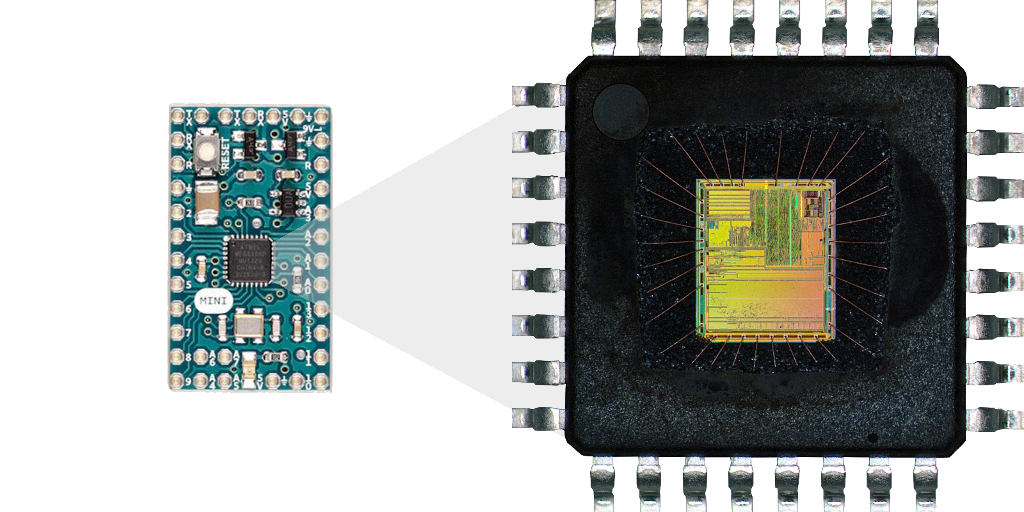
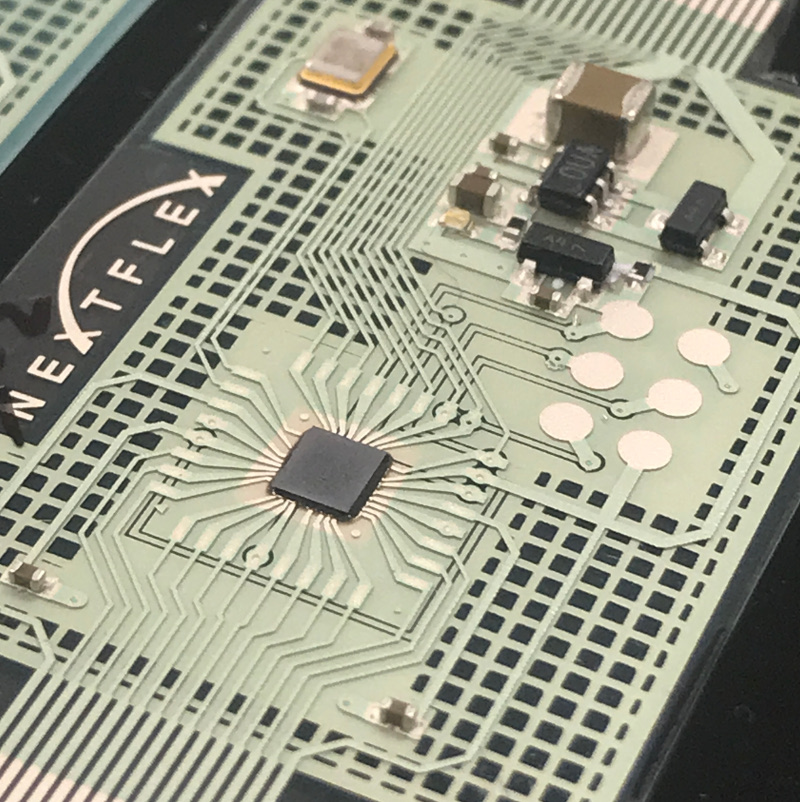
We recently visited NextFlex, the flexible electronics manufacturing institute in Silicon Valley, where they developed a flexible prototype based on the Arduino Mini. Their mission is to make flexible electronics mainstream, opening up all kinds of new applications.

How did you make the flexible Arduino prototype?

Some of the equipment we use is familiar. For example, automated screen printers and industrial inkjet printers. We used them to print the circuit on a 1mm thick flexible plastic ‘board’ (known as the substrate).

We then took the microcontroller silicon die, which is usually inside a chip package, and connected it directly to the substrate. For this, we used our production-level assembly equipment for precision adhesive dispense, die, and component attach.

Using these techniques, we’re able to create flexible wire connections with a resolution of 50um (that’s 0.005 cm, roughly the thickness of a human hair).

Silicon die inside a standard microcontroller package. (Image credit: NextFlex)

What kind of conductive inks are you using to connect components?

Conductive inks are not new, however we focus our efforts on making these materials very reliable and resilient.

We are using advanced formulations of silver ink with strong adhesion to the base substrate, uniform particle distribution, and the ability to bend and flex after curing — all without degrading the electrical performance.

Some components you use are rigid. When will they be flexible too?

We use some rigid components, which is why we call it “Flexible Hybrid Electronics,” but aim for them to be as small and thin as possible.

The unpackaged die can be thinned to 30um or less. At these thicknesses the silicon becomes flexible and allows for 10mm or smaller bend radii (roughly the radius of your thumb).

Some passive components we use, like capacitors and resistors, are rigid today. Eventually we will print these components, so they are flexible too.

When will flexible electronics be used in every day products? 

The technology is already here! Over the next couple of years, we think it will reach prices that make it widely adopted in consumer products. Before then, by working on projects like the flexible Arduino implementation, we hope we can soon put development tools into the hands of more students, makers and product designers to innovate with.

MCU silicon die bonded to the flexible Arduino prototype. (Image credit: NextFlex)

NextFlex will be talking more about this project at the Sensors Expo & Conference in San Jose, California on June 26th, during the “Democratizing IoT” session.

Teddy Ruxpin answers queries with Arduino and Google Assistant

If you have an unused Teddy Ruxpin lying around, you’re in luck. This hack from “Jayden17” turns the iconic ’80s toy from a fancy tape player into your own talking bear assistant!

The build started out with obtaining one of these vintage bears and fixing up the internals, as well as equipping it with a new speaker. An old smartphone was then added, running Google Assistant to take and answer queries. An Arduino Uno is tasked with translating the amplitude of incoming sound into mouth movements with the help of a motor shield.

If you can get your hands on one of these animatronics toys, it’s a relatively simple hack and something that could work with any sort of voice assistant or audio input. Check it out in the video below! 

Making music with your muscles!

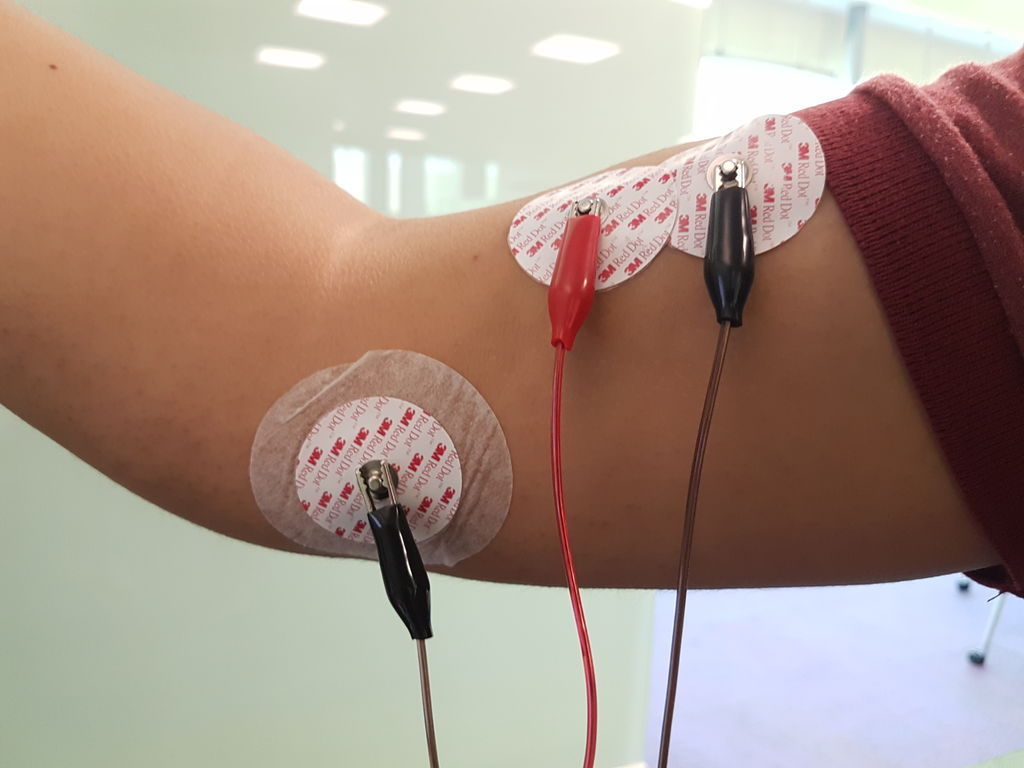
After being inspired by an Old Spice commercial where actor Terry Crews plays music with his muscles and EMG sensors, hacker Julio David Barriga decided to do the same thing using an Arduino. 

While Crews’ setup involves an entire one-man band, Barriga’s system is greatly simplified, detecting the amplitude of the electrical signals emanating from his bicep. An Arduino Uno is then used to translate this signal into output notes on a small speaker, either as varying frequencies in the first video below, or as actual notes on the C major scale in the second.

The project write-up outlines a simple to implementation with a pre-built MyoWare sensor assembly, as well as a way to build own if you’d like to learn more about this technology.

DoggoBot is an Arduino-controlled cardboard robotic pet

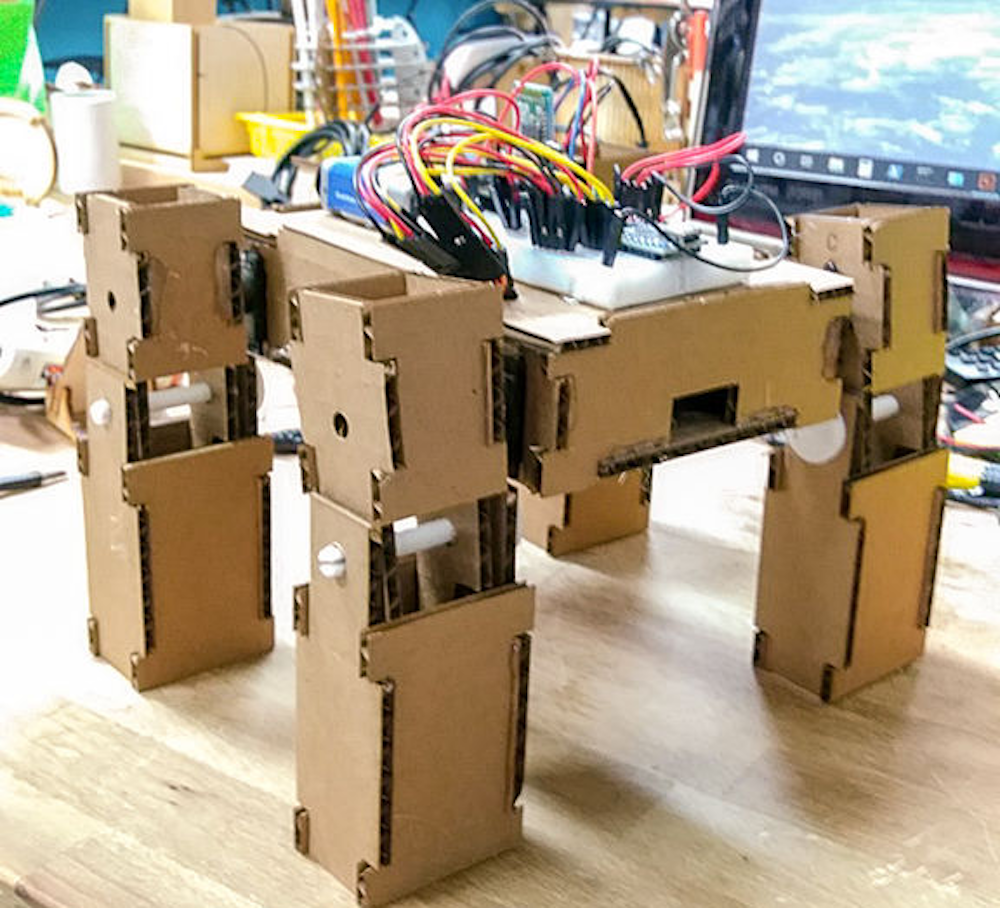
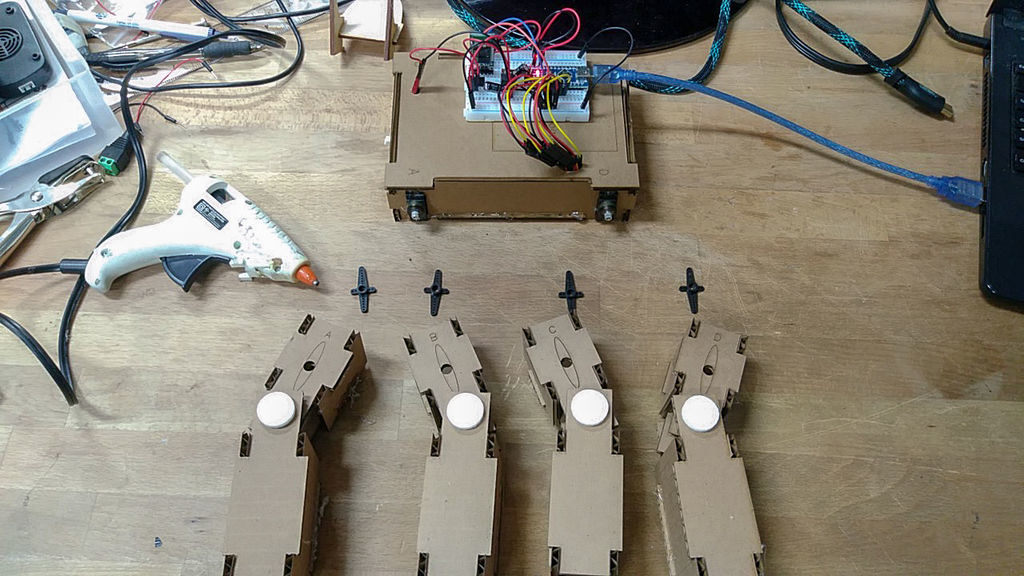
While building a walking robot especially with less than six legs can be quite a challenge, maker “Skill Mill NYC” decided to construct a quadruped robot named DoggoBot using cardboard for its body.

Four micro high torque servos power the legs, which are able to move the robot around with the help of unpowered knee joints.

DoggoBot is controlled by an Arduino, and it takes movement commands via a computer USB-serial connection or from a Bluetooth module. 

Ever since I started programming Arduinos, I wanted to build a robot using one. I also want a dog. However, living in NYC makes it tough to take care of a dog. So after hours of watching videos of robots and dogs, I decided to put my phone down and build myself a pet!

Although what’s seen in the demonstration below is an impressive feat of “cardboard engineering,” its creator has a few more ideas for it, such as adding sensors and getting Doggo’ to turn.

Ultrasonic Arduino-to-Arduino Communication

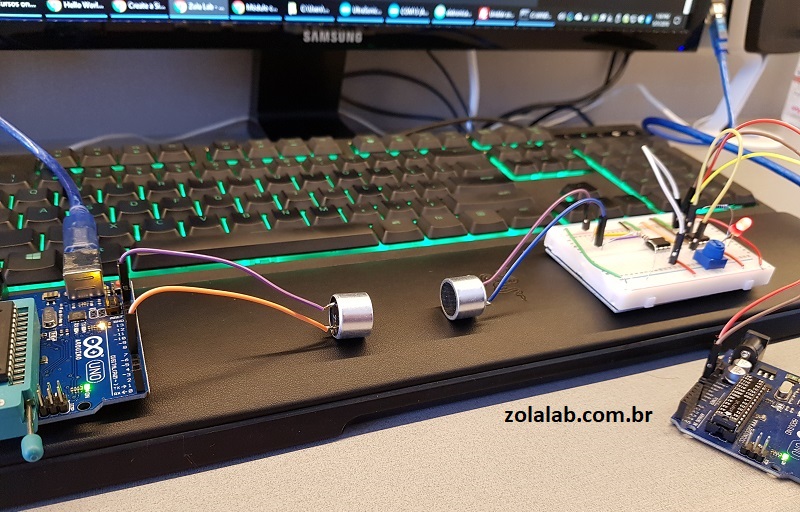
In the video below, Brazilian maker Eduardo Zola shows us that you don’t necessarily need radio waves to pass messages between Arduino boards; instead, he’s using ultrasonics. 

Zola’s setup features TX and RX transducers desoldered from an HC-SR04 module along with a pair of Unos to transmit text short distances. An LM386 amplifier and LM393 comparator are also used for the receiver.

While the transmission can easily be interrupted by putting a hand between the TX and RX, this configuration would certainly have some useful applications. So, how does it work exactly? As Hackaday explains:

Looking through the source code for the transmitter and receiver, we can see it’s about as basic as it gets. The transmitter Arduino breaks down a given string into individual characters, and then further converts the ASCII to eight binary bits. These bits are sent out as tones, and are picked up on the receiving end. Once the receiver has collected a decent chunk of tones, it works through them and turns the binary values back into ASCII characters which get dumped over serial. It’s slow, but it’s simple.

If you’d like to try it yourself, code and a full parts list can be found on the Zola’s website.

DIY submersible ROV flies through the water

If you’d like to check out your pool or a lake without getting wet, this underwater ROV looks like a great solution. 

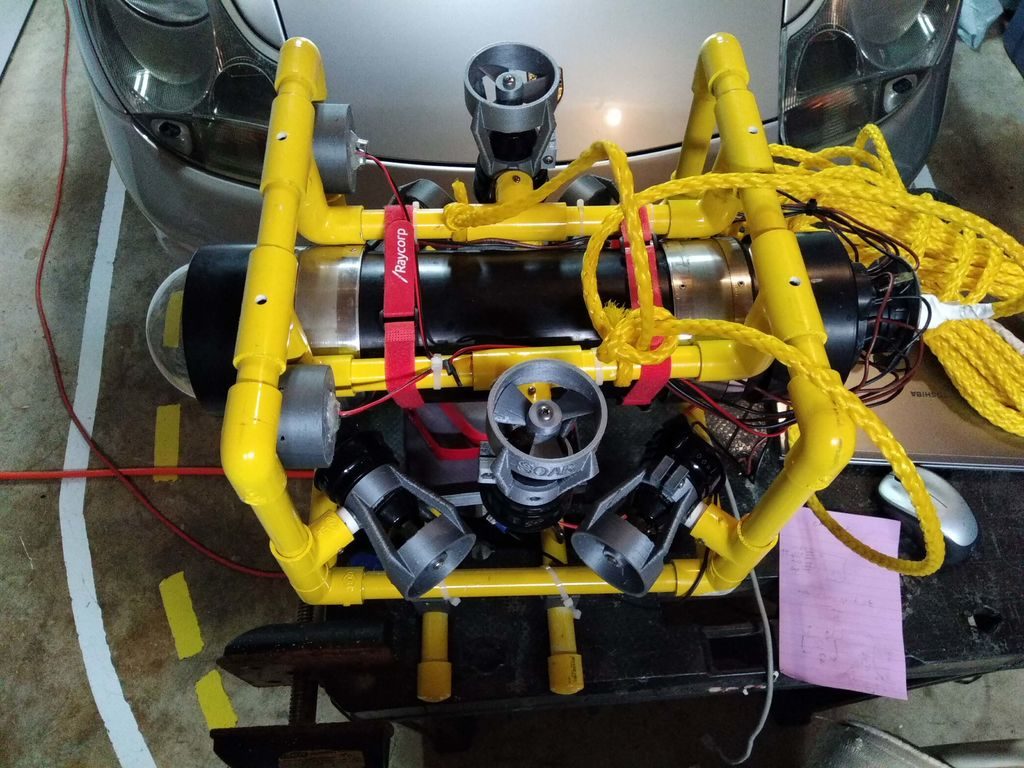
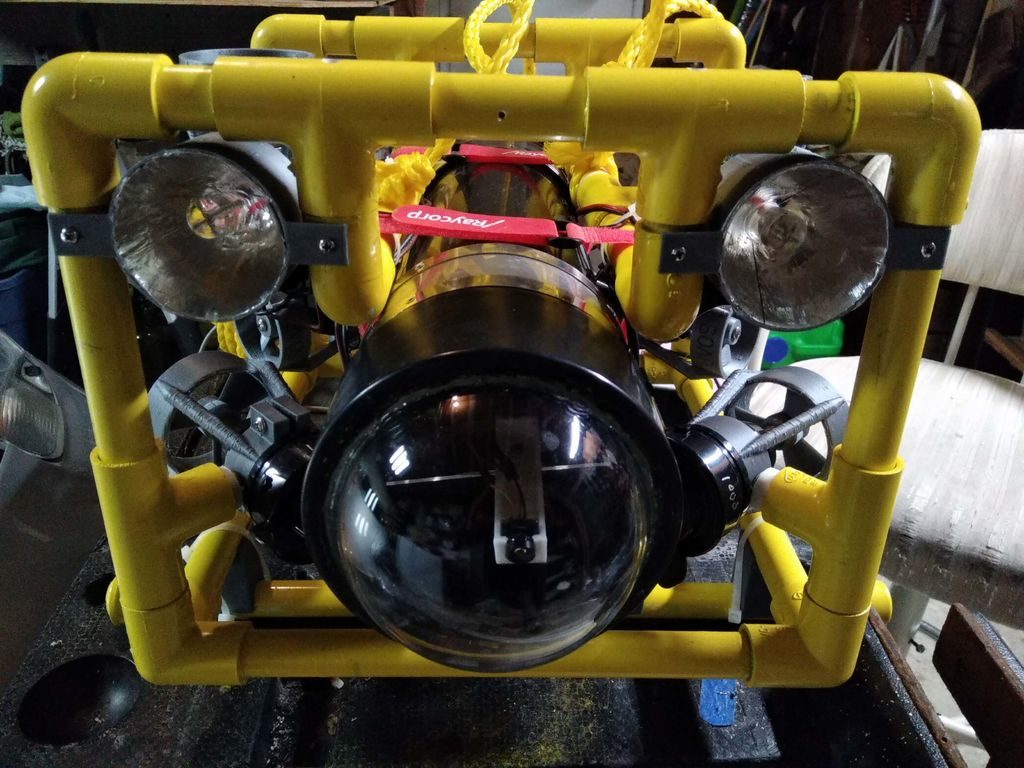
The DIY device features a sturdy PVC frame with six thrusters that allow it to move through water like a drone through the air (complete with depth and heading hold), and uses the same kind of controller configuration as its airborne cousin.

Onboard control is handled by an Arduino Mega along with an FPV camera, which transmit signals back to a base station via an Ethernet cable stuffed inside of a length of polypropylene rope. The driver can then see what the ROV sees on a small display, supplemented with data from the base station’s Arduino Uno and an onscreen display (OSD) shield.

Arduino Blog 31 May 15:07