Posts with «featured» label

Robotic Connect Four lets you play remotely
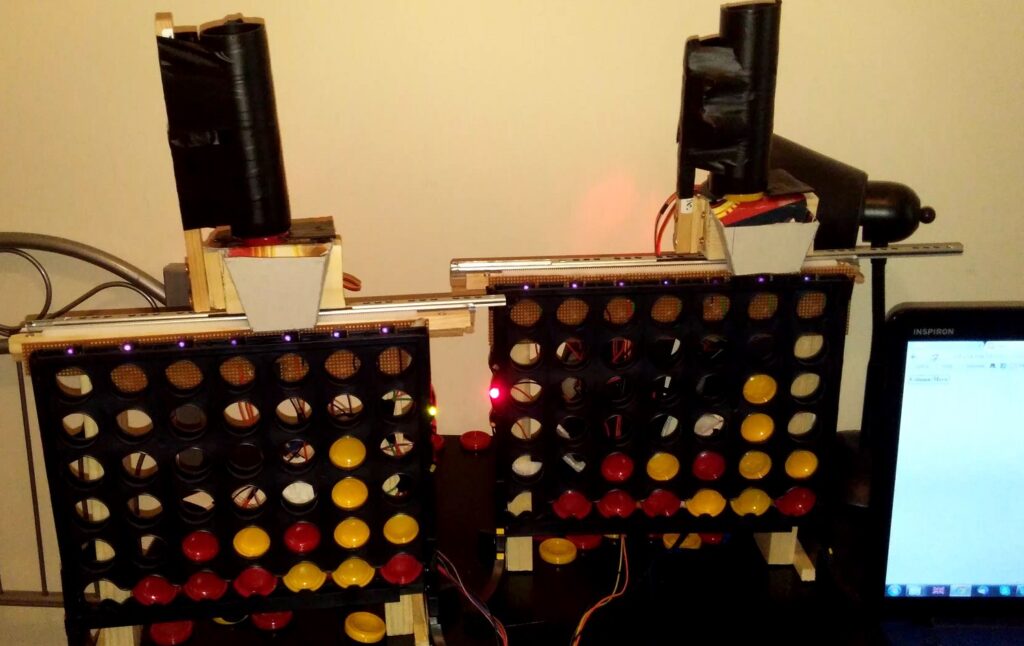
In order to restore some tactile feeling to remotely-played board games, maker “lyudatan” created a pair of Arduino Uno-based Connect Four robots. 

When a player makes a move by dropping a disc into a slot, this is recorded by an IR proximity sensor on the first board. The data is then transmitted via an Ethernet shield to a web server.

The second board uses a stepper motor to position discs above the correct slot, and drops them using a servo motor. This process is repeated until the game is done, allowing two players to play the game at a distance.
Code for the project is available here.

An auto-curing chamber for SLA prints

If you have a 3D printer, it’s probably the fused deposition modeling (FDM) type that deposits melted material onto a bed, eventually building up whatever you had in mind. Stereolithography (SLA) printers, however, work in the opposite way using light to solidify liquid material, which is then pulled out of a vat. 

While an interesting process, one consideration is that after generating the print, materials, especially those that are biocompatible, must be left alone under the proper light and temperature conditions in order to solidify fully.

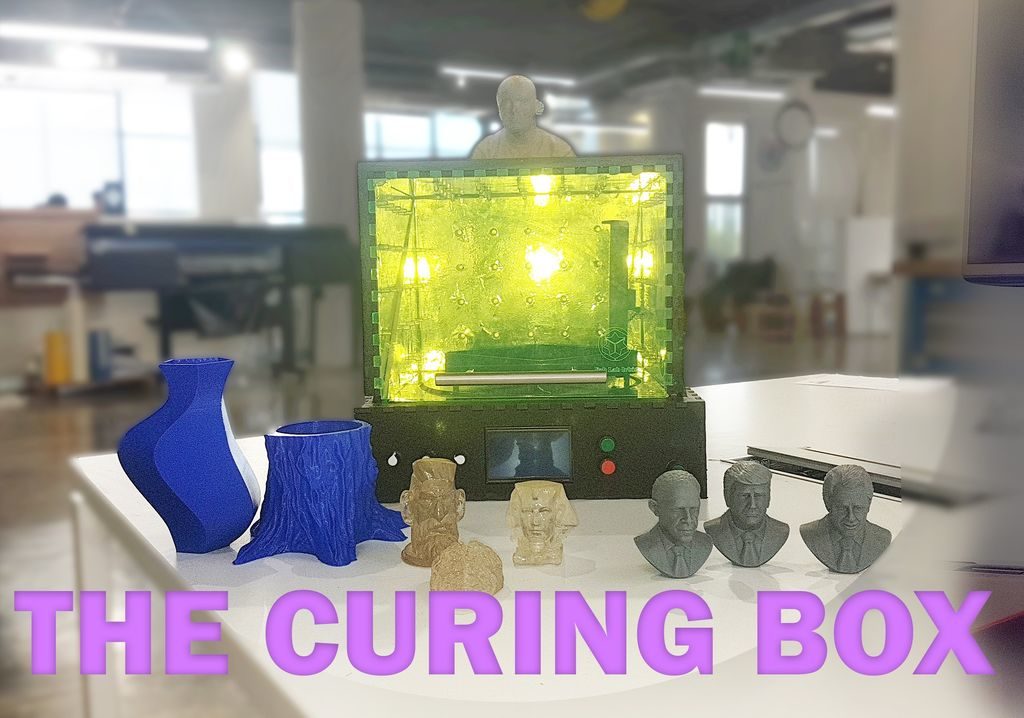
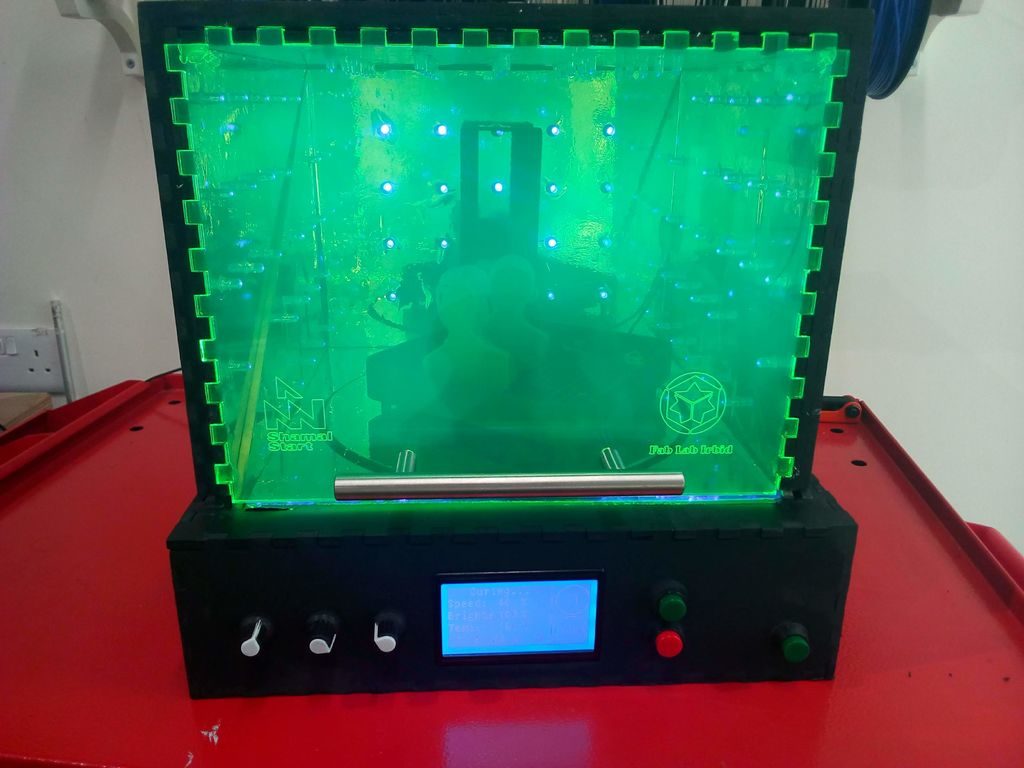
To help with this task, makers at Fablab Irbid designed their own Arduino Uno-based “Post-Curing Box.” It features UV LEDs and a rotating platform, along with a temperature sensor for monitoring conditions. Brightness, rotation, and cure time are set with a simple user interface consisting of an LCD screen, knobs, and buttons. 

This project not only produces ideal conditions for finished parts, but certainly helps with the temptation to poke around—especially since you can see in with its partially translucent viewing window!

Control your GoPro wirelessly with an Arduino MKR1000

As Arduino boards have revolutionized what people can make at home, you might say that GoPros have done the same thing for portable cameras. Later generations of these devices even feature WiFi capabilities, so with the proper programming, Arduinos like the MKR1000 can be used for control!

In this project write-up, maker Randy Sarafan (AKA “randofo”) takes us through how he was able to set up a MKR1000 to communicate with a Hero 4 as well as a Session 5, including sending a “magical” Wake-on-LAN signal to power up the Session camera. 

While he’s not the first to control a GoPro using an Arduino, it’s certainly more elegant than methods like hot-wiring a remote or even recording your own voice to speak commands to it remotely!

TerraDome is a Jurassic World-themed terrarium

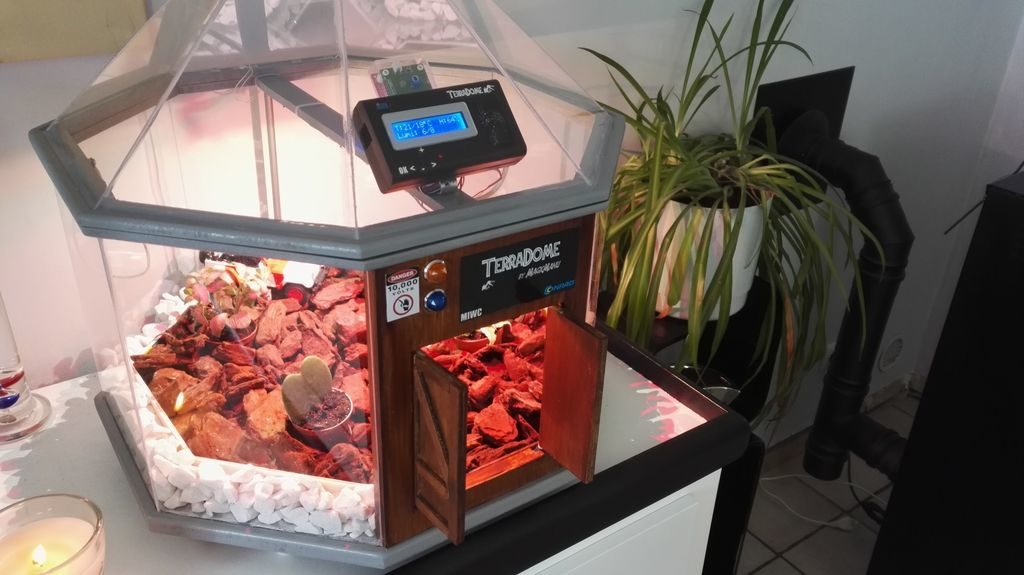
If you need a warm place to keep your tropical plants, then look no further than the beautiful “TerraDome” from maker “MagicManu.”

The device is equipped with an Arduino Mega that helps regulate the temperature inside its clear octagonal structure via a reptile heating pad, along with a fan salvaged from a PC power supply. A DHT11 sensor is used to sense temperature and humidity, shown on top of the dome by a small LED display.

Aside from taking care of plants, the project is decidedly dinosaur-themed, specifically Jurassic Park/World. It even features a servo-driven wooden door assembly on the front that looks like it came straight out of the movie, which swings open automatically to allow heat (or dinosaurs) to escape. 

You can check out the build process in the video below (in French), or see the second for a short dino-style glimpse of the assembly.

Earth Clock brilliantly tracks the sun’s light

While we understand that the Earth rotates to produce day and night, and tilts on its axis to vary the day’s length, how is the planet positioned in relation to the sun right now? Unless you’re well-attuned to our solar system’s rotational dance, this is difficult to visualize. To help with this, hacker “SimonRob” came up with a clock that shows how the sun shines in real-time at all points on the Earth.

An array of LEDs provides artificial lighting for the device, which rotates a nicely painted physical globe around a daily axis, along with a much larger rotational axis that controls the Earth’s tilt. Both are controlled via stepper motors, which are in turn controlled by an Arduino Uno and a bevy of supporting electronics.

It’s a clever concept, and a well-executed build, so be sure to check out the project write-up for more information!

Arduino Blog 25 Jun 14:34

MESOMIX is an automated paint mixing machine

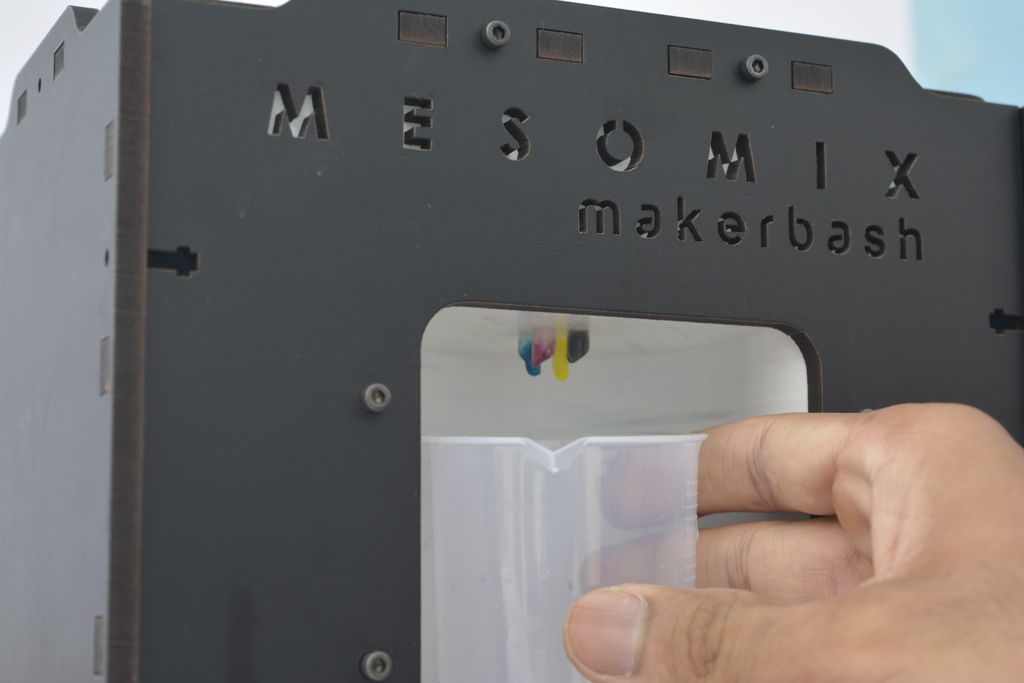
If you’re an artist who works with paint, getting your colors right is critical, and somewhat of an art form in itself. For those that need a little assistance, the MESOMIX paint mixing machine is here to help using four 3D-printed peristaltic pumps to pull the right amount of cyan, magenta, yellow, and black (or key) to produce your desired color.

An Arduino Uno along with a GRBL shield is implemented to coordinate each pump’s stepper motors, and MESOMIX features a design* reminiscent of a well-built 3D-printer. 

Are you a designer, an artist or a creative person who loves to throw colors on your canvas, but it’s often a struggle when it comes to making the desired shade.

So, this art-tech instruction will vanish that struggle into thin air. As this device, uses off the shelf components to makes the desired shade by mixing the right amount of CMYK (Cyan-Magenta-Yellow-Black) pigments automatically, which will drastically reduce the time spent on mixing the colors or money spent on purchasing different pigments. And will provide you that extra time for your creative.

For more information, you can check out MakerBash’s excellent project here.

*Frame parts were laser-cut out of vinyl material, generally not recommended per safety concerns.

An Automated Paper Cutter

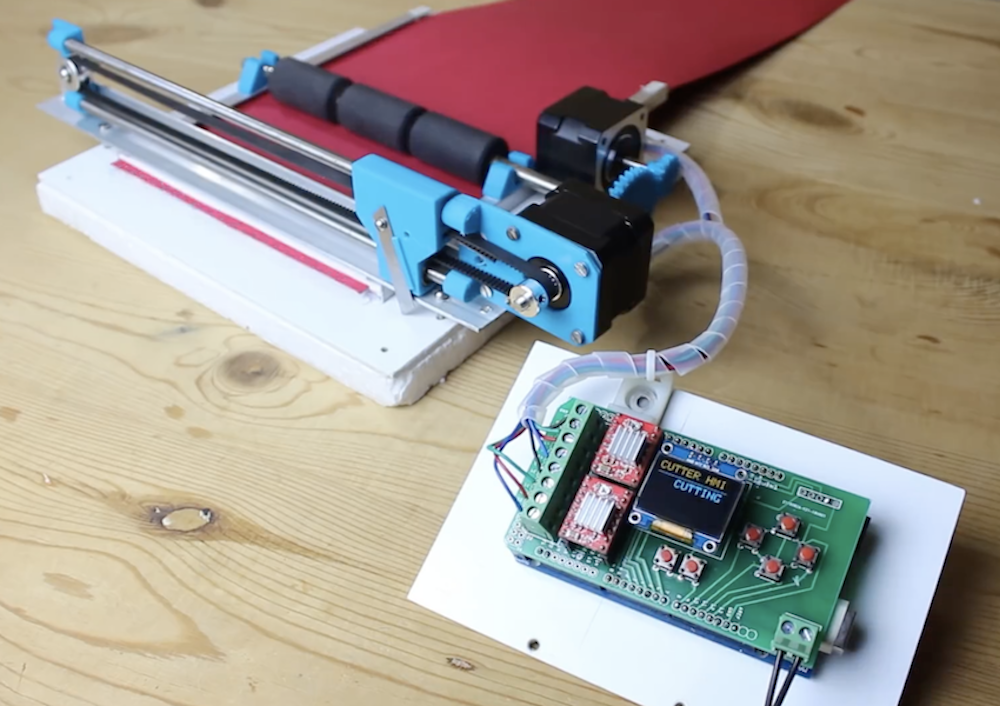
Are scissors and manual paper cutters not working for you? Well, “Mr Innovative” has the solution in the form of an Arduino-driven device that cuts paper to length automatically. 

As you can see in the video below, a user simply inputs the length of paper and the number of strips needed via a series of buttons and a tiny OLED display, and the automated machine does the rest.

The system works by pulling paper inserted into the machine’s body at precise intervals using a stepper motor and rollers. When in place, a second stepper moves a razor blade over the paper, cutting it into perfect strips for whatever craft project you have in mind. An Arduino Mega controls the device, along with a pair of stepper drivers via designed PCB-shield. Code and PCB files are available here for download.

SmartCash can sort and give out change

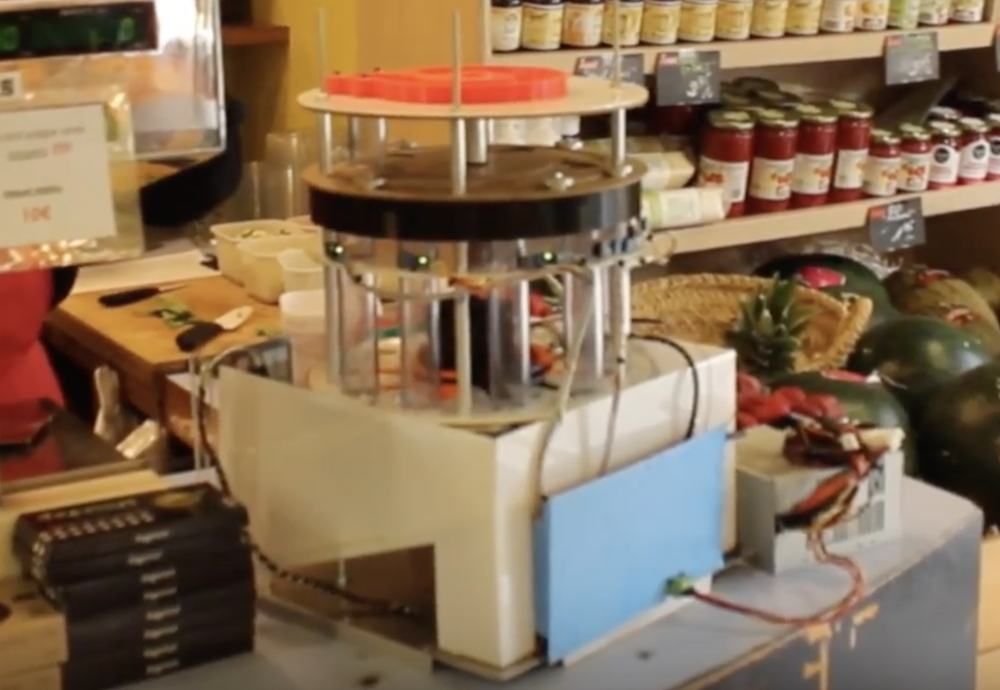
If you run a small business where transactions are made, handling out coins is a necessary part of the job. While a cash register does the trick, perhaps you could try out the SmartCash device—a cylindrical electromechanical system running on an Arduino Mega—to help you count coins and make change.

Aside from sorting coins, there’s the added benefit that customers will want to come and try it out, maybe even using more cash (and letting you as the owner avoid pesky credit card charges). 

SmartCash is currently designed to work with Euro coins ranging from 5 cents to 2€. Build information is available in this write-up and on the project’s official site. You can also see it in action in the first video below, or how it’s assembled in 3D CAD in the second.

Meme Weaver guides users through fabric creation

We all need to wear clothes, but where do they come from? If you answered “the mall,” then perhaps it’s time to play a couple rounds on the “Meme Weaver.” 

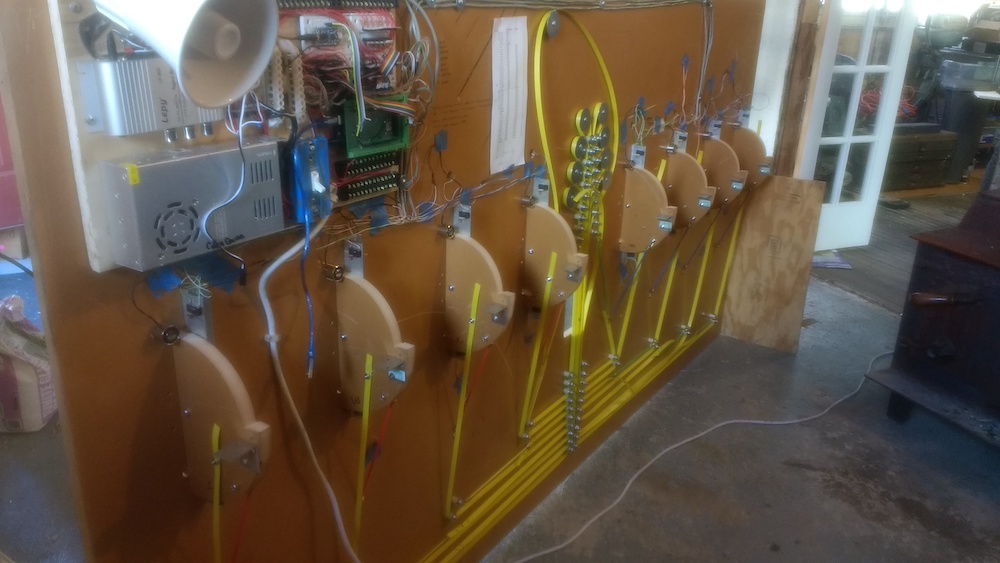
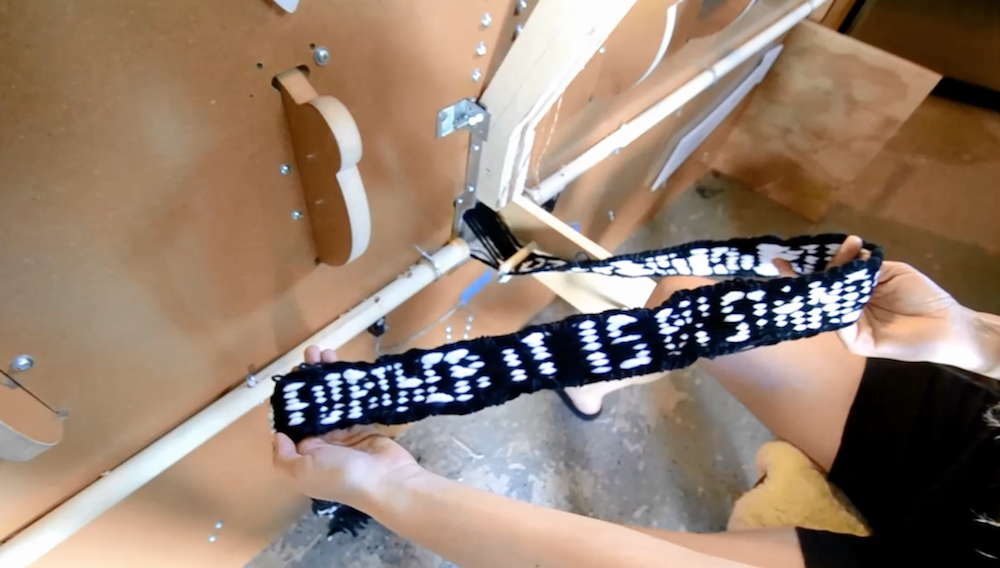
As seen here, this project by the husband and wife team of David Heisserer and Danielle Everine prompts users to adjust levers correctly in order to control how yarn travels through the machine, weaving fabrics together that reveal poems, quotes, and other interesting sayings.

Control for the device—which in turn “commands” humans via a series of audio-visual cues—is accomplished using an Arduino Mega, along with an Adafruit Audio FX sound board. 

Part mechanized tool and part arcade game, Meme Weaver is an interactive machine that weaves poems. Meme Weaver is a complex instrument with large-scale elements of a traditional loom – beams, rollers, yarns, shuttle, beater – with people operating individual treadles. Blinking lights and buzzers create an arcade game feel by lending a bit of Dance Dance Revolution ambiance to the loom.

We have chosen to weave a collection of memes, poems, quotes and maxims from a wide range of authors. The selections include personal favorites, well-known classics and contemporary works within the theme of knowledge sharing. The scroll will be written with poems that remind us that we are standing on the shoulders of giants when we make new technologies.

More info is available on the Meme Weaver’s website , or you can see it on display at the Northern Spark art festival in Minneapolis on June 15–16th.

Pull small planes around with this Arduino Mega-based tug

While there are many ways to move an airplane on the ground, Anthony DiPilato decided to build a “tug” of his own.  

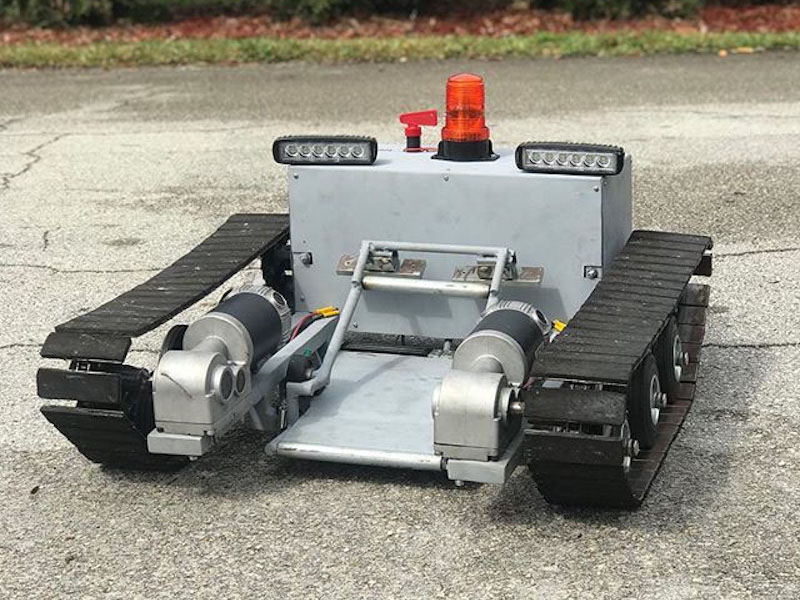
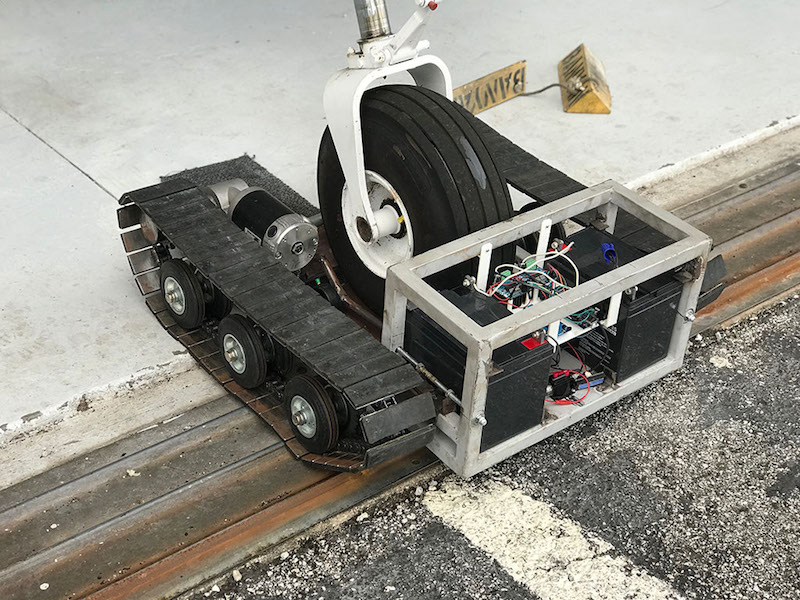
The treaded device looks like a tiny tank, and when it slides under the aircraft’s front wheel it locks in place, allowing a 5,200-pound plane to be pulled around courtesy of the RC system’s wheelchair motors. Onboard, an Arduino Mega serves as the brains of the operation along with an H-bridge for motor control. User interface is handled by DiPilato’s iPhone via Bluetooth.

For small aircraft, a towbar is sufficient, but for larger aircraft a power assisted tug is necessary for maneuvering the aircraft. Commercially available aircraft tugs are considerably expensive, so many people use small tractors or golf carts to pull their aircraft.For this project I wanted to see if I could build a remote controlled aircraft tug for a reasonable price.

The goal was to design a remotely controlled tug capable of pulling a Cessna 310 with an estimated weight of 5,200 lbs while keep the cost under $1,000.

Build details can be found in his blog write-up. The Arduino code is available on GitHub, as well as the iOS program. Finally, you can see the tug in action in the first video below, while the second clip shows how the locking mechanism works.

Arduino Blog 12 Jun 17:07